Grumpy's Honeybunch

  • Classic Comfort Food and Easy Keto Friendly Family Recipes
  • Recipes
    • Breakfast
    • Lunch
    • Dinner
    • Desserts
    • Low Carb Keto Recipes
  • Disclosure & Privacy Policy
menu icon
go to homepage
  • About
  • Recipes
  • Contact

search icon
Homepage link
  • About
  • Recipes
  • Contact

×
Home

Weekly Meal Plan 30

July 14, 2022 by Shelby Law Ruttan Leave a Comment

Collage of images for weekly #30 meal plan.

Here is your free Weekly Meal Plan 30. Each meal includes side dish recommendations, along with a beverage and dessert of the week along with weekend options.

Collage of images for weekly #30 meal plan.

Do you have any requests or special needs? If so, please let me know and I will do what I can to help!

[feast_advanced_jump_to]

🍽️ Meal Planning and Prep Tips

I'm here to share with you recipes to make during the week that aren't hard to make and take little prep. Most feed 4 so if there are just 1 or 2 to feed, you may want to scale down and halve a recipe OR just make a couple of these and enjoy leftovers throughout the week.

This weekly meal plan makes your life easier with easy air fryer recipes! Then on the weekend, relax with a hot cup of coffee and a cinnamon roll for brunch, and enjoy a super easy and delicious slow cooker recipe for Sunday supper.

Here are some shortcuts and tips to help you throughout the week.

As an Amazon Associate I earn from qualifying purchases.

Any prep that can be done on Sunday (July 24) is called prep day.

  • If you belong to Costco, BJ's or Sam's club, grab a big package of Chicken Drumsticks and then freeze in portions that will feed the family. If you don't belong to a club, I find Aldi meat prices are good as well.
  • Make the Amish Macaroni Salad on prep day so it has time to develop the flavors and absorb some of the dressing. It is much better the day after making it.
  • Make the meat and rice filling for the stuffed peppers on prep day then reheat in the microwave before adding to the peppers. You can also prep the peppers on prep day and keep them stored in the fridge. This will save a lot of time when cooking dinner.
  • Buy the fajita tortilla or the low carb street taco tortilla as they are smaller and fit in the air fryer best.
  • The black bean corn salsa can be made on prep day if desired.
  • On Thursday, while the potatoes are cooking for the German Potato Salad, prep the toppings you will want for your hot dogs. Some of my favorites are crushed bbq potato chips, blue cheese, sweet and spicy bbq sauce, mustard, sriracha sauce, and more.
  • Clean, chop, and store the cauliflower on prep day or while the chicken is in the rotisserie. About 30 minutes into the cooking time for the chicken, make the mashed cauliflower. Be sure to have an instant read meat thermometer to check for doneness on the chicken.
  • Make the oatmeal cookies on prep day and store them in the freezer. They thaw in just minutes so just take out what you want when you are ready to enjoy.
  • Friday morning put together the sangria and it will be ready when you are home from work!
  • The cinnamon rolls can be assembled ahead of time. Just place the baking dish of unbaked rolls in the fridge covered lightly in plastic. Then take out in the morning and allow them to come to room temp and rise before baking.

Weekly Meal Plan 30

Monday

Featured image for Air Fryer Chicken Legs.

Air Fryer Chicken Legs

These Air Fryer Chicken Legs are SO delicious. They can be served with or without barbecue sauce and goes great with a side of Amish Macaroni Salad.

Tuesday

Featured image for air fryer stuffed peppers.

Air Fryer Stuffed Peppers

Air Fryer Stuffed Peppers are so full of flavor! This is a big batch recipe so there will be plenty of leftovers to pack for lunches. Serve these stuffed peppers with a side of Air Fryer Corn on the Cob.

Wednesday

Air Fryer Quesadillas

Air Fryer Quesadillas are so easy and are excellent with a side of this Black Bean Corn Salsa or Homemade Guacamole.

Thursday

Featured image for Air Fryer Hot Dogs.

Air Fryer Hot Dogs

Dinner can be ready in a flash when making these Air Fried Hot Dogs. Top with your favorite toppings and serve with a side of potato chips and/or this German Potato Salad.

Friday

One whole chicken that was cooked in an air fryer rotisserie with golden brown and crispy skin.

Air Fryer Rotisserie Chicken

I love to make this Air Fryer Rotisserie Chicken and use leftovers to make Buffalo Chicken Burritos or Buffalo Chicken Bowls. Serve the chicken with a side of Garlic Mashed Cauliflower with Browned Butter.

Dessert of the week

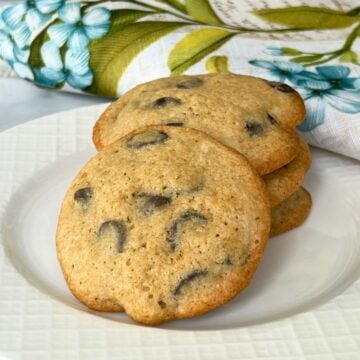
Nanny's Soft Oatmeal Cookies

I have made these many times as an adult and enjoyed them more times as a child in my Nanny's kitchen. These Soft Oatmeal Cookies are a perfect ending to dinner with a cup of coffee, tea, or milk and make great snacks.

Cocktail of the week

Watermelon Berry Wine Sangria

Try this cool and refreshing Watermelon Berry Wine Sangria to end the week with! I

Sunday Brunch

Featured image for Clone of a Cinnabon.

Clone of a Cinnabon

One of my favorites, Easy Cinnabon Recipe Clone is soft, sweet, and delicious. Serve these warm with a hot cup Irish Coffee or Almond Coffee Cream.

Sunday Supper

Slow Cooker Beef Sliders

These Slow Cooker Beef Sliders can make Sunday dinner easy. Just put it in the slow cooker and enjoy the rest of the day with your family. Serve with a side of Air Fryer Corn on the Cob and

Grumpy's Honeybunch Shopping List

Download Shopping List
Printable and downloadable grocery list.

Related Posts

You must use the category name, not a URL, in the category field.

Don't forget to check out my Amazon storefront for some of my favorite products!

When you make these recipes, please comment below and let me know what you think. I'd love it if you tag me on Instagram @grumpyshoneybunch or #grumpyshoneybunch so I can see your photos!

Recommended

  • Close-up of a freshly baked golden-brown whole wheat dinner roll on a wire cooling rack.
    Wheat Dinner Rolls (Soft Honey Whole Wheat Rolls)
  • Two thick, fudgy walnut brownies stacked on a white plate with large walnut pieces visible.
    Nanny's Walnut Brownies (Classic Fudgy Recipe)
  • A slice of homemade butterscotch meringue pie on a white plate with the whole pie in the background.
    Nanny's Old Fashioned Butterscotch Pie with Meringue Topping
  • Glass bowl of smooth, golden homemade whipped maple butter sitting on a red patterned towel.
    Whipped Maple Butter Recipe (Easy 2-Ingredient Spread)

Weekly Meal Plan 34

July 13, 2022 by Shelby Law Ruttan Leave a Comment

Collage of images for weekly #34 meal plan.

Here is your free Weekly Meal Plan 34. Each meal includes side dish recommendations, along with a beverage and dessert of the week along with weekend options.

Collage of images for weekly #34 meal plan.

Do you have any requests or special needs? If so, please let me know and I will do what I can to help!

[feast_advanced_jump_to]

🍽️ Meal Planning and Prep Tips

I'm here to share with you recipes to make during the week that aren't hard to make and take little prep. Most feed 4 so if there are just 1 or 2 to feed, you may want to scale down and halve a recipe OR just make a couple of these and enjoy leftovers throughout the week.

This weekly meal plan makes your life easier with easy air fryer recipes! Then on the weekend, relax with a hot cup of coffee and a cinnamon roll for brunch, and enjoy a super easy and delicious slow cooker recipe for Sunday supper.

Here are some shortcuts and tips to help you throughout the week.

As an Amazon Associate I earn from qualifying purchases.

Any prep that can be done on Sunday is called prep day.

  • Make the salad of choice on prep day for Monday's side dish. If making the broccoli salad, don't add the bacon until you are ready to serve.
  • Use regular or keto buns for the butter burgers, and make the Italian Vinaigrette on prep day.
  • Special K Loaf can be made on prep day and stored in the fridge. Just reheat in the oven or microwave on Wednesday dinner. Squash for the side dish can be washed and sliced on prep day and stored in the fridge.
  • Bacon and shrimp can be precooked and stored until ready to use and the cream cheese spread for the pizza can be made ahead of time also.
  • If making your own pizza crust, mix it the night before and keep it in the fridge. Take the dough out of the fridge at least 30 minutes before shaping.
  • Make the maple cupcakes and/or peanut butter no bakes on Sunday. Keep the cupcakes in the fridge.
  • Allow a couple of hours on Sunday morning to make the cinnamon rolls.
  • For Sunday dinner, put the roast in the crockpot in the morning. For dinner make your own homemade mashed potatoes and use the air fryer to make the asparagus.

Weekly Meal Plan 34

Monday

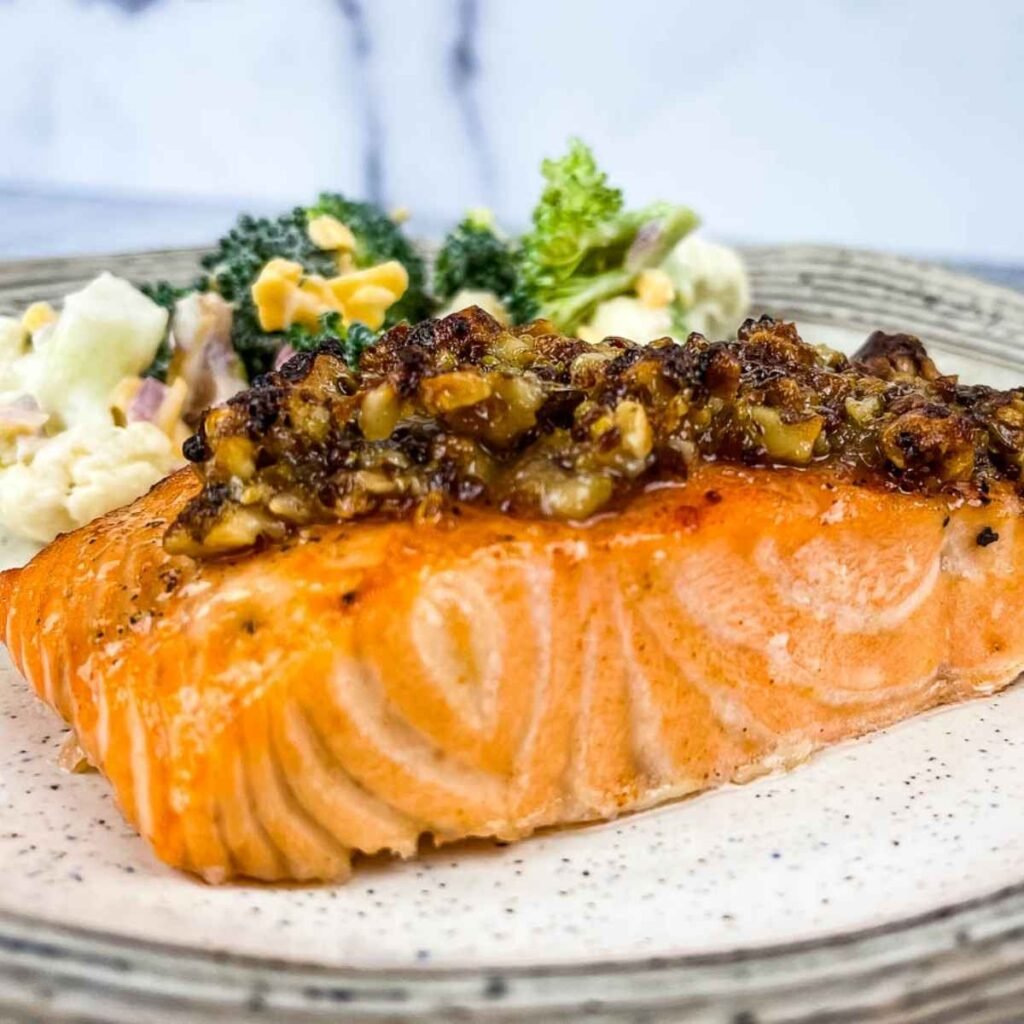
Featured image for Air Fryer Salmon Fillets.

Air Fryer Salmon

I am loving this Air Fryer Salmon Fillet with a maple walnut topping. It is so easy and good for you. Serve with a side of Amish Macaroni Salad or Broccoli Salad.

Tuesday

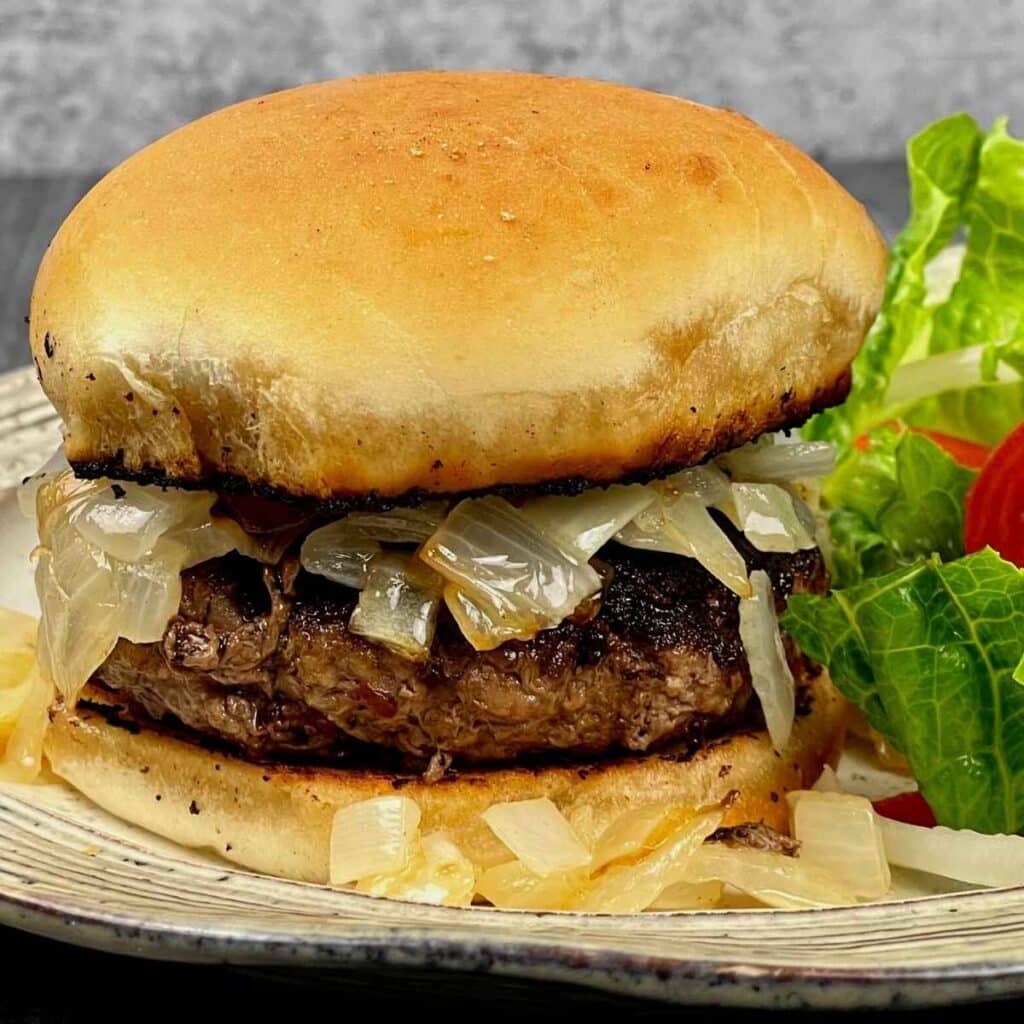
Butter Burgers Featured Image.

Butter Burgers

These Butter Burgers are SO packed with flavor, and you can enjoy these on Keto by using a keto burger bun! Serve with a green side salad topped with Italian Vinaigrette.

Wednesday

Special K Loaf Featured image.

Special K Loaf

I LOVE this Special K Loaf. I is so delicious and perfect for a vegetarian meal. Serve with a side of sauteed summer squash and Air Fryer Baked Potatoes.

Thursday

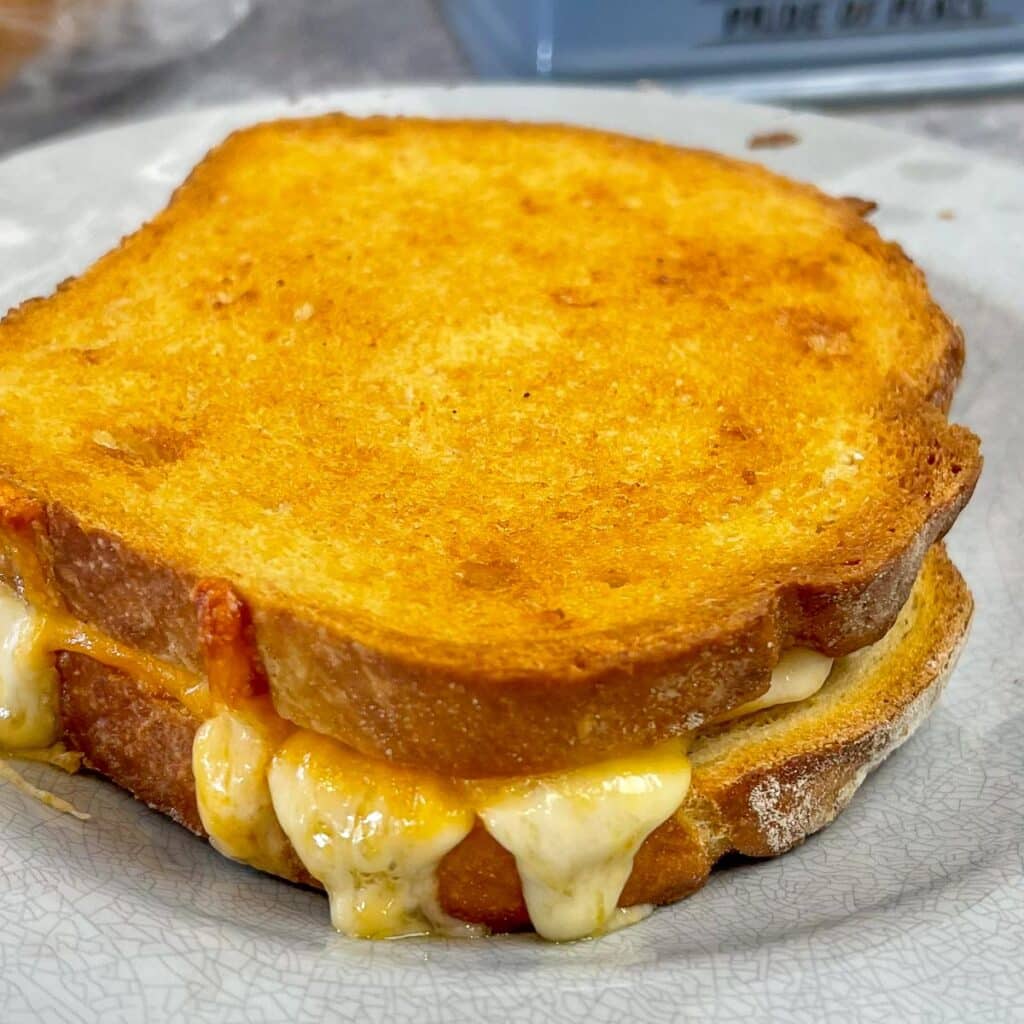
Air Fryer Grilled Cheese Sandwich Featured Image.

Air Fryer Grilled Cheese Sandwiches

When I'm in a hurry, this Air Fryer Grilled Cheese Sandwich makes dinner time easy. Adults and kids both love the gooey cheese and crispy brown bread. Serve with a fresh fruit salad or green tossed salad.

Friday

Featured image for Jalapeno Pizza.

Jalapeno Popper Pizza

It's Friday night and in traditions past with my family, it's pizza night. How about giving this Jalapeno Popper Pizza with Shrimp and Bacon a try this week? It is SO good! These Boneless Chicken Wings in the Air Fryer are a great side and kids love these Peanut Butter No Bakes for dessert.

Saturday

Maple Cupcake in a paper wrapper with maple frosting and topped with a walnut.

Maple Cupcakes

Made with pure maple syrup in the cake and frosting, this recipe for Maple Cupcakes make one dozen, enough for a few days worth of dessert!

Cocktail of the week

Featured image for hot fireball apple cider.

Hot Fireball Apple Cider

With the fall coming up on us, I love to enjoy this Hot Fireball Apple Cider. The combination of apple and cinnamon is a perfect pairing and if there is a chill in the air, it will be sure to warm you up.

Sunday Brunch

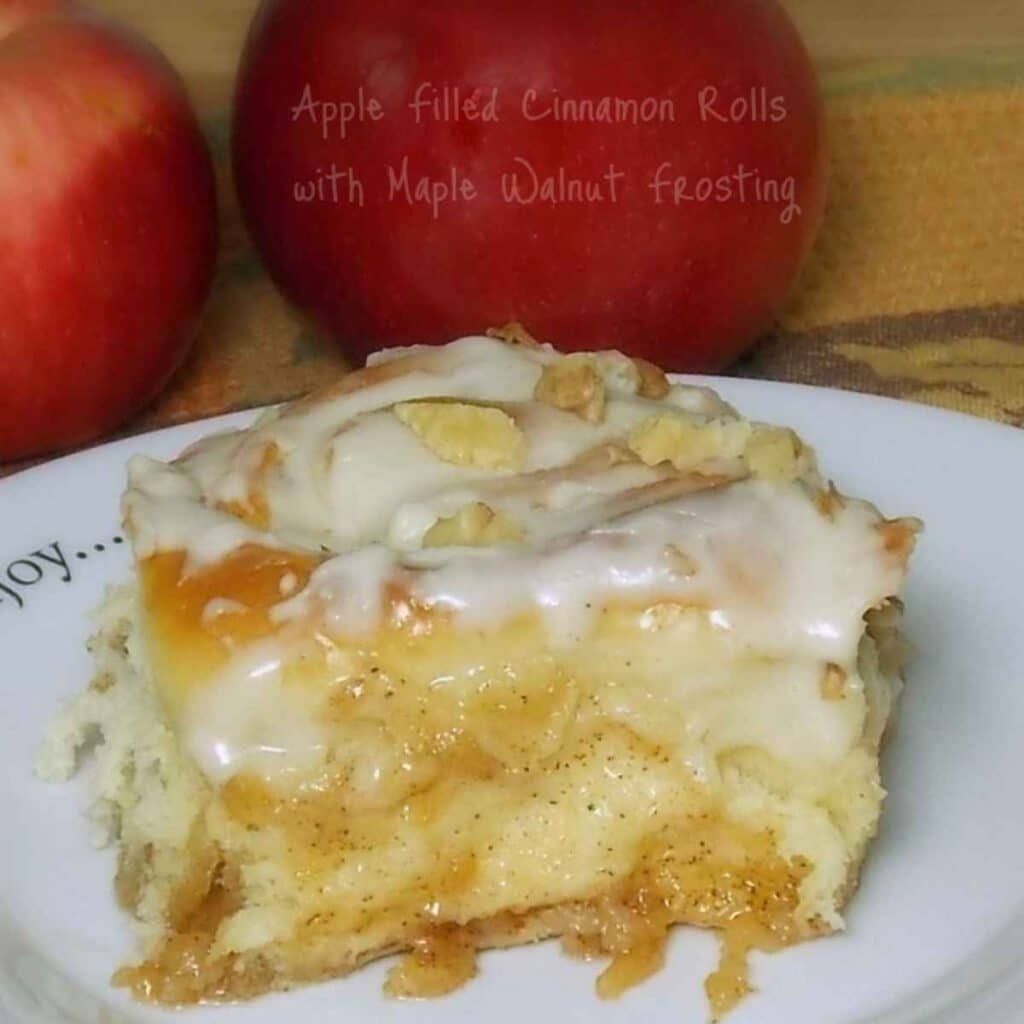
Apple Filled Cinnamon Rolls FI.

Apple Filled Cinnamon Rolls

Apple season means it is time to try these Apple Filled Cinnamon Rolls! They are moist, delicious and the perfect Sunday morning sweet treat with a hot cup of coffee, make it extra special and serve with this Irish Coffee.

Sunday Supper

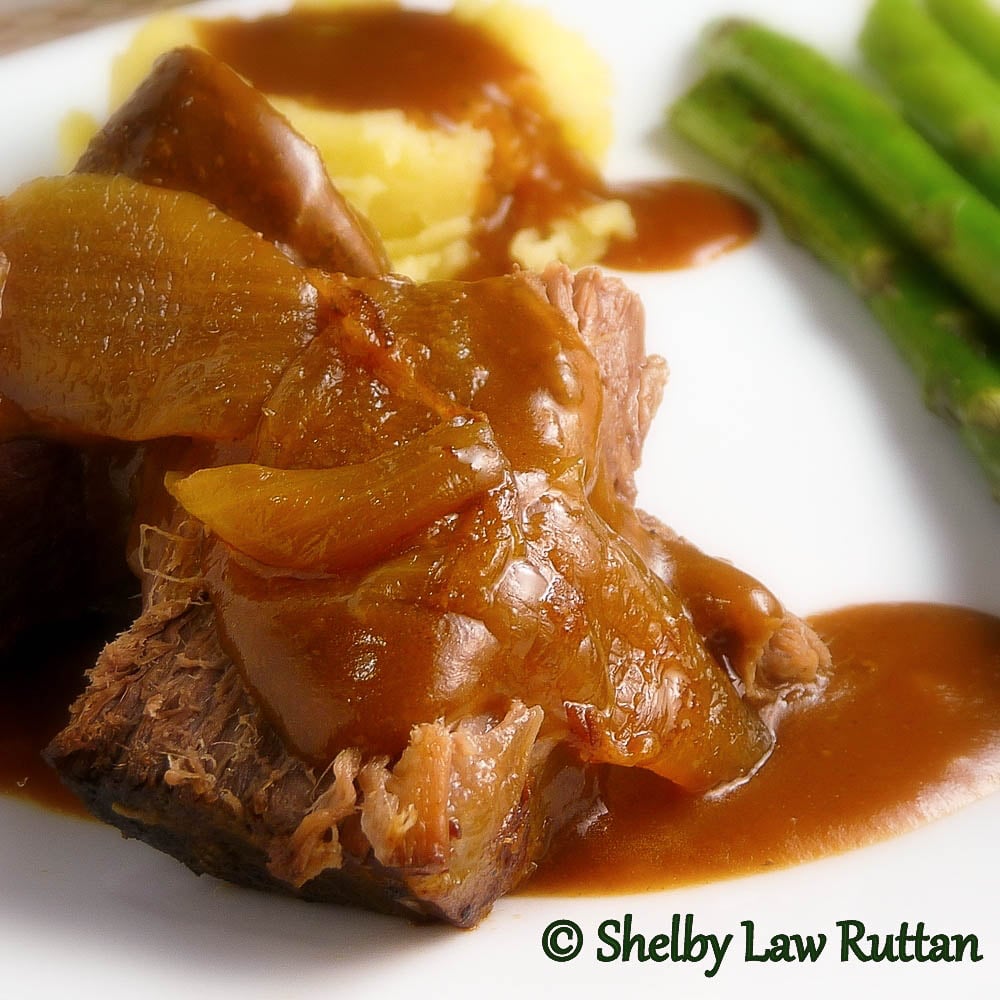
Crock Pot Pot Roast FI.

Crockpot Roast with Onions

Crock Pot Pot Roast and Onion Gravy is an all time favorite. I love to serve this with mashed potatoes, gravy, and Air Fried Asparagus! For dessert serve this Chocolate Zucchini Cake with Spiced Cream.

Grumpy's Honeybunch Shopping List

Download Shopping List
Printable and downloadable grocery list.

Related Posts

You must use the category name, not a URL, in the category field.

Don't forget to check out my Amazon storefront for some of my favorite products!

When you make these recipes, please comment below and let me know what you think. I'd love it if you tag me on Instagram @grumpyshoneybunch or #grumpyshoneybunch so I can see your photos!

Recommended

  • Overhead image of a stack of freshly cooked golden brown corn and flour tortillas with dark charred spots, resting on a blue and white patterned cloth napkin.
    Mom's Homemade Corn and Flour Tortillas
  • Chicken Parmesan Meatballs served on a white platter, with a toothpick inserted into the front meatball.
    Chicken Parmesan Meatballs
  • A stack of thick, soft chocolate chip cookies served on a white plate with a floral and butterfly embroidered napkin in the background.
    Nanny's Soft Chocolate Chip Cookies
  • A tall stack of three thick, fluffy griddle cakes topped with a melting pat of butter and glistening amber syrup, served on a white plate with a side of fresh orange slices.
    Buttermilk Pancakes

Nanny's Soft Oatmeal Cookies

July 13, 2022 by Shelby Law Ruttan 3 Comments

Featured Image for Soft Oatmeal Cookies.

This is my Nanny's recipe for Soft Oatmeal Cookies that I enjoyed all my childhood.

Tender, pillowy, and studded with plump raisins, these are the best oatmeal cookies to have on hand for a quick snack or to include in a holiday cookie tray!

A stack of 3 soft oatmeal cookies studded with raisins.

While I love chewy oatmeal raisin cookies, these soft oatmeal cookies bring back a lot of childhood memories, and these classic cookies are pure comfort food for me.

❤️ Why you'll love it

✔️ The cookies are puffy and soft with a hint of cinnamon.

✔️ Just 1 cookie has 70 calories, so you can help yourself to 2 without guilt!

✔️ You get 3 dozen good sized cookies from 1 batch!

Ingredients for Nanny's Soft Oatmeal Cookies.

🥘 Ingredients

Vegetable oil, feel free to use canola oil or olive oil. I went with vegetable oil because that is what my grandmother used and it is more budget friendly.

Granulated sugar

Large eggs, take the eggs out at least 15 minutes to bring to room temperature before mixing together the cookie dough

Ground cinnamon, adds a touch of sweet warmth to the cookies

Vanilla extract, I always use pure vanilla extract. If using imitation, you may want to double the amount used.

Buttermilk, I don't always have buttermilk on hand and sometimes it is hard to find in the store. But Kefir is a great substitute in a pinch or make your own by adding a tablespoon of vinegar to the measuring cup and filling the cup with whole milk.

All purpose flour, flour doesn't have to be sifted, but at least stir the flour with a spoon to aerate it.

Old fashioned oats, these are also known as whole oats.

Baking powder aids making a puffed cookie.

Salt to balance out the flavors.

Raisins (optional)

Walnuts (optional)

Adding wet ingredients to dry ingredients.
I like to blend all wet ingredients and add at once to the flour mixture.
Pouring oats into cookie batter.
Use regular or instant oats, whatever you have on hand.
Adding oats and raisins to the cookie dough.
Raisins are optional, you can also add your favorite add ins like chocolate chips or toffee chips!
Cookie dough mixture in mixing bowl.
The fully mixed batter will have a soft wet look, but still will hold its shape when scooped.

🔪 Instructions

  1. Preheat the oven to 350 degrees F. Line a baking sheet with parchment paper. Set aside.
  2. In a large bowl, whisk together canola oil, granulated sugar, eggs, cinnamon, and vanilla extract until well combined.
  3. In a separate bowl whisk together baking soda, baking powder, white whole wheat flour and oatmeal.
  4. Stir ½ dry ingredients into wet ingredients and stir until combined.
  5. Add buttermilk and stir until just combined. Add remaining flour mixture and stir until combined. Stir in raisins if desired.
  6. Scoop batter with cookie scoop and place on prepared baking sheet.
  7. Bake in preheated oven for 14-15 minutes or until edges are slightly browned and top of cookie no longer looks wet.
  8. Remove the cookies from the oven and transfer to a wire rack. Cool completely.
Cookie dough on parchment lined baking sheet.

Storage

Store cookies in an airtight container on the counter at room temperature up to 5 days and in the freezer up to 3 months.

Baked Soft Oatmeal Cookies on a baking sheet.

📖 Variations

  • Use your favorite add ins instead of the raisins. Great choices would chocolate chips, peanut butter chips, butterscotch chips, or candy coated chocolate pieces.
  • 1 cup unsalted butter can be melted and used in place of the vegetable oil. Just remember the cookies may not be as soft as if you used oil.
  • Quick oats can replace the whole oats, when doing so, the batter will be a little thicker due to the difference in the oats.
  • Substitute light brown sugar half of the white sugar or use dark brown sugar to give the cookies a more caramelized flavor.
  • Coconut oil can be used in place of vegetable oil without changing the texture of the cookie. It will give the cookie a hint of coconut flavor.

💭 Tips

  • For a more shaped cookie, gradually add more flour to the dough to make it stiffer. Then roll out the dough on a floured work surface and cut into circle shapes. The end result will still be a soft, but firmer cookie.
  • I don't recommend using a hand mixer for this recipe. The oil in the recipe makes it very easy to mix with a spoon. As the dough comes together it will come clean easily from the sides of the bowl due to the oil in the dough.
  • Line a baking sheet with parchment paper and scoop cookie dough balls onto the sheet. Freeze cookie dough until stiff, then transfer to the freezer in an airtight container. To bake, remove oatmeal cookie dough from freezer and place on baking sheet. Cook time will be a little longer due to the frozen dough, just bake until edges are brown and top of the cookie is no longer wet.
A plate full of oatmeal cookies studded with raisins.

Related Recipes

Old Fashioned Peanut butter cookies have crispy edges and chewy centers.

Vanishing Oatmeal Raisin Cookies are a family favorite chewy oatmeal cookie.

This Strawberry Baked Oatmeal is perfect for weekend brunches.

Peanut butter lovers will love these Peanut Butter Oatmeal Cookies.

These Oatmeal Raisin Walnut Cookies are for chewy cookie lovers!

Nanny's Soft Chocolate Chip Cookies are always bring back memories of my childhood and go great with a hot cup of coffee!

🍽 Serve with...

Serve these soft oatmeal cookies with a scoop of homemade vanilla ice cream, glass of milk, of hot cup of coffee.

🏫 The last word

Nanny's kitchen always had cookies in it and if the box in the cupboard was empty, you could be sure there was a box in the freezer. She always made soft, tender cookies and all of the grandkids loved the old-fashioned cookies

The one thing Nanny's soft cookie recipes all had in common was the use of oil to make the dough. I believe that is the main factor in making these cookies pillowy and soft.

Soft Oatmeal Cookies

If you give this recipe a try, I'd love to hear how it turned out! Please leave a comment and ⭐⭐⭐⭐⭐ rating below to let me know how you liked it. Don't forget to tag me on Instagram @grumpyshoneybunch so I can see your beautiful salad bowls!

📖 Recipe

Featured Image for Soft Oatmeal Cookies.

Nanny's Soft Oatmeal Cookies

Shelby Law Ruttan
Soft Oatmeal Cookies are studded with raisins and have a hint of cinnamon. This old fashioned cookie is soft and tender and absolutely delicious. Perfect for every day and holiday cookie trays.
4.60 from 5 votes
Prevent your screen from going dark
Print FREE recipe card with your email address Pin Recipe Save Go to Collections
Prep Time 10 minutes mins
Cook Time 20 minutes mins
Total Time 30 minutes mins
Course Cookie Recipes
Cuisine American
Servings 36
Calories 70 kcal

Equipment

  • Large baking sheet
  • Parchment Paper
  • mixing bowls
  • Wooden mixing spoon
  • Rubber scraper
  • Measuring cups
  • Measuring spoons

As an Amazon Associate I earn from qualifying purchases.

Ingredients
  

  • ¾ cup vegetable oil
  • 1 cup granulated sugar
  • 2 large eggs
  • ½ teaspoon ground cinnamon
  • 1 teaspoon vanilla extract
  • ½ cup buttermilk
  • 2 cups flour
  • 2 cups regular oats
  • ½ teaspoon baking soda
  • 2 teaspoons baking powder
  • pinch salt
  • ½ cup raisins (optional)
  • ½ cup walnuts (optional)

Instructions
 

  • In a large mixing bowl, blend together canola oil, granulated sugar, eggs, cinnamon, and vanilla extract. 
  • In another mixing bowl stir together baking soda, baking powder, white whole wheat flour and oatmeal.
  • Stir ½ flour mixture into egg mixture and stir until combined. Add buttermilk and stir until combined. Add remaining flour mixture and stir until combined. Stir in raisins if desired.
  • Bake at 350 for 14-15 minutes or until edges are slightly browned and top of cookie no longer looks wet.

Nutrition

Calories: 70kcalCarbohydrates: 14gProtein: 2gFat: 1gSaturated Fat: 0.2gPolyunsaturated Fat: 0.2gMonounsaturated Fat: 0.2gTrans Fat: 0.001gCholesterol: 11mgSodium: 31mgPotassium: 32mgFiber: 1gSugar: 6gVitamin A: 21IUVitamin C: 0.001mgCalcium: 22mgIron: 1mg
Keyword Soft Oatmeal Cookies
Tried this recipe?Mention @grumpyshoneybunch or tag #grumpyshoneybunch!

Air Fryer Quesadillas

July 12, 2022 by Shelby Law Ruttan Leave a Comment

Featured image for air fryer quesadilla.

When you need something quick and easy for lunch or dinner, these Air Fryer Quesadillas are is just what you are looking for. With crispy tortillas and melty cheese, this classic cheese quesadillas recipe is one your whole family will love.

A stack of air fryer quesadillas with salsa in the background.

This easy to make air fryer quesadilla recipe is a great way to feed hungry bellies and it is super versatile. All you need to know is the method and the filling can be whatever you desire!

❤️ Why you'll love it

✔️ The tortillas cook to crispy perfection with perfectly melted cheese

✔️ Air fryer cheese quesadillas make a quick lunch made with simple ingredients

✔️ Making homemade quesadillas in the air fryer takes less time and no mess.

🥘 Ingredients

As an Amazon Associate I earn from qualifying purchases.

Flour tortillas, smaller sizes work best to fit in air fryer baskets. I love these low carb flour tortillas.

Butter

Shredded cheese, I find the best cheese is Monterey jack, Mexican cheese blend, mozzarella cheese, or cheddar cheese.

Favorite toppings for quesadillas

Butter, shredded yellow cheese, and two flour tortillas.
Just 3 ingredients are needed for this simple recipe. Swap out cooking spray for butter to reduce the fat.

🔪 Instructions

  1. Spread one side of the tortilla with butter and place in the air fryer basket or on an air fryer tray.
  2. Sprinkle shredded cheese on the bottom half of the tortilla.
  3. Place the top tortilla on top of the cheese, butter side up.
  4. Place the basket in the air fryer and cook for 2 minutes. Remove basket and carefully flip tortilla over. Return to the air fryer and cook for another 2 minutes, until cheese melts and tortilla has browned.
  5. Remove quesadilla from the air fryer and place on a cutting board. With a chef knife or pizza cutter, cut each tortilla into 4-6 sections.

🥄 Equipment

Air fryer

Chef knife or pizza cutter for cutting the quesadilla

Turner

Flour tortilla topped with shredded cheese.
Use any of your favorite melty cheese to make this air fryer quesadillas recipe!

🥫Storage

Store any leftover air fryer quesadillas in an airtight container in the fridge up to 4 days. These can be reheated easily with just a minute or two in the air fryer.

📖 Variations

  • Use cooking spray in place of butter to reduce fat and calories
  • Use corn tortillas in place of flour tortillas
  • Add shredded chicken, ground beef, or spread a layer of black beans or refried beans on the tortilla before sprinkling with cheese.
  • Include any of your favorite fillings

💭 Tips

  • Be sure to watch the quesadillas carefully if using an air fryer with trays. It will brown quickly the closer to the top of the air fryer the quesadilla is. If making more than one at a time, be sure to rotate the trays after 1 minute.
  • Cooking time will vary depending on what type of air fryer you are using. Basket air fryers and tray air fryers work differenty.
Uncut air fryer quesadilla with salsa in the background.s

📚 Related Recipes

Buffalo chicken fans love these Low Carb Buffalo Chicken Quesadillas.

These Breakfast Quesadillas are absolutely delicious!

Have you tried making an Air Fryer Grilled Cheese Sandwich?

Shrimp Quesadillas are low carb and protein packed!

🍽 Serve with...

Serve this crispy quesadilla topped with homemade salsa, homemade guacamole, sour cream, and a side of black bean corn salsa.


Don't forget to check out my Amazon storefront for some of my favorite products!

When you make this recipe, please comment below and let me know what you think. I'd love it if you tag me on Instagram @grumpyshoneybunch or #grumpyshoneybunch so I can see your photos!

If you love this recipe, please leave a ⭐⭐⭐⭐⭐ rating

📖 Recipe

Featured image for air fryer quesadilla.

Air Fryer Quesadillas

Shelby Law Ruttan
Air Fryer Quesadillas make a quick and easy lunch or snack you will love with buttery crisp tortillas and melty cheese.
5 from 1 vote
Prevent your screen from going dark
Print FREE recipe card with your email address Pin Recipe Save Go to Collections
Prep Time 1 minute min
Cook Time 4 minutes mins
Total Time 5 minutes mins
Course Snack
Cuisine American
Servings 1
Calories 401 kcal

Equipment

  • Air Fryer
  • Turner
  • chef knife , or pizza cutter

As an Amazon Associate I earn from qualifying purchases.

Ingredients
  

  • 2 low carb flour tortillas
  • ½ cup shredded monterey jack cheese
  • ½ tablespoon butter

Instructions
 

  • Spread one side of the tortilla with butter and place in the air fryer basket or on an air fryer tray.
  • Sprinkle shredded cheese on the bottom half of the tortilla.Place the top tortilla on top of the cheese, butter side up.
  • Place the basket in the air fryer and cook for 2 minutes. Remove basket and carefully flip tortilla over.
  • Return to the air fryer and cook for another 2 minutes, until cheese melts and tortilla has browned.
  • Remove quesadilla from the air fryer and place on a cutting board. With a chef knife or pizza cutter, cut each tortilla into 4-6 sections.

Nutrition

Calories: 401kcalCarbohydrates: 38gProtein: 24gFat: 29gSaturated Fat: 16gPolyunsaturated Fat: 4gMonounsaturated Fat: 6gTrans Fat: 0.2gCholesterol: 65mgSodium: 1024mgPotassium: 47mgFiber: 30gSugar: 0.3gVitamin A: 609IUCalcium: 423mgIron: 0.4mg
Keyword Air Fryer Quesadillas
Tried this recipe?Mention @grumpyshoneybunch or tag #grumpyshoneybunch!

Air Fried Hot Dogs

July 11, 2022 by Shelby Law Ruttan Leave a Comment

Featured image for Air Fryer Hot Dogs.

Make perfectly cooked hot dogs right in the air fryer! Air Fried Hot Dogs are a quick and easy dinner and the air fryer is the best way to make them.

Hero Image for Air Fried Hot Dogs.

Air fryer hot dogs made an easy peasy weeknight dinner and the whole family loves them. They also are perfect for game days as they take only minutes to cook.

[feast_advanced_jump_to]

❤️ Why you'll love it

✔️ You get a grilled juicy hot dog flavor without turning on the grill.

✔️ Cook time is approximately 6 minutes and clean up is a breeze!

✔️ It is an easy way to feed a hungry family fast!

Raw hotdogs on a plate with hot dog rolls in the background.

🥘 Ingredients

Hot dogs, I prefer what we called snappy dogs, hoffman hots, or glazier reds. These are the best hot dogs and have a thicker skin. When they cook up, they have a crispy skin, will snap when you take a bite and a tender hotdog inside.

Hot dog buns, potato buns are the best bun for hot dots. You can purchase side cut or top cut. I prefer top cut.

Favorite condiments and toppings

Air Fried Hot Dogs on air fryer rack.

🔪 Instructions

  1. Place hotdogs in a single layer n an air fryer basket or tray leaving space between the hot dogs to allow the hot circulating air flow between them.
  2. Slide basket into the air fryer and cook at 400 degrees F for 4 minutes. Remove basket and give it a shake to flip hotdogs over. Return to the air fryer and cook 2 more minutes, until outside begins to brown and skin starts to break.

🥄 Equipment

Air fryer

Tongs

Hot Dog in a roll with a combination of toppings.
Air Fried Hot Dog with Bourbon BBQ Sauce, Blue Cheese, Crushed Potato Chips, Diced Onion, and Jalapeno.

🥫Storage

Store any leftover hot dogs in an air tight container in the fridge up to 4 days.

📖 Variations

  • Make cheese dogs! Place ½ slice of cheese over the cooked hot dogs and air fry 15 seconds to melt the cheese.
  • Wrap a slice of thin cut bacon around the hot dog before cooking for bacon wrapped hot dogs.

💭 Tips

  • Watch the hot dogs carefully after returning to the air fryer for the last few minutes. They may not seem ready when you take them out to toss, but they turn brown and split quickly.
Three hot dogs in buns with different toppings.
Serve air fried hot dogs in a hot dog bun with your favorite toppings!

📚 Related Recipes

Perfectly cooked Air Fryer Salmon has a tasty maple walnut topping.

Air Fryer Hamburgers are super easy and delicious

Low Carb Chili Dog Casserole is another great way to enjoy this hot dog favorite!

Try these Thai Style Hot Dogs for a different twist on hot dogs.

🍽 Serve with...

Serve hot dogs on a regular or toasted bun with your favorite hot dog toppings. Great side dishes would be pasta salad, potato salad, french fries, or potato chips.


Don't forget to check out my Amazon storefront for some of my favorite products!

When you make this recipe, please comment below and let me know what you think. I'd love it if you tag me on Instagram @grumpyshoneybunch or #grumpyshoneybunch so I can see your photos!

If you love this recipe, please leave a ⭐⭐⭐⭐⭐ rating

📖 Recipe

Featured image for Air Fryer Hot Dogs.

Air Fried Hot Dogs

Shelby Law Ruttan
The best way to make perfectly cooked hot dogs with a chargrilled flavor in just minutes!
5 from 1 vote
Prevent your screen from going dark
Print FREE recipe card with your email address Pin Recipe Save Go to Collections
Prep Time 5 minutes mins
Cook Time 6 minutes mins
Total Time 11 minutes mins
Course Main Dish
Cuisine American
Servings 8
Calories 230 kcal

Equipment

  • Air Fryer
  • Tongs

As an Amazon Associate I earn from qualifying purchases.

Ingredients
  

  • 8 hot dogs
  • 8 hot dog rolls

Instructions
 

  • Place hotdogs in a single layer n an air fryer basket or tray leaving space between the hot dogs to allow the hot circulating air flow between them.
  • Slide basket into the air fryer and cook at 400 degrees F for 4 minutes. Remove basket and give it a shake to flip hotdogs over.
  • Return to the air fryer and cook 2 more minutes, until outside begins to brown and skin starts to break.
  • Serve hot dogs in hot dog rolls.

Nutrition

Calories: 230kcalCarbohydrates: 30gProtein: 9gFat: 8gSaturated Fat: 3gPolyunsaturated Fat: 2gMonounsaturated Fat: 3gCholesterol: 20mgSodium: 518mgPotassium: 118mgFiber: 1gSugar: 3gVitamin A: 0.4IUVitamin C: 1mgCalcium: 72mgIron: 3mg
Keyword Air Fried Hot Dogs
Tried this recipe?Mention @grumpyshoneybunch or tag #grumpyshoneybunch!

Air Fryer Corn on the Cob

July 10, 2022 by Shelby Law Ruttan 1 Comment

Featured image for Air Fryer Corn on the Cob.

This Air Fryer Corn on the Cob recipe makes the most delicious corn with just a few minutes of cook time. It is one of my favorite easy recipes and is the perfect side dish for your next meal.

Cooked air fryer corn on the cob

I love easy air fryer recipes and this sweet corn in the air fryer makes an easy side dish that goes with almost any main. That is why corn season is the best time to make it in the air fryer.

❤️ Why you'll love it

✔️ There is no need to heat up the grill for just a few ears of perfect corn.

✔️ The air fryer gives the best results with roasted and crispy sweet corn kernels are packed with flavor.

✔️ Making fresh sweet corn in the air fryer is a quick and easy way to make it and it saves time!

3 ears of corn seasoned with salt and pepper on a white plate
A quick rub of olive oil or cooking spray aids in the seasoning sticking to the cob corn.

🥘 Ingredients

Fresh corn on the cob

Olive oil

Salt and black pepper

🔪 Instructions

  1. Place corn on a large plate and drizzle with olive oil. Rub the oil over the entire ear of corn with your hands.
  2. Season with salt and pepper, then place the corn in the basket of the air fryer in a single layer.
  3. Return the basket to the air fryer and air fry corn at 400 degrees F for 8 minutes.
  4. Remove the air fryer basket from and flip the corn. Cook another 8 minutes, or until corn is tender and kernels are lightly charred.
Raw seasoned corn in the air fryer.
Just a quick rub of olive oil and sprinkling of salt and pepper is all you need to air fry corn on the cob.

🥄 Equipment

Air Fryer

🥫Storage

Store leftovers in an airtight container in the fridge up to 4 days.

📖 Variations

  • Leave off the oil and spritz the corn cobs with cooking spray before adding the seasoning.

💭 Tips

  • Depending on the size of your air fryer, the amount of corn and cooking time will vary. You should be able to cook 4-8 ears of corn. Depending on the size of your air fryer Tray air fryers require you to rotate the tray because the higher the tray, the quicker the heat will char the kernels.
  • When air frying be sure to leave space between the ears of corn to allow hot air to circulate around the ears.

🙋 FAQ's

Can you cook frozen corn cobs in the air fryer?

Yes, it takes a little less time to cook frozen corn. Just follow the same prep but cook for only 12 minutes.

Air Fryer Corn on the Cob on a plate.
Air Fryer Corn on the Cob is a great side to baked potatoes and meatloaf!

📚 Related Recipes

🍽 Serve with...

Serve corn with melted butter, parmesan cheese, a squeeze of lime juice, and sprinkle of cayenne pepper or red chili powder.

🏫 The last word

The air fryer method is a great option for cooking corn cobs when you want to save time. It is less messy, quick, easy, and clean up is a breeze. It is a great way to serve fresh corn fast with that roasted flavor.

Any leftover corn can be used to make this delicious Mexican Street Corn Salad or Tomato Avocado Salad Stack!


Don't forget to check out my Amazon storefront for some of my favorite products!

When you make this recipe, please comment below and let me know what you think. I'd love it if you tag me on Instagram @grumpyshoneybunch or #grumpyshoneybunch so I can see your photos!

If you love this recipe, please leave a ⭐⭐⭐⭐⭐ rating

📖 Recipe

Featured image for Air Fryer Corn on the Cob.

Air Fryer Corn on the Cob

Shelby Law Ruttan
A method for cooking corn without boiling water! Air Fryer Corn on the cob is perfectly cooked in just 7 minutes.
5 from 2 votes
Prevent your screen from going dark
Print FREE recipe card with your email address Pin Recipe Save Go to Collections
Prep Time 2 minutes mins
Cook Time 16 minutes mins
Total Time 18 minutes mins
Course Side Dish
Cuisine American
Servings 4
Calories 113 kcal

Equipment

  • Air Fryer

As an Amazon Associate I earn from qualifying purchases.

Ingredients
  

  • 4 ears corn on the cob , husk and silk removed
  • 4 teaspoons olive oil
  • salt , to taste
  • black pepper , to taste

Instructions
 

  • Place corn on a large plate and drizzle with olive oil. Rub the oil over the entire ear of corn with your hands.
  • Season with salt and pepper, then place the corn in the basket of the air fryer in a single layer.
  • Return the basket to the air fryer and air fry corn at 400 degrees F for 8 minutes.
  • Remove the air fryer basket from and flip the corn. Cook another 8 minutes, or until corn is tender and kernels are lightly charred.

Nutrition

Calories: 113kcalCarbohydrates: 17gProtein: 3gFat: 5gSaturated Fat: 1gPolyunsaturated Fat: 1gMonounsaturated Fat: 3gTrans Fat: 0.01gSodium: 14mgPotassium: 243mgFiber: 2gSugar: 6gVitamin A: 168IUVitamin C: 6mgCalcium: 2mgIron: 0.5mg
Keyword Air Fryer Corn on the Cob
Tried this recipe?Mention @grumpyshoneybunch or tag #grumpyshoneybunch!

Air Fryer Stuffed Peppers

July 9, 2022 by Shelby Law Ruttan 2 Comments

Featured image for air fryer stuffed peppers.

You are going to love this delicious dinner recipe for Air Fryer Stuffed Peppers! This comfort food is a family favorite and an easy way to make good food fast.

Hero image for Air Fryer Stuffed Peppers.

If you love easy recipes made with ground meat, then this pepper recipe is one to try. Tender pepper filled with a rice and meat mixture

[feast_advanced_jump_to]

❤️ Why you'll love it

✔️ It is an easy dinner made with simple ingredients and a great use for leftover rice.
✔️ The air fryer prevents soggy peppers and browns the tops of the peppers perfectly.

✔️ The cheese topping gets golden brown and adds so much flavor.

Ingredients for air fryer stuffed peppers.

🥘 Ingredients

Fresh bell peppers, use your favorite peppers, I used red bell peppers and green bell peppers.

Lean ground beef

Ground pork

White rice, I recommend jasmine rice

Onion, I used and prefer the vidalia onion

Canned whole tomatoes, I used 1 quart of home canned tomatoes. 4 cups of canned diced tomatoes can be used instead.

Tomato paste

Italian seasoning

Garlic powder

Salt & Pepper

Monterey jack cheese

Fresh chives for garnish

Ground meat and onions in a skillet.
Meat and rice sauce for stuffing peppers.
The meat and tomato sauce mixture simmers to develop flavors.
Cooked rice on top of tomato meat mixture.
Precooked rice is added to thicken the meat sauce
Meat and rice mixture.
A delicious stuffed pepper filling, basically a spanish rice recipe!

🔪 Instructions

  1. Prepare the peppers by cutting the tops off and removing the core and seeds. Wash and dry the peppers and set aside.
  2. Heat 1 tablespoon olive oil in a large skillet over medium high heat until hot. Add the onions and cook for 3 minutes, stirring often, until onions soften.
  3. Add the ground pork and ground beef and cook, chopping meat into small pieces while cooking for 7 minutes, until meat is browned.
  4. Stir in the Italian seasoning, garlic powder, salt, and pepper. Add the tomatoes and tomato paste stirring to combine.
  5. Add the cooked rice and stir to incorporate.Using a spoon, fill each bell pepper with the meat mixture then place the stuffed pepper in the air fryer basket, leaving space between each pepper to allow hot air to circulate around the peppers. Cook at 400 degrees for 10 minutes.
  6. Remove the peppers from the air fryer and sprinkle cheese over each pepper.
  7. Return the air fryer basket to the air fryer and cook at 370 degrees for 2 minutes, until cheese is bubbly and begins to brown.
  8. Remove the air fryer basket and set aside to cool for 10 minutes. Using a long handled spatula, remove the peppers from the air fryer to serve.
  9. Garnish with chopped chives, if desired.
Upclose image of green bell pepper with meat stuffing in the air fyer.

🥄 Equipment

Air fryer

Large skillet, to cook the stuffed pepper filling

Flat head wooden spoon

Large spoon, to mix and stir the ingredients in the skillet.

Long handled spatula, to remove the peppers from the air fryer

🥫Storage

Store leftovers in an airtight container in the fridge up to 4 days.

📖 Variations

  • Use taco seasoning in place of the garlic, salt, pepper, and Italian seasoning.
  • Use a combination of your favorite ground meats. Lean ground turkey, ground chicken, or Italian sausage are good choices.
  • Substitute 4 cups cauliflower rice for the regular rice to make this a low carb keto recipe.
  • Try different cheeses for topping, pepper jack cheese, cheddar cheese, or colby jack cheese all taste great with the peppers.
  • Use brown rice in place of white rice.
Overhead shot of air fryer stuffed pepper in the air fryer.

💭 Tips

  • Look for peppers that have 4 - 5 lobes on the bottom. These will be easier to stand up in the air fryer.
  • If the tomato sauce mixture is still too runny, add another tablespoon of tomato paste

📚 Related Recipes

These Air Fryer Baked Potatoes are a personal favorite.

Air Fryer Egg Rolls make a great appetizer.

These Air Fryer Pork Chops are cooked perfectly moist and delicious.

Stuffed pepper with a portion cut out of the pepper.

🍽 Serve with...

Serve stuffed peppers with a side salad dressed with your favorite dressing

🏫 The last word

This recipe is perfect for the air fryer, but if you don't have one, bake them in the oven instead. Just preheat the oven to 350 degrees, stuff the peppers, place in a baking dish and bake for 20 minutes. Remove from oven, sprinkle with cheese and bake another 5 minutes, until melted cheese begins to brown.


Don't forget to check out my Amazon storefront for some of my favorite products!

When you make this recipe, please comment below and let me know what you think. I'd love it if you tag me on Instagram @grumpyshoneybunch or #grumpyshoneybunch so I can see your photos!

If you love this recipe, please leave a ⭐⭐⭐⭐⭐ rating

📖 Recipe

Featured image for air fryer stuffed peppers.

Air Fryer Stuffed Peppers

Shelby Law Ruttan
Making stuffed peppers in the air fryer is an easy and delicious way to make dinner. Whole peppers are stuffed with a tomato meat mixture and topped with cheese.
4.41 from 10 votes
Prevent your screen from going dark
Print FREE recipe card with your email address Pin Recipe Save Go to Collections
Prep Time 8 minutes mins
Cook Time 22 minutes mins
Total Time 30 minutes mins
Course Main Dish
Cuisine American
Servings 4
Calories 528 kcal

Equipment

  • Air Fryer
  • Large skillet
  • Flat head wooden spoon
  • ladle
  • Long handled spatula

As an Amazon Associate I earn from qualifying purchases.

Ingredients
  

  • 8 bell peppers , tops cut off, seeds and core removed.
  • 1 tblespoon olive oil
  • ½ medium vidalia onion , diced
  • ½ pound lean ground beef
  • ½ pound ground pork
  • 1 tablespoon Italian seasoning
  • 1 teaspoon garlic powder
  • ½ teaspoon salt
  • ¼ teaspoon black pepper
  • 15.5 ounce canned diced tomatoes
  • ¼ cup tomato paste
  • 2 cups cooked jasmine rice
  • ½ cup shredded Monterey jack cheese

Instructions
 

  • Prepare the peppers by cutting the tops off and removing the core and seeds. Wash and dry the peppers and set aside.
  • Heat 1 tablespoon olive oil in a large skillet over medium high heat until hot. Add the onions and cook for 3 minutes, stirring often, until onions soften.
  • Add the ground pork and ground beef and cook, chopping meat into small pieces while cooking for 7 minutes, until meat is browned.
  • Stir in the Italian seasoning, garlic powder, salt, and pepper. Add the tomatoes and tomato paste stirring to combine.
  • Add the cooked rice and stir to incorporate.
  • Using a spoon, fill each bell pepper with the meat mixture then place the stuffed pepper in the air fryer basket, leaving space between each pepper to allow hot air to circulate around the peppers. Cook at 400 degrees for 10 minutes.
  • Remove the peppers from the air fryer and sprinkle cheese over each pepper.
  • Return the air fryer basket to the air fryer and cook at 370 degrees for 2 minutes, until cheese is bubbly and begins to brown.
  • Remove the air fryer basket and set aside to cool for 10 minutes. Using a long handled spatula, remove the peppers from the air fryer to serve.
  • Garnish with chopped chives, if desired.

Nutrition

Calories: 528kcalCarbohydrates: 49gProtein: 32gFat: 24gSaturated Fat: 9gPolyunsaturated Fat: 2gMonounsaturated Fat: 11gTrans Fat: 0.2gCholesterol: 89mgSodium: 746mgPotassium: 1348mgFiber: 8gSugar: 17gVitamin A: 7965IUVitamin C: 321mgCalcium: 213mgIron: 5mgNet Carbohydrates: 41g
Keyword Air Fryer Stuffed Peppers
Tried this recipe?Mention @grumpyshoneybunch or tag #grumpyshoneybunch!

Amish Macaroni Salad

July 8, 2022 by Shelby Law Ruttan Leave a Comment

Featured image for Amish Macaroni Salad.

This Amish Macaroni Salad is creamy, tangy, and slightly sweet, making it a perfect side dish for picnics, potlucks, or summer barbecues. The combination of tender pasta, crisp vegetables, and a flavorful dressing will have everyone coming back for seconds.

Hero image for Amish Macaroni Salad.

This mac salad is a great side dish recipe and is a family favorite for picnics and potlucks in the summer and on holidays. It has great flavor and is on the sweet side with a tangy dressing that is different from regular macaroni salad.

Inspired by the classic Macaroni Salad, this version brings in a hint of sweetness and a bit of crunch for extra texture. If you love old-fashioned, homemade flavors, this recipe will be a great addition to your collection.

[feast_advanced_jump_to]

Why You'll Love Amish Macaroni Salad

Creamy and Flavorful - The dressing is rich and balanced with the perfect mix of sweet, tangy, and savory flavors.

Simple Ingredients - Everything you need is likely already in your kitchen, making this a no-fuss recipe.

Perfect for Gatherings - It's a crowd-pleaser that pairs well with grilled meats, sandwiches, or fried chicken.

Ingredients

Just a few simple ingredients and sweet tangy dressing make this tasty Amish Macaroni Salad recipe.

Salad ingredients

For the dressing, most recipes call for Miracle Whip which has a sweet tangy flavor of it's own, but I am not a fan of this, so I just use real mayonnaise and add other ingredients to get a similar flavor.

View the recipe card below for full list of ingredients.

How to Make Amish Macaroni Salad

Below is a visual guide on how to make Amish Macaroni Salad. Please see the recipe card below for complete instructions.

Salad ingredients in a mixing bowl without the dressing.

Step 1

In large bowl, toss together the cooked macaroni, red bell pepper, scallions, hard boiled eggs, and celery seed.

Pouring the dressing over top of the pasta salad.

Step 2

In a medium bowl, mix together the mayonnaise, mustard, sugar, and apple cider vinegar until combined and sugar has dissolved. Pour the dressing mixture over top of the pasta mixture and toss to coat.

Substitutions

Pasta - Swap elbow macaroni with small shells or ditalini for a slight texture change.

Mayonnaise - Use Greek yogurt or sour cream for a tangier, lighter version.

Sugar - Replace with honey or omit entirely for a less sweet version.

Variations

Spicy Kick - Add a diced jalapeño or a teaspoon of hot sauce for a little heat.

Protein-Packed - Mix in diced ham, shredded chicken, or crumbled bacon.

Cheesy Twist - Stir in shredded cheddar or crumbled feta for an extra layer of flavor.

Amish macaroni salad in a blue dish with another dish of salad blurred in the back left.

Tips for Making Amish Macaroni Salad

Let the salad chill - Allow at least an hour in the fridge before serving to let the flavors meld.

Use real mayo - This gives the best creamy texture and flavor balance.

Chop ingredients evenly - Smaller, uniform pieces make for a better texture and distribution of flavors.

Taste and adjust - Add more seasoning, vinegar, or sugar to suit your preference.

How to Store Leftovers

Store leftover Amish Macaroni Salad in an airtight container in the refrigerator for up to 4 days. Stir before serving, as the dressing may settle.

📚 Related Recipes

  • Featured image for Amish Broccoli Cauliflower Salad.
    Amish Broccoli Cauliflower Salad
  • Classic Potato Salad Recipe
  • An orange and blue patterned bowl with spiral pasta mixed in a creamy dressing with asparagus, corn, and sun dried tomatoes.
    Parmesan Pasta Salad with Asparagus and Corn
  • Featured image for Dill Pickle Pasta Salad.
    Dill Pickle Pasta Salad Recipe

Serve with...

Enjoy as a side with deviled eggs and coleslaw at a picnic or potluck.

Serve alongside grilled burgers, hot dogs, or BBQ chicken for a classic summer meal.

Pair with air fryer chicken or pulled pork sandwiches for a comforting Southern-inspired plate.

When you make this Amish Macaroni Salad recipe, please comment below and let me know what you think. I'd love it if you tag me on Instagram @grumpyshoneybunch or #grumpyshoneybunch so I can see your photos!

If you love this recipe, please leave a ⭐⭐⭐⭐⭐ rating

📖 Recipe

Featured image for Amish Macaroni Salad.

Amish Macaroni Salad

Shelby Law Ruttan
A creamy, sweet, and tangy Amish Macaroni Salad with crisp veggies and a flavorful dressing. Perfect for BBQs, picnics, and make-ahead meals!
4.80 from 5 votes
Prevent your screen from going dark
Print FREE recipe card with your email address Pin Recipe Save Go to Collections
Prep Time 10 minutes mins
Cook Time 7 minutes mins
Total Time 17 minutes mins
Course Side Dish
Cuisine American, Amish
Servings 12
Calories 398 kcal

Equipment

  • Large pot
  • Colendar
  • mixing bowls
  • Mixing spoon

As an Amazon Associate I earn from qualifying purchases.

Ingredients
  

For the salad

  • 2 cups dried elbow macaroni , cooked per package instructions
  • 3 large hard boiled eggs , chopped
  • 2 stalks celery , diced
  • 2 green onions , diced
  • ½ medium red bell pepper , diced
  • 1 teaspoon celery seed

For the dressing

  • 2 cups mayonnaise
  • ½ cup granulated sugar
  • 3 tablespoons yellow mustard
  • 2 tablespoons apple cider vinegar

Instructions
 

  • Cook the macaroni noodles according to package directions until al dente. Strain and rinse the pasta with cold water to cool it down. Set aside to drain completely.
  • In a medium bowl, mix together the mayonnaise, mustard, sugar, and apple cider vinegar until combined and sugar has dissolved. Set aside.
  • In large bowl, toss together the cooked macaroni, red bell pepper, scallions, hard boiled eggs, and celery seed.
  • Pour the dressing mixture over top of the pasta mixture and toss to coat. Cover and store in the fridge until ready to serve.

Nutrition

Calories: 398kcalCarbohydrates: 27gProtein: 5gFat: 30gSaturated Fat: 5gPolyunsaturated Fat: 17gMonounsaturated Fat: 7gTrans Fat: 0.1gCholesterol: 62mgSodium: 302mgPotassium: 119mgFiber: 1gSugar: 10gVitamin A: 297IUVitamin C: 7mgCalcium: 24mgIron: 1mg
Keyword Amish Macaroni Salad
Tried this recipe?Mention @grumpyshoneybunch or tag #grumpyshoneybunch!

Weekly Meal Plan 29

July 7, 2022 by Shelby Law Ruttan Leave a Comment

Collage of images for weekly #29 meal plan.

Here is your free Weekly Meal Plan 29. Each meal includes side dish recommendations, along with a beverage and dessert of the week along with weekend options.

Do you have any requests or special needs? If so, please let me know and I will do what I can to help!

Collage of images for weekly #29 meal plan.
[feast_advanced_jump_to]

🍽️ Meal Planning and Prep Tips

I'm here to share with you recipes to make during the week that aren't hard to make and take little prep. Most feed 4 so if there are just 1 or 2 to feed, you may want to scale down and halve a recipe OR just make a couple of these and enjoy leftovers throughout the week.

This weekly meal plan brings air fryer recipes, grilled recipes, slow cooker, and refurbished recipes made with leftovers!

Here are some shortcuts and tips to help you throughout the week.

Any prep that can be done on Sunday (July 17) is called prep day.

  • On prep day make these Raisin Bran Muffins to enjoy throughout the week for breakfast.
  • Marinate the chicken on prep day, then par boil on Monday right before grilling.
  • For the unstuffed cabbage rolls, hop the cabbage and onions on prep day to save prep time on Tuesday.
  • The baked ham and cheese sliders is another super quick and easy recipe, and there really is no prep needed. These reheat well in the air fryer or oven so the entire recipe can be made on prep day and reheated when ready to serve if desired.
  • Take the shrimp out of the freezer and place it in the fridge on Wednesday night. Allow it to gradually thaw during the day and rinse on Thursday night before proceeding with the recipe.
  • I recommend making grilled veggies to go with the shrimp cakes and make enough to have leftovers to make the grilled veggie flatbread on Friday.
  • Make the Peanut Butter Layer Bars on prep day and store them in the fridge for the week to enjoy them as dessert after meals.
  • Double up on those Apple Fritter Donuts on Sunday morning and freeze half the batch to enjoy throughout the week!
  • Enjoy a special baked from scratch cake with Sunday supper, make this Southern Diner Cake on Saturday to be sure it's had enough time to set before serving.

Weekly Meal Plan 29

Monday

Featured image for field day chicken.

Firemen's Field Day Chicken Barbecue

Marinated and grilled Firemen's Field Day Chicken Barbecue is one of my family favorites! Sere this with a side of Pesto Pasta Salad. Use leftover chicken to make Chicken Salad for lunches during the week.

Tuesday

Featured image for Weight Watchers Unstuffed Casserole

Unstuffed Cabbage Rolls

Weight Watchers Unstuffed Cabbage Rolls are super simple and flavorful. It's a weight watchers recipe and can be kept low carb by serving with Cauliflower Fried Rice instead of regular rice.

Wednesday

Featured image for baked ham and cheese sliders.

Baked Ham and Cheese Sliders

Everyone loves these easy to make Baked Ham and Cheese Sliders, especially the melty cheese and sweet and savory mustard topping. Serve with a side of German Style Potato Salad.

Thursday

Featured image for Shrimp Cakes recipe.

Shrimp Cakes

These Shrimp Cakes with Chipotle are so good you might want to double the recipe. Serve them with a drizzle Chipotle Salad Dressing and Roasted Red Skinned Potatoes.

Friday

Grilled Vegetable Flatbread

Friday night pizza night is fresh and delicious. Grilled Vegetable Flatbread is topped with grilled corn, mushrooms, zucchini, and more for an easy and delicious end of the week.

Dessert of the week

Chewy Peanut Butter Layer Bars FI.

Chewy Peanut Butter Layer Bars

These Chewy Peanut Butter Layer Bars are similar to magic cookie bars but with peanut butter flavors. This makes a 9 x 13 size pan so this rich dessert makes enough to enjoy all week long.

Cocktail of the week

Black Cherry Mojito

Black Cherry Mojitos are made with frozen black cherries and rum for a refreshing end of the week beverage.

Sunday Brunch

Homemade Apple Fritters FI.

Homemade Apple Fritters

These Apple Fritters are made with apple pie filling, tender inside and crispy outside. Perfect with your hot cup of coffee on the weekend morning.

Sunday Supper

Pot Roast with Onions

Crock Pot Pot Roast

This Crock Pot Pot Roast is delicious with a side of mashed potatoes or garlic mashed cauliflower or these homemade mashed potatoes. If you want dessert, try this Southern Diner Cake.

Grumpy's Honeybunch Shopping List

Download Shopping List
Printable and downloadable grocery list.

Related Posts

You must use the category name, not a URL, in the category field.

Don't forget to check out my Amazon storefront for some of my favorite products!

When you make these recipes, please comment below and let me know what you think. I'd love it if you tag me on Instagram @grumpyshoneybunch or #grumpyshoneybunch so I can see your photos!

Recommended

  • Homemade Chicken Breakfast Sausage patties golden-brown and crispy, served for breakfast with toast.
    Chicken Breakfast Sausage (Easy Homemade Patties)
  • Several thick slices of homemade buttermilk bread stacked on a wooden cutting board, showing a soft, airy crumb and a golden brown crust.
    Buttermilk Bread (Soft American Farmhouse Loaf)
  • A white fluted bowl filled with tender braised collard greens in a savory broth, shown with a large wooden serving spoon.
    Braised Collard Greens
  • Hard-boiled eggs on a grey plate with two sliced open to show a creamy yolk, garnished with salt, pepper, and fresh parsley.
    Crockpot Boiled Eggs (Easy & Hands Off)

Air Fryer Chicken Legs

July 6, 2022 by Shelby Law Ruttan Leave a Comment

Featured image for Air Fryer Chicken Legs.

Air Fryer Chicken Legs are an easy recipe to make and is perfect for busy weeknights. These juicy chicken drumsticks have a delicious crispy skin without added fat.

Featured image for Air Fryer Chicken Legs.

This air fryer chicken drumsticks recipe is my one of my favorite easy chicken recipe that the whole family loves.

[feast_advanced_jump_to]

❤️ Why you'll love it

✔️ It is an easy dinner recipe that is packed with take out flavor without deep frying.

✔️ This mess free cooking method will be your favorite way to make chicken and the best part is the crispy chicken with juicy meat.

✔️ The bbq sauce glaze adds a level of flavor that takes the crispy drumsticks do another whole new level!

Raw seasoned chicken on an air fryer tray.

🥘 Ingredients

Chicken drumsticks

Salt and Pepper

Your favorite bbq sauce (optional)

🔪 Instructions

  1. Place the chicken legs in the air fryer basket or tray in a single layer making sure to leave space between the drumsticks. Season with salt and pepper.
  2. Slide the air fryer basket or tray into the air fryer and set the cooking time for 30 minutes at 400 degrees F.
  3. Pull out the basket and flip the chicken legs over. Return to the air fryer and cook for 5 more minutes, until internal temperature is 165 degrees F.
  4. At this point, If coating the chicken legs with a bbq sauce, pull out the basket and coat the chicken with the sauce using a silicone brush. Return the chicken legs to the air fryer and cook for 2 additional minutes, until chicken legs are golden and have a crispy skin.
Air fried chicken drumsticks on a tray.

🥄 Equipment

Air Fryer

Silicone brush

Tongs

🥫Storage

Store any leftovers in an airtight container the fridge up to 4 days.

📖 Variations

  • Use chicken breasts or thicken thighs instead of drumsticks. Cook time may vary, so be sure to check internal temperature to gauge doneness.
  • Coat the chicken legs with your favorite spice mixture before cooking.
Glazed chicken drumsticks.

💭 Tips

  • Cook time will vary on the size of the chicken drumstick. To be sure the chicken is cooked through, an instant read meat thermometer should register an internal temperature of the chicken legs at 165 degrees F.
  • There is no need to coat the chicken with olive oil. The fat in the chicken skin itself will allow it to crisp up with the hot air from the air fryer.

📚 Related Recipes

Try cooking the whole chicken in an air fryer, this Air Fryer Rotisserie Chicken is the best recipe!

Asian Drumsticks are oven roasted and glazed with a sweet and spicy asian style glaze.

This Chicken and Biscuits recipe is delicious comfort food.

Try these Instant Pot Chicken Drumsticks!

The whole family will love these Air Fryer Baked Potatoes.

🍽 Serve with...

Side dishes to enjoy with these chicken legs would be french fries, potato salad, or amish macaroni salad. Be sure to include your favorite dipping sauce to dip the chicken legs in!

Upclose image of air fryer chicken legs with glaze.

🏫 The last word

Air frying chicken does a great job and produces the most tender meat and crunchy skin. The hot air surrounding the chicken cooks it to perfection without any added fat and the result is better than deep fried.

Using an air fryer is the best way to make quick meals packed with flavor and little clean up.


Don't forget to check out my Amazon storefront for some of my favorite products!

When you make this recipe, please comment below and let me know what you think. I'd love it if you tag me on Instagram @grumpyshoneybunch or #grumpyshoneybunch so I can see your photos!

If you love this recipe, please leave a ⭐⭐⭐⭐⭐ rating

📖 Recipe

Featured image for Air Fryer Chicken Legs.

Air Fryer Chicken Legs

Shelby Law Ruttan
The most delicious, perfectly fried chicken legs from the air fryer. This low carb keto recipe has a crispy chicken skin and moist tender meat inside all ready in just 40 minutes. Delicious finished off with your favorite bbq sauce.
4.80 from 5 votes
Prevent your screen from going dark
Print FREE recipe card with your email address Pin Recipe Save Go to Collections
Prep Time 5 minutes mins
Cook Time 30 minutes mins
Total Time 35 minutes mins
Course Main Dish
Cuisine American
Servings 3
Calories 277 kcal

Equipment

  • Air Fryer
  • Tongs
  • Silicone pastry brush

As an Amazon Associate I earn from qualifying purchases.

Ingredients
  

  • 1½ pounds skin on chicken legs
  • ½ teaspoon salt
  • ½ teaspoon black pepper
  • ½ cup sugar free bbq sauce

Instructions
 

  • Place the chicken legs in the air fryer basket or tray in a single layer making sure to leave space between the drumsticks. Season with salt and pepper.
  • Slide the air fryer basket or tray into the air fryer and set the cooking time for 30 minutes at 400 degrees F.
  • Pull out the basket and flip the chicken legs over. Return to the air fryer and cook for 5 more minutes, until internal temperature is 165 degrees F.
  • At this point, If coating the chicken legs with a bbq sauce, pull out the basket and coat the chicken with the sauce using a silicone brush. Return the chicken legs to the air fryer and cook for 2 additional minutes, until chicken legs are golden and have a crispy skin.

Nutrition

Calories: 277kcalCarbohydrates: 0.4gProtein: 21gFat: 21gSaturated Fat: 6gPolyunsaturated Fat: 4gMonounsaturated Fat: 9gTrans Fat: 0.1gCholesterol: 120mgSodium: 496mgPotassium: 267mgFiber: 0.1gSugar: 0.003gVitamin A: 121IUVitamin C: 0.3mgCalcium: 13mgIron: 1mg
Keyword Air Fryer Chicken Drumsticks, Air Fryer Chicken Legs
Tried this recipe?Mention @grumpyshoneybunch or tag #grumpyshoneybunch!

Keto Hamburger Helper

July 2, 2022 by Shelby Law Ruttan Leave a Comment

Featured image for keto hamburger helper.

Keto Hamburger Helper is a low carb version of the boxed cheeseburger macaroni meals you can buy on the shelf in the grocery store. It is a skillet recipe for quick dinners that even picky eaters will enjoy!

Keto Hamburger Helper with a green napkin on a table setting.

The cheesy goodness and simple ingredients make this classic favorite easy to make and one the whole family will love.

[feast_advanced_jump_to]

❤️ Why you'll love it

✔️ It is a healthy low carb hamburger helper made with low carb pasta.

✔️ There are 6 generous servings with just 7 net carbs per serving.

✔️ It is a nostalgic meal packed with cheeseburger flavors and is a perfect for busy weeknight meal.

Ingredients for keto hamburger helper recipe.

🥘 Ingredients

As an Amazon Associate I earn from qualifying purchases.

Lean ground beef

Heavy cream

Almond milk

Pepper jack cheese

Cheddar cheese

Cream cheese

Mustard powder

Onion powder

Garlic powder

Low carb elbow pasta

Cooked low carb macaroni elbows in a colendar.
Low carb pasta does look similar but has a firmer texture than regular pasta, however that seems to be the only difference I noticed.

🔪 Instructions

  1. Cook the pasta in a large pot according to package directions. Drain and set aside.
  2. While the pasta is cooking, heat a large skillet coated with cooking spray over medium-high heat, until hot. Cook the ground beef for 5 minutes, until browned.
  3. Stir the mustard, onion, and garlic powder into the ground beef and cook for 1 minute.
  4. Add the half and half and stir to combine, cooking for 1 minute, until beef mixture begins to bubble.
  5. Whisk in the sour cream and cheeses until cheese is melted. Stir in the low carb pasta until coated with sauce.
Cooking lean ground beef in a skillet.

🥄 Equipment

Large skillet

Large pot

Box shredder

Measuring spoons

Adding milk to the ground beef mixture.

🥫Storage

Store any leftover casserole in an airtight container in the fridge up to 4 days or in the freezer up to 3 months.

📖 Variations

  • Use any of your favorite low carb cheese to make the cheese sauce.
  • Chop a head of cauliflower and steam it in the microwave for 7 minutes, until tender. Replace the pasta with the cauliflower.

💭 Tips

  • Test the pasta as it cooks. Low carb pasta will have a firmer texture than regular pasta. You may need to cook it longer than the packaging states (I went over by about 3 minutes).
Keto Hamburger Helper in a skillet sprinkled with fresh parsley.

📚 Related Recipes

Everyone loves this Cauliflower Fried Rice.

Hamburger Steaks Stroganoff is a delicious Keto and Paleo friendly meal.

Easy Hamburger Soup is warm and comforting!

🍽 Serve with...

Serve with a green salad topped with your favorite low carb or zero carb dressing.

🏫 The last word

I wanted to keep this to true hamburger helper style and use pasta. I found a low carb pasta to test this recipe with and was very satisfied with the results and I prefer the pasta over the cauliflower in this keto cheeseburger helper.

If you want to use 4 cups chopped steamed cauliflower in place of the pasta, feel free to do so. However, the net carbs actually increase to 9 by doing this due to the fact that the pasta itself is very high in fiber.


Don't forget to check out my Amazon storefront for some of my favorite products!

When you make this recipe, please comment below and let me know what you think. I'd love it if you tag me on Instagram @grumpyshoneybunch or #grumpyshoneybunch so I can see your photos!

If you love this Keto Hamburger Helper recipe, please leave a ⭐⭐⭐⭐⭐ rating

📖 Recipe

Featured image for keto hamburger helper.

Keto Hamburger Helper

Shelby Law Ruttan
Lean ground beef in a creamy cheese sauce is combined with low carb pasta for a classic hamburger helper recipe similar to the boxed version but keto friendly.
4 from 20 votes
Prevent your screen from going dark
Print FREE recipe card with your email address Pin Recipe Save Go to Collections
Prep Time 5 minutes mins
Cook Time 15 minutes mins
Total Time 20 minutes mins
Course Keto Main Dish
Cuisine American
Servings 6
Calories 469 kcal

Equipment

  • Large skillet
  • Large pot
  • Wooden spoon
  • Box shredder
  • Measuring spoons

As an Amazon Associate I earn from qualifying purchases.

Ingredients
  

  • 1 pound lean ground beef
  • 1¾ cup almond milk
  • ¼ cup heavy cream
  • 2 cups shredded pepper jack cheese
  • 1 cup shredded cheddar cheese
  • ¼ cup cream cheese
  • 1 teaspoon ground mustard powder
  • 1 teaspoon onion powder
  • 1 teaspoon garlic powder
  • 8 ounces low carb elbow pasta
  • ½ tablespoon chopped fresh parsley

Instructions
 

  • Cook the pasta in a large pot according to package directions. Drain and set aside.
  • While the pasta is cooking, heat a large skillet coated with cooking spray over medium-high heat, until hot. Cook the ground beef for 7 minutes, until browned.
  • Stir the mustard, onion, and garlic powder into the ground beef and cook for 3 minute.
  • Add the cream cheese and half and half and stir to combine, simmer for 5 minutes, until beef mixture reduces some.
  • Whisk in the cheeses until melted. Stir in the low carb pasta until coated with sauce.
  • Serve garnished with chopped fresh parsley if using.

Nutrition

Calories: 469kcalCarbohydrates: 19gProtein: 39gFat: 30gSaturated Fat: 17gPolyunsaturated Fat: 2gMonounsaturated Fat: 9gTrans Fat: 0.3gCholesterol: 120mgSodium: 653mgPotassium: 340mgFiber: 12gSugar: 1gVitamin A: 751IUVitamin C: 0.2mgCalcium: 527mgIron: 2mgNet Carbohydrates: 7g
Keyword Keto Hamburger Helper
Tried this recipe?Mention @grumpyshoneybunch or tag #grumpyshoneybunch!

Weight Watchers Unstuffed Cabbage

July 1, 2022 by Shelby Law Ruttan 6 Comments

Featured image for Weight Watchers Unstuffed Casserole

This weight watchers Unstuffed Cabbage Rolls recipe is a low calorie skillet meal with the delicious flavors of cabbage rolls. You get all the deliciousness of traditional stuffed cabbages with little labor.

I love healthy dinner recipes that are quick and easy to make, and this unstuffed cabbage roll is a family favorite. This ground beef recipe is an easy main dish that the whole family will love.

[feast_advanced_jump_to]

❤️ Why you'll love it

✔️ Prep time is drastically reduced due to using chopped cabbage instead of rolling a meat filling in a cabbage leaf.

✔️ This stove top recipe is not only weight watchers friendly, but will fit the low carb keto diet as well.

✔️ Each generous serving of this unstuffed cabbage roll casserole is only 3 weight watcher points and 8 net carbs.

Ingredients for unstuffed cabbage rolls
Diced tomatoes, chopped cabbage, lean ground beef, garlic, and onions are the simple ingredients that make up this easy dinner recipe.

🥘 Ingredients

Whole green cabbage, ½ of a small cabbage should yield the 4 cups needed

Lean ground beef

Canned diced tomatoes

Canned diced tomatoes

Onion

Garlic cloves

Italian seasoning

Salt and black pepper

Stirring ground beef and cabbage together.

🔪 Instructions

  1. Heat a large skillet over medium-high heat until hot. Spray the skillet with cooking spray and add the onion and garlic to the skillet. Cook for 2 minutes, stirring often, until onion begins to soften.
  2. Add the ground beef to the skillet and cook, stirring often, for 5 minutes, until beef is browned.
  3. Add the chopped cabbage and stir to combine. Reduce to medium heat and cover, cooking for 7 minutes, until cabbage begins to wilt.
  4. Remove cover and add tomato sauce, diced tomatoes, Italian seasoning, salt, and pepper. Bring to a boil, then simmer for 6 minutes, until sauce has reduced some.

🥄 Equipment

Large skillet

Flat head wooden spoon

Food processor (to chop the cabbage quickly)

Chef knife

Cutting board

Pouring diced tomatoes into ground beef and cabbage in skillet.

🥫Storage

Store any leftover casserole in air-tight containers in the fridge up to 4 days or in the freezer up to 3 months. To reheat, place thawed casserole in a microwave safe container and heat in 30 second intervals until warm.

📖 Variations

  • Use lean ground meat such as ground turkey in place of ground beef.
  • Make unstuffed cabbage roll soup and add 4 cups of low sodium beef broth to the skillet when adding the tomatoes.
  • Add a couple of bay leaves to the skillet while simmering to infuse flavor. Remove the bay leaves before serving.
Weight Watchers Unstuffed Cabbage Rolls in a skillet.

💭 Tips

  • Cut cooking time in half and use coleslaw mix in place of the chopped cabbage.
  • For a thicker casserole, use 4 ounce can of tomato paste in place of the tomato sauce.
  • Use a food processor to quickly and easily chop the cabbage.

📚 Related Recipes

This Weight Watchers Meatloaf is a delicious comfort meal.

Venison Cabbage Rolls are a delicious casserole made with ground venison.

End your meal with these Weight Watchers Chocolate Pumpkin Donuts.

I LOVE this 2 Ingredient Pizza Dough!

🍽 Serve with...

Serve this unstuffed cabbage roll with a serving of steamed white or brown rice, or for low carb, serve with cauliflower rice and a dollop of sour cream.

Unstuffed Cabbage Casserole hero image.

🏫 The last word

The original recipe calls for rice in the dish, however, I like to serve this on top of cauliflower or regular rice instead of stirring it into the casserole.


Don't forget to check out my Amazon storefront for some of my favorite products!

When you make this recipe, please comment below and let me know what you think. I'd love it if you tag me on Instagram @grumpyshoneybunch or #grumpyshoneybunch so I can see your photos!

If you love this recipe, please leave a ⭐⭐⭐⭐⭐ rating

📖 Recipe

Featured image for Weight Watchers Unstuffed Casserole

Unstuffed Cabbage Rolls

Shelby Law Ruttan
A 30 minute meal that is weight watchers friendly, low carb, and delicious. Unstuffed Cabbage Rolls make a hearty dinner the whole family will love.
4.72 from 7 votes
Prevent your screen from going dark
Print FREE recipe card with your email address Pin Recipe Save Go to Collections
Prep Time 10 minutes mins
Cook Time 20 minutes mins
Total Time 30 minutes mins
Course Main Dish
Cuisine American
Servings 4
Calories 141 kcal

Equipment

  • Large skillet
  • Flat head wooden spoon
  • Food processor , optional (to chop the cabbage quickly)
  • chef knife
  • cutting board

As an Amazon Associate I earn from qualifying purchases.

Ingredients
  

  • ½ pound lean ground beef
  • ½ cup diced onion
  • 2 cloves garlic , minced
  • 4 cups chopped cabbage
  • 2 cups diced tomatoes
  • 8 ounces tomato sauce
  • 1 teaspoon Italian seasoning
  • ½ teaspoon salt
  • ¼ teaspoon black pepper

Instructions
 

  • Heat a large skillet over medium-high heat until hot. Spray the skillet with cooking spray and add the onion and garlic to the skillet. Cook for 2 minutes, stirring often, until onion begins to soften.
  • Add the ground beef to the skillet and cook, stirring often, for 5 minutes, until beef is browned.
  • Add the chopped cabbage and stir to combine. Reduce to medium heat and cover, cooking for 7 minutes, until cabbage begins to wilt.
  • Remove cover and add diced tomatoes, Italian seasoning, salt, and pepper. Bring to a boil, then simmer for 6 minutes, until sauce has reduced some.

Notes

 Each generous serving of this unstuffed cabbage roll casserole is only 3 weight watcher points and 8 net carbs.

Nutrition

Calories: 141kcalCarbohydrates: 15gProtein: 15gFat: 3gSaturated Fat: 1gPolyunsaturated Fat: 0.3gMonounsaturated Fat: 1gTrans Fat: 0.2gCholesterol: 35mgSodium: 623mgPotassium: 752mgFiber: 4gSugar: 8gVitamin A: 464IUVitamin C: 43mgCalcium: 94mgIron: 4mgNet Carbohydrates: 10g
Keyword Unstuffed Cabbage Rolls, Weight Watchers Unstuffed Cabbage Rolls
Tried this recipe?Mention @grumpyshoneybunch or tag #grumpyshoneybunch!

Weekly Meal Plan 28

July 1, 2022 by Shelby Law Ruttan Leave a Comment

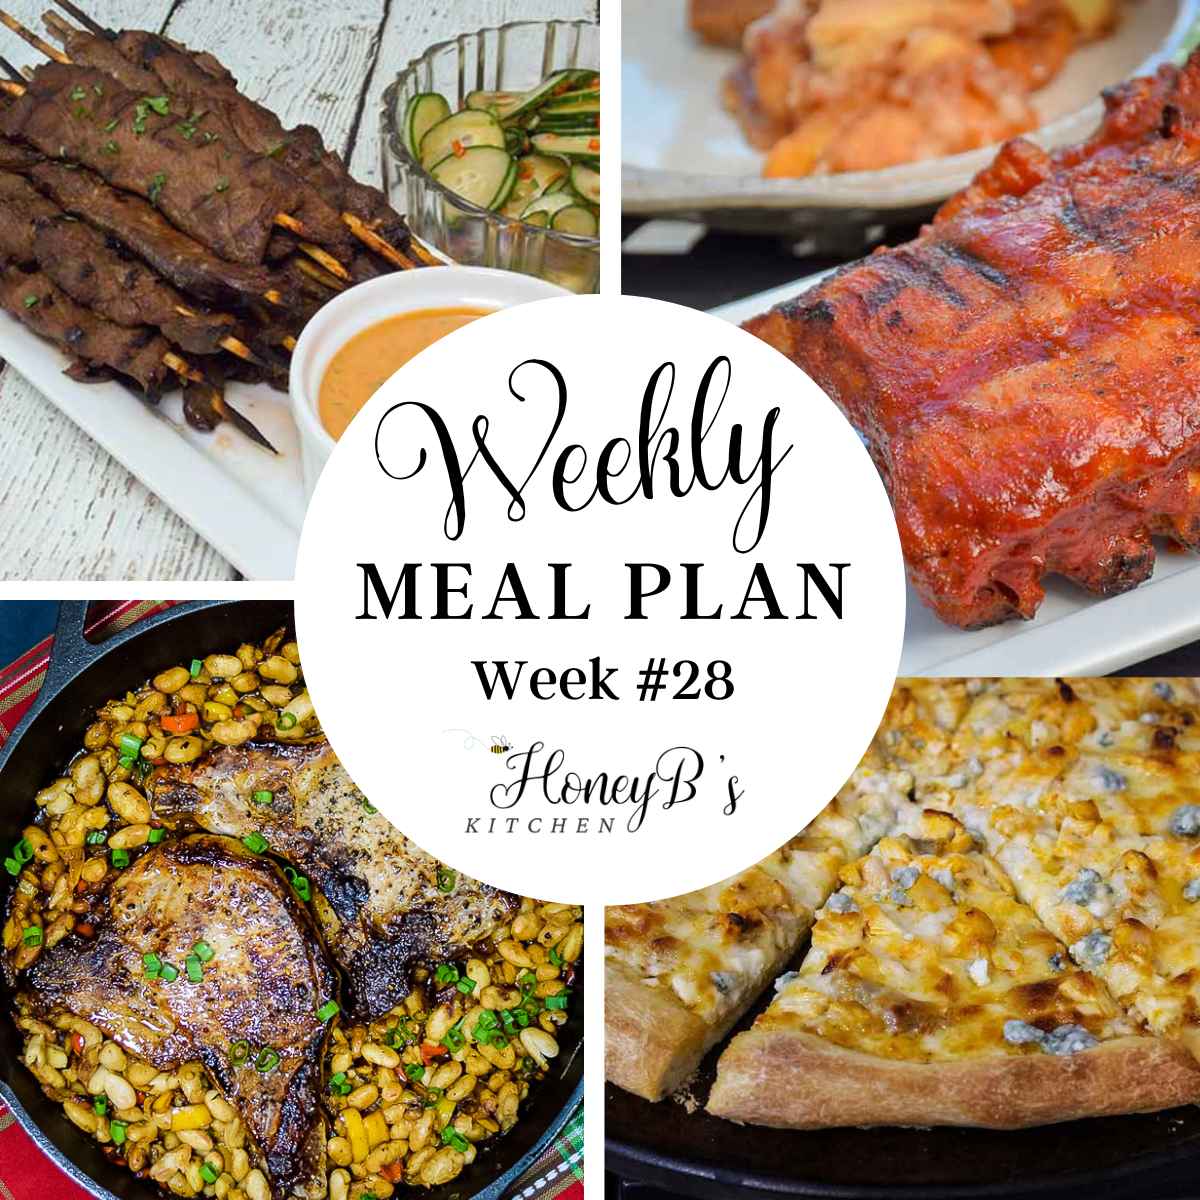
Collage of images for weekly #28 meal plan.

Here is your free Weekly Meal Plan 28. Each meal includes side dish recommendations, along with a beverage and dessert of the week along with weekend options.

Do you have any requests or special needs? If so, please let me know and I will do what I can to help!

Collage of images for weekly #28 meal plan.
[feast_advanced_jump_to]

🍽️ Meal Planning and Prep Tips

I'm here to share with you recipes to make during the week that aren't hard to make and take little prep. Most feed 4 so if there are just 1 or 2 to feed, you may want to scale down and halve a recipe OR just make a couple of these and enjoy leftovers throughout the week.

This weekly meal plan brings air fryer recipes, grilled recipes, slow cooker, and refurbished recipes made with leftovers!

Here are some shortcuts and tips to help you throughout the week.

Any prep that can be done on Sunday is called prep day.

  • On prep day or the morning of, make and marinate the venison satay at least 6 hours.
  • The melon salad can be made on prep day to save time and enhance flavor.
  • If you plan to make the crab rangoon or egg rolls to go with the shrimp pad thai, these can be assembled on prep day and stored in the freezer until you are ready to cook them.
  • Wednesday's meal is super simple and doesn't need much prep or cook time!
  • The weight watchers meatloaf can be assembled in the morning and stored in the fridge until ready to cook. Just be sure to take it out of the fridge at least 15 minutes before cooking. If serving Air Fryer Potatoes, these take 30 minutes, so I recommend putting them in the air fryer the same time the meatloaf is put in the oven.
  • Make an Air Fryer Rotisserie Chicken on prep day (or buy one). Set aside 2 cups of chicken for the buffalo pizza on Friday (it can be stored in the freezer until Friday morning) and use the rest for sandwiches during the week.
  • Make the cupcakes on prep day and store them in the fridge to enjoy them throughout the week.
  • The ribs don't have a lot of prep. The stove top does the work of cooking them and the oven or grill adds the crisp and char with the barbecue sauce.

Weekly Meal Plan 28

Monday

Venison Satay with Peanut Sauce

Venison Satay with Peanut Sauce is a great way to enjoy venison on the grill and is excellent with a quick pickled cucumber and a side of Minted Melon Salad.

Tuesday

Featured image for shrimp pad thai.

Shrimp Pad Thai

Shrimp Pad Thai is packed with flavor and texture. This easy to make better than takeout meal is one you might want to serve often! Serve with Crab Rangoon or Air Fryer Egg Rolls.

Wednesday

Featured Image for Bourbon Glazed Pork Chops

Bourbon Glazed Pork Chops

A quick and easy meal for 2, Bourbon Glazed Pork Chops is a one dish meal that saves time in the kitchen. Serve this with a side of Air Fried Asparagus.

Thursday

Featured image for weight watchers meatloaf.

Weight Watchers Meatloaf

This Weight Watchers Meatloaf is made with lean ground beef and packed with veggies. Great served with Air Fryer Baked Potatoes.

Friday

Buffalo Chicken Pizza

Pizza night calls for Buffalo Chicken Pizza. Serve with a side of celery and blue cheese or ranch dressing. These Boneless Chicken Wings in the Air Fryer are a great accompaniment.

Dessert of the week

Peanut Butter and Jelly Cupcakes

These Peanut Butter and Jelly Cupcakes are a long time family favorite. Vanilla cake with jam in the center and peanut butter frosting. The perfect ending to eny meal.

Cocktail of the week

Dill Pickle Martini

Dill Pickle Martini aka the Dirty Pickle is not far of the beaten path of the Dirty Martini and is sure to please pickle lovers.

Sunday Brunch

Featured image for Garlic Scrambled Eggs with Chickpes

Garlic Scrambled Eggs with Chickpeas

Mom always bulked her meals up with extras and these Garlic Scrambled Eggs with Chickpeas make the perfect weekend brunch. Serve with some fresh strawberries and a slice of toast made with Homemade Soft White Bread.

Sunday Supper

Stove top ribs featured image.

Stove Top Ribs

Sunday dinner is super easy! These ribs start on the stove and can finish in the oven or grill. Finger licking good. Serve these with Homemade Coleslaw, German Style Potato Salad, and Almond Apple Loaf Cake.

Grumpy's Honeybunch Shopping List

Download Shopping List
Printable and downloadable grocery list.

Related Posts

You must use the category name, not a URL, in the category field.

Don't forget to check out my Amazon storefront for some of my favorite products!

When you make these recipes, please comment below and let me know what you think. I'd love it if you tag me on Instagram @grumpyshoneybunch or #grumpyshoneybunch so I can see your photos!

Recommended

  • A top-down view of a moist almond flour cake garnished with sliced almonds on a marbled counter top in front of a window.
    Almond Flour Cake
  • A white fluted ramekin filled with thick, creamy homemade mayonnaise, sitting next to fresh lemons and eggs.
    Homemade Mayonnaise
  • A silver fork takes a bite from a heap of fluffy, seasoned crockpot scrambled eggs served on a dark green plate.
    Crockpot Scrambled Eggs
  • Featured image of homemade Sweet and Salty Chex Mix in a glass jar, showcasing the mix of crunchy cereal, salty pretzels, nuts, and a savory shredded cheese.
    Sweet and Salty Chex Mix

Weight Watchers Meatloaf

June 27, 2022 by Shelby Law Ruttan Leave a Comment

Featured image for weight watchers meatloaf.

This Weight Watchers Meatloaf recipe is a low carb, protein packed easy meal that is full of veggies and only 5 WW points per serving. It is comfort food that you can afford while on a healthy eating plan.

Hero Image for Weight Watchers meatloaf.
[feast_advanced_jump_to]

This particular recipe is one of my favorites that I have made for many years now. With just 7 grams of fat and very few calories per serving this amazing recipe will allow you to leave the table full and satisfied without breaking the points bank..

❤️ Why you'll love it

✔️ It is a healthy meatloaf recipe with just 5 weight watchers points and 28 grams of protein per serving.

✔️ There are 4 hearty servings to satisfy the appetite and the whole family will love.

✔️ This skinny meatloaf has only 8 net carbs, making it great for low carb dieters.

Ingredients for weight watchers meatloaf recipe.

🥘 Ingredients

Extra lean ground beef

Reduced calorie wheat bread

White onion

Red pepper

Jalapeno or green bell pepper

Garlic cloves

Italian seasoning

Salt and black pepper

Sugar free ketchup

Nonstick cooking spray

Ingredients for meatloaf that have not been mixed together in a bowl.
The veggies can be sauted or added raw to the meatloaf mixture.

🔪 Instructions

  1. Preheat the oven to 350 degrees F. Spray loaf pan with non stick cooking spray.
  2. In a large bowl, combine beef, bread crumbs, onion, peppers, garlic, italian seasoning, salt and pepper until combined.
  3. Pack the meatloaf mixture tightly into the prepared loaf pan.
  4. Spread ketchup on top of the loaf and bake for 45 minutes, until internal temperature reaches 165 degrees F on a meat thermometer inserted into the center of the loaf.

🥄 Equipment

Loaf pan

Instant read thermometer

Large bowl

Raw meatloaf in a baking dish with specks of bread crumbs, peppers, and onions visible.
The veggies and low calorie bread offer bulk, fiber, and flavor to this delicious comfort food.

🥫Storage

Store any leftover meatloaf in the fridge up to 4 days or in the freezer up to 3 months.

To reheat, place meatloaf in a microwave safe container and heat for 30-60 seconds, until meatloaf is warmed through.

Overhead shot of unbaked meatloaf topped with ketchup.
Spreading ketchup over top of the meatloaf adds moisture and flavor.

📖 Variations

  • Ground turkey breast or ground chicken can be used in place of the ground beef.
  • Pack the meat mixture into muffin tins to make meatloaf muffins.
  • Use regular ketchup in place of sugar free, just remember the sugar content will change as well as the points value.
  • Substitute ½ cup quick oats in place of the reduced calorie bread.
  • Substitute ¼ cup barbecue sauce or pizza sauce for the ketchup. Use a sugar free version if possible or nutritional information will change.
  • To reduce fat more, substitute 2 egg whites for 1 whole egg.
  • For extra tang and sweetness, stir in ½ tablespoon brown sugar substitute with 1 teaspoon cider vinegar to the ketchup.

💭 Top Tip

  • If desired, soften the onions and peppers by sauteing them in a large nonstick skillet coated with cooking spray over medium heat. Allow to cool, then add to the meatloaf mixture.
Overhead shot of unbaked meatloaf topped with ketchup.
Spreading ketchup over top of the meatloaf adds moisture and flavor.

📚 Related Recipes

Everyone loves the sweet and spicy flavors in this Jalapeno Cheddar Meatloaf.

These Chocolate Pumpkin Baked Donuts are a delicious weight watchers recipe the whole family will love.

This 2 Ingredient Pizza Dough is fabulous!

Bacon Cheeseburger Meatloaf Muffins are made with low fat beef, cheeses, and topped with a touch of bacon!

🍽 Serve with...

Serve this weight watchers recipe with a side of green beans, corn on the cob, or air fried baked potatoes.

🏫 The last word

Often times, making weight watcher recipes is as easy as making a small change or two to the ingredients. For this recipe, I used lean ground beef, sugar free ketchup, light wheat bread (that is only 45 calories for 2 slices), and a lot of veggies.

I personally like my veggies to have a toothsome bite, but for those who do not care for this can saute the veggies by following the top tip above.

For the weight watcher points calculation, I used calculator.net and use the most recent calculator for the ww plan. This is the one that is dated from Dec 2015 and on.


Don't forget to check out my Amazon storefront for some of my favorite products!

When you make this recipe, please comment below and let me know what you think. I'd love it if you tag me on Instagram @grumpyshoneybunch or #grumpyshoneybunch so I can see your photos!

If you love this recipe, please leave a ⭐⭐⭐⭐⭐ rating

📖 Recipe

Featured image for weight watchers meatloaf.

Weight Watchers Meatloaf

Shelby Law Ruttan
A low calorie, high protein, low carb veggie packed meatloaf that fits the weight watchers diet with only 5 WW Points per serving.
4.60 from 5 votes
Prevent your screen from going dark
Print FREE recipe card with your email address Pin Recipe Save Go to Collections
Prep Time 15 minutes mins
Cook Time 45 minutes mins
Total Time 1 hour hr
Course Main Dish
Cuisine American
Servings 4
Calories 227 kcal

Equipment

  • loaf pan
  • Meat thermometer
  • Large bowl

As an Amazon Associate I earn from qualifying purchases.

Ingredients
  

  • 1 pound lean ground beef
  • 4 slices reduced calorie wheat bread
  • 1 large egg
  • ½ small onion , diced
  • ½ medium red bell pepper
  • 1 small jalapeno , optional
  • 1 tablespoon minced garlic cloves
  • 1 teaspoon Italian seasoning
  • ½ teaspoon salt
  • ½ teaspoon black pepper
  • 2 tablespoons sugar free ketchup

Instructions
 

  • Preheat the oven to 350 degrees F. Spray loaf pan with non stick cooking spray.
  • In a large bowl, combine beef, bread crumbs, onion, peppers, garlic, italian seasoning, salt and pepper until combined.
  • Pack the meatloaf mixture tightly into the prepared loaf pan.
  • Spread ketchup on top of the loaf and bake for 45 minutes, until internal temperature reaches 165 degrees F on a meat thermometer inserted into the center of the loaf.
  • Remove the meatloaf from the oven and cool for 15 minutes before serving.

Nutrition

Calories: 227kcalCarbohydrates: 10gProtein: 28gFat: 7gSaturated Fat: 3gPolyunsaturated Fat: 1gMonounsaturated Fat: 3gTrans Fat: 0.4gCholesterol: 117mgSodium: 548mgPotassium: 515mgFiber: 2gSugar: 2gVitamin A: 582IUVitamin C: 24mgCalcium: 56mgIron: 4mg
Keyword Weight Watchers Meat Loaf
Tried this recipe?Mention @grumpyshoneybunch or tag #grumpyshoneybunch!

Weekly Meal Plan 27

June 26, 2022 by Shelby Law Ruttan Leave a Comment

Collage of images for weekly #27 meal plan.

Here is your free Weekly Meal Plan 27. Each meal includes side dish recommendations, along with a beverage and dessert of the week along with weekend options.

Do you have any requests or special needs? If so, please let me know and I will do what I can to help!

Collage of images for weekly #27 meal plan.
[feast_advanced_jump_to]

🍽️ Meal Planning and Prep Tips

I'm here to share with you recipes to make during the week that aren't hard to make and take little prep. Most feed 4 so if there are just 1 or 2 to feed, you may want to scale down and halve a recipe OR just make a couple of these and enjoy leftovers throughout the week.

This weekly meal plan brings air fryer recipes, grilled recipes, slow cooker, and refurbished recipes made with leftovers!

Here are some shortcuts and tips to help you throughout the week.

Any prep that can be done on Sunday is called prep day.

  • For the cheeseburgers, if you will be having a crowd, go ahead and mix and shape them into patties on prep day and store in the fridge until ready to cook.
  • Make the potato salad and cheesecake on prep day.
  • Make the watermelon mojitos on prep day so all you need to do on the day of serving is pour over ice and serve!
  • Tuesday night's meal is super quick and easy to make and the air fryer potatoes take no effort at all. Just be sure to throw a few extra potatoes in the air fryer to have leftovers for the home fries on the weekend.
  • Buy precooked pork belly (I get mine at Trader Joes) and it makes it easy to air fry to a crisp and make the sandwiches.
  • You can buy premade or make sweet dinner rolls on prep day and use them for the Pork Belly Sliders and as a side to Garlic Butter Chicken Bites.

Weekly Meal Plan 27

Monday

Featured Image for Steakhouse Bacon Cheeseburger.

Barbeque Bacon Cheeseburgers

There is nothing better than a backyard bbq on July 4th. Make these Barbeque Bacon Cheeseburgers, Red White and Blue Potato Salad, Wave Your Flag Cheesecake, and Watermelon Mojitos!

Tuesday

Featured image for Cabbage and Kielbasa recipe.

Skillet Cabbage and Kielbasa

This Cabbage and Kielbasa Skillet Recipe is quick and easy and packed with flavor. Serve with a side of buttered egg noodles or Air Fryer Baked Potatoes.

Wednesday

Pork Belly Sliders

Dinner is super easy tonight, just pull out the air fryer and make these Crispy Pork Belly Sliders. Serve them with a side of Amish Broccoli Cauliflower Salad.

Thursday

Featured Image for Garlic Butter Chicken Bites.

Garlic Butter Chicken Bites

These perfectly browned pieces of Garlic Butter Chicken Bites are packed with flavor. They go treat with a side of Roasted Asparagus with Balsamic Browned Butter and some Sweet Dinner Rolls for dipping.

Friday

Ground Beef Pizza

Ground Beef Pizza is one of my go to budget recipes for pizza night. I like to top ours with tomatoes and peppadews for a little burst of color and sweet heat! You can always drizzle some Thousand Island Dressing on top if you wish!

Dessert of the week

Featured image for Rhubarb Custard Bars

Rhubarb Custard Bars

If you haven't made Rhubarb Custard Bars yet this year, then it's a must make! Don't have rhubarb, try using fresh cranberries!

Cocktail of the week

featured image

Blended Pina Colada

Cool down with a Blended Pina Colada this weekend, these are the best frozen drink ever, my favorite one to make all summer long.

Sunday Brunch

Featured image for Moms Skillet Home Fries.

Mom's Skillet Home Fries

Pull out the eggs, and serve them up with a side of Mom's Skillet Home Fries. These are SO delicious!

As an Amazon Associate I earn from qualifying purchases.

Sunday Supper

Chili Cheese Dogs Featured Image.

Chili Cheese Dogs

If it's nice outside, grill up some hotdogs for these Chili Cheese Dogs. If not, then make these Air Fryer Hot Dogs and serve with the chili! These snappy red hot dogs make the perfect chili dog! A side of Dill Pickle Pasta Salad is the perfect accompanyment!

Grumpy's Honeybunch Shopping List

Download Shopping List
Printable and downloadable grocery list.

Related Posts

You must use the category name, not a URL, in the category field.

Don't forget to check out my Amazon storefront for some of my favorite products!

When you make these recipes, please comment below and let me know what you think. I'd love it if you tag me on Instagram @grumpyshoneybunch or #grumpyshoneybunch so I can see your photos!

Recommended

  • A stach of 3 fudgy cake mix brownies studded with colorful M&M candies on a white plate with more brownies blurred in the background.
    M&M Cake Mix Brownies
  • Thick and creamy homemade sour cream on a wooden spoon, held above a glass jar in a bright kitchen setting.
    Homemade Sour Cream
  • Two thick, moist slices of Banana Bread with Browned Butter stacked on a dark plate, showing a soft crumb and golden brown crust.
    Banana Bread with Browned Butter
  • A bowl of hearty beef enchilada soup with corn, black beans, and melted cheese garnish.
    Beef Enchilada Soup

Ground Beef Pizza

June 25, 2022 by Shelby Law Ruttan Leave a Comment

Featured image for Ground Beef Pizza.

Pizza night just got tastier with this Ground Beef Pizza recipe. This simple recipe has a protein packed ground beef topping over a layer of sauce and cheese for an easy weeknight dinner.

Overhead photo of a portion of the pizza round with slices removed.

This hamburger pizza one of my favorite beef recipes to enjoy on Friday nights. You can make or buy pizza dough, whichever makes it easier for you and the beef mixture can be made ahead of time.

[feast_advanced_jump_to]

❤️ Why you'll love it

✔️ It is a budget friendly restaurant style pizza that feeds a family of four.

✔️ This meal falls into the 500-700 calorie range for lunch and dinner and has 2 slices per serving!

✔️ There has a whopping 34 grams of protein per serving.

🥘 Ingredients

Lean ground beef

Pizza dough, either make a homemade pizza dough or buy ready made. I find ready made pizza dough in bags in the deli section of the grocery store.

Pizza sauce

Garlic powder

Italian seasoning

Part-skim mozzarella cheese

Salt

Optional toppings: grape tomato slices, peppadew peppers

Pizza ingredients: ground beef, onion, oil, salt, garlic powder, italian seasoning.

🔪 Instructions

  1. Add the olive oil to a large skillet over medium-high heat and heat until hot. Add the onions and cook, stirring often, for 2 minutes.
  2. Stir in the ground beef and cook beef for 7 minutes, until beef has browned. Add the garlic powder, Italian seasoning, salt and black pepper (if using). Stir to combine. Transfer ground beef mixture to a small bowl and set aside to cool.
  3. Pre heat oven to 425 degrees F.
  4. Drizzle a tablespoon of oil over top of a pizza stone or large baking sheet. Place dough on a floured surface and roll dough into a 12" circle. Transfer dough from work surface to pizza pan and press to edges making a 1 inch border.
  5. Spread the pizza sauce over top of the pizza dough and sprinkle with ¼ cup grated parmesan cheese. Top with the mozzarella cheese and then the ground beef mixture.
  6. Bake the pizza in the hot oven for 20 minutes, until cheese is browned and bottom of the pizza crust is golden.
Pizza topping ingredients.

🥄 Equipment

Large nonstick skillet

Pizza stone or large baking sheet

Large bowl

Spatula

Chef knife

Cutting board

🥫Storage

Store any leftovers in an airtight container in the fridge up to 4 days.

Reheat leftover pizza in the oven or air fryer at 400 degrees for 5 minutes.

A slice of pizza being pulled away from the pie with cheese string attachments.

📖 Variations

  • Make it a taco pizza and partially bake pizza crust. Then spread a cup of refried beans over top of the dough, and season the beef with 1 tablespoon taco seasoning. Top the beans with the cheese and then with the ground beef. Serve with fresh diced tomatoes, shredded lettuce, and salsa.
  • Bread dough can be used in place of pizza dough.
  • Top with your favorite burger toppings like, shredded lettuce, tomato, and pickle slices.
  • Fresh garlic cloves can be substituted for the garlic powder.
  • Sprinkle to top of the baked pizza with red pepper flakes to add a little heat.

💭 Tips

  • Is using premade refrigerated dough, be sure to bring it to room temperature before using.
  • Make the beef mixture ahead of time and stored in the fridge up to 4 days to save time when assembling the pizza.
One slice of pizza facing point forward with whole pie blurred in the background.

📚 Related Recipes

Buffalo chicken fans will love this Buffalo Chicken Pizza.

Chicken Sausage Pizza with Onions and Peppers is like a sausage hoagie on pizza, so good!

Try this Bubble Up Pizza Casserole made with canned biscuits.

Big Mac Casserole is a low carb and healthier version of a Big Mac Sandwich.

American Chop Suey is a ground beef goulash recipe the whole family will love.

🍽 Serve with...

This ground beef pizza goes great with a side of wings and green salad.


Don't forget to check out my Amazon storefront for some of my favorite products!

When you make this recipe, please comment below and let me know what you think. I'd love it if you tag me on Instagram @grumpyshoneybunch or #grumpyshoneybunch so I can see your photos!

If you love this recipe, please leave a ⭐⭐⭐⭐⭐ rating

📖 Recipe

Featured image for Ground Beef Pizza.

Ground Beef Pizza

Shelby Law Ruttan
A delicious ground beef recipe to serve on pizza night, Ground Beef Pizza is packed with protein and flavor.
5 from 1 vote
Prevent your screen from going dark
Print FREE recipe card with your email address Pin Recipe Save Go to Collections
Prep Time 10 minutes mins
Cook Time 20 minutes mins
Total Time 30 minutes mins
Course Main Dish
Cuisine American
Servings 4
Calories 553 kcal

Equipment

  • Large nonstick skillet
  • Pizza stone or large baking sheet
  • Large bowl
  • Spatula
  • chef knife
  • cutting board

As an Amazon Associate I earn from qualifying purchases.

Ingredients
  

  • ½ teaspoon olive oil
  • ½ cup diced onion
  • ½ pound lean ground beef
  • t teaspoon garlic powder
  • 1 teaspoon Italian seasoning
  • ½ teaspoon salt
  • 1 pound pizza dough
  • 1 cup pizza sauce
  • 2 cups mozzarella cheese

Instructions
 

  • Add the olive oil to a large skillet over medium-high heat and heat until hot. Add the onions and cook, stirring often, for 2 minutes.
  • Stir in the ground beef and cook beef for 7 minutes, until beef has browned. Add the garlic powder, Italian seasoning, salt and black pepper (if using). Stir to combine. Transfer ground beef mixture to a small bowl and set aside to cool.
  • Pre heat oven to 425 degrees F. Drizzle a tablespoon of oil over top of a pizza stone or large baking sheet.
  • Place dough on a floured surface and roll dough into a 12" circle. Transfer dough from work surface to pizza pan and press to edges making a 1 inch border.
  • Spread the pizza sauce over top of the pizza dough and sprinkle with ¼ cup grated parmesan cheese. Top with the mozzarella cheese and then the ground beef mixture.
  • Bake the pizza in the hot oven for 20 minutes, until cheese is browned and bottom of the pizza crust is golden.

Nutrition

Calories: 553kcalCarbohydrates: 61gProtein: 34gFat: 20gSaturated Fat: 10gPolyunsaturated Fat: 2gMonounsaturated Fat: 5gTrans Fat: 0.2gCholesterol: 79mgSodium: 1790mgPotassium: 456mgFiber: 3gSugar: 11gVitamin A: 653IUVitamin C: 6mgCalcium: 309mgIron: 5mg
Keyword Ground Beef Pizza Recipe
Tried this recipe?Mention @grumpyshoneybunch or tag #grumpyshoneybunch!

Mom's Skillet Home Fries

June 22, 2022 by Shelby Law Ruttan 2 Comments

Featured image for Moms Skillet Home Fries.

Crispy Skillet home fries are a delicious way to to serve crispy breakfast potatoes on Sunday morning! They are the perfect side dish to eggs and bacon for a hearty breakfast the whole family will love.

A hot skillet with salted butter and little stirring is the best way to cook this classic brunch side dish. This is one of my favorite great potato recipes from mom to make with leftover baked or boiled potatoes.

Hero image for Mom's Skillet Home Fries.
[feast_advanced_jump_to]

❤️ Why you'll love it

✔️ It is a quick side dish that is ready in just 15 minutes.

✔️ This is an easy home fries recipe that requires simple ingredients you already have on hand.

✔️ The home fries have a crispy exterior and are perfect for dipping in a little bit of ketchup!

Ingredients for home fries.

🥘 Ingredients

Leftover baked russet potatoes, diced. These can have the skins on or they can be peeled of before dicing.

Sweet onions

Red bell peppers, add color and sweetness.

Jalapeno pepper, or green bell pepper if you prefer no heat.

Garlic cloves

Salted butter

Salt and black pepper to season the potatoes.

🔪 Instructions

  1. Place 1 tablespoon butter in a large skillet over medium high heat. Warm until butter is melted and starts to bubble.
  2. Stir in the onion, garlic, red pepper, and jalapeno pepper (if using). Cook for 3 minutes, until vegetables have softened and onions are translucent. Remove the onion mixture from the skillet and set aside.
  3. Add the remaining butter to the hot pan and melt until bubbly. Add the diced potatoes to the hot skillet in a single layer and season with salt and pepper. Lower to medium heat and cook the potatoes without stirring for 2 minutes to allow the potatoes to brown and crisp. Stir potatoes and cook for another 2 minutes.
  4. Add more butter if needed, then add the bread pieces to the potato mixture. Stir to toss the bread with the potatoes and then cook for another 3 minutes, stirring occasionally.
  5. Return the cooked onion mixture to the skillet with the potatoes and stir to combine. Remove from heat and serve immediately.
Bread and potatoes in the skillet.

🥄 Equipment

Non-stick pan, if you have a cast iron skillet, that will work well also.

Chef knife

Cutting board

Spatula

🥫Storage

Store leftover home fries in the fridge up to 4 days. Reheat in a skillet over medium low heat until potatoes are warmed through.

📖 Variations

  • Substitute ½ teaspoon garlic powder for the garlic clove.
  • Olive oil can be used in place of butter to reduce saturated fats.
  • Opt to use your favorite herbs and spices instead of just salt and pepper.
Onion mixture in the center of the skillet before stirring into the potatoes.
Toss the onion mixture in last to add flavor without overcooking.

💭 Tips

  • Make extra baked potatoes when cooking dinner to have leftover potatoes on hand to make this home fries recipe.

🙋 FAQ's

What is the best potato to make home fries?

The best potato is any cooked leftover boiled yukon golds or baked russet potatoes. Since they are precooked, they will crisp up in a different and better way than they would if they were raw.

Can I use raw potatoes to make home fries?

Fresh cut potato home fries can be made but they take longer to cook and will have a different texture. They also will not crisp as nicely as precooked potatoes will.

📚 Related Recipes

Bacon is the star in these Cheesy Bacon Home Fries.

Mom's Potato Rolls make a great side dish and leftovers work great as a bread replacement in the home fries recipe!

Sweeten things up a little with these Oven Baked Spicy Sweet Potato Fries!

🍽 Serve with...

Serve home fries with a side of eggs and bacon, or sausage. I love to drizzle mine with a small amount of ketchup or hot sauce.

Mom's Skillet Home Fries in a bowl topped with chopped chives.

🏫 The last word

I grew up with my mom making these skillet home fries, also known as breakfast potatoes on a regular basis. She would make them for breakfast or dinner as a side to whatever she was serving.

My mom would always put bread in the home fries as a way to bulk up the dish when there weren't enough potatoes to serve everyone. I think that the crispy fried bread pieces were favorite part of the dish for me!

Mom usually just fried the potatoes with some onion, butter, and salt, pepper, and garlic powder. Over the years, I changed the method of making these delicious home fries by sauteing the onions with some bell pepper and fresh garlic before cooking the potatoes. Then I stir the onion mixture back into the crispy potatoes just before serving.


Don't forget to check out my Amazon storefront for some of my favorite products!

When you make this skillet home fries recipe, please comment below and let me know what you think. I'd love it if you tag me on Instagram @grumpyshoneybunch or #grumpyshoneybunch so I can see your photos!

If you love this recipe, please leave a ⭐⭐⭐⭐⭐ rating

📖 Recipe

Featured image for Moms Skillet Home Fries.

Mom's Skillet Home Fries

Shelby Law Ruttan
A delicious way to make leftover potatoes a side dish for another meal. Crispy potatoes, buttery crispy bread, and buttery onions, peppers, and garlic bring this dish together to make a perfect addition to the breakfast table.
5 from 1 vote
Prevent your screen from going dark
Print FREE recipe card with your email address Pin Recipe Save Go to Collections
Prep Time 5 minutes mins
Cook Time 10 minutes mins
Total Time 15 minutes mins
Course Side Dish
Cuisine American
Servings 4
Calories 236 kcal

Equipment

  • Large non-stick skillet
  • chef knife
  • cutting board
  • Spatula

As an Amazon Associate I earn from qualifying purchases.

Ingredients
  

  • 2 medium baked potatoes , diced
  • 1 cup hearty bread pieces
  • ½ cup diced onions
  • ¼ cup diced red bell pepper
  • 1 tablespoon diced jalapeno , optional
  • 1 large garlic clove , minced
  • 4 tablespoons salted butter
  • salt , to taste
  • black pepper , to taste

Instructions
 

  • Place 1 tablespoon butter in a large skillet over medium high heat. Warm until butter is melted and starts to bubble.
  • Stir in the onion, garlic, red pepper, and jalapeno pepper (if using). Cook for 3 minutes, until vegetables have softened and onions are translucent. Remove the onion mixture from the skillet and set aside.
  • Add the remaining butter to the hot pan and melt until bubbly. Add the diced potatoes to the hot skillet in a single layer and season with salt and pepper. Lower to medium heat and cook the potatoes without stirring for 2 minutes to allow the potatoes to brown and crisp. Stir potatoes and cook for another 2 minutes.
  • Add more butter if needed, then add the bread pieces to the potato mixture. Stir to toss the bread with the potatoes and then cook for another 3 minutes, stirring occasionally.
  • Return the cooked onion mixture to the skillet with the potatoes and stir to combine. Remove from heat and serve immediately.

Nutrition

Calories: 236kcalCarbohydrates: 29gProtein: 4gFat: 12gSaturated Fat: 7gPolyunsaturated Fat: 1gMonounsaturated Fat: 3gTrans Fat: 0.5gCholesterol: 30mgSodium: 163mgPotassium: 528mgFiber: 3gSugar: 3gVitamin A: 684IUVitamin C: 24mgCalcium: 42mgIron: 2mgNet Carbohydrates: 26g
Keyword Skillet Home Fries
Tried this recipe?Mention @grumpyshoneybunch or tag #grumpyshoneybunch!

Air Fryer Baked Potatoes

June 20, 2022 by Shelby Law Ruttan Leave a Comment

Air Fryer Baked potatoes featured image.

Air fryer baked potatoes are the best baked potatoes! They have a crispy skin, are fluffy and perfectly cooked on the inside, exactly the way the whole family loves them.

The air fryer is one of the most versatile cooking methods and it usually takes less time to cook the potato over baking it. Once you have tried this air fryer baked potato recipe, you will probably never bake them another way!

Hero image for air fryer baked potatoes.
[feast_advanced_jump_to]

❤️ Why you'll love it

✔️ They are the perfect side dish to any meal and cooking time is only 30 minutes!

✔️ It is an easy recipe that won't heat up your kitchen.

✔️ Making potatoes in the air fryer is the best way to cook them.

4 Russett potatoes on a white plate.
Just a few simple ingredients to make this 30 minute recipe!

🥘 Ingredients

Russet potatoes, medium potatoes work best, most air fryers will fit 4-6 potatoes.

Olive oil, to rub on the outside of the potatoes

Salt and black pepper, to season the potato skin

🔪 Instructions

  1. Wash the potatoes and remove any blemishes. Dry with a paper towel.
  2. Place potatoes on a plate and drizzle with the oil. Rub the oil all over the outside of the potato skin.
  3. Season with salt and pepper, then use a kitchen knife to place a 2-3 slits into the potato.
  4. Place the potatoes in the air fryer basket in a single layer, being sure to leave space between the potatoes to allow the air to circulate all around.
  5. Bake potatoes at 400 degrees F for 30 minutes, or until a sharp knife edge easily pieces through the potato. Use tongs to easily remove the baked potato from the air fryer basket.
Upclose image of russet potatoes.

🥄 Equipment

Air fryer

Chef knife

🥫Storage

Store any leftover potatoes in the fridge in an airtight container up to 4 days.

📖 Variations

  • Substitute sweet potatoes for russet potatoes.
4 potatoes in an air fryer basket.
Potatoes rubbed with oil and seasoned with salt and pepper make the perfect air fryer baked potatoes.

💭 Tips

  • Be sure to use an oil that has a high smoke point. Avocado oil, grapeseed oil, olive oil, and canola oil are all oils that would work.
  • Try to be consistent with the size of potato to ensure even cooking. Different sized potatoes will require different cooking times.
  • Russets is the best type of potato to bake. The have a thicker skin and the flesh of the potato is starchier and fluffier.

📚 Related Recipes

Air Fryer Fingerling Potatoes are roasted until golden brown and crispy with a creamy inside!

Roasted Red Skinned Potatoes crisp up nicely with a breadcrumb coating.

Air Fryer Pork Chops are juicy, and perfectly cooked in the air fryer.

Try these Air Fryer Egg Rolls for a delicious easy appetizer.

If you love air fryer recipes, then be sure to read 57 Easy Air Fryer Recipes - Appetizers to Dessert.

Baked potato on a plate and cut in half.
A perfectly baked potato made in the air fryer will have a crispy skin and tender fluffy inside!

🍽 Serve with...

Serve baked potatoes with a pat of butter, dollop of sour cream, chopped fresh chives, bacon bits, cheddar cheese, or any of your other favorite toppings.


Don't forget to check out my Amazon storefront for some of my favorite products!

When you make this recipe, please comment below and let me know what you think. I'd love it if you tag me on Instagram @grumpyshoneybunch or #grumpyshoneybunch so I can see your photos!

If you love this recipe, please leave a ⭐⭐⭐⭐⭐ rating

📖 Recipe

Air Fryer Baked potatoes featured image.

Air Fryer Baked Potatoes

Shelby Law Ruttan
Perfectly baked potatoes using the air fryer! These potatoes have a crispy skin layer with a tender, fluffy inside. They are delicious with a dollop of sour cream and a sprinkling of chives.
4.72 from 7 votes
Prevent your screen from going dark
Print FREE recipe card with your email address Pin Recipe Save Go to Collections
Prep Time 5 minutes mins
Cook Time 30 minutes mins
Total Time 35 minutes mins
Course Side Dish
Cuisine American
Servings 4
Calories 199 kcal

Equipment

  • Air Fryer
  • chef knife

As an Amazon Associate I earn from qualifying purchases.

Ingredients
  

  • 4 medium russet potatoes
  • 1 tablespoon grapeseed oil
  • salt , to taste
  • black pepper , to taste

Instructions
 

  • Wash the potatoes and remove any blemishes. Dry with a paper towel.
  • Place potatoes on a plate and drizzle with the oil. Rub the oil all over the outside of the potato skin.
  • Season with salt and pepper, then use a kitchen knife to place a 2-3 slits into the potato.
  • Place the potatoes in the air fryer basket in a single layer, being sure to leave space between the potatoes to allow the air to circulate all around.
  • Bake potatoes at 400 degrees F for 30 minutes, or until a sharp knife edge easily pieces through the potato. Use tongs to easily remove the baked potato from the air fryer basket.

Nutrition

Calories: 199kcalCarbohydrates: 38gProtein: 5gFat: 4gSaturated Fat: 0.4gPolyunsaturated Fat: 3gMonounsaturated Fat: 1gSodium: 11mgPotassium: 888mgFiber: 3gSugar: 1gVitamin A: 2IUVitamin C: 12mgCalcium: 28mgIron: 2mg
Keyword Air Fryer Baked Potatoes
Tried this recipe?Mention @grumpyshoneybunch or tag #grumpyshoneybunch!

Black Bean Corn Salsa

June 17, 2022 by Shelby Law Ruttan 2 Comments

Featured Image for corn and bean salsa.

Fresh and delicious this easy recipe for Black Bean and Corn Salsa is the perfect side dish for all your barbecue and game day needs. This crowd favorite is a great as a side with crunchy tortilla chips or your favorite grilled chicken or steak.

This black bean salsa recipe is an easy dish made with a combination of black beans and fresh flavors in a lime dressing and fresh cilantro lending amazing flavor to this homemade salsa.

A black bowl with black bean corn salsa and tortilla chips blurred in the background.
[feast_advanced_jump_to]

❤️ Why you'll love it

✔️ It is a big batch homemade salsa made with fresh ingredients that makes a healthy snack.

✔️ It is a great way to add fresh veggies and fiber to your diet.

✔️ There is a burst of sweetness combined with spicy flavors.s

Ingredients for salsa with corn and beans.

🥘 Ingredients

Sweet corn on the cob, the kernels should be cut from the cob when the corn is raw

Olive oil

Canned black beans, it is important to rinse and drain these well

Ground cumin, adds flavor, not heat

Fresh roma tomatoes, these should be used as they are a meatier tomato

Red bell pepper or green bell peppers, added for color and freshness

Red onion

Jalapeno

Fresh cilantro

Limes

Ingredients combined in a bowl before mixing.

🔪 Instructions

  1. Heat the olive oil to a large skillet over medium high heat until hot. Add the corn, cook and stir for 2 minutes, until the corn is slightly chard.
  2. Add the red bell peppers and cook for 2 minutes. Stir in the ground cumin, cooking 1 minute longer. Remove from the heat.
  3. In a large bowl, combine the black beans, tomatoes, bell pepper, onion, jalapeno, and cilantro.
  4. Transfer the corn mixture to the black bean mixture and stir to combine.
  5. Pour the lime juice over the salsa and stir to combine. Add salt and pepper to taste if needed.
Fresh corn cooking in a skillet.
Cook the corn on a high heat for the charring, that gives added flavor.
Corn, red peppers, and seasoning cooking in a skillet.
Red peppers are cooked just long enough to soften.
Black bean salsa mixture in a mixing bowl.
Mix all the ingredients together for the best black bean corn salsa ever!

🥄 Equipment

Large skillet

Large bowl

Mixing spoon

Chef knife

Cutting board

🥫Storage

Store any leftover black bean corn salsa in an airtight container in the fridge up to 4 days.

Overhead photo of black bean corn salsa in a bowl.

📖 Variations

  • To add more flavor and heat stir in 1 - 2 teaspoons chili powder with the ground cumin when cooking the corn.
  • Adjust the heat level of the salsa by adding more or less jalapeno pepper.
  • Substitute canned pinto or white beans in place of the black beans.
  • Use frozen corn in place of fresh corn.

💭 Tips

  • Transfer the black beans to a colander and rinse them well to remove the cloudy thick liquid that coats the beans before adding to the salad.
  • I do not recommend using canned corn. Canned corn has a very different flavor and does not taste fresh.

📚 Related Recipes

Black Bean and Corn Salsa on a round tortilla chip.
This homemade salsa is so fresh and delicious and perfect for scooping with tortilla chips.

🍽 Serve with...

Serve this black bean salsa with tortilla chips or as a side dish to your main protein.

🏫 The last word

The ingredients in this recipe are all fresh vegetables along with a couple of pantry staples. It is an easy salsa recipe that tastes fresh and makes a great dip or side dish. My family will happily scoop this with tortilla chips as a dip or eat it next to burritos, tacos, grilled chicken, and more. It is very versatile and not too spicy.


Don't forget to check out my Amazon storefront for some of my favorite products!

When you make this recipe, please comment below and let me know what you think. I'd love it if you tag me on Instagram @grumpyshoneybunch or #grumpyshoneybunch so I can see your photos!

If you love this recipe, please leave a ⭐⭐⭐⭐⭐ rating

📖 Recipe

Featured Image for corn and bean salsa.

Black Bean Corn Salsa

Shelby Law Ruttan
A combination of fresh ingredients and black beans marinated in a lime dressing, this Black Bean and Corn Salsa makes the perfect appetizer or side dish. This recipe serves 6 people, however if you want to feed a crowd, feel free to double the recipe.
5 from 1 vote
Prevent your screen from going dark
Print FREE recipe card with your email address Pin Recipe Save Go to Collections
Prep Time 10 minutes mins
Cook Time 5 minutes mins
Total Time 15 minutes mins
Course Appetizer
Cuisine Mexican
Servings 6
Calories 135 kcal

Equipment

  • Large skillet
  • Large bowl
  • Mixing spoon
  • cutting board
  • chef knife

As an Amazon Associate I earn from qualifying purchases.

Ingredients
  

  • 1½ cups fresh corn kernels , about 3 medium sized ears
  • 1 tablespoon olive oil
  • ¼ cup red bell pepper , diced
  • 1 teaspoon cumin
  • 15 ounces canned black beans , rinsed and drained
  • 2 limes , juiced
  • 1 jalapeno pepper , diced and seeded
  • ½ cup diced fresh roma tomatoes , with seeds removed.
  • ⅓ cup diced red onion
  • ⅓ cup chopped cilantro
  • salt , to taste (optional)
  • black pepper , to taste (optional)

Instructions
 

  • Heat the olive oil to a large skillet over medium high heat until hot. Add the corn, cook and stir for 2 minutes, until the corn is slightly chard.
  • Add the red bell peppers and cook for 2 minutes. Stir in the ground cumin, cooking 1 minute longer. Remove from the heat.
  • In a large bowl, combine the black beans, tomatoes, bell pepper, onion, jalapeno, and cilantro.
  • Transfer the corn mixture to the black bean mixture and stir to combine.Pour the lime juice over the salsa and stir to combine. Add salt and pepper to taste if needed.

Nutrition

Calories: 135kcalCarbohydrates: 23gProtein: 6gFat: 3gSaturated Fat: 1gPolyunsaturated Fat: 1gMonounsaturated Fat: 2gTrans Fat: 0.003gSodium: 280mgPotassium: 428mgFiber: 7gSugar: 4gVitamin A: 530IUVitamin C: 25mgCalcium: 38mgIron: 2mg
Keyword Black Bean and Corn Salsa, Black Bean Corn Salsa
Tried this recipe?Mention @grumpyshoneybunch or tag #grumpyshoneybunch!

Weekly Meal Plan 26

June 16, 2022 by Shelby Law Ruttan Leave a Comment

Collage of images for weekly #26 meal plan.

Here is your free Weekly Meal Plan 26 for June 26 - 30. Each meal includes side dish recommendations, along with a beverage and dessert of the week along with weekend options.

Do you have any requests or special needs? If so, please let me know and I will do what I can to help!

Collage of images for weekly #26 meal plan.
[feast_advanced_jump_to]

🍽️ Meal Planning and Prep Tips

I'm here to share with you recipes to make during the week that aren't hard to make and take little prep. Most feed 4 so if there are just 1 or 2 to feed, you may want to scale down and halve a recipe OR just make a couple of these and enjoy leftovers throughout the week.

This weekly meal plan brings air fryer recipes, grilled recipes, slow cooker, and refurbished recipes made with leftovers!

Here are some shortcuts and tips to help you throughout the week.

Any prep that can be done on Sunday (26) is called prep day.

  • For the beef kabobs, add the beef to the marinade on prep day so the meat is ready to grill on Monday.
  • Buy or make an air fryer rotisserie chicken on prep day so you have the chicken you need on Tuesday for the Buffalo Chicken Burritos.
  • To make things easier on Wednesday evening, prep the cauliflower for the rice on prep day or buy pre riced cauliflower. Take the shrimp out of the freezer in the morning and allow it to thaw in the fridge during it the day.
  • When you buy the ground beef for the burgers, shape the into patties and freeze until the day before you will cook them.
  • Pizza night is easy peasy. Change the toppings up if you want, if you have leftover chicken, burgers, try using that instead of pepperoni.
  • Make the Chocolate Cake Roll on Sunday and store in the fridge to serve throughout the week.
  • The French Toast Casserole is made using an Italian bread. You can buy this or make your own Italian Bread on prep day to have it ready for the weekend.

Weekly Meal Plan 26

June 26

Sweet and Spicy Beef Kabobs

Sweet and Spicy Beef Kabobs means it is time to fire up the grill and offer up a punch of flavor. Serve this Parmesan Pasta Salad or Classic Potato Salad as a side dish.

June 27

Buffalo chicken burritos cut in half and stacked on each other.

Buffalo Chicken Burritos

Buffalo Chicken Burritos is an easy meal to put together fast. It is full of buffalo flavor and makes a great dinner with a side of Black Bean and Corn Salsa. Leftovers are excellent to pack in lunches!

June 28

Cashew Shrimp

Making take out at home is SO easy. With this Cashew Shrimp recipe, all you need to do is cook the shrimp, mix together the sauce, and it's ready! Serve it over regular rice, or try serving with Coconut Cauliflower Rice.

June 29

French Onion Burger

These French Onion Burgers with Caramelized Onions are packed with so much flavor and I love serving them on an onion roll with a side of Mexican Street Corn Salad.

June 30

One Dish Pepperoni Pizza

This One Dish Pepperoni Pizza literally is made in just one dish and turns out delicious! Serve it with green salad topped with Italian Vinaigrette.

Dessert of the week

chocolate zucchini cake roll

Chocolate Zucchini Cake Roll

Zucchini is growing quickly in the gardens, and what better way to enjoy it than this Chocolate Zucchini Cake with Spiced Cream? Everyone in my family loves this recipe and you will too!

Cocktail of the week

Strawberry Mojito featured image.

Strawberry Mojito

Enjoy a refreshing Strawberry Mojito to wind down the week.

Sunday Brunch

Blueberry French Toast Casserole Featured Image.

Blueberry French Toast Casserole

Blueberries are my favorite fruit, especially for baking! This Blueberry French Toast Casserole is the perfect weekend brunch. Serve it with a side of fresh mixed fruit.

As an Amazon Associate I earn from qualifying purchases.

Sunday Supper

Featured image shrimp salad sandwich.

Shrimp Roll

This Shrimp Salad Roll recipe is super delicious. If you can find split top hot dog rolls, be sure to butter and grill them first. If not, then grill the inside of the hot dog roll before adding the shrimp salad. Serve any leftover Mexican Street Corn as a side dish.

Grumpy's Honeybunch Shopping List

Download Shopping List
Printable and downloadable grocery list.

Related Posts

You must use the category name, not a URL, in the category field.

Don't forget to check out my Amazon storefront for some of my favorite products!

When you make these recipes, please comment below and let me know what you think. I'd love it if you tag me on Instagram @grumpyshoneybunch or #grumpyshoneybunch so I can see your photos!

Recommended

  • Slice of rich chocolate ganache raspberry tart on a white plate with a gold fork in the background.
    Chocolate Ganache Tart
  • Crispy, golden brown baked salami cips arranged on a parchment-lined baking sheet.
    Crispy Baked Salami Chips
  • A thick slice of cinnamon raisin bread on a white plate, showing a detailed swirl of cinnamon and pockets of raisins in the soft crumb.
    Cinnamon Raisin Bread
  • A bowl of General Tso Chicken topped with sesame seeds and sliced green onions, with chopsticks picking up a piece.
    Air Fryer General Tso Chicken

Buffalo Chicken Calzone

June 15, 2022 by Shelby Law Ruttan Leave a Comment

Featured Image for buffalo chicken calzone recipe.

A delicious Buffalo Chicken Calzone recipe made with shredded chicken, buffalo sauce, cheeses, caramelized onions and more. This chicken calzone recipe is your favorite buffalo chicken pizza wrapped up in the dough instead of topping a pizza crust!

Baked Buffalo Chicken Calzone cut in half and stacked.

I love buffalo chicken recipes, and anything "pizzafied" is a winner in my book. These calzones inspired me to make this buffalo chicken french bread pizza and i love to serve these Buffalo Chicken Stuffed Mushrooms at game day parties!

❤️ Why you'll love it

✔️ Buffalo calzones are an easy hand held meal with mildly spicy chicken so kids will love them too.

✔️ This recipe makes 4 giant meal-sized calzones that will feed 4 people with hearty appetites.

✔️ Serving sizes can be made smaller and served up as gameday grub.

Ingredients for chicken mixture.

🥘 Ingredients

Shredded chicken, this can be leftover chicken, rotisserie chicken, or chicken breast cooked in a slow cooker (see top tips)

Premade pizza dough, makes this a quick and easy recipe to make for dinner!

Hot sauce

Ranch dressing, this is used to help tone down the spice of the hot sauce

Mozzarella cheese, these calzones are packed with lots of mozzarella cheese!

Blue cheese, added for flavor and is a perfect combo with buffalo flavors

Caramelized onions, these add flavor. You can follow this recipe on how to make caramelized onions.

Celery, because celery and buffalo chicken just go together naturally!

Olive oil, for greasing the baking sheets.

Buffalo chicken mixture, pizza dough, and cheese ingredients for assembly.
Premade pizza dough and precooked chicken make this calzone recipe easy to make any night of the week.

🔪 Instructions

  1. Preheat the oven to 425 degrees F.
  2. In a large bowl, combine the chicken, caramelized onions, celery, blue cheese, and cilantro.
  3. Add the hot sauce and ranch dressing to the chicken mixture and stir until chicken is coated. Set aside
  4. In a hard work surface, divide the pizza dough into 4 sections.
  5. Flatten each dough portion out over a lightly floured surface until it is approximately a 6 inch circle. Place ¼ of the buffalo chicken mixture on one half of the dough and top ½ cup cheese.
  6. Fold over the dough to cover the filling and pinch together the edges of the dough together to seal. Bake for 25 minutes or until golden brown.
Buffalo chicken mixture in a mixing bowl.
Pizza dough pressed out to prepare for filling.
Be sure to press the dough out on a large baking sheet so you don't have to try and move a filled unbaked calzone.
Chicken mixture and mozzarella on half of the pizza dough before folding over and sealing shut.
A hearty serving of buffalo chicken mixture is topped with a good amount of mozzarella cheese.
Assembled and unbaked calzone on a baking sheet.
Folded and ready to bake, feel free to brush with an egg wash and sprinkle with parmesan cheese.

🥄 Equipment

Sharp knife

Large baking sheets

Large bowl

Measuring cups

Cutting board

🥫Storage

Store any leftover calzones in the fridge up to 4 days and in the freezer up to 3 months.

Whole baked buffalo chicken calzones on a baking sheet.

📖 Variations

  • Substitute blue cheese dressing for the ranch dressing
  • Stir in some red pepper flakes to up the heat level.
  • Substitute red bell pepper for the celery
  • Brush the top of each calzone with egg wash and sprinkle with grated parmesan cheese.
  • Substitute breaded precooked chicken tenders for the shredded chicken for added texture.

💭 Tips

  • Press the dough out on the large baking sheet so you don't have to try and move the unbaked calzone from the counter to the baking sheet.
  • If using refrigerated premade dough, be sure to remove it from the fridge at least 30 minutes before using.

📚 Related Recipes

Buffalo Chicken Bowls make a great protein packed meal.

Sausage lovers will want to try this Sausage and Mushroom Calzones.

Everyone loves this Buffalo Chicken Pizza recipe.

Buffalo Chicken Sandwiches are a family favorite.

Buffalo Chicken Mac and Cheese is creamy comfort food!

🍽 Serve with...

Serve with a side of your favorite ranch or bleu cheese dressing.

Calzone cut in half and stacked on a plate.

🏫 The last word

Depending on appetite, 1 whole calzone can feed 1-2 people for a meal.

You can make these calzones ahead of time and freeze unbaked in the freezer. They can be stored there up to 3 months. When ready to bake, remove from the freezer and let rest on the baking sheet for 15 minutes, then bake as instructed. It may take 5-10 minutes longer to bake from its frozen state.


📖 Recipe

Featured Image for buffalo chicken calzone recipe.

Buffalo Chicken Calzones

Shelby Law Ruttan
Everything you love about a buffalo chicken pizza wrapped up in pizza dough and baked to golden perfection. This buffalo chicken calzone recipe is a hearty hand held sandwich or makes the perfect game day appetizer.
5 from 1 vote
Prevent your screen from going dark
Print FREE recipe card with your email address Pin Recipe Save Go to Collections
Prep Time 10 minutes mins
Cook Time 25 minutes mins
Total Time 35 minutes mins
Course Main Dish
Cuisine American
Servings 4
Calories 697 kcal

Equipment

  • chef knife
  • Large baking sheet
  • Large bowl
  • Measuring cups
  • cutting board

As an Amazon Associate I earn from qualifying purchases.

Ingredients
  

  • 1 pound pizza dough
  • 3 cups shredded chicken
  • 2 cups mozzarella cheese
  • ⅓ cup caramelized onions
  • ½ cup diced celery
  • ¼ cup blue cheese , crumbled
  • ⅛ cup chopped cilantro
  • ½ cup hot sauce
  • 2 tablespoons ranch dressing

Instructions
 

  • Preheat the oven to 425 degrees F.
  • In a large bowl, combine the chicken, caramelized onions, celery, blue cheese, and cilantro.Add the hot sauce and ranch dressing to the chicken mixture and stir until chicken is coated. Set aside.
  • In a hard work surface, divide the pizza dough into 4 sections.
  • Flatten each dough portion out over a lightly floured surface until it is approximately a 6 inch circle. Place ¼ of the buffalo chicken mixture on one half of the dough and top ½ cup cheese.
  • Fold over the dough to cover the filling and pinch together the edges of the dough together to seal. Bake for 25 minutes or until golden brown.

Nutrition

Calories: 697kcalCarbohydrates: 59gProtein: 50gFat: 29gSaturated Fat: 12gPolyunsaturated Fat: 5gMonounsaturated Fat: 8gCholesterol: 131mgSodium: 2218mgPotassium: 417mgFiber: 2gSugar: 9gVitamin A: 628IUVitamin C: 24mgCalcium: 354mgIron: 5mg
Keyword Buffalon Chicken Calzone
Tried this recipe?Mention @grumpyshoneybunch or tag #grumpyshoneybunch!

Buffalo Chicken Burritos

June 14, 2022 by Shelby Law Ruttan Leave a Comment

Buffalo chicken burritos cut in half and stacked on each other.

Buffalo Chicken Burritos are an easy meal packed with buffalo sauce flavor wrapped in flour tortillas. This chicken burrito takes mexican food idea and combines it with the American love of buffalo chicken and makes a quick delicious lunch.

Fully assembled and cut in half buffalo chicken burritos.

Wrap recipes make a delicious quick lunch and these buffalo chicken burritos are easy to make ahead and pack to take on the go.

[feast_advanced_jump_to]

❤️ Why you'll love it

✔️ Fans of buffalo wings will love all of the flavors of a chicken wing wrapped in a tortilla for an easy hand held meal.

✔️ These are delicious hot or cold and make a great lunch or picnic item.

✔️ These make a great idea to make ahead for game day!

Ingredients to assemble burrito.
Super simple ingredients make this a quick and easy meal to make!

🥘 Ingredients

Shredded chicken

Hot sauce

Butter

Spanish rice

Monterey jack cheese

Blue cheese crumbles

Lettuce

Shredded chicken in a bowl with sauce ingredients in measuring cups.
Shredded chicken, hot sauce, and butter combine for a delicious buffalo flavor.

🔪 Instructions

  1. In a large bowl, combine the shredded chicken, hot sauce, and melted butter until chicken is thoroughly coated.
  2. Lay 1 tortilla on a flat surface and two spoonfuls of the buffalo chicken mixture in center of each tortilla. Top with spanish rice, Monterey jack cheese, blue cheese crumbles and lettuce.
  3. Fold the side of tortilla closest to you up and over, packing the filling in. Fold each side of the tortilla up over the top of the first roll. Continue to roll tortilla to enclose filling, pushing sides of tortilla in to completely enclose filling.
  4. Cut burritos in half (if desired) and serve hot or cold.
Shredded chicken and rice on a flour tortilla.
Chicken and spanish rice make the two base layers.
Flour tortilla with shredded chicken, rice, and cheese on top.
Two cheese to the chicken and rice mixture.

🥄 Equipment

Mixing bowls

Measuring spoons

🥫Storage

Store any leftovers in the fridge up to 3 days.

Flour tortilla with all fillings in a layer on top.
Optional lettuce to top the burrito before folding.
Rolled buffalo chicken burrito.
Folded and rolled for a convenient portable lunch.

📖 Variations

  • Substitute diced crunchy celery for the lettuce.
  • Turn it into a buffalo chicken burrito bowl and combine the filling ingredients in a bowl eliminating the tortilla.
  • Use shredded cheddar cheese or monterey jack cheese in place of pepper jack.
  • Stir 1-2 tablespoons of ranch dressing or blue cheese dressing and 2 tablespoons green onions, sliced, into the chicken mixture.
  • Use crumbled and cooked ground chicken in place of the shredded chicken.
  • Substitute black beans for the rice.
  • Stir 1 cup diced celery or red pepper into the chicken mixture.
Fully assembled and cut in half buffalo chicken burritos.

💭 Top Tips

  • Leftover chicken (or rotisserie chicken) is a great way to make this buffalo chicken burrito.
  • Cook 2 large chicken breasts or 4 chicken thighs in a crock pot on low for 6-8 hours with ½ cup of chicken stock, salt and pepper to taste. When done, shred the chicken to use for this recipe.
  • Warm tortillas for 20 seconds in the microwave to make folding the burritio easier.

📚 Related Recipes

Kids love these Turkey Bacon Breakfast Burritos and they are a great make and take breakfast on the go.

Sauce and spicy Buffalo Chicken Sandwiches make a tasty lunch or dinner.

Buffalo Chicken Bowls are packed with protein and flavor.

Buffalo Chicken Panini are super easy and great for game day!

🍽 Serve with...

Serve these Buffalo Chicken Burritos with a corn and black bean salsa, sour cream, or homemade guacamole.

Corn and black bean salsa on a plate with a burrito in the background.
Buffalo Chicken Burritos are excellent with a side of corn and black bean salsa!

🏫 The last word

Buffalo Chicken Burritos can be enjoyed several ways. Hot or cold and with a variations of fillings.

Spray the outside of the tortilla with cooking spray and after it has been wrapped, place burritos in a large skillet over medium-high heat for 2-3 minutes on each side, until browned. Or, place the burrito in the air fryer and cook at 400 degrees for 4-6 minutes, flipping the burrito over half way through.

I also like to skip the flour tortilla and rice entirely and make buffalo chicken burrito bowls for a low carb version. Or, use a low carb tortilla and eliminate the rice, using cauliflower rice instead if desired. When I do this I like to add extra salsa and guacamole to the bowl.

Buffalo Chicken Burritos

Don't forget to check out my Amazon storefront for some of my favorite products!

When you make this recipe, please comment below and let me know what you think. I'd love it if you tag me on Instagram @grumpyshoneybunch or #grumpyshoneybunch so I can see your photos!

If you love this recipe, please leave a ⭐⭐⭐⭐⭐ rating

📖 Recipe

Buffalo chicken burritos cut in half and stacked on each other.

Buffalo Chicken Burritos

Shelby Law Ruttan
Delicious and super easy to make Buffalo Chicken Burritos make a great lunch or game day sandwich. They can be enjoyed hot or cold, grilled or not, and are packed with protein and flavor that will please buffalo flavor fans.
5 from 2 votes
Prevent your screen from going dark
Print FREE recipe card with your email address Pin Recipe Save Go to Collections
Prep Time 10 minutes mins
Total Time 10 minutes mins
Course lunch
Cuisine American
Servings 6
Calories 438 kcal

As an Amazon Associate I earn from qualifying purchases.

Ingredients
  

For the chicken

  • 2 cups shredded chicken , packed
  • ⅓ cup hot sauce
  • 2 tablespoons butter , melted

For the sandwich

  • 6 flour tortillas
  • 1½ cups spanish rice
  • ½ cup monterey jack cheese , shredded
  • ⅓ cup blue cheese crumbles
  • 1½ cups shredded lettuce

Instructions
 

For the chicken

  • In a large bowl, combine the shredded chicken, hot sauce, and melted butter until chicken is thoroughly coated.

To assemble the burrito

  • Lay 1 tortilla on a flat surface and ⅓ cup buffalo chicken mixture in center of each tortilla.
  • Top with ¼ cup spanish rice, and evenly distribute Monterey jack cheese, blue cheese crumbles and lettuce over top of chicken and rice.
  • Fold the short side of tortilla closest to you up and over, packing the filling in. Fold each side of the tortilla up over the top of the first roll. Continue to roll tortilla to enclose filling, pushing sides of tortilla in to completely enclose filling.
  • Cut burritos in half (if desired) and serve hot or cold.

Nutrition

Calories: 438kcalCarbohydrates: 53gProtein: 22gFat: 15gSaturated Fat: 7gPolyunsaturated Fat: 2gMonounsaturated Fat: 4gTrans Fat: 1gCholesterol: 59mgSodium: 785mgPotassium: 270mgFiber: 2gSugar: 2gVitamin A: 377IUVitamin C: 10mgCalcium: 178mgIron: 2mg
Keyword buffalo chicken burritos
Tried this recipe?Mention @grumpyshoneybunch or tag #grumpyshoneybunch!

Garlic Butter Chicken Bites

June 13, 2022 by Shelby Law Ruttan Leave a Comment

Featured Image for Garlic Butter Chicken Bites.

Garlic Butter Chicken Bites have so much flavor and is an easy recipe to put dinner on the table on those busy weeknights. This chicken dish is coated with a flavorful garlic butter sauce, these quick to make chicken nuggets are a 15 minute recipe the whole family will love.

Bite sized pieces of chicken are sauteed until golden brown on the outside and are coated in a rich garlic butter sauce to finish, making it a delicious meal to serve alongside your favorite veggies. Garlic chicken bites is one of my favorite one-pan meals.

Pieces of golden brown chicken in a skillet.

❤️ Why you'll love it

✔️ It is an easy chicken recipe perfect for busy weeknights with dinner on the table in just 15 minutes!

✔️ Garlic butter chicken bites have only 1 net carb per serving, a great recipe for those following low carb keto diet!

✔️ It is a recipe with minimal prep that you probably have all the ingredients on hand for!

Ingredients for garlic sauce.

🥘 Ingredients

Chicken thighs, breasts or chicken tenders, cut into bite-sized chunks

All purpose seasoning

Hot sauce

Butter

Garlic cloves

Chicken broth

Lemon juice

Parsley

Black pepper

Chicken pieces frying in a skillet.

🔪 Instructions

  1. In a large skillet over medium-low heat, melt 2 tablespoons butter until bubbly. Add the chicken and turn the heat up to medium-high.
  2. Cook the chicken, tossing frequently, for 7 minutes, until chicken is golden brown on the outside,
  3. Remove the chicken bites from the skillet and add the remaining butter and garlic to the skillet. Saute for 1 minute.
  4. Add the chicken broth to the skillet, and bring to a boil, scraping up the browned bits from the bottom of the skillet.
  5. Stir in hot sauce, turn heat down to low and simmer for 2 minutes.
  6. Return the chicken pieces to the skillet and add the lemon juice. Toss to coat. Sprinkle with fresh parsley.
Deglazing the skillet with chicken broth.

🥄 Equipment

Large skillet

Cutting board

Chef knife

Flat head wooden spoon

🥫Storage

Store any leftovers in an airtight container in the fridge up to 3 days and in the freezer up to 3 months.

Adding hot sauce to chicken broth.

🥄 Equipment

Large skillet

Cutting board

Chef knife

Flat head wooden spoon

🥫Storage

Store any leftover garlic butter chicken bites in an airtight container in the fridge up to 3 days and in the freezer up to 3 months.

A bowl of golden brown garlic butter chicken bites sprinkled with fresh parsley.

📖 Variations

  • Substitute 2 teaspoons garlic powder for the fresh garlic.
  • Sprinkle the top of the chicken bites with red pepper flakes to add a little heat.
  • Stir 1 tablespoon of honey in with the sauce ingredients.

💭 Pro Tip

It is an important thing to not overcook the chicken. These chicken bites will cook fast over high heat, This allows the chicken to cook quickly and not become tough while still allowing the outside to become golden brown.

📚 Related Recipes

Keto Sesame Chicken is a great chinese recipe to make right at home that is low carb.

These Bacon Wrapped Butternut Squash Bites make great party appetizers.

Crunchy Tuna Roll Bites make a great lunch.

Garlic Butter Chicken Bites on a plate with asparagus and bread.

🍽 Serve with...

Serve Garlic Butter Chicken Bites lemon slices and a side dish of asparagus or green beans, cauliflower rice or regular rice, and bread (for dipping into the sauce).


Don't forget to check out my Amazon storefront for some of my favorite products!

When you make this recipe, please comment below and let me know what you think. I'd love it if you tag me on Instagram @grumpyshoneybunch or #grumpyshoneybunch so I can see your photos!

If you love this recipe, please leave a ⭐⭐⭐⭐⭐ rating

📖 Recipe

Featured Image for Garlic Butter Chicken Bites.

Garlic Butter Chicken Bites

Shelby Law Ruttan
Bite-sized pieces of chicken with a golden brown crust are coated with a rich garlic butter sauce with a punch of lemon.
4.80 from 5 votes
Prevent your screen from going dark
Print FREE recipe card with your email address Pin Recipe Save Go to Collections
Prep Time 5 minutes mins
Cook Time 10 minutes mins
Total Time 15 minutes mins
Course Keto Main Dish
Cuisine American
Servings 4
Calories 287 kcal

Equipment

  • Large skillet
  • cutting board
  • chef knife
  • Flat head wooden spoon

As an Amazon Associate I earn from qualifying purchases.

Ingredients
  

  • 1½ pounds chicken , cut into bite sized pieces
  • 1 teaspoon all purpose seasoning
  • ½ teaspoon hot sauce
  • 4 tablespoons butter divided
  • 4 large garlic cloves
  • ½ cup chicken broth
  • 2 tablespoons lemon juice
  • 1 teaspoon hot sauce
  • 1 tablespoons fresh parsley , chopped

Instructions
 

  • In a large skillet over medium-low heat, melt 2 tablespoons butter until bubbly. Add the chicken and turn the heat up to medium-high.
  • Cook the chicken, tossing frequently, for 7 minutes, until chicken is golden brown on the outside.
  • Remove the chicken bites from the skillet and add the remaining butter and garlic to the skillet. Saute for 1 minute.
  • Add the chicken broth to the skillet, and bring to a boil, scraping up the browned bits from the bottom of the skillet.
  • Stir in hot sauce, turn heat down to low and simmer for 2 minutes. Return the chicken pieces to the skillet and add the lemon juice. Toss to coat. Sprinkle with fresh parsley.

Nutrition

Calories: 287kcalCarbohydrates: 2gProtein: 16gFat: 24gSaturated Fat: 11gPolyunsaturated Fat: 3gMonounsaturated Fat: 8gTrans Fat: 1gCholesterol: 92mgSodium: 297mgPotassium: 199mgFiber: 1gSugar: 1gVitamin A: 552IUVitamin C: 8mgCalcium: 21mgIron: 1mg
Keyword Garlic Butter Chicken Bites
Tried this recipe?Mention @grumpyshoneybunch or tag #grumpyshoneybunch!

Cashew Shrimp Stir Fry

June 10, 2022 by Shelby Law Ruttan 6 Comments

Plated cashew shrimp in a bowl with white rice, sesame seeds and fresh chopped parsley.

Tender shrimp and crunchy cashews come together in this quick and flavorful Cashew Shrimp stir fry. Coated in a sticky homemade brown sauce, this Chinese takeout favorite is easy to make at home in under 30 minutes.

Close up of sticky cashew shrimp garnished with sesame seeds and chopped parsley next to a serving of white rice.

I love ordering shrimp with cashew nuts from our favorite Chinese restaurant, but this homemade version has become a go-to. It reminds me of the sweet, tangy flavor in my Vietnamese Caramel Chicken, but with chicken instead of shrimp.

[feast_advanced_jump_to]

Cashew Shrimp Fast Facts

  • Total time: Under 30 minutes (only 10 minutes of active stir-frying)
  • Sauce Ratios: A balanced mix of thick hoisin sauce, sweet maple syrup, savory soy sauce, and tangy rice vinegar.
  • Pro Tip: Roast the raw cashews in an air fryer or oven at 400°F for 3-5 minutes until golden and fragrant before tossing them with the shrimp.

Why You'll Love This Cashew Shrimp Recipe

Quick & Easy: This 10-minute cashew shrimp stir fry is ideal for busy weeknights.

Family friendly: Everyone loves the combination of sweet, savory sauce with shrimp and cashews.

Healthier than takeout: No breading or deep frying needed. Just simple stir-frying.

Key Ingredients

Overhead view of ingredients for cashew shrimp including cashews, minced garlic, soy sauce, and brown sauce in measuring cups.

Large raw shrimp: Peeled and deveined, tails on or off, depending on preference. Cooks fast and holds the sauce well.

Raw cashews: Toasted to bring out their rich, nutty flavor and perfect crunch.

Hoisin sauce: A thick, sweet and savory base. Think of it as Asian style BBQ sauce.

Maple syrup: My sweetener of choice for a mellow, caramel-like flavor.

Soy sauce: Adds salt and depth.

Rice vinegar: Brightens the sauce with just the right touch of acidity.

Fresh ginger and garlic: Classic aromatics that add depth and freshness.

Cilantro and sesame seeds: Used as a garnish for extra flavor and presentation

Lightly browned shrimp seasoned with black pepper in a stainless steel skillet.

Ingredient Substitutions

Honey or brown sugar instead of maple syrup for sweetness.

Coconut aminos or tamari sauce in place of soy sauce for a lower-sodium or gluten free option.

Green onions instead of cilantro for garnish.

Variations

Stir in 1 cup chopped red bell peppers or water chestnuts for added texture.

Add ½ to 1 teaspoon red pepper flakes if you like a little heat.

Swap shrimp for chicken breast or tofu if you want to switch up the protein

Thick glossy garlic sauce simmering in a pan with bits of minced garlic throughout.

Top Tips

  • Toast the cashews in an air fryer or oven at 400°F for 3-5 minutes, until golden and fragrant.
  • Don't overcook the shrimp. They should be just pink and opaque to stay juicy.
  • For even more sauce, double the sauce ingredients and simmer slightly longer to thicken.

Storage

Place leftovers in an airtight container and refrigerate for up to 4 days. Reheat gently on the stove or in the microwave until warmed through.

Cooked shrimp and whole cashews in a skillet with sticky brown garlic sauce.

Serve with...

This cashew shrimp stir fry is best served hot over steamed white rice, cauliflower rice, zucchini or rice noodles.

More Quick and Easy Dinner Recipes

  • Venison Stir Fry Recipe.
  • Old Bay Shrimp Boil
  • Garlic Shrimp Zoodles
  • Coconut Milk Shrimp Curry
  • Longevity Noodles with Shrimp and Ginger
Cashew shrimp in a skillet coated in glossy sauce and sprinkled with sesame seeds and chopped herbs.

When you make this recipe for Cashew Shrimp, please comment below and let me know what you think. I'd love it if you tag me on Instagram @grumpyshoneybunch or #grumpyshoneybunch so I can see your photos!

If you love this recipe, please leave a ⭐⭐⭐⭐⭐ rating

📖 Recipe

Plated cashew shrimp in a bowl with white rice, sesame seeds and fresh chopped parsley.

Cashew Shrimp

Shelby Law Ruttan
Cashew Shrimp is a quick and easy Chinese stir fry made with tender shrimp and crunchy toasted cashews tossed in a sweet hoisin-based sauce. It's ready in minutes and perfect for weeknight dinners or when you're craving shrimp stir fry with a takeout twist.
4.83 from 17 votes
Prevent your screen from going dark
Print FREE recipe card with your email address Pin Recipe Save Go to Collections
Prep Time 5 minutes mins
Cook Time 10 minutes mins
Total Time 15 minutes mins
Course Main Course
Cuisine Chinese
Servings 4
Calories 552 kcal

Equipment

  • Large skillet
  • Flat head wooden spoon

As an Amazon Associate I earn from qualifying purchases.

Ingredients
  

  • 1 pound large shrimp
  • 1 tablespoon olive oil
  • 1 cup cashew nuts , roasted
  • ⅓ cup hoisin sauce
  • 1 tablespoons soy sauce
  • 2 tablespoons maple syrup
  • 1 tablespoon rice vinegar
  • 2 cloves garlic , minced
  • 1 teaspoon fresh ginger , minced

Instructions
 

  • In a small bowl, mix together the hoisin sauce, maple syrup, soy sauce, rice vinegar, ginger, and garlic. Stir to combine and set aside.
  • In a large skillet, heat the oil until hot. Add the shrimp and season with salt and pepper. Stir fry for 7 minutes, or until the shrimp just turn pink.
  • Remove the shrimp from the skillet and add the brown sauce. Cook and stir until the sauce starts to bubble, then cook for 2 minutes, or until sauce thickens.
  • Return the cooked shrimp back to the skillet along with the roasted cashews. Toss to coat with the sauce and remove from heat.

Nutrition

Calories: 552kcalCarbohydrates: 64gProtein: 26gFat: 22gSaturated Fat: 4gPolyunsaturated Fat: 5gMonounsaturated Fat: 11gTrans Fat: 1gCholesterol: 146mgSodium: 2820mgPotassium: 513mgFiber: 4gSugar: 36gVitamin A: 210IUVitamin C: 1mgCalcium: 122mgIron: 4mg
Keyword Cashew Shrimp, Shrimp Cashew Stir Fry, Shrimp with cashew nuts
Tried this recipe?Mention @grumpyshoneybunch or tag #grumpyshoneybunch!

Buffalo Chicken Bowls

June 10, 2022 by Shelby Law Ruttan Leave a Comment

These Buffalo Chicken Bowls are an easy recipe made with fresh veggies, quinoa, and chicken coated in a buffalo ranch dressing. These healthy bowls are perfect for busy weeknights and a great choice for those who love buffalo style meals.

Hero image for Buffalo Chicken Bowl.

My whole family loved this buffalo chicken quinoa bowl! The creamy dressing that coats the chicken has great buffalo hot sauce tamed down with the ranch dressing and is combined fresh crisp veggies to make an easy weeknight dinner.

[feast_advanced_jump_to]

❤️ Why you'll love it

Protein packed: These delicious power bowls are packed with 38 grams of protein.

Meal prep: buffalo bowls can be made ahead of time and stored in meal prep containers for convenience.

Buffalo Chicken Lovers: Buffalo fans will love these flavor packed bowls with all the flavors of buffalo chicken.

Ingredients for buffalo chicken bowl.

🥘 Ingredients

Cooked chicken, you can use chicken breast or chicken thighs. I like to use grilled chicken.

Quinoa, I like to cook mine in chicken broth to add flavor.

Romaine lettuce, makes the bed of the

Cucumbers

Cherry tomatoes

Blue cheese crumbles

Ranch dressing

Buffalo wing sauce

Green onion

Pouring hot sauce over the chicken.
First add the hot sauce.
Pouring the ranch dressing over the chicken mixture.
Ranch sauce is added to the chicken next
Chicken chunks coated with buffalo ranch sauce.
Stir well to combine.
Ingredients for salad assembly Buffalo Chicken Bowl.
Line the ingredients up for assembly to make it easy to put together the salad.

🔪 Instructions

  1. Cook the quinoa according to package instructions.
  2. In a large bowl, toss together the cooked chicken, buffalo sauce, and ranch dressing to coat well.
  3. Place 1 cup of lettuce in the bottom of 4 large shallow bowl.
  4. Top the lettuce with 1 cup of cooked quinoa, the buffalo chicken mixture, cherry tomatoes, diced cucumbers, blue cheese crumbles, and garnish with green onion slices.

🥄 Equipment

Large bowl

Measuring cups

Wooden spoon

🥫Storage

Store any leftovers in separate air tight containers in the fridge up to 4 days.

A bowl with a bed of lettuce topped with quinoa.
1 cup of quinoa adds 8 grams of protein to this salad!

📖 Variations

  • Substitute greek yogurt for the ranch dressing to reduce fat.
  • Substitute brown rice for the quinoa or use cauliflower rice for a low carb keto version.
  • Add black beans, corn kernels, and red onion.
  • Spice the chicken up a little more and add ½ teaspoon chipotle powder to the sauce mixture.
  • Use cheddar or colby jack cheese in place of the blue cheese crumbles.
  • Sprinkle the top of the salad with chopped cilantro leaves in place of the green onion.
  • Celery can be used in place of diced cucumbers.

💭 Tips

  • Assemble the salad on a large wrap and make a sandwich
  • Make a keto low carb buffalo chicken bowl and substitute cauliflower fried rice for the quinoa
  • Make this Air fryer rotisserie chicken and use leftover shredded chicken in place of the grilled chicken
  • To add flavor to the quinoa, cook it in chicken broth instead of water.

📚 Related Recipes

Everyone loves these Buffalo Chicken Sandwiches.

Quinoa fans will love this Southwestern Quinoa Salad with Citrus Dressing.

Low Carb Buffalo Chicken Quesadillas make a quick and delicious lunch.

King Ranch Chicken Casserole is a delicious one dish recipe.

🍽 Serve with...

These Buffalo Chicken Bowls pair up well with your favorite drink or smoothie. These bowls are pretty much a meal on it's own and is very satisfying and filling.

Overhead shot of Buffalo Chicken Salad bowl.
This big satisfying buffalo chicken bowl packs 38 grams of protein in just 1 serving!

🏫 The last word

I love easy dinners and I love them even more when they are made with fresh veggies. Dinner salads are perfect for summertime when it's hot outside and you don't feel like cooking.

These power bowls are perfect for summer. They are packed with so much protein they will satisfy you and they don't require a lot of cooking. You can easily buy a rotisserie chicken or make your own, and use shredded chicken or cube it up like I do. You can also buy precooked chicken found in the deli section of the grocery store.

Buffalo Chicken Bowls

Don't forget to check out my Amazon storefront for some of my favorite products!

When you make this recipe, please comment below and let me know what you think. I'd love it if you tag me on Instagram @grumpyshoneybunch or #grumpyshoneybunch so I can see your photos!

If you love this recipe, please leave a ⭐⭐⭐⭐⭐ rating

📖 Recipe

Buffalo Chicken Bowls

Shelby Law Ruttan
A hearty and satisfying high protein salad for dinner. Buffalo Chicken Bowls are packed with protein and flavor and are perfect for busy weeknights.
5 from 1 vote
Prevent your screen from going dark
Print FREE recipe card with your email address Pin Recipe Save Go to Collections
Prep Time 10 minutes mins
Total Time 10 minutes mins
Course Main Dish
Cuisine American
Servings 4
Calories 518 kcal

Equipment

  • Large bowl
  • Measuring cups
  • Wooden spoon
  • Salad bowls

As an Amazon Associate I earn from qualifying purchases.

Ingredients
  

  • 3 cups cooked chicken , cubed
  • ½ cup hot sauce
  • ¼ cup ranch dressing
  • 8 cups romaine lettuce , chopped
  • 1 cup cherry tomatoes , halved
  • 1 small cucumber , diced
  • 4 tablespoons blue cheese , optional
  • 1 green onion , sliced
  • 4 cups cooked quinoa

Instructions
 

  • Cook the quinoa according to package instructions.
  • In a large bowl, toss together the cooked chicken, buffalo sauce, and ranch dressing to coat well.
  • Place 1 cup of lettuce in the bottom of 4 large shallow bowl.
  • Top the lettuce with 1 cup of cooked quinoa, the buffalo chicken mixture, cherry tomatoes, diced cucumbers, blue cheese crumbles, and garnish with green onion slices.

Nutrition

Calories: 518kcalCarbohydrates: 47gProtein: 38gFat: 20gSaturated Fat: 5gPolyunsaturated Fat: 8gMonounsaturated Fat: 6gCholesterol: 88mgSodium: 1113mgPotassium: 1005mgFiber: 8gSugar: 5gVitamin A: 8588IUVitamin C: 37mgCalcium: 130mgIron: 6mg
Keyword Buffalo Chicken Bowl
Tried this recipe?Mention @grumpyshoneybunch or tag #grumpyshoneybunch!

Weekly Meal Plan 25

June 9, 2022 by Shelby Law Ruttan Leave a Comment

Collage of images for weekly #25 meal plan.

Here is your free Weekly Meal Plan 25 for June 19-23. Each meal includes side dish recommendations, along with a beverage and dessert of the week along with weekend options.

Do you have any requests or special needs? If so, please let me know and I will do what I can to help!

Collage of images for weekly #25 meal plan.
[feast_advanced_jump_to]

🍽️ Meal Planning and Prep Tips

I'm here to share with you recipes to make during the week that aren't hard to make and take little prep. Most feed 4 so if there are just 1 or 2 to feed, you may want to scale down and halve a recipe OR just make a couple of these and enjoy leftovers throughout the week.

This weekly meal plan brings air fryer recipes, grilled recipes, slow cooker, and refurbished recipes made with leftovers!

Here are some shortcuts and tips to help you throughout the week.

Any prep that can be done on Sunday (June 19) is called prep day.

  • Coconut milk shrimp curry is a quick to make recipe, my only recommendation is to take the shrimp out of the freezer in the morning and put it in the fridge. That way, when it is time to finish thawing it under cold water, it will only take seconds.
  • If you plan to serve rice with the shrimp curry, then it would be ideal to make this on prep day and just reheat it when ready to serve. If serving the coconut cauliflower rice, the cauliflower could be chopped on prep day so it is ready to go on Monday night.
  • Make the hamburger rolls on prep day and use any extras throughout the week for lunchtime sandwiches.
  • This meal is super easy and doesn't need much prep. I always buy chicken thighs with the skin on as my family loves the crispy skin.
  • The onions can be made the night before or the day. Then it's as simple as grilling the hot dogs and assembly. The German Potato Salad can be made on prep day and re-warmed in the microwave or eaten room temperature or chilled.
  • Buy a small steak for this pizza, it won't take much to cover the pizza. The steak can be grilled while the pizza is baking, then sliced and added to the top of the pizza with the arugula just before serving.
  • If making the cookies, I would do this on prep day and store in the freezer. Just take out what you want throughout the week.
  • The chicken riggies are SO delicious and this makes a big batch. Serve leftovers throughout the week for lunch, or store in desired serving sizes in the freezer up to 3 months. Just thaw, reheat and serve.

Weekly Meal Plan 25

June 19

Featured image for Coconut Milk Shrimp Curry.

Coconut Milk Shrimp Curry

This delicious Coconut Milk Shrimp Curry is ready in just 30 minutes and is packed with flavor. It goes great over white rice, or if you want to keep it low carb, try this Coconut Cauliflower Rice!

June 20

Loose Meat Sandwich

Loose Meat Sandwiches

This recipe for Loose Meat Sandwiches is similar to sloppy joes, but not as saucy. They are great served in a Homemade Hamburger Bun!

June 21

Featured image for chicken thighs with cilantro sauce.

Chicken Thighs with Cilantro Sauce

This super simple recipe for Chicken Thighs with Cilantro Sauce is bursting with flavor, and its budget friendly too! It's excellent served with a side of Air Fried Asparagus or Cauliflower Fried Rice.

June 22

Bourbon Onion Bacon Hotdogs

Bourbon Onion Bacon Dogs are a great way to fancy up your hot dogs! Serve this with a green side salad, potato chips, or this German Style Potato Salad.

.

June 23

Pesto Steak and Arugula Pizza

You don't need a lot of steak to make this delicious Pesto Steak and Arugula Pizza. I luse steak that I have grilled and a convenient store bought pizza dough. However, you can make your own Homemade Pizza Dough Recipe.

Dessert of the week

Featured image for White Chocolate Macadamia Nut Cookies.

White Chocolate Macadamia Nut Cookies

If your feeding more than two people, I highly recommend doubling this recipe for White Chocolate Macadamia Nut Cookies! They disappear fast.

Cocktail of the week

Featured Image for Recipe for Mango Mojito.

Mango Mojito

Enjoy a refreshing Mango Mojito to wind down the week.

Sunday Brunch

Homemade Pancakes without Baking Powder.

Homemade Pancakes

This is my daughter-in-law's recipe and these Homemade Pancakes without Baking Soda are brown sugar sweet and perfect for making your own McGrilddle! Of course, they are delicious with a pat of butter and maple syrup as well!

Sunday Supper

Featured Image for Creamy Chicken Riggies

Creamy Chicken Riggies

Make Sunday special with this recipe for Chicken Riggies. They are a little spicy, creamy, and out of this world delicious. Be sure to serve it with some delicious Italian Bread.

Grumpy's Honeybunch Shopping List

Download Shopping List
Printable and downloadable grocery list.

Related Posts

You must use the category name, not a URL, in the category field.

Don't forget to check out my Amazon storefront for some of my favorite products!

When you make these recipes, please comment below and let me know what you think. I'd love it if you tag me on Instagram @grumpyshoneybunch or #grumpyshoneybunch so I can see your photos!

Recommended

  • A blue plate filled with shrimp fried rice.
    Shrimp Fried Rice
  • English Muffin Pizzas on an air fryer tray topped with mushrooms, red peppers, onions, and a fresh basil sprig.
    English Muffin Pizzas (Air Fryer or Oven)
  • A white bowl with blue design filled with cucumber kimchi with a pair of chopsticks picking up some pieces of cucumber.
    Cucumber Kimchi
  • A completed Grinch charcuterie board featuring layers of pepperoni, cheese cubes, and green grapes shaped like the Grinch's face with rosemary eyebrows, cheese and raisin eyes, and a small red heart nose.
    Grinch Charcuterie Board

Homemade Strawberry Syrup

June 9, 2022 by Shelby Law Ruttan Leave a Comment

Clear glass bottle filled with homemade strawberry syrup, with fresh strawberries blurred in the background.

Sweet, fruity, and versatile, Homemade Strawberry Syrup is a simple recipe that turns fresh berries into a flavorful topping or mixer. It's perfect for drizzling over breakfast pancakes, ice cream, or stirring into drinks.

Clear glass bottle filled with homemade strawberry syrup, with fresh strawberries blurred in the background.

This easy recipe reminds me of summer mornings when my mom would make pancakes and would always have some kind of fruit syrup or sauce on the table. If you'e tried my Strawberry Rhubarb Compote or Rhubarb Simple Syrup, you'll love how this strawberry syrup adds that same homemade touch to your meals.

[feast_advanced_jump_to]

Why You'll Love This Recipe

Simple process: just a few ingredients and under 20 minutes of simmering.

Fresh flavor: bursting with real strawberry taste, enhanced with a touch of extract.

Multi-use: works as a pancake syrup, dessert topping, or cocktail mixer.

Key Ingredients for Strawberry Syrup

Measured ingredients including sliced strawberries in a measuring cup, a cup of sugar and a cup of water on a marble surface.
  • Strawberries: fresh berries bring natural sweetness and a bright color.
  • Granulated sugar: balances the tartness of the berries.
  • Strawberry extract: deepens the berry flavor, making the syrup more concentrated.

Ingredient Substitutions

  • Brown sugar instead of granulated sugar for a richer, caramel like sweetness.
  • Frozen strawberries can be used when fresh berries aren't in season.
  • Vanilla extract in place of strawberry extract for a softer, rounded flavor.
Sliced strawberries simmering in a saucepan with a wooden spoon.

Variations for Strawberry Syrup

  • Citrus twist: add a splash of lemon or orange juice while simmering.
  • Spiced syrup: simmer with a cinnamon stick or a few cloves for warmth.
  • Berry blend: mix in raspberries or blueberries for a mixed fruit syrup.

Tips for the Best Strawberry Syrup

  • Mash gently: use a potato masher to help release juices without over-pureeing.
  • Strain well: press with the back of a spoon to get every drop of syrup.
  • Cool completely: let the syrup rest before storing so it thickens properly.
Cooked strawberry mixutre being poured through a strainer to separate the liquid for syrup.

How to Store

Store the strawberry syrup in an airtight container in the fridge up to 2 weeks or in a freezer-safe container up to 3 months.

Serve With...

Try this syrup drizzled over your favorite pancakes, spooned onto rice pudding, or as a topping for Strawberry Stuffed French toast.

Overhead view of a glass bottle filled with homemade strawberry syrup, with a bowl of strawberries in the background.

More Strawberry Recipes You'll Love

If you enjoy fruity recipes, you might also like my Strawberry Cheesecake Parfait, Strawberry Cupcakes, Chocolate Strawberry Cream Puff Bites, and Berry Smoothie Bowl.

When you make this recipe, please comment below and let me know what you think. I'd love it if you tag me on Instagram @grumpyshoneybunch or #grumpyshoneybunch so I can see your photos!

If you love this recipe, please leave a ⭐⭐⭐⭐⭐ rating

📖 Recipe

Clear glass bottle filled with homemade strawberry syrup, with fresh strawberries blurred in the background.

Homemade Strawberry Syrup

Shelby Law Ruttan
This homemade strawberry syrup is a quick and flavorful recipe that turns ripe strawberries into a sweet topping or drink mixer you'll use again and again.
5 from 1 vote
Prevent your screen from going dark
Print FREE recipe card with your email address Pin Recipe Save Go to Collections
Prep Time 5 minutes mins
Cook Time 10 minutes mins
Total Time 15 minutes mins
Course Condiments
Cuisine American
Servings 12
Calories 70 kcal

Equipment

  • Medium saucepan
  • Wooden spoon
  • Potato masher , or immersion blender
  • Fine Mesh Strainer

As an Amazon Associate I earn from qualifying purchases.

Ingredients
  

  • 1½ cups sliced strawberries
  • 1 cup granulated sugar
  • ½ cup water
  • ½ teaspoon strawberry extract

Instructions
 

  • Place the strawberries, sugar, and water in a medium saucepan over medium heat. Bring to a boil and then reduce heat to simmer using a potato masher to break the berries down as they cook.
  • Simmer over low heat for 15 minutes, or until the berries are mushy and sauce has thickened slightly. Stir in the strawberry extract.
  • Strain the syrup using a fine mesh sieve into a small bowl, being sure to press with the back of a spoon to get all the juice without any of the fruit pulp.
  • Transfer the syrup to an airtight container and allow to cool completely. Store in the refrigerator.

Nutrition

Serving: 2tablespoonsCalories: 70kcalCarbohydrates: 18gProtein: 0.1gFat: 0.1gSaturated Fat: 0.003gPolyunsaturated Fat: 0.03gMonounsaturated Fat: 0.01gSodium: 1mgPotassium: 28mgFiber: 0.4gSugar: 18gVitamin A: 2IUVitamin C: 11mgCalcium: 3mgIron: 0.1mgNet Carbohydrates: 18g
Keyword easy strawberry syrup, fresh strawberry syrup, Homemade Strawberry Syrup, strawberry dessert topping, Strawberry Syrup Recipe, syrup for pancakes
Tried this recipe?Mention @grumpyshoneybunch or tag #grumpyshoneybunch!

Coconut Cauliflower Rice

June 8, 2022 by Shelby Law Ruttan Leave a Comment

Feature image for coconut cauliflower rice.

This creamy Coconut Cauliflower Rice is a keto recipe full of coconut flavor without all the carbs from regular rice. It is a simple side dish has the perfect balance of sweet and savory and perfect to serve with any of your favorite keto Asian dish.

Cauliflower coconut rice will be one of your new favorite ways to enjoy cauliflower rice recipes. It is the perfect way to get extra veggies in the diet and a great addition to your menu.

Coconut Cauliflower Rice in a gray bowl with chopped cilantro sprinkled on top.
The flavor of creamy coconut cauliflower rice is enhanced with a touch of sweetener and salt.

❤️ Why you'll love it

✔️ It is another delicious way to enjoy this versatile veggie that is the perfect addition to a low-carb diet.

✔️ Each serving is only 4 net carbs and is full of creamy tropical flavors!

✔️ It is a healthy side dish made with simple ingredients and a great way to get kids to eat cauliflower!

Chopped cauliflower on a green cutting board.
Hand chop the cauliflower or use a food processor to roughly chop the florets into riced pieces.

🥘 Ingredients

1 Head of cauliflower, riced

Full-fat coconut milk

Powdered sweetener (optional) and salt, to balance the flavors

Cilantro

🔪 Instructions

  1. Add the riced cauliflower and coconut milk to a large skillet. Season with salt and sugar and bring to a boil over medium high heat.
  2. Turn the heat down to medium low and simmer for 10 minutes, until the cauliflower is tender.
Ingredients for coconut rice.
Just 3 simple ingredients to make this keto coconut rice recipe!

🥄 Equipment

Chef knife

Cutting board

Large sauté pan

Wooden spoon

🥫Storage

Store any leftover coconut cauliflower rice in an airtight container in the fridge up to 3 days.

📖 Variations

Stir in 1 teaspoon fresh lime juice and serve with a squeeze of lime zest.

Add ¼ teaspoon coconut extract for extra coconut flavor.

Sprinkle with unsweetened toasted coconut flakes for added texture.

To reduce the amount of fat, use lite coconut milk in place of the full fat coconut milk.

Riced cauliflower and coconut milk simmering on the stove.
The riced cauliflower and coconut milk simmers uncovered until cauliflower is tender and coconut milk has reduced.

💭 Tips

Save time and use frozen cauliflower rice instead of fresh cauliflower rice. It does not need to be thawed, just place it in the dish with the coconut milk and proceed as directed.

📚 Related Recipes

This Cauliflower Fried Rice makes a great base to any bowl recipe.

Keto Pork Fried Rice is packed with flavor and protein.

The browned butter in this recipe makes this Garlic Mashed Cauliflower irresistibly delicious!

🍽 Serve with...

Serve this coconut cauliflower rice with a side of Keto sesame chicken or Coconut Milk Shrimp Curry. It also is a great base for burrito bowls and to serve with stir fries.

🏫 The last word

I like to use canned coconut milk that is full fat. Coconut cream can be used in place of coconut milk, but I recommend reducing the amount of cream to keep the saturated fat down.


Don't forget to check out my Amazon storefront for some of my favorite products!

When you make this recipe, please comment below and let me know what you think. I'd love it if you tag me on Instagram @grumpyshoneybunch or #grumpyshoneybunch so I can see your photos!

If you love this recipe, please leave a ⭐⭐⭐⭐⭐ rating

📖 Recipe

Feature image for coconut cauliflower rice.

Coconut Cauliflower Rice

Shelby Law Ruttan
A keto recipe for coconut rice without the carbs. Just 3 ingredients and 10 minutes on the stove and you will have a delicious cauliflower side dish recipe for all your keto take out favorites.
5 from 2 votes
Prevent your screen from going dark
Print FREE recipe card with your email address Pin Recipe Save Go to Collections
Prep Time 10 minutes mins
Cook Time 10 minutes mins
Total Time 20 minutes mins
Course Side Dish
Cuisine Thai
Servings 6
Calories 135 kcal

As an Amazon Associate I earn from qualifying purchases.

Ingredients
  

  • 1 head cauliflower
  • 1½ cups coconut milk
  • ½ teaspoon salt
  • 1 tablespoon classic monkfruit
  • 1 tablespoon chopped cilantro , optional

Instructions
 

  • Add the riced cauliflower and coconut milk to a large skillet. Season with salt and sugar and bring to a boil over medium high heat.
  • Turn the heat down to medium low and simmer for 10 minutes, until the cauliflower is tender.
  • Remove from heat and garnish with cilantro (if using).

Nutrition

Calories: 135kcalCarbohydrates: 6gProtein: 3gFat: 12gSaturated Fat: 11gPolyunsaturated Fat: 1gMonounsaturated Fat: 1gSodium: 230mgPotassium: 411mgFiber: 2gSugar: 2gVitamin C: 47mgCalcium: 31mgIron: 2mg
Keyword Coconut Cauliflower Rice
Tried this recipe?Mention @grumpyshoneybunch or tag #grumpyshoneybunch!

Coconut Milk Shrimp Curry

June 7, 2022 by Shelby Law Ruttan 1 Comment

Featured image for Coconut Milk Shrimp Curry.

Coconut milk shrimp curry is a delicious low carb keto shrimp recipe packed with flavor. It is a main dish recipe to make when you are craving take out but don't want to spend the money!

Coconut Shrimp Curry On a plate with Cauliflower Fried Rice.

This is one of the best shrimp recipes. It is low carb and keto friendly, making it the perfect meal with big flavor for the whole family to enjoy. The combination of spicy sweet flavors coating juicy shrimp is filling and comforting without all the carbs.

[feast_advanced_jump_to]

❤️ Why you'll love it

Easy recipe: It is an easy coconut shrimp curry recipe that is ready in just 30 minutes.

Low carb: 4 generous servings with only 10 net carbs per serving.

Packed with protein: There is plenty of delicious plump shrimp in each serving, with 19 grams of protein per serving.

Ingredients for curry vegetable sauce.
Vegetables and spice for sauce from top to bottom clockwise: tomatoes, bell pepper, jalapeno, coconut oil, curry powder, black pepper, salt, ginger, garlic, and onion.

🥘 Ingredients

Large raw shrimp, I used 21-25 count, but feel free to use jumbo-sized shrimp

Coconut oil, used for flavor

Full-fat Coconut milk, I buy this in cans and it is unsweetened.

Green bell peppers, added for sweetness

Jalapeno pepper, added for heat

Onion, added for flavor

Garlic cloves, fresh garlic is best, but you can also buy jarred minced garlic.

Fresh ginger

Tomatoes

Curry powder, this is a yellow powder.

Hot sauce, I like to use chili garlic sauce

Golden monkfruit, this is a sugar free version of brown sugar.

Salt and black pepper

Onions, Peppers, and tomatoes in a skillet with hot oil.

🔪 Instructions

  1. In a large hot skillet over medium-high heat, add the coconut oil and allow it to melt. Add the bell peppers, jalapeno, onion, garlic, ginger, and tomatoes to the oil and saute for 5 minutes, until vegetables have begun to soften. Stir in the curry powder, hot sauce (if using), and black pepper.
  2. Add the shrimp to the vegetable mixture and cook for 5 minutes, stirring often to cook shrimp on all sides. Remove the shrimp to a small bowl and set aside.
  3. Add the chicken broth and coconut milk to the vegetables and bring to a simmer. Reduce to medium heat and simmer for 15 minutes, until stock begins to reduce.
  4. Return the shrimp to the vegetable mixture and sprinkle with fresh cilantro. Simmer for 5 minutes, until shrimp are cooked through.
Shrimp cooking in the veggies with curry sauce.
Shrimp are cooked in a curried veggie mix to add flavor to the shrimp.

🥄 Equipment

Measuring cups

Cutting board

Chef knife

Large skillet

Storage bowl

Pouring chicken broth into the cooked vegetables.
Chicken broth is added to give body and flavor to the curry sauce.

🥫Storage

Store any leftover curry shrimp in an airtight container in the fridge up to 3 days or in the freezer up to 3 months.

📖 Variations

  • Substitute 2 teaspoons garlic paste for the minced ginger.
  • A tablespoon of red curry paste can be substituted for the curry powder.
Curry simmering in a skillet.
Keto curry sauce simmers on the stove top until it reduces in volume and thickens.

💭 Tips

  • If you are cooking for only 1 or two, this recipe is easy to portion out into 4 servings and store them in the freezer (up to 3 months) for easy premade lunch or dinner.
  • For a thicker curry, allow the coconut sauce to simmer until it has reduced to desired thickness.

📚 Related Recipes

This Coconut Curry Tofu Bowl is a delicious vegetarian recipe.

Chickpea and Spinach Curry is packed with curry flavor.

Try this easy to make Curried Butternut Squash Naan Pizza for your next pizza night.

My whole family loves this Chinese restaurant favorite Honey Walnut Shrimp recipe

A plate with shrimp in a curry sauce on top of coconut cauliflower rice.
Succulent large shrimp in a creamy coconut curry sauce makes the perfect keto dinner.

🍽 Serve with...

This coconut curry shrimp recipe is delicious served over top of coconut cauliflower rice and if carbs aren't an issue, it can be served over jasmine rice or rice noodles.


Don't forget to check out my Amazon storefront for some of my favorite products!

When you make this recipe, please comment below and let me know what you think. I'd love it if you tag me on Instagram @grumpyshoneybunch or #grumpyshoneybunch so I can see your photos!

If you love this recipe, please leave a ⭐⭐⭐⭐⭐ rating

📖 Recipe

Featured image for Coconut Milk Shrimp Curry.

Coconut Milk Shrimp Curry

Shelby Law Ruttan
A keto curry shrimp recipe packed with flavor, this coconut milk shrimp curry is sweet and spicy and a satisfying dinner.
4.88 from 8 votes
Prevent your screen from going dark
Print FREE recipe card with your email address Pin Recipe Save Go to Collections
Prep Time 10 minutes mins
Cook Time 20 minutes mins
Total Time 30 minutes mins
Course Keto Main Dish
Cuisine Asian
Servings 4
Calories 319 kcal

Equipment

  • Measuring cups
  • cutting board
  • chef knife
  • Large skillet
  • Storage bowl

As an Amazon Associate I earn from qualifying purchases.

Ingredients
  

  • 1 pound large shrimp
  • 1 tablespoon coconut oil
  • 1 large tomato , diced
  • 1 green bell pepper , seeded and diced
  • ¾ cup onion , diced
  • 1 tablespoon minced garlic
  • ½ tablespoon minced ginger
  • 1 tablespoon curry powder
  • 1 teaspoon hot sauce
  • ½ teaspoon black pepper
  • 2 cups chicken broth
  • 1½ cups full-fat coconut milk
  • 1 tablespoon golden monkfruit (optional)
  • 2 tablespoon cilantro , chopped (optional)

Instructions
 

  • In a large hot skillet over medium-high heat, add the coconut oil and allow it to melt. Add the bell peppers, jalapeno, onion, garlic, ginger, and tomatoes to the oil and saute for 5 minutes, until vegetables have begun to soften. Stir in the curry powder, hot sauce (if using), and black pepper.
  • Add the shrimp to the vegetable mixture and cook for 5 minutes, stirring often to cook shrimp on all sides. Remove the shrimp to a small bowl and set aside.
  • Add the chicken broth and coconut milk to the vegetables and bring to a simmer. Reduce to medium heat and simmer for 15 minutes, until stock begins to reduce.
  • Return the shrimp to the vegetable mixture and sprinkle with fresh cilantro. Simmer for 5 minutes, until shrimp are cooked through.

Nutrition

Calories: 319kcalCarbohydrates: 12gProtein: 19gFat: 23gSaturated Fat: 19gPolyunsaturated Fat: 1gMonounsaturated Fat: 1gTrans Fat: 1gCholesterol: 145mgSodium: 1121mgPotassium: 579mgFiber: 2gSugar: 4gVitamin A: 714IUVitamin C: 35mgCalcium: 108mgIron: 4mg
Keyword Coconut Milk Shrimp Curry, Easy curry shrimp recipe, Keto curry
Tried this recipe?Mention @grumpyshoneybunch or tag #grumpyshoneybunch!

Keto Sesame Chicken

June 5, 2022 by Shelby Law Ruttan Leave a Comment

Featured image for Keto Sesame Chicken recipe.

Keto Sesame Chicken is your favorite chinese restaurant meal for a low carb diet made in your own kitchen! It is a great recipe to make the next time you have the craving for take out and is super easy to make.

This easy dinner is made with real food ingredients and is ready to have on the table in just 20 minutes. It is a quick and easy to make healthy meal that the whole family will love.

Keto Sesame Chicken sprinkled with sesame seeds in a bowl.
[feast_advanced_jump_to]

❤️ Why you'll love it

✔️ This homemade chinese food recipe has just 6 grams of net carbs per serving

✔️ It is a delicious meal made right in the comfort of your home!

✔️ It is made with ingredients you probably already have on hand.

Ingredients for cooking chicken pieces.
Chicken pieces are marinated in a cornstarch batter before frying.

🥘 Ingredients

As an Amazon Associate I earn from qualifying purchases.

Boneless skinless chicken thighs or boneless skinless chicken breasts,cut into 1-inch pieces.

Large egg

Cornstarch or Arrowroot powder

Olive oil

Soy sauce

Toasted sesame oil, added for sesame flavor

Sugar free maple syrup, takes the place of honey in the original recipe

Brown sugar substitute, adds a deeper flavor

Rice wine vinegar

Garlic Cloves 

Sugar free ketchup

Toasted sesame seeds

Keto friendly sesame sauce ingredients

🔪 Instructions

  1. Place the egg and cornstarch in a large bowl and whisk until foamy. Transfer the chicken pieces to the egg mixture and toss to coat. Set aside.
  2. In a medium bowl, whisk together the soy sauce, sesame oil, syrup, brown sugar substitute, rice wine vinegar, garlic cloves, and ketchup. Set aside.
  3. Heat the olive oil in a large skillet over medium high heat until hot. Remove the chicken pieces from the egg mixture using a slotted spoon, allowing the excess batter to drip off.
  4. Place the chicken in the skillet and cook over medium-high heat for 7 minutes, stirring often, until chicken is browned and cooked thru. Transfer the cooked chicken from the skillet to a bowl and set aside.
  5. Pour the sesame sauce into the hot skillet and whisk, making sure to scrape up any browned bits of chicken cooked onto the bottom of the skillet. Bring to a boil and simmer for 3 minutes, or until the sauce has reduced and thickened.
  6. Return the chicken to the skillet and toss to coat with the sauce. Sprinkle with the toasted sesame seeds prior to serving.
Browned pieces of chicken in a bowl.

🥄 Equipment

Large skillet

Mixing bowls

Wooden Spoon

Spatula

Measuring cups

Measuring spoons

🥫Storage

Store any leftovers in an airtight container in the fridge up to 4 days.

Sesame sauce simmering in a skillet.

📖 Variations

Substitute coconut aminos or liquid aminos for the regular soy sauce

Avocado oil can be substituted for the olive oil

Spice the sauce up with 1 teaspoons red pepper flakes and sprinkle with green onions before serving.

Use 1 teaspoon garlic powder in place of the cloves.

💭 Tips

Check the rice wine vinegar bottle before buying. It should be unseasoned rice vinegar with zero carbs. If it is seasoned rice vinegar, it likely has sugar in it.

Cooked chicken pieces on top of the sesame sauce in the skillet.
Toss the cooked chicken pieces in the sesame sauce just before serving.

📚 Related Recipes

This Keto Pork Fried Rice is another great make at home take out recipe.

Honey Sesame Chicken is battered and fried chicken pieces in a honey sesame sauce.

🍽 Serve with...

Serve this Keto Sesame Chicken with in lettuce wraps or over shirataki noodles or with a side of cauliflower rice, green beans, or broccoli.

🏫 The last word

I used cornstarch in this recipe because it is the best way to coat the chicken before frying. One tablespoon has 3 net carbs and between 6 servings, that makes it only ½ carb from cornstarch per serving.

Cornstarch is not considered keto. However, there is so little in the recipe that I have no problem using it. If cornstarch does kick you out of ketosis, I recommend substituting Xanthan gum.

Keto Sesame Chicken

Don't forget to check out my Amazon storefront for some of my favorite products!

When you make this recipe, please comment below and let me know what you think. I'd love it if you tag me on Instagram @grumpyshoneybunch or #grumpyshoneybunch so I can see your photos!

If you love this recipe, please leave a ⭐⭐⭐⭐⭐ rating

📖 Recipe

Featured image for Keto Sesame Chicken recipe.

Keto Sesame Chicken

Shelby Law Ruttan
Keto Sesame Chicken is a low carb take on a Chinese Restaurant favorite without the carbs and sugar! Super easy to make, this keto chicken recipe is one the whole family will love.
5 from 3 votes
Prevent your screen from going dark
Print FREE recipe card with your email address Pin Recipe Save Go to Collections
Prep Time 10 minutes mins
Cook Time 10 minutes mins
Total Time 20 minutes mins
Course Keto Main Dish
Cuisine Chinese
Servings 6
Calories 203 kcal

Equipment

  • Large skillet
  • mixing bowls
  • Wooden spoon
  • Spatula
  • Measuring cups
  • Measuring spoons

As an Amazon Associate I earn from qualifying purchases.

Ingredients
  

For the chicken

  • 1.5 pounds boneless skinless chicken thighs , cut into bite sized pieces
  • 1 large eggs , whisked
  • 1 tablespoon cornstarch
  • 1 tablespoon olive oil

For the sauce

  • 3 tabelspoons soy sauce
  • ¼ cup sugar free maple syrup
  • 2 tablespoons golden monkfruit
  • 2 tablespoons rice wine vinegar
  • 1 teaspoon toasted sesame oil , optional
  • 2 cloves garlic minced
  • ¼ cup sugar free ketchup
  • 2 tablespoons toasted sesame seeds

Instructions
 

  • Place the egg and cornstarch in a large bowl and whisk until foamy. Transfer the chicken pieces to the egg mixture and toss to coat. Set aside.
  • In a medium bowl, whisk together the soy sauce, sesame oil, syrup, brown sugar substitute, rice wine vinegar, garlic cloves, and ketchup. Set aside.
  • Heat the olive oil in a large skillet over medium high heat until hot. Remove the chicken pieces from the egg mixture using a slotted spoon, allowing the excess batter to drip off.
  • Place the chicken in the skillet and cook over medium-high heat for 7 minutes, stirring often, until chicken is browned and cooked thru. Transfer the cooked chicken from the skillet to a bowl and set aside.
  • Pour the sesame sauce into the hot skillet and whisk, making sure to scrape up any browned bits of chicken cooked onto the bottom of the skillet. Bring to a boil and simmer for 3 minutes, or until the sauce has reduced and thickened.
  • Return the chicken to the skillet and toss to coat with the sauce. Sprinkle with the toasted sesame seeds prior to serving.

Nutrition

Calories: 203kcalCarbohydrates: 3gProtein: 23gFat: 10gSaturated Fat: 2gPolyunsaturated Fat: 2gMonounsaturated Fat: 4gTrans Fat: 0.02gCholesterol: 139mgSodium: 142mgPotassium: 307mgFiber: 0.4gSugar: 1gVitamin A: 73IUVitamin C: 0.3mgCalcium: 43mgIron: 1mgNet Carbohydrates: 3g
Keyword Keto Sesame Chicken
Tried this recipe?Mention @grumpyshoneybunch or tag #grumpyshoneybunch!

Weekly Meal Plan 24

June 3, 2022 by Shelby Law Ruttan Leave a Comment

Collage of images for weekly #24 meal plan.

Here is your free Weekly Meal Plan 24 for June 12-16. Each meal includes side dish recommendations, along with a beverage and dessert of the week along with weekend options.

Do you have any requests or special needs? If so, please let me know and I will do what I can to help!

Collage of images for weekly #24 meal plan.
[feast_advanced_jump_to]

🍽️ Meal Planning and Prep Tips

I'm here to share with you recipes to make during the week that aren't hard to make and take little prep. Most feed 4 so if there are just 1 or 2 to feed, you may want to scale down and halve a recipe OR just make a couple of these and enjoy leftovers throughout the week.

This weekly meal plan brings air fryer recipes, grilled recipes, slow cooker, and refurbished recipes made with leftovers!

Here are some shortcuts and tips to help you throughout the week.

Any prep that can be done on Sunday (June 12) is called prep day.

  • If you have time on prep day, make the waffles for next Sunday and keep them in the freezer. On Sunday morning, they can be reheated in the toaster or in the oven.
  • Make the 4 Bean Salad on prep day to give it time to develop flavor.
  • Make the Pina Colada Pie on prep day and freeze it until the morning of the day you want to enjoy it as dessert. It can be eaten frozen or not frozen. Once it is in the fridge, it should be consumed within 5 days.
  • Be sure to add kitchen twine to the shopping list. You will need it when making the grilled pork tenderloin.
  • The Heirloom tomato pizza uses pesto for sauce. You can make your own homemade basil pesto or try this pistachio pesto. Feel free to purchase pre-made pesto also if it makes it easier. If you make this on prep day, be sure to keep it covered. The pesto has a shelf life in the fridge of one week. It can be stored in the freezer up to 6 months.
  • If you plan to make the Iced Lemon Cookies, I recommend doing this on Sunday and keeping them in the freezer. These are great frozen, but take only a few minutes to thaw out.
  • The Pina Colada Pie is a refrigerator pie, It would be a perfect ending to Sunday's BBQ menu.
  • If you made homemade pesto and froze it, be sure to take it out of the freezer and put it in the fridge on Thursday morning.
  • Make the coleslaw on Saturday night or Sunday morning. You might have cabbage leftover from last week's menu if you made the cabbage rolls, and this is a great use for it!
  • On Saturday night, prepare the berry syrup for Sunday brunch and keep it in an airtight container in the fridge. It can be warmed slightly in the microwave to remove the chill before serving.
  • These Sweet Dinner Rolls are great for making the Slow Cooker BBQ Beef Sandwiches. If you make these on prep day, they can be frozen and pulled out the freezer on the morning.

Weekly Meal Plan 24

June 12

Featured Image for Air Fryer Fish Sticks.

Air Fryer Fish Sticks

A super easy recipe for Air Fryer Fish Sticks! These make a quick and easy dinner. Enjoy them as are or as a sandwich. Serve with a side of 4 Bean Salad with Cilantro Lime Dressing.

June 13

Featured image for Grilled Stuffed Pork Tenderloin.

Grilled Stuffed Pork Tenderloin

Grilled Stuffed Pork Tenderloin makes a delicious meal on the grill and a side of German Style Potato Salad is the perfect side dish!

June 14

Featured Image for Ultimate Burger Bowl.

The Ultimate BUrger Bowl

Everything you love on a burger but in a bowl. Low carb and delicious, The Ultimate Burger Bowl is filling and satisfying. Serve it up with this refreshing Berry Banana Smoothie.

June 15

Easy Pork Street Tacos

Pork Street Tacos

Make these Easy Pork Street Tacos with any leftover Grilled Pork Tenderloin and serve them with a side of Mexican Street Corn Salad. For dessert serve these Iced Lemon Cookies.

June 16

Featured Image for Heirloom Tomato Pizza.

Heirloom Tomato Pizza

Heirloom Tomato Pizza with Pesto Sauce is super fresh and a great summer time pizza for Friday night! Serve this up with a Watermelon Lime-Berry Sangria.

Dessert of the week

Pina Colada Pie

A no bake dessert with the flavors of pineapple and coconut. Pina Colada Pie is cool, delicious and the perfect ending to any meal.

Cocktail of the week

Featured Image for Blue Diamond Cocktail.

Blue Diamond Wine Cocktail

Enjoy a refreshing Blue Diamond Wine Cocktail. It's fruity, bubbly, and a great start to the weekend.

Sunday Brunch

Featured image for classic waffle recipe.

Classic Waffles

Serve these Classic Waffles Recipe with Berry Syrup for brunch along with a side of Venison Breakfast Sausage made in the air fryer.

Sunday Supper

Slow Cooker BBQ Beef Sandwich FI.

Barbecue Beef Sandwiches

Slow Cooker BBQ Beef Brisket Sandwiches are perfect for Sunday supper served up with a dollop of Homemade Coleslaw on top.

Grumpy's Honeybunch Shopping List

Download Shopping List
Printable and downloadable grocery list.

Related Posts

You must use the category name, not a URL, in the category field.

Don't forget to check out my Amazon storefront for some of my favorite products!

When you make these recipes, please comment below and let me know what you think. I'd love it if you tag me on Instagram @grumpyshoneybunch or #grumpyshoneybunch so I can see your photos!

Recommended

You must use the category name, not a URL, in the category field.

Keto Pork Fried Rice

June 2, 2022 by Shelby Law Ruttan Leave a Comment

Featured Image for Keto Pork Fried Rice.

This Keto Fried Rice is a cauliflower rice recipe made to create a low carb version of pork fried rice. It makes a great stir fry side dish without traditional rice that fits the keto diet and one the whole family will love.

This cauliflower fried rice is a great recipe bursting with flavor and is a tasty recipe to serve next time you are craving chinese take out. You can skip the Chinese restaurant and make this recipe right at home in just 15 minutes!

A bowl of fried cauliflower rice with two chopsticks inside of the bowl.
[feast_advanced_jump_to]

❤️ Why you'll love it

✔️ This will become one of your favorite cauliflower rice recipes, allowing you to have chinese take-out at home without all the carbs from regular rice!

✔️ Keto pork fried rice is made with simple ingredients and is the perfect side dish to your favorite keto Chinese food recipes.

✔️ This easy to make recipe has 4 generous servings with 20 grams of protein and 8 net carbs!

Ingredients for Fried Rice Recipe.

🥘 Ingredients

Olive oil, to fry the aromatics and veggies (can also use avocado oil)

Onion and Garlic, for flavor

Frozen mixed vegetables

Cooked pork tenderloin

Ground ginger

Fresh cauliflower rice

Soy sauce or coconut aminos, added for flavor

Green onions, as a garnish

Cooking spray, for scrambling the eggs

Large eggs, to add to the fried rice

Salt and black pepper (optional)

Scrambled eggs in a skillet.
Scrambled eggs add a boost of protein and nutrition to this low carb recipe!

🔪 Instructions

  1. Coat a large skillet with cooking spray and heat over medium heat until hot. Add the eggs and scramble for 2 minutes, until they are just set. Remove the eggs from the skillet and set aside.
  2. Wipe the skillet clean with paper towels and return the skillet to the burner on medium-high heat. Add the oil and heat until hot. Stir the onions and mixed vegetables into the hot oil, stir frying for 2 minutes, until onions begin to soften.
  3. Add the diced pork and ground ginger to the veggie mixture, cook and stir for 1 minute.
  4. Stir in the cauliflower rice and cook for 7 minutes, until rice has slightly browned and softened.
  5. Add the soy sauce and stir to combine. Stir in the scrambled eggs and salt and pepper to taste.
Mixed veggies and diced pork tenderloin sauteing in a skillet.
Leftover pork tenderloin adds protein to this keto side dish.

🥄 Equipment

Large nonstick skillet

Mixing bowls

Measuring cups

Hand whisk, for whisking the eggs

Flat head wooden spoon

🥫Storage

Store any leftover fried rice in an airtight container in the fridge up to 3 days.

📖 Variations

  • Use toasted sesame oil in place of the olive oil.
  • Coconut aminos can be used in place of soy sauce. Be sure it is a keto friendly version as some coconut aminos are high in carbs. My favorite brand is this one.
  • Add a dash of fish sauce for umami flavors to come through.
Adding soy sauce to the fried rice.
Soy sauce (or coconut aminos) is added for flavor.

💭 Tips

  • Make your own cauliflower rice by processing cauliflower florets in the food processor until the cauliflower is broken down into rice sized pieces.
  • If you don't have a food processor, or don't want the rice to be chopped into too small pieces, then use a knife and chop the cauliflower by hand. This adds about 10 minutes to prep time, but if you have the time, and prefer bigger chunks of cauliflower rice, that is the method to take.
  • A box grater is another way to "rice" the cauliflower. Shred the florets on the side of the grater with the largest holes to make riced sized pieces.
  • Other veggies that can be used in place of the mixed veggies are green beans, red pepper, and asparagus to drop the carb count some. You can also reduce carbs more by using just ¼ cup onion.
A bowl of keto pork fried rice with two chopsticks lying across the top of the bowl.

📚 Related Recipes

Try these Garlic Scrambled Eggs with Chickpeas for a high protein vegetarian meal.

Vegetarian Cauliflower Fried Rice has a delicious lime and cilantro combination.

Serve this Grilled Stuffed Pork Tenderloin for a low carb dinner and use the leftovers to make keto fried rice!

🍽 Serve with...

Serve this pork fried rice as a side to keto sesame chicken and steamed broccoli.

Keto Pork Fried Rice

Don't forget to check out my Amazon storefront for some of my favorite products!

When you make this keto fried rice recipe, please comment below and let me know what you think. I'd love it if you tag me on Instagram @grumpyshoneybunch or #grumpyshoneybunch so I can see your photos!

If you love this recipe, please leave a ⭐⭐⭐⭐⭐ rating

📖 Recipe

Featured Image for Keto Pork Fried Rice.

Keto Fried Rice

Shelby Law Ruttan
A keto fried rice made with cauliflower rice, mixed veggies, scrambled eggs and leftover pork tenderloin for a chinese side dish as close to the real thing as you can get and packed with tons of flavor.
5 from 2 votes
Prevent your screen from going dark
Print FREE recipe card with your email address Pin Recipe Save Go to Collections
Prep Time 10 minutes mins
Cook Time 10 minutes mins
Total Time 20 minutes mins
Course Keto Side Dish
Cuisine Chinese
Servings 4
Calories 223 kcal

As an Amazon Associate I earn from qualifying purchases.

Ingredients
  

  • 2 large eggs
  • 4 cups riced cauliflower
  • 2 tablespoons olive oil
  • ⅓ cup diced onion
  • 2 cloves garlic
  • 1 cup diced pork tenderloin
  • ¼ cup frozen mixed vegetables
  • ½ teaspoon ground ginger
  • cooking spray
  • 2 tablespoons soy sauce

Instructions
 

  • Coat a large skillet with cooking spray and heat over medium heat until hot. Add the eggs and scramble for 2 minutes, until they are just set. Remove the eggs from the skillet and set aside.
  • Wipe the skillet clean with paper towels and return the skillet to the burner on medium-high heat. Add the oil and heat until hot. Stir the onions and mixed vegetables into the hot oil, stir frying for 2 minutes, until onions begin to soften.
  • Add the diced pork and ground ginger to the veggie mixture, cook and stir for 1 minute.
  • Stir in the cauliflower rice and cook for 7 minutes, until rice has slightly browned and softened.
  • Add the soy sauce and stir to combine. Stir in the scrambled eggs and salt and pepper to taste.

Nutrition

Calories: 223kcalCarbohydrates: 12gProtein: 20gFat: 11gSaturated Fat: 2gPolyunsaturated Fat: 2gMonounsaturated Fat: 7gTrans Fat: 1gCholesterol: 131mgSodium: 624mgPotassium: 821mgFiber: 4gSugar: 4gVitamin A: 713IUVitamin C: 80mgCalcium: 63mgIron: 2mg
Keyword Keto Fried Rice, Keto Pork Fried Rice
Tried this recipe?Mention @grumpyshoneybunch or tag #grumpyshoneybunch!

German Style Potato Salad

June 2, 2022 by Shelby Law Ruttan 2 Comments

Featured image for German Style Potato Salad.

German Style Potato Salad recipe is made with creamy gold potatoes bathed in a warm bacon dressing. It makes a delicious side dish for potlucks, and barbecues and is packed with sweet, salty, and savory flavors.

German Style Potato Salad in a blue bowl with steam rising from the bowl.

This family favorite German-style potato salad is delicious served warm or cold. The tangy dressing is made with onions cooked in bacon drippings, white vinegar, and sugar for sweetness and acid.

[feast_advanced_jump_to]

❤️ Why you'll love it

✔️ The sweet and tangy warm dressing is a delicious combination with the creamy potatoes.

✔️ It is a warm potato salad recipe that can also be enjoyed cold and is easily portable!

✔️ It is the perfect potato side dish for grilled meats.

Ingredient image for German potato salad.

🥘 Ingredients

Yukon gold potatoes, (also known as yellow potatoes) are waxy potatoes with a creamy texture and are great for boiling. They are creamy and delicious and hold their shape well.

Salt

Garlic cloves

Yellow onions

Thick cut bacon, this is my preferences as I like meatier pieces of bacon. Regular cut bacon will work in this recipe also.

Granulated sugar

White vinegar

Water

Raw diced bacon in a skillet.
Diced bacon is cooked until crips and bacon drippings are used to cook the onions and garlic.

🔪 Instructions

  1. Place potatoes covered in cold water in a large pot over medium high heat and bring to a boil. Cook for 10 minutes, or until the potatoes are just fork tender. Remove the potatoes from the heat and drain. Set aside.
  2. While the potatoes are cooking, heat a large skillet over medium heat until hot. Add the bacon to the hot skillet and cook bacon for 7 minutes, or until bacon is crispy. Remove the bacon from the skillet with a slotted spoon and place the bacon pieces on paper towels to drain.
  3. Add the onions to the bacon grease and cook for 2 minutes. Stir in the garlic into the sautéed onions and cook for 2 minutes longer, until the onions begin to soften. Add the granulated sugar, vinegar, water and water. Cook and stir for 1 minute until dressing begins to thicken.
  4. Place hot potatoes in a large serving bowl and toss with the warm bacon dressing. Stir in the cooked bacon pieces and garnish with fresh parsley (if using).
Diced onion cooking in bacon grease.
Diced onions and garlic are sauteed in bacon grease.

🥄 Equipment

Large pot

Large frying pan

Chef knife

Cutting board

Mixing spoon

Large bowl with lid

🥫Storage

Store leftover potato salad in an airtight container in the fridge up to 4 days.

Adding vinegar to the onion mixture.
Onions and garlic sauteed in bacon grease and simmered with sugar and vinegar make the dressing.

📖 Variations

  • Apple cider vinegar can be used in place of white vinegar.
  • Red onion can be substituted for white onion.
  • Add 2 teaspoons of dijon mustard to the bacon dressing for extra tang.
  • Sprinkle a tablespoon or two for fresh herbs such as parsley, chives, or green onions on top of the salad to garnish.
  • Use vegetable broth or chicken broth for the water for extra flavor.
  • Small red potatoes can be substituted for the gold potatoes.

💭 Top Tip

  • Wash and dice the potatoes into bite sized small pieces then cook them. This way they are ready to just toss with the dressing when warm.
Pouring the bacon dressing over the warm cooked potatoes.
Pouring the warm bacon dressing over the hot potatoes.

📚 Related Recipes

Try this classic potato salad recipe with a mayonnaise based dressing.

This German Chocolate Bundt Cake is a family dessert favorite!

Slow Cooker Pot Roast and Onions is perfect to set and forget!

🍽 Serve with...

Serve this German Potato Salad recipe with a dollop of sour cream, Grilled Stuffed Pork Tenderloin, and a green side salad.

German Style Potato Salad on a plate.

🏫 The last word

An authentic German Potato Salad is made with bacon drippings to make a sweet vinegar dressing and is tossed with warm potatoes and crispy bacon pieces. It is delicious warm, but can be enjoyed at room temperature or cold.

This particular recipe does not have a thickener for the sauce as it does not need one. The dressing absorbs into the potatoes, giving it great flavor. It can be enjoyed cold or easily be reheated in the microwave to enjoy it warm!


Don't forget to check out my Amazon storefront for some of my favorite products!

When you make this German potato recipe, please comment below and let me know what you think. I'd love it if you tag me on Instagram @grumpyshoneybunch or #grumpyshoneybunch so I can see your photos!

If you love this recipe, please leave a ⭐⭐⭐⭐⭐ rating

📖 Recipe

Featured image for German Style Potato Salad.

German Style Potato Salad

Shelby Law Ruttan
This delicious German potato salad recipe is made with tender, creamy gold potatoes and served with warm with a sweet and tangy bacon dressing. It makes the perfect side dish for beef, pork or chicken.
4.72 from 7 votes
Prevent your screen from going dark
Print FREE recipe card with your email address Pin Recipe Save Go to Collections
Prep Time 10 minutes mins
Cook Time 20 minutes mins
Total Time 30 minutes mins
Course Side Dish
Cuisine German
Servings 6
Calories 199 kcal

Equipment

  • Large pot
  • Large skillet
  • chef knife
  • cutting board
  • Mixing spoon
  • Large bowl with lid

As an Amazon Associate I earn from qualifying purchases.

Ingredients
  

  • 3 cups potatoes , peeled and diced
  • 4 slices thick cut bacon , diced
  • ½ cup diced onion
  • 2 cloves garlic chopped
  • ¼ cup white vinegar
  • ¼ cup granulated sugar
  • 2 tablespoons water
  • 1 teaspoon salt (optional)
  • ½ teaspoon black pepper (optional)
  • 2 tablespoon chopped fresh parsley (optional)

Instructions
 

  • Place potatoes covered in cold water in a large pot over medium high heat and bring to a boil. Cook for 10 minutes, or until the potatoes are just fork tender. Remove the potatoes from the heat and drain. Set aside.
  • While the potatoes are cooking, heat a large skillet over medium heat until hot. Add the bacon to the hot skillet and cook bacon for 7 minutes, or until bacon is crispy. Remove the bacon from the skillet with a slotted spoon and place the bacon pieces on paper towels to drain.
  • Add the onions to the bacon grease and cook for 2 minutes. Stir in the garlic into the sautéed onions and cook for 2 minutes longer, until the onions begin to soften. Add the granulated sugar, vinegar, water and water. Cook and stir for 1 minute until dressing begins to thicken.
  • Place hot potatoes in a large serving bowl and toss with the warm bacon dressing. Stir in the cooked bacon pieces and garnish with fresh parsley (if using).

Nutrition

Calories: 199kcalCarbohydrates: 23gProtein: 5gFat: 10gSaturated Fat: 3gPolyunsaturated Fat: 2gMonounsaturated Fat: 4gTrans Fat: 1gCholesterol: 16mgSodium: 164mgPotassium: 380mgFiber: 1gSugar: 9gVitamin A: 10IUVitamin C: 5mgCalcium: 15mgIron: 1mg
Keyword German Potato Salad, German Style Potato Salad
Tried this recipe?Mention @grumpyshoneybunch or tag #grumpyshoneybunch!

Grilled Stuffed Pork Tenderloin

June 1, 2022 by Shelby Law Ruttan 1 Comment

Featured image for Grilled Stuffed Pork Tenderloin.

Grilled Stuffed Pork Tenderloin is a very budget friendly family dinner is packed with flavor and cooked by indirect grilling on the grill. This summer, weeknight dinners just became a whole lot more delicious with this keto low carb stuffed pork loin!

This recipe for grilled pork tenderloin is filled with mushrooms, fresh herbs, and goat cheese stuffing then tied with kitchen string and grilled over indirect heat for about 40 minutes. Adding a final touch of flavor by brushing the tenderloin with your favorite barbecue sauce in the last few minutes of grilling, this grilled pork recipe is bound to become a favorite of the whole family.

Hero image for Pork Tenderloin.
This Grilled Stuffed Pork Tenderloin is an impressive meal that friends and family will love!
[feast_advanced_jump_to]

❤️ Why you'll love it

✔️ It is an easy to make pork tenderloin recipe perfect for summertime grilling.

✔️ Pork tenderloin is very budget friendly and this recipe makes 6 generous servings.

✔️ Each serving has only 2 net carbs.

Ingredients for mushroom stuffing.

🥘 Ingredients

Fresh mushrooms, make up the bulk of the stuffing.

Goat cheese, adds a creaminess. I like to use a honey flavored goat cheese. I usually purchase this at Aldi as it is the best price for 4 ounce log there.

Red onion, to add flavor.

All purpose seasoning, I like to use this Umami seasoning.

Baby spinach

Salt and black pepper (optional)

1-½ pounds pork tenderloin

Mushrooms and Red Onions cooking in butter in a skillet.
Mushrooms and onions cooking in butter in a skillet.

🔪 Instructions

To prepare the pork tenderloins

  1. Using a sharp knife, cut the each pork tenderloin in half, without cutting all the way through the meat. Place the tenderloins on a cutting board between a piece of plastic wrap and pound the pork with the meat mallet to flatten.
  2. Remove the plastic wrap from the tenderloin and season with salt and pepper.

To make the mushroom stuffing

  1. In a large skillet, heat the butter over medium-high heat until bubbly.
  2. Stir in the diced mushrooms and onions. Cook for 2 minutes, stirring often, until vegetables begin to soften.
  3. Add the rosemary and all purpose seasoning. Stir to combine and cook for 2 minutes longer, until mushrooms and onions have softened.
  4. Turn off the heat and stir in the goat cheese until mushroom mixture is creamy. Remove from heat and set aside.
Umami Seasoning and chopped rosemary added to mushroom mixture.
Umami seasoning and fresh rosemary added for flavor in the cheese mushroom filling.

To stuff the pork tenderloin

  1. Lay 1 cup of spinach green in the center each one of the flattened pork tenderloin. Place ½ of the mushroom mixture over top of the spinach.
  2. Roll the pork tenderloin over the filling, securing with kitchen twine to hold it together.
Pork tenderloin flat with mushroom and spinach filling on top.
Mushroom stuffing and spinach along the center of the tenderloin before rolling.

To cook the stuffed tenderloin

  1. Place the pork over indirect heat on a gas grill preheated to 350 degrees. Grill for 40 minutes, turning occasionally, until outside of meat has browned and internal temperature registered at 165 with an instant read thermometer.
  2. Brush each pork loin with your choice of barbecue sauce and grill for 1 minute longer. Remove from the grill and allow to rest for 10 minutes before slicing.

🥄 Equipment

Gas grill, this is my preference, however if you have experience with a charcoal grill, free free to use it instead.

Meat mallet, for pounding out the meat.

Chef knife, to chop the vegetables

Cutting board, to chop the vegetables.

Large skillet, to cook the mushroom stuffing

Kitchen twine, for securing the pork tenderloin.

🥫Storage

Store leftover grilled pork in the fridge in an airtight container up to 3 days or in the freezer up to 3 months.

Rolled stuffed pork tenderloin that has been secured with kitchen twine.
Use kitchen twine to tie the pork loin together and secure the stuffing.

📖 Variations

  • Substitute cream cheese, or feta cheese for the goat cheese.
  • Substitute olive oil for butter.
  • Dice 1 jalapeno or ½ red bell pepper and add to the mushroom mixture.

💭 Tips

  • Use sharp pointed knife to break beneath the silver skin on the pork loin. Then cut the silver skin away from the roast. This prevents a tough and chewy exterior on the meat.
  • Be sure when pounding out the meat, that you do so with an even thickness of the meat to allow even cooking.
Two tenderloins cooking on the grill.

🙋 FAQ's

Is pork tenderloin and pork loin the same thing?

A pork tenderloin is a smaller cut of meat and is boneless, where a pork loin can be bone in or boneless and is a larger cut of meat. Pork tenderloin is a great cut of meat to stuff and grill for this reason.

What does it mean to cook over indirect heat?

When grilling, it is good to cook any meats that are especially lean, over indirect heat. This will prevent the meat from drying out as it cooks. To cook over indirect heat, once the grill has been brought to temperature, turn the burners off on one side of the grill, leaving burners on the opposite side on. Place the meat on the side of the grill where the burners have been turned off.

📚 Related Recipes

Try this Marinated & Grilled Venison Tenderloin for a change of protein.

Grilled Apricot Glazed Chicken is another recipe made over indirect heat on the grill.

Pork Chops with Onions are smothered in a onion and barbecue sauce.

This Firemen's Field Day Chicken Barbecue is a must try grill recipe!

Grilled stuffed meat on a cutting board with a slice cut off the end.
Grilled Stuffed Pork Tenderloin has a delicious Mushroom Goat Cheese Herb Stuffing and makes a great low carb meal!

🍽 Serve with...

This Grilled Pork Tenderloin recipe goes great with a side of German Potato Salad and a green side salad.

🏫 The last word

Pork tenderloin is a lean cut of meat that can dry out easily if overcooked This is why indirect grilling is the best way to cook this recipe. With indirect grilling, the flames do not hit the meat, charring or drying it out.

I purchased my pork tenderloins at Costco, where you can buy in larger volumes at more budget friendly prices. One package of two tenderloins are 1-½ pounds.

At the end of cooking time, I like to glaze the stuffed tenderloin with a coating of barbecue sauce. I love this sweet & spicy sugar free glaze.

Grilled Stuffed Pork Tenderloin

Don't forget to check out my Amazon storefront for some of my favorite products!

When you make this recipe, please comment below and let me know what you think. I'd love it if you tag me on Instagram @grumpyshoneybunch or #grumpyshoneybunch so I can see your photos!

If you love this recipe, please leave a ⭐⭐⭐⭐⭐ rating

📖 Recipe

Featured image for Grilled Stuffed Pork Tenderloin.

Grilled Stuffed Pork Tenderloin

Shelby Law Ruttan
Pork tenderloins pounded out thin and filled with a savory goat cheese and mushroom filling are grilled to perfection over indirect heat and glazed with a sweet and spicy barbecue sauce at the very end of cooking time.
4.25 from 4 votes
Prevent your screen from going dark
Print FREE recipe card with your email address Pin Recipe Save Go to Collections
Prep Time 10 minutes mins
Cook Time 1 hour hr
Total Time 1 hour hr 10 minutes mins
Course Main Dish
Cuisine American
Servings 6
Calories 169 kcal

Equipment

  • Gas grill
  • Meat mallet
  • chef knife
  • cutting board
  • Large skillet
  • Kitchen twine

As an Amazon Associate I earn from qualifying purchases.

Ingredients
  

  • 1½ pounds pork tenderloin
  • 4 ounces goat cheese , plain or honey flavored
  • 2 cups baby spinach
  • 8 ounces mushrooms , diced
  • 1 medium red onion , diced
  • 1 tablespoon butter
  • ½ tablespoon umami seasoning (or all purpose seasoning)
  • ½ teaspoon salt
  • ½ teaspoon black pepper

Instructions
 

To prepare the pork tenderloins

  • Using a sharp knife, cut the each pork tenderloin in half, without cutting all the way through the meat. Place the tenderloins on a cutting board between a piece of plastic wrap and pound the pork with the meat mallet to flatten.
  • Remove the plastic wrap from the tenderloin and season with salt and pepper.

To make the mushroom stuffing

  • In a large skillet, heat the butter over medium-high heat until bubbly.Stir in the diced mushrooms and onions. Cook for 2 minutes, stirring often, until vegetables begin to soften.
  • Add the rosemary and all purpose seasoning. Stir to combine and cook for 2 minutes longer, until mushrooms and onions have softened.
  • Turn off the heat and stir in the goat cheese until mushroom mixture is creamy. Remove from heat and set aside.

To stuff the pork tenderloin

  • Lay 1 cup of spinach green in the center each one of the flattened pork tenderloin. Place ½ of the mushroom mixture over top of the spinach.
  • Roll the pork tenderloin over the filling, securing with kitchen twine to hold it together.

To cook the stuffed tenderloin

  • Place the pork over indirect heat on a gas grill preheated to 350 degrees. Grill for 40 minutes, turning occasionally, until outside of meat has browned and internal temperature registered at 165 with an instant read thermometer.
  • Brush each pork loin with your choice of barbecue sauce and grill for 1 minute longer. Remove from the grill and allow to rest for 10 minutes before slicing.

Nutrition

Calories: 169kcalCarbohydrates: 3gProtein: 25gFat: 6gSaturated Fat: 3gPolyunsaturated Fat: 1gMonounsaturated Fat: 2gTrans Fat: 1gCholesterol: 79mgSodium: 852mgPotassium: 596mgFiber: 1gSugar: 2gVitamin A: 62IUVitamin C: 2mgCalcium: 14mgIron: 1mg
Keyword Grilled Stuffed Pork Tenderloin
Tried this recipe?Mention @grumpyshoneybunch or tag #grumpyshoneybunch!

Air Fryer Fish Sticks

May 30, 2022 by Shelby Law Ruttan Leave a Comment

Featured Image for Air Fryer Fish Sticks.

Air Fryer Fish Sticks the best way to make crispy fish sticks to feel good about feeding your family. Air frying homemade fish sticks are an easy dinner made with real fish with a 10 minute cooking time and so much cleaner than deep frying.

Air Fryer Fish Sticks on a teal plate.
[feast_advanced_jump_to]

❤️ Why you'll love it

Air Fryer Recipe: fans of air fryer recipes will love how easy these fish sticks are to make with simple ingredients from the pantry.

Healthy recipe: these air Kids love these flaky fish fingers served with homemade tarter sauce.

Kid friendly: They are a great way to feed the whole family an easy meal without using processed frozen fish sticks.

Air Fryer Fish Sticks Ingredient Image.

🥘 Ingredients

As an Amazon Associate I earn from qualifying purchases from affiliate links.

Please scroll to the bottom of this post for a printable recipe card with complete instructions.

Fish fillets: I used cod fish, but tilapia or haddock is another white fish that works well with this recipe.

Cornmeal: I like to use cornmeal over flour for the air fryer recipe to get a little more of a crispy texture on the outside.

Seasoning blend: I used a lemon pepper seasoning blend.

Salt: (optional), use only if the seasoning you are using does not have salt in it.

Black pepper

Large eggs, the fish is coated with an egg wash prior to dipping into the seasoned corn meal.

Cooking spray or vegetable oil spray

Pouring the seasoning into the corn meal.

🔪 Instructions

  1. Preheat the air fryer for 10 minutes at 400 degrees.
  2. In a small shallow bowl, mix together the cornmeal and seasoning.
  3. Cut the fish fillets into 5 inch long pieces about 1-½ inches wide. Set on a plate and season with salt (if using) and pepper.
  4. In another small shallow bowl, whisk together the eggs until foamy.
  5. Coat the air fryer basket or rack with cooking spray. Set aside.
  6. Dip a piece of fish in the egg mixture, then dip in the cornmeal mixture.
  7. Place on prepared air fryer rack in a single layer and repeat until all fish sticks have been breaded. Be sure to leave enough space between the fish sticks to allow the hot air to circulate.
  8. Spritz the top of the breaded fish sticks with cooking spray or avocado oil.
  9. Place the tray/basket in the air fryer and cook for 7 minutes at 400 degrees, until fish stick coating has crisped up and fish flakes easily.
Cornmeal breading in a bowl with a fish stick inside the bowl coated with the corn flour.

Storage

Refrigerate: Store any leftover fish sticks in the fridge in an airtight container up to 3 days or in the freezer up to 3 months.

Freeze: store in a freezer safe airtight container

Reheat: reheat air fryer frozen fish sticks in the air fryer on 350 degrees F for 7-10 minutes, until hot.

Variations

  • Use old bay seasoning to season the cornmeal.
  • Substitute almond flour for the cornmeal to make a keto friendly gluten-free version of this fish stick recipe.
  • Add a teaspoon of garlic and onion powder to the seasoning blend.

Air Fryer Fish Stick Tips

  • If using an air fryer with racks, be sure to place the tray in the center of the air fryer to allow the hot air to circulate evenly all around and brown all sides of the fish sticks.
  • If in the fish sticks have not browned enough, move the tray to the top rack and cook for another 30-60 seconds.
  • It is a good idea to buy the fish fillet in bulk, then cut it into portions.
A fish sandwich made with air fryer fish sticks on a brown tray.

More Easy Air Fryer Recipes to Try

You will love these Air Fryer Keto Chicken Nuggets made with canned chicken!

This Air Fryer Salmon is easy and delicious!

This Air Fryer Cod with Ritz Cracker Topping is another delicious cod fish recipe.

Everyone loves these Air Fryer Salmon Bites.

Serve with...

Serve air fryer fish sticks with a squeeze of lemon juice, Easy Homemade Tartar, and a side of Air Fryer Frozen Fries.

Air Fryer Fish Sticks

The last word

These homemade air fryer fish sticks are not like the frozen fish sticks you can buy premade in the grocery store. Most fish sticks you buy in the grocery are made with minced fish and have a thick coating on them to make them easy to pick up with the fingers. These air fryer fish sticks are made with fresh fish and the breading is kept light. Because of this the fish stick will not be as sturdy if you try to pick it up with your fingers.

These delicious fish sticks can also be made in the oven instead of the air fryer. Just place in a preheated 400 degree oven and bake for 10 minutes, flipping fish sticks over halfway through cooking.

A fish sandwich that has been cut in half on a brown tray.

When you make this recipe, please comment below and let me know what you think. I'd love it if you tag me on Instagram @grumpyshoneybunch or #grumpyshoneybunch so I can see your photos!

If you love this recipe, please leave a ⭐⭐⭐⭐⭐ rating

📖 Recipe

Featured Image for Air Fryer Fish Sticks.

Air Fryer Fish Sticks

Shelby Law Ruttan
A delicious and healthier way to make fish sticks is by using the air fryer. A lightly battered piece of fish is cooked to flaky perfection in a matter of minutes.
5 from 2 votes
Prevent your screen from going dark
Print FREE recipe card with your email address Pin Recipe Save Go to Collections
Prep Time 5 minutes mins
Cook Time 7 minutes mins
Total Time 12 minutes mins
Course Main Course
Cuisine American
Servings 4
Calories 225 kcal

Equipment

  • Air Fryer
  • mixing bowls
  • chef knife
  • cutting board
  • Tongs

As an Amazon Associate I earn from qualifying purchases.

Ingredients
  

  • 1 pound white fish fillet , cut into 5 x 2 inch fish sticks.
  • 2 large eggs , whisked
  • ½ cup cornmeal
  • 1 tablespoon lemon pepper seasoning blend
  • salt (optional)
  • black pepper (optional)
  • cooking spray

Instructions
 

  • Preheat the air fryer for 10 minutes at 400 degrees.
  • In a small shallow bowl, mix together the cornmeal and seasoning.
  • Cut the fish fillets into 5 inch long pieces about 1-½ inches wide. Set on a plate and season with salt (if using) and pepper.
  • In another small shallow bowl, whisk together the eggs until foamy.
  • Coat the air fryer basket or rack with cooking spray. Set aside.
  • Dip a piece of fish in the egg mixture, then dip in the cornmeal mixture.
  • Place on prepared air fryer rack in a single layer and repeat until all fish sticks have been breaded. Be sure to leave enough space between the fish sticks to allow the hot air to circulate.
  • Spritz the top of the breaded fish sticks with cooking spray or avocado oil.
  • Place the tray/basket in the air fryer and cook for 7 minutes at 400 degrees, until fish stick coating has crisped up and fish flakes easily.

Nutrition

Calories: 225kcalCarbohydrates: 16gProtein: 28gFat: 6gSaturated Fat: 2gPolyunsaturated Fat: 1gMonounsaturated Fat: 2gTrans Fat: 1gCholesterol: 150mgSodium: 96mgPotassium: 461mgFiber: 2gSugar: 1gVitamin A: 143IUCalcium: 33mgIron: 2mg
Keyword Air Fryer Fish Sticks
Tried this recipe?Mention @grumpyshoneybunch or tag #grumpyshoneybunch!

Weekly Meal Plan 23

May 28, 2022 by Shelby Law Ruttan Leave a Comment

Collage of images for weekly #23 meal plan.

Here is your free Weekly Meal Plan 23. Each meal includes side dish recommendations, along with a beverage and dessert of the week along with weekend options.

Do you have any requests or special needs? If so, please let me know and I will do what I can to help!

Collage of images for weekly #23 meal plan.
[feast_advanced_jump_to]

🍽️ Meal Planning and Prep Tips

I'm here to share with you recipes to make during the week that aren't hard to make and take little prep. Most feed 4 so if there are just 1 or 2 to feed, you may want to scale down and halve a recipe OR just make a couple of these and enjoy leftovers throughout the week.

This weekly meal plan is I worked a few low carb meals, in to balance out the pasta meals!

Here are some short cuts and tips to help you throughout the week.

  • Shrimp and Broccoli with Pasta, if you want to eliminate the pasta in this recipe to stick lower carbs, then cook cauliflower florets to toss in with the broccoli and replace the pasta. Another alternative would be to serve it over zucchini noodles.
  • Keto cabbage rolls are delicious and no real speciality ingredients are used here. Cauliflower rice replaces regular rice. Try this meal for a delicious take on the classic.
  • Apricot Grilled Chicken is as easy as heating up the grill, adding the chicken, and brushing with marinade. This takes a little longer due to the raw chicken, but so worth it!
  • The Beef and Broccoli Lo Mein is packed with flavor. I recommend partially freezing the steak to make it easier to thinly slice.
  • Homemade Mac and Cheese is pure comfort food and the perfect side to a grilled burger, hot dog, or chicken. You can make this a few days ahead of time and just reheat in the microwave when it's time to eat.
  • Strawberry Cheesecake Shooters are not only cute, but they are delicious and fun to serve. They can be made with lemon or lime curd in place of the strawberry curd also.
  • Peaches are in season SOON! But you don't have to have fresh peaches to make the peach muffins. Canned peaches work here quite well also.
  • Sex on the beach can be made as a virgin drink by eliminating the vodka and peach schnapps and adding a little flavored peach water in its place. Just be sure to add a little simple syrup to taste if the sweetness factor needs to be boosted.
  • On Sunday, fire up the grill for the pork chops, a super easy recipe, these go great with grilled or Air Fried Asparagus.

Weekly Meal Plan 23

Monday

Featured image for Shrimp Broccoli Cavatappi.

Shrimp and Broccoli with Pasta

One of my favorite healthier copycat recipes from Applebees (now a retired recipe). Shrimp with Broccoli and Pasta stands great on its own, I recommend serving it with a side of Air Fried Asparagus.

Tuesday

Keto Cabbage Rolls Featured Image.

Keto Cabbage Rolls

These Cabbage Rolls may be a keto recipe, but you would never know! Made with cauliflower rice instead of regular rice, this meal is one that the whole family can enjoy. Serve with Garlic Mashed Cauliflower.

Wednesday

Grilled Apricot Glazed Chicken Featured image.

Grilled Apricot Glazed Chicken

Grilled Apricot Glazed Chicken is an economical and delicious recipe! Chicken lets (thighs can be used as well) are cooked on the grill with an apricot marinade. Great served with a side of Pea Salad with Bacon and cheese.

Thursday

Featured image for keto beef and broccoli.

Beef and Broccoli

Beef and Broccoli Lo Mein is a great recipe with for those who are looking to enjoy a low carb meal. If pasta is ok for your diet, its ok to sub regular spaghetti noodles. This recipe goes great with Air Fryer Egg Rolls.

Friday

Homemade Mac and Cheese FI

Homemade Mac and Cheese

A great main dish on it's own, or serve with a Chili Cheese Dog or Air Fried Hamburger. Then, cool down with this Pineapple Agua Fresca.

Dessert of the week

Strawberry Cheesecake Shooters FI.

Strawberry Cheesecake Shooters

A delicious no bake dessert that is the perfect ending to any meal. Make these Strawberry Cheesecake Shooters at the beginning of the week to enjoy for dessert throughout the week.

Cocktail of the week

Featured image for sex on the beach cocktail.

Sex on the Beach

Sex on the Beach Cocktail is a fruity sweet drink made with fruit juice, vodka, and peach schnapps. It's a great weekend summer drink to wind down for the weekend with!

Sunday Brunch

Peach Muffins

Peaches are in season soon and what is better than a warm Peach Muffins for breakfast? These are great for snacking also and are a great side to Garlic Scrambled Eggs with Chickpeas or Scrambled Tofu!

Sunday Supper

Grilled Pork Chops with Chipotle Sauce featured image.

Grilled Pork Chops with Chipotle Sauce

Grilled Pork Chops with Chipotle Sauce are a great sunday meal idea. Pair them up with this Mediterranean Chickpea Salad as a side or your favorite green veggie. Serve this creamy, delicious Butterscotch Pudding for dessert.

Grumpy's Honeybunch Shopping List

Download Shopping List
Printable and downloadable grocery list.

Related Posts

You must use the category name, not a URL, in the category field.

Don't forget to check out my Amazon storefront for some of my favorite products!

When you make these recipes, please comment below and let me know what you think. I'd love it if you tag me on Instagram @grumpyshoneybunch or #grumpyshoneybunch so I can see your photos!

Recommended

You must use the category name, not a URL, in the category field.

Weekly Meal Plan 22

May 25, 2022 by Shelby Law Ruttan Leave a Comment

Weekly Meal Plan 22 featured image.

Here is your free Weekly Meal Plan 22 for May 29 - June 2. Each meal includes side dish recommendations, along with a beverage and dessert of the week along with weekend options.

Do you have any requests or special needs? If so, please let me know and I will do what I can to help!

Weekly Meal Plan 22 featured image.
[feast_advanced_jump_to]

🍽️ Meal Planning and Prep Tips

I'm here to share with you recipes to make during the week that aren't hard to make and take little prep. Most feed 4 so if there are just 1 or 2 to feed, you may want to scale down and halve a recipe OR just make a couple of these and enjoy leftovers throughout the week.

This weekly meal plan is pretty easy, most meals can be made very quickly the same night without a lot of prep time.

Here are some short cuts and tips to help you throughout the week.

  • This is the week of air fryer recipes! An air fried hamburger is one of the best burgers and is ready in minutes! I like to serve potato salad with it and like to make the salad the day before to allow flavors to blend.
  • No more skillets for grilled cheese sandwiches. The air fryer turns the bread golden brown and the cheese melts perfectly throughout! Mexican Street Corn Salad or the Minted Melon Salad can be made a day or two ahead so its ready to serve when dinner is ready.
  • For the Shrimp Pad Thai, I recommend pulling the shrimp out of the freezer and put in the fridge until you are ready to start making the recipe. The shrimp will thaw under the water faster.
  • The Buffalo Chicken Sandwiches are a slow cooker recipe that makes dinner easy. Use leftovers to make Buffalo Chicken Panini Sandwiches for lunch!
  • Be sure to buy a lot of fresh limes this week! If you can't find key limes, regular limes will work for the pie. You will want limes for the Lime Refresher drink also. The Key Lime PIe can be made on Sunday and stored in the freezer to serve throughout the week.

Weekly Meal Plan 22

May 29

Featured image for air fried hamburger.

Air Fried Hamburger

If you adverse to frying a burger in the skillet and the grill isn't convenient, then an Air Fried Hamburger is the way to go. Perfectly cooked deliciousness! Serve with a side of Red White and Blue Potato Salad!

May 30

Air Fryer Grilled Cheese Sandwich Featured Image.

Air Fryer Grilled Cheese Sandwich

Air Fryer Grilled Cheese Sandwich is buttery and golden with a gooey center. Everyone will love this easy weeknight dinner! Serve these with a side of Mexican Street Corn Salad or Minted Melon Salad.

May 31

Shrimp Pad Thai

Make your favorite Thai take out right at home. Shrimp Pad Thai has always been my go to order, but making it at home is easy and delicious! Stick with the Asian style theme and serve with Air Fryer Egg Rolls.

June 1

Buffalo Chicken Sandwiches

Buffalo Chicken Sandwiches are made right in the slow cooker making dinner super easy. These are great with a side of Amish Broccoli Cauliflower Salad or serve leftover Mexican Corn Salad from Tuesday.

June 2

Chili Cheese Dogs Featured Image.

Chili Cheese Dogs

Chili Cheese Dogs were a favorite of mine as a young adult. I remember going to Dairy Queen and ordering this. Making them at home is better on the budget and so much more satisfying. Serve these with a Pina Colada Smoothie!

Dessert of the week

Key Lime Pie

It's heating up outside and there is no better excuse than to make this recipe for Key Lime Pie! A freezer dessert that has a tangy sweet flavor that is hard to resist!

Cocktail of the week

Featured image for Coconut Lime Refresher with Rum

Coconut Lime Rum Refresher

This Coconut Lime Refresher with Rum is a frosty, creamy, sweet, and tangy drink made with fresh limes. The rum is totally optional and can be left out.

Sunday Brunch

Featured image for Strawberry Baked Oatmeal.

Strawberry Baked Oatmeal

Strawberry Baked Oatmeal is made in layers with fresh strawberries baked in. Serve it with your choice of milk and a

Sunday Supper

Barbecue Bean Bake

This cowboy style Barbecue Bean Bake is so easy and delicious. Serve them with a side of air fryer french fries or Air Fryer Potato Wedges. These

Grumpy's Honeybunch Shopping List

Download Shopping List
Printable and downloadable grocery list.

Related Posts

You must use the category name, not a URL, in the category field.

Don't forget to check out my Amazon storefront for some of my favorite products!

When you make these recipes, please comment below and let me know what you think. I'd love it if you tag me on Instagram @grumpyshoneybunch or #grumpyshoneybunch so I can see your photos!

Recommended

You must use the category name, not a URL, in the category field.

Paula Deens Key Lime Pie

May 22, 2022 by Shelby Law Ruttan 1 Comment

Paula Deens Key Lime Pie recipe has a baked sweetened graham cracker crust with just a tiny hint of cinnamon and a sweet and tangy filling packed with the juice of tangy key limes, heavy cream, and cream. This pie makes the perfect summertime dessert and is delicious when frozen!

Featured image for recipe card for key lime pie.

I am a fan southern cooking, and Paula Deen's key lime pie recipe is one I have loved for a long time now. I love this recipe is entirely from scratch and sweetened with sugar and sweetened condensed milk, making for a wonderful creamy dessert.

[feast_advanced_jump_to]

❤️ Why you'll love it

Sweet and Tangy: it is the perfect sweet tart dessert ending.

Packed with lime flavor: citrus lovers will love the sweet and bitter tang in the pie filling.

Make ahead: It's the perfect make ahead dessert!

🥘 Ingredients

Crust Ingredients:

Graham crackers, brown sugar, and butter make up the pie crust for this recipe and is the only part that is baked.

Cinnamon, just a touch for a hint of flavor added to the crust.

Pie Filling Ingredients:

Key limes, for the juice, zest, and garnish

Heavy cream, builds body and adds the creamy factor

Half and half, adds bulk to the pie

Sugar and sweetened condensed milk, sweetens and adds creaminess.

Ingredients for Paula Deens Key Lime Pie recipe.

🔪 Instructions

  1. Preheat the oven to 350 degrees F. In a medium bowl, combine cracker crumbs, brown sugar, cinnamon, and butter.
  2. Transfer the graham cracker mixture to the tart pan and press mixture tightly to fit the bottom and up the sides of the pan. Bake for 10 minutes, until golden brown. Remove from oven and cool completely on a wire rack.
  3. In a small bowl, combine the and key lime zest and sugar, working the zest into the sugar with your fingers, to infuse the oils from the zest
  4. In a large bowl using a hand mixer at medium speed, beat the heavy cream until it begins to thicken, about 2 minutes. Gradually add ½ cup sugar mixture and continue to mix for about 3 minutes on high speed, until soft peaks form.
  5. Slowly add the sweetened condensed milk to the heavy cream mixture, mixing constantly, until thoroughly combined.
  6. Gradually mix in the fresh key lime juice into the cream mixture until thoroughly combined.
  7. Add the half and half and mix 5 minutes longer, to build body and incorporate air into the filling mixture.
  8. Transfer the filling mixture to the cooled graham cracker crust. Cover and freeze at least 6 hours.
One half teaspoon of cinnamon being added to the graham cracker crust.

🥄 Equipment

Electric mixer

Large bowl

Medium bowl

Rubber scraper

Tart pan with removable bottom

🥫Storage

Store any leftover Key Lime Pie in the freezer up to 2 weeks.

Pressing the pie crust into the tart pan.

📖 Variations

  • Use a springform pan in place of the tart pan. Be sure to press the graham cracker crust up the sides of a 10-inch spring form pan to create an edge for the filling.
  • Use cool whip for the garnish portion of the key lime pie and decorate with key lime slices and white chocolate curls.
  • Substitute lemon juice or regular lime juice for the key lime juice.
  • Use ½ cup of sour cream in place of ½ cup of half and half to add some extra tang.
  • Substitute whole milk for the half and half.

💭 Tips

  • Make sure all the ingredients for the pie filling are cold when using them.
  • Be sure that you let the crust cool completely before adding the pie filling, if it is not cold, it will cause the pie filling to flop.
  • Substitute 8 ounces of cream cheese at room temperature for the heavy cream. Be sure to whip the cream cheese until it is fluffy and light.
Overhead shot of Paula Deens Key Lime Pie Recipe.

🙋 FAQ's

Can you use regular limes to make this key lime pie?

Yes, you can use regular limes to make this key lime pie. The flavor will be a little different but delicious.

📚 Related Recipes

This Fresh Strawberry Pie is perfect for when fresh berries are in season.

This Oil Pie Crust if perfect for all your pie making needs!

This Pumpkin Pie with Condensed Milk is delicious year round!

Chili Lime Shrimp makes a great appetizer or main dish and has that great lime flavor.

🍽 Serve with...

Serve this key lime pie recipe with dollops of whipped cream around the edges, topped with lime wedges, lime zest, and white chocolate curls.

Whole pie on a green cake stand.

🏫 The last word

This is Paula Deen's key lime pie recipe, whom I consider the queen of southern cooking, and it is the best recipe I have made!

Key limes are more readily available than they used to be and can usually be found in any grocery store when in season.

Prep and cook time combined is only 30 minutes, however be sure to at least freeze the pie for 6 hours before serving. Total time before this recipe is ready is 6 hours and 30 minutes, however I recommend making this the day before to allow the flavors to blend.

Don't be afraid that this recipe has flopped if the filling seems runny. I recommend whipping it with the hand mixer at least 5-10 minutes after all the ingredients have incorporated to build body. If the filling were to be stiff, it would not fit into the tart pan as it would have too much volume. Just pour the filling into the crust and freeze it, knowing that it will be delicious when its time to enjoy!

Paula Deen's Key Lime Pie

Don't forget to check out my Amazon storefront for some of my favorite products!

When you make this recipe, please comment below and let me know what you think. I'd love it if you tag me on Instagram @grumpyshoneybunch or #grumpyshoneybunch so I can see your photos!

If you love this recipe, please leave a ⭐⭐⭐⭐⭐ rating

📖 Recipe

Featured image for recipe card for key lime pie.

Key Lime Pie

Shelby Law Ruttan
This Key Lime Pie is Paula Deen's recipe with the addition of a touch of cinnamon in the pie crust. This frozen pie is one of the best, tangy citrus desserts and is perfect for hot summer days!
4.23 from 48 votes
Prevent your screen from going dark
Print FREE recipe card with your email address Pin Recipe Save Go to Collections
Prep Time 15 minutes mins
Cook Time 10 minutes mins
Freeze time 6 hours hrs
Total Time 6 hours hrs 25 minutes mins
Course Desserts
Cuisine American
Servings 8
Calories 588 kcal

Equipment

  • Tart pan
  • rubber spatula
  • Electric mixer
  • mixing bowls

As an Amazon Associate I earn from qualifying purchases.

Ingredients
  

For the graham cracker crust

  • 2 cups graham cracker crumbs
  • ¼ cup light brown sugar , firmly packed
  • ½ cup unsalted butter , melted
  • ½ teaspoon ground cinnamon

For the key lime pie filling

  • 1 cup heavy whipping cream
  • ½ cup granulated sugar
  • 12 ounces sweetened condensed milk
  • ¾ cup key lime juice , freshly squeezed
  • 1 tablespoon key lime zest
  • 2 cups half and half
  • fresh key lime slices , (optional)
  • whipped cream , (optional)

Instructions
 

  • Preheat the oven to 350 degrees F. In a medium bowl, combine cracker crumbs, brown sugar, cinnamon, and butter.
  • Transfer the graham cracker mixture to the tart pan and press mixture tightly to fit the bottom and up the sides of the pan. Bake for 10 minutes, until golden brown. Remove from oven and cool completely on a wire rack.
  • In a small bowl, combine the and key lime zest and sugar, working the zest into the sugar with your fingers, to infuse the oils from the zestIn a large bowl using a hand mixer at medium speed, beat the heavy cream until it begins to thicken, about 2 minutes. Gradually add ½ cup sugar mixture and continue to mix for about 3 minutes on high speed, until soft peaks form.
  • Gradually add the sweetened condensed milk to the heavy cream mixture, mixing constantly, until thoroughly combined.
  • Gradually mix in the fresh key lime juice into the cream mixture until thoroughly combined. Add the half and half and mix 5 minutes longer, to build body and incorporate air into the filling mixture.
  • Transfer the filling mixture to the cooled graham cracker crust. Cover and freeze at least 6 hours.

Nutrition

Calories: 588kcalCarbohydrates: 64gProtein: 8gFat: 35gSaturated Fat: 21gPolyunsaturated Fat: 1gMonounsaturated Fat: 9gTrans Fat: 1gCholesterol: 100mgSodium: 241mgPotassium: 344mgFiber: 1gSugar: 51gVitamin A: 1132IUVitamin C: 9mgCalcium: 236mgIron: 1mg
Keyword Key Lime Pie, Paula Deens Key Lime Pie
Tried this recipe?Mention @grumpyshoneybunch or tag #grumpyshoneybunch!

Air Fryer Grilled Cheese Sandwich

May 20, 2022 by Shelby Law Ruttan 2 Comments

Air Fryer Grilled Cheese Sandwich Featured Image.

This Air Fryer Grilled Cheese Sandwich is a simple way to enjoy grilled cheese sandwiches with optimal crisp and gooey cheese! This simple recipe will toast the buttered bread until golden brown and provide the melty cheese center that everyone loves so much.

Next time you're looking for an easy meal, skip the frying pan and the classic way of making a grilled cheese sandwich and use the air fryer instead! It is the perfect grilled cheese recipe for lunch or snacking

Ingredients for cheese sandwich.
[feast_advanced_jump_to]

❤️ Why you'll love it

✔️ Fans of air fryer recipes will love this simple method for the best grilled cheese sandwiches.

✔️ This is a great recipe for a simple sandwich that even kids can make on their own.

✔️ It is the classic sandwich taken to a whole new level of melty goodness!

Cheddar and provolone cheese on to of one slice of bread.

🥘 Ingredients

As an Amazon Associate I earn from qualifying purchases.

Sturdy white bread, I love to use a good firm sourdough bread but a french bread will work well also.

Cheese slices, I used a combination of sharp cheddar and provolone cheese. I buy the cheddar cheese by the brick and slice it myself.

Salted butter, I prefer salted butter vs unsalted butter for a grilled sandwich due to the saltiness it adds.

🔪 Instructions

  1. Liberally spread one side of two slices of bread with butter.
  2. Lay one slice of bread butter side down on the air fryer basket or tray. Place a slice of cheddar cheese and a slice of provolone cheese on top of the bread and cover with the second slice of bread, butter side up.
  3. Place the basket or tray in the air fryer and airfry at 370 degrees F for 3 minutes. Flip sandwich and air fry another 3 minutes at 400 degrees, or until both sides of the bread are golden brown.
Fresh bread with cheese between the buttered slices.

🥄 Equipment

Air fryer

Turner

Cheese slicer

Cutting board

📖 Variations

  • Use a variety of cheeses that match your own personal preference.
  • Substitute full fat mayonnaise for the butter spread.
Air Fryer Grilled Cheese Sandwich on a gray plate with melty cheese coming out of the sides of the sandwich.

💭 Tips

  • Use any of our favorite cheese, but be sure to choose a good melting cheese.
  • Always start at a lower temperature to aid in melting the cheese, then turning the temperature up after flipping to aid in browning the bread.
  • Use thicker slices bread for a sturdier sandwich.

📚 Related Recipes

A delicious combination of sweet, savory, spicy, and salty! Everyone loves this Grilled Cheese Sandwich with Bacon, Jalapeno & Rhubarb Sauce.

Super easy and delicious, Air Fryer Egg Rolls takes greasy frying out of the picture.

The perfect way to cook pork: Air Fryer Pork Chops.

Air Fryer Grilled Cheese Sandwich cut in half with melty cheese running down the sides of the bread.

🍽 Serve with...

Serve these yummy gooey melted cheese sandwiches with a side of tomato soup or a side of crispy potato chipe

🏫 The last word

I feel the best air fryer to use is one with trays over one with a basket as you can make more sandwiches at a time with the larger air fryer.

Add as much cheese as you wish, but remember that too much cheese may melt outside of the bread slices. Some like to shred the cheese instead of using slices. My preference is to use sliced in the air fry recipe. When cooking on the stove top I prefer shredded as it melts easier. The air fryer tends to melt the cheese perfectly, whether sliced of shredded.

Some air fryers require preheating. The one I own does not. Check your user manual for the air fryer you own for preheating recommendations.

The air fryer works perfectly for making a grilled cheese sandwich as the hot air circulates around the sandwich, causing the cheese to melt evenly and the buttery bread to crisp to perfection.

Air Fryer Grilled Cheese Sandwich

Don't forget to check out my Amazon storefront for some of my favorite products!

When you make this recipe, please comment below and let me know what you think. I'd love it if you tag me on Instagram @grumpyshoneybunch or #grumpyshoneybunch so I can see your photos!

If you love this recipe, please leave a ⭐⭐⭐⭐⭐ rating

📖 Recipe

Air Fryer Grilled Cheese Sandwich Featured Image.

Air Fryer Grilled Cheese Sandwich

Shelby Law Ruttan
A delicious golden brown sandwich with perfectly melty cheese in the center! Use this air fryer method for the best grilled cheese sandwich ever!
4.57 from 55 votes
Prevent your screen from going dark
Print FREE recipe card with your email address Pin Recipe Save Go to Collections
Prep Time 2 minutes mins
Cook Time 8 minutes mins
Total Time 10 minutes mins
Course lunch
Cuisine American
Servings 1
Calories 664 kcal

Equipment

  • Air Fryer
  • Turner
  • Cheese slicer
  • cutting board

As an Amazon Associate I earn from qualifying purchases.

Ingredients
  

  • 2 slices sourdough bread
  • 1 ounce sharp cheddar cheese
  • 1 ounce provolone cheese
  • 1 tablespoon salted butter

Instructions
 

  • Liberally spread one side of two slices of bread with butter.Lay one slice of bread butter side down on the air fryer basket or tray.
  • Place a slice of cheddar cheese and a slice of provolone cheese on top of the bread and cover with the second slice of bread, butter side up.
  • Place the basket or tray in the air fryer and air fry at 370 degrees F for 3 minutes.
  • Flip sandwich using a turner and air fry another 3 minutes at 400 degrees, or until both sides of the bread are golden brown.

Nutrition

Calories: 664kcalCarbohydrates: 68gProtein: 28gFat: 32gSaturated Fat: 18gPolyunsaturated Fat: 2gMonounsaturated Fat: 8gTrans Fat: 1gCholesterol: 78mgSodium: 1252mgPotassium: 214mgFiber: 3gSugar: 6gVitamin A: 883IUCalcium: 485mgIron: 5mg
Keyword Air Fryer Grilled Cheese Sandwich
Tried this recipe?Mention @grumpyshoneybunch or tag #grumpyshoneybunch!

Air Fried Hamburger

May 18, 2022 by Shelby Law Ruttan Leave a Comment

Featured image for air fried hamburger.

An air fried hamburger is probably the best way to make juicy hamburgers outside of a grill! The air fryer is a game changer for many recipes and these delicious hamburgers are no exception!

Make mouthwatering restaurant style burgers are right at home in under 15 minutes and dress with your favorite toppings, lettuce, tomatoes, pickles, onions, and cheese for delicious air fryer burgers the whole family will love.

Air Fried Hamburger on an air fryer rack.
[feast_advanced_jump_to]

❤️ Why you'll love it

✔️ No more greasy frying pan and grease splatters to clean up afterward!

✔️ You can enjoy a great meal on burger night with a cooking time under 15 minutes.

✔️ This recipe makes 4 good-sized hamburgers are packed with protein!

🥘 Ingredients

Fresh lean ground beef, for less smoke chances in the air fryer.

Barbecue sauce, my favorite is this sweet and spicy barbecue sauce!

Seasoning, I use this all purpose umami seasoning.

Non stick spray

Burger ingredients.

🔪 Instructions

  1. Preheat the air fryer at 400 degrees for 3 minutes. Spray the air fryer basket or tray with non stick spray.
  2. In a large bowl, combine the ground beef, seasoning, and barbecue sauce.
  3. Divide the beef mixture into 4 equal sized beef patties.
  4. Place the hamburger patties in the air fryer basket in a single layer (or the air fryer tray) and slide into the the air fryer. If using an air fryer with a tray, slide it into the center rack.
  5. Air fry hamburgers for 7 minutes at 400 degrees. Remove the burgers from the air fryer and flip over, returning to the air fryer for another 5 minutes, or until a meat thermometer inserted into the center of each patty registers 160 degrees F.
  6. To make a cheeseburger, top cooked burgers with your favorite cheese slices and return to the air fryer for 40-60 seconds.

🥄 Equipment

Air Fryer

Turner

Measuring cups

Measuring spoons

Raw burgers on the air fryer rack.

🥫Storage

Store leftover burgers in an airtight container in the fridge up to 3 days and in the freezer up to 3 months.

📖 Variations

Substitute ground turkey or chicken for the ground beef.

Some great cheese top top the burgers with would be american cheese, sharp cheddar, or provolone.

Various ways to season the burgers would be to use onion powder, garlic powder, worcestershire sauce, or a touch of liquid smoke.

💭 Tips

Buy ground meat with a lower fat content to prevent smoking in the air fryer.

For the best burgers, butter the hamburger bun and toast it under the broiler until golden for a crispy buttery roll.

Use an instant read thermometer to check the internal temperature.

Line the drip pan with an air fryer liner or aluminum foil to prevent a greasy mess.

Air Fried Hamburger on a roll topped with cheese and a side of dill pickles.

🙋 FAQ's

Can you air fry frozen burgers?

Yes, you can air fry frozen burgers. The cook time will be a little longer, so be sure to gauge their doneness using a meat thermometer.

📚 Related Recipes

Juicy and delicious Air Fryer Pork Chops are a recipe the whole family will love.

Hamburger Steaks with Mushrooms and Onions is a great skillet recipe with a creamy savory gravy.

Try this Easy Hamburger Soup for lunch!

When you want air fryer recipes, be sure to check out this guide for 57 Easy Air Fryer Recipes - Appetizers to Dessert.

Air Fryer Egg Rolls are crispy and delicious appetizers.

Cheeseburger on a burger roll.

🍽 Serve with...

Serve these juicy air fryer hamburgers topped with sauteed peppers and onions, with a side of air fryer frozen fries, sweet potato fries, potato chips, or green side salad.

🏫 The last word

1 pound of ground beef will yield about 4 good-sized burgers approximately ½ inch thick.

Air Fried Hamburger

Don't forget to check out my Amazon storefront for some of my favorite products!

When you make this Air Fried Hamburger recipe, please comment below and let me know what you think. I'd love it if you tag me on Instagram @grumpyshoneybunch or #grumpyshoneybunch so I can see your photos!

If you love this recipe, please leave a ⭐⭐⭐⭐⭐ rating

📖 Recipe

Featured image for air fried hamburger.

Air Fried Hamburger

Shelby Law Ruttan
Make your next hamburgers in the air fryer! This air fried hamburger recipe produces juicy, delicious burgers just 15 minutes for a quick dinner on the table.
4.38 from 8 votes
Prevent your screen from going dark
Print FREE recipe card with your email address Pin Recipe Save Go to Collections
Prep Time 3 minutes mins
Cook Time 12 minutes mins
Total Time 15 minutes mins
Course Main Dish
Cuisine American
Servings 4
Calories 230 kcal

Equipment

  • Air Fryer
  • Turner
  • Measuring cups
  • Measuring spoons

As an Amazon Associate I earn from qualifying purchases.

Ingredients
  

  • 1 pound lean ground beef
  • ¼ cup barbecue sauce
  • 1 tablespoon umami seasoning

Instructions
 

  • Preheat the air fryer at 400 degrees for 3 minutes. Spray the air fryer basket or rack with non stick spray.
  • In a large bowl, combine the ground beef, seasoning, and barbecue sauce.
  • Divide the beef mixture into 4 equal sized beef patties.
  • Place the hamburger patties in the air fryer basket in a single layer (or the air fryer tray) and slide into the the air fryer. If using an air fryer with a tray, slide it into the center rack.
  • Air fry hamburgers for 7 minutes at 400 degrees. Remove the burgers from the air fryer and flip over, returning to the air fryer for another 5 minutes, or until a meat thermometer inserted into the center of each patty registers 160 degrees F.
  • To make a cheeseburger, top cooked burgers with your favorite cheese slices and return to the air fryer for 40-60 seconds.

Nutrition

Calories: 230kcalCarbohydrates: 7gProtein: 23gFat: 11gSaturated Fat: 5gPolyunsaturated Fat: 1gMonounsaturated Fat: 5gTrans Fat: 1gCholesterol: 74mgSodium: 2003mgPotassium: 406mgFiber: 1gSugar: 6gVitamin A: 40IUVitamin C: 1mgCalcium: 21mgIron: 3mg
Keyword Air Fried Hamburger, Air Fryer Burgers
Tried this recipe?Mention @grumpyshoneybunch or tag #grumpyshoneybunch!
You must use the category name, not a URL, in the category field.

Air Fryer Salmon Fillet

May 15, 2022 by Shelby Law Ruttan Leave a Comment

Featured image for Air Fryer Salmon Fillets.

This quick air fryer salmon fillet is the best way to cook fresh salmon filets. With only a 10 minute cook time, it is an easy way to put a healthy dinner on the table fast on a busy weeknight.

I love air fryer recipes, and this air fryer salmon recipe is a nutritious meal and one of my favorites salmon recipes. It is high in protein and Omega 3 fatty acids and can easily be converted into a keto recipe with one simple substitution.

Air Fryer Salmon Fillet with Maple Walnut Topping and Broccoli Cauliflower Salad on a plate.

❤️ Why you'll love it

✔️ This is a delicious salmon recipe made with fresh fish.

✔️ The end result is perfectly cooked flaky salmon packed with tons of flavor.

✔️ It is the perfect salmon recipe that gives the best results with a sweet and tangy topping and crispy edges around the salmon.

Raw salmon fillets on an air fryer tray.

🥘 Ingredients

 As an Amazon Associate I earn from qualifying purchases.

Salmon, cut into 4 to 6-ounce salmon fillets, or purchase precut.

Maple Syrup, to brush over the salmon and as part of the topping ingredients.

Walnuts, for the topping on the salmon.

Onion powder for flavor

Coarse ground dijon mustard as part of the topping.

Smoked paprika, salt, and pepper for seasoning the fish prior to adding the topping.

Pouring maple syrup into a bowl over top of walnuts and mustard.

🔪 Instructions

  1. In a small bowl, mix 2 tablespoons of the maple syrup with the chopped walnuts, onion powder, and mustard. Stir until well combined.
  2. If the salmon is not cut into fillets, cut it into 6 equal portions.
  3. Spray the air fryer basket or tray with cooking spray or line with aluminum foil to prevent sticking.
  4. Place the fish filets on the basket or tray and brush with the remaining maple syrup on the top and around the outside of the salmon. Sprinkle with salt, pepper, and smoked paprika.
  5. Place the salmon in the air fryer at 400 degrees and cook for 8 minutes. Remove the salmon and evenly spread the maple walnut topping over each fillet.
  6. Return the salmon to the air fryer and air fry at 350 degrees for 2 minutes, or when a meat thermometer is inserted into the thickest part of the salmon reaches an internal temperature of 145ºf.
Partially cooked salmon prior to adding topping.

🥄 Equipment

Air fryer, to cook the salmon

Chef knife, to cut the salmon into fillets

Cutting board, to use when cutting the salmon.

Silicone brush, for brushing maple syrup over top of the salmon fillets.

Small bowl, to mix the maple walnut topping in

Nut chopper, to chop the walnuts

🥫Storage

Store any leftover salmon in an airtight container in the fridge up to 3 days or in the freezer up to 3 months.

Partly cooked salmon with a walnut topping.

📖 Variations

  • Make this a keto recipe and substitute the maple syrup with sugar free maple syrup.
  • Season the salmon with your favorite seasonings in place of the walnut topping.
  • Serve with a squeeze of lemon juice to enhance the fish flavor and increase acid.
  • Substitute brown sugar for the maple syrup and chili powder for the smoked paprika.
  • Skip the walnut topping and use your favorite dry rub recipe.

💭 Tips

  • Depending on the thickness of the salmon, you may need to increase or decrease the air frying time.
  • If using frozen salmon, you will want to start by cooking the salmon at 360 degrees for approximately 7 minutes. This is the "thaw" cook time. Then proceed with the procedure for fresh salmon.
Salmon pieces that have been fully cooked on an air fryer tray.

📚 Related Recipes

This recipe for Air fryer chicken wings is crispy and delicious!

I love this Air Fryer Asparagus and it is a quick and easy side dish.

Cod is delicious in the air fryer also! Try this Air Fryer Cod with Ritz Cracker Topping.

Baked Red Snapper with Garlic is another long time fish recipe.

🍽 Serve with...

Serve this Air Fryer Salmon with your a side of veggies or this delicious Garlic Mashed Cauliflower.

Air Fryer Salmon Fillet

Don't forget to check out my Amazon storefront for some of my favorite products!

When you make this Air Fryer Salmon Fillet, please comment below and let me know what you think. I'd love it if you tag me on Instagram @grumpyshoneybunch or #grumpyshoneybunch so I can see your photos!

If you love this recipe, please leave a ⭐⭐⭐⭐⭐ rating

📖 Recipe

Featured image for Air Fryer Salmon Fillets.

Air Fryer Salmon Fillet with Maple Walnut Topping

Shelby Law Ruttan
This air fryer salmon recipe makes perfectly cooked salmon in the air fryer with a delicious maple walnut topping in just 10 minutes, for a nutritious, healthy dinner on the table fast.
4.50 from 2 votes
Prevent your screen from going dark
Print FREE recipe card with your email address Pin Recipe Save Go to Collections
Prep Time 5 minutes mins
Cook Time 10 minutes mins
Total Time 15 minutes mins
Course Main Dish
Cuisine American
Servings 6
Calories 263 kcal

Equipment

  • Air Fryer
  • chef knife
  • cutting board
  • Silicone basting brush
  • mixing bowls
  • Nut chopper

As an Amazon Associate I earn from qualifying purchases.

Ingredients
  

  • 1½ pound salmon fillet
  • 1 teaspoon smoked paprika
  • 1 teaspoon salt
  • ½ teaspoon black pepper
  • 4 tablespoons maple syrup , divided
  • ½ cup chopped walnuts
  • 1 tablespoon coarse ground dijon mustard
  • 1 teaspoon onion powder

Instructions
 

  • In a small bowl, mix 2 tablespoons of the maple syrup with the chopped walnuts, onion powder, and mustard. Stir until well combined.If the salmon is not cut into fillets, cut it into 6 equal portions.
  • Spray the air fryer basket or tray with cooking spray or line with aluminum foil to prevent sticking.
  • Place the fish filets on the basket or tray and brush with the remaining maple syrup on the top and around the outside of the salmon. Sprinkle with salt, pepper, and smoked paprika.
  • Place the salmon in the air fryer at 400 degrees and cook for 8 minutes. Remove the salmon and evenly spread the maple walnut topping over each fillet.
  • Return the salmon to the air fryer and air fry at 350 degrees for 2 minutes, or when a instant read thermometer is inserted into the thickest part of the salmon reaches an internal temperature of 145ºf.

Nutrition

Calories: 263kcalCarbohydrates: 11gProtein: 24gFat: 14gSaturated Fat: 2gPolyunsaturated Fat: 8gMonounsaturated Fat: 3gCholesterol: 62mgSodium: 79mgPotassium: 636mgFiber: 1gSugar: 8gVitamin A: 49IUVitamin C: 1mgCalcium: 41mgIron: 1mg
Keyword Air Fryer Salmon Fillet, Maple Walnut Topping
Tried this recipe?Mention @grumpyshoneybunch or tag #grumpyshoneybunch!
You must use the category name, not a URL, in the category field.

Weekly Meal Plan 21

May 14, 2022 by Shelby Law Ruttan Leave a Comment

Meal Plan 21 Featured Image.

Here is your free Weekly Meal Plan 21 for May 22-26. Each meal includes side dish recommendations, along with a beverage and dessert of the week along with weekend options.

Do you have any requests or special needs? If so, please let me know and I will do what I can to help!

Meal Plan 21 Featured Image.
[feast_advanced_jump_to]

🍽️ Meal Planning and Prep Tips

I'm here to share with you recipes to make during the week that aren't hard to make and take little prep. Most feed 4 so if there are just 1 or 2 to feed, you may want to scale down and halve a recipe OR just make a couple of these and enjoy leftovers throughout the week.

This weekly meal plan is pretty easy, most meals can be made very quickly the same night without a lot of prep time.

Most of the recipes here are very easy to make an don't take a lot of time. However, below are some tips to help you throughout the week.

  • Air Fryer Cod, super easy and fast! Not a lot of prep needed for this and very little clean up!
  • Thai Style Hotdogs are SO delicious. One of my favorite recipes here on this website. Make the slaw and peanut sauce ahead of time then all you will need to do is grill the hotdogs.
  • This Stove-Top Baby Back Ribs recipe is my favorite way to make ribs. Use your favorite bbq sauce and enjoy this fall off the bone deliciousness.
  • If your air fryer does not have a rotisserie, as long as the basket fryer is big enough, you can roast the whole chicken in the air fryer still. Just be sure to turn it over halfway through cooking.
  • Mix the chicken salad up the morning of and allow it to sit throughout the day to develop flavors. If you plan to make the dinner rolls, do so on Sunday and freeze until Friday morning.
  • Make the peanut butter cookies on Sunday so they can be enjoyed all week long!
  • The spaghetti pie can be made ahead of time and just rewarmed in the oven before dinner.

Weekly Meal Plan 21

May 23

Featured image for air fryer cod.

Air Fryer Cod

Air Fryer Cod with Ritz Cracker Topping makes dinner so easy and it's great when you can have dinner ready that is nutritious and delicious in under 20 minutes! Serve this Air Fried Asparagus as a side dish!

May 24

Featured Image for Thai Hot Dogs.

Thai Style Hot Dogs

My favorite way to enjoy a hot dog is this Thai Style Hot Dog recipe. Be prepared to want more than one! These are great with a side of Classic Potato Salad Recipe or your favorite potato chips.

May 25

Stove top ribs featured image.

Baby Back Ribs

These Stove-Top Baby Back Ribs are the easiest recipe! Start on the stove, then finish off on the grill or under the broiler. You won't regret trying this recipe! Serve it with a side of Amish Broccoli Cauliflower Salad or this Dill Pickle Pasta Salad.

May 26

cropped-Plate-with-cut-rotisserie-chicken.jpeg

Air Fryer Rotisserie Chicken

Air Fryer Rotisserie Chicken is the best way to make a whole chicken in just an hour that is the juiciest most tender chicken. Serve it up with a side of Caramelized Onion Mashed Red Potatoes with Bacon and Cheese and a green salad.

May 27

Featured image for chicken salad sandwiches.

Chicken Salad Sandwiches

Use leftover Rotisserie Chicken to make this Delicious Chicken Salad with Grapes. Serve it on a croissant, a Sweet Dinner Roll, or a lettuce cup! Try making these

Dessert of the week

Old Fashioned Peanut Butter Cookies Featured Image.

Old Fashioned Peanut Butter Cookies

These Peanut Butter Cookies are my very favorite recipe. The recipe came from a very old community cookbook from my childhood and will forever be my go to!

Cocktail of the week

Featured image for Strawberry Vodka Mojito.

Strawberry Vodka Mojita

This refreshing Strawberry Vodka Mojito is for those who don't love rum, but want a refreshing minty mojito! These are the perfect sit around the firepit kind of drink with friends.

Sunday Brunch

Low Carb Breakfast Quesadillas

These Breakfast Quesadillas are so delicious, everyone in my family loves these. Make your own Homemade Flour Tortillas or buy regular or low carb tortillas to make this breakfast recipe.

Sunday Supper

Spaghetti Pie Casserole

Spaghetti noodles covered with a cheesy mixture and topped with a beefy tomato sauce. Spaghetti Pie Casserole is satisfying comfort food! Serve this with a slices of Cheesy Italian Bread.

Grumpy's Honeybunch Shopping List

Download Shopping List
Printable and downloadable grocery list.

Related Posts

You must use the category name, not a URL, in the category field.

Don't forget to check out my Amazon storefront for some of my favorite products!

When you make these recipes, please comment below and let me know what you think. I'd love it if you tag me on Instagram @grumpyshoneybunch or #grumpyshoneybunch so I can see your photos!

Recommended

You must use the category name, not a URL, in the category field.
  • « Previous Page
  • 1
  • …
  • 12
  • 13
  • 14
  • 15
  • 16
  • …
  • 37
  • Next Page »
An image of Shelby Law Ruttan.

Hey, I'm Shelby

Shelby Law Ruttan is the cookbook author and food blogger behind HoneyB's Kitchen, where she shares scratch-made family recipes, comfort food, and easy home cooking inspired by generations of home cooks.

About me

Footer

↑ back to top

About

About Shelby Law Ruttan

Privacy Policy

Terms and Conditions of Use

Accessibility Statement

Contact Shelby

Contact

Work with me

As an Amazon Associate I earn from qualifying purchases.

Copyright © 2026 Foodie Pro on the Foodie Pro Theme

Rate This Recipe

Your vote:


A rating is required
A name is required
An email is required