Grumpy's Honeybunch

  • Classic Comfort Food and Easy Keto Friendly Family Recipes
  • Recipes
    • Breakfast
    • Lunch
    • Dinner
    • Desserts
    • Low Carb Keto Recipes
  • Disclosure & Privacy Policy
menu icon
go to homepage
  • About
  • Recipes
  • Contact

search icon
Homepage link
  • About
  • Recipes
  • Contact

×
Home

Chicken Crescent Rolls (Chicken Baseballs)

February 11, 2008 by Shelby Law Ruttan 5 Comments

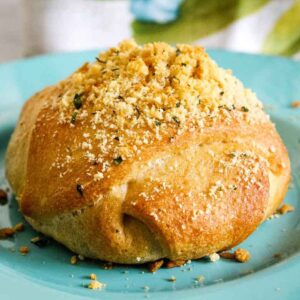
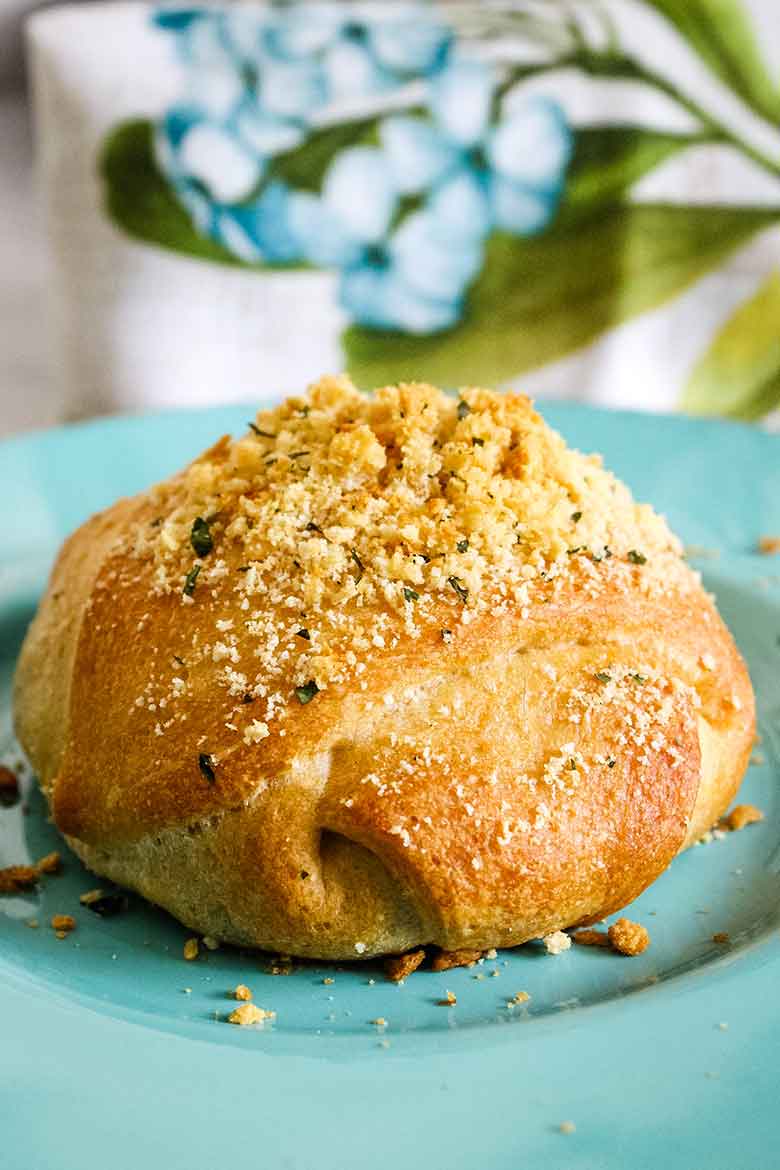
Chicken baseballs on a turquoise plate.

Chicken Crescent Rolls are a cozy American classic filled with creamy chicken and mushrooms wrapped in golden crescent dough. They're easy to make and perfect for busy nights when you want something warm and satisfying on the table.

One golden brown Chicken Crescent Roll, also known as Chicken Baseball on a blue plate with napkin in the background.
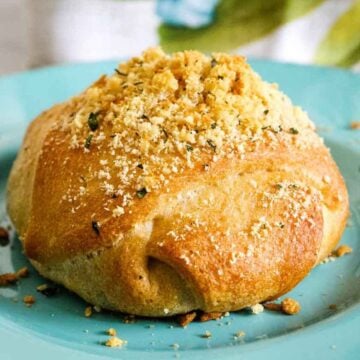
Growing up my family has always called these Chicken Baseballs, and that name has continued to stick with me. They remind me of evenings when my boys were young and hungry for something comforting after soccer practice, right alongside recipes like my Turkey Pot Pie with Cheddar Garlic Biscuits.

Why You'll Love Chicken Crescent Rolls Recipe

Creamy filling: the cream cheese mixture makes the center rich and comforting without being heavy.

Easy assembly: using crescent dough keeps things simple for a quick, easy chicken dinner.

Family favorite: these chicken baseballs have been loved for years in my home and make great leftovers too.

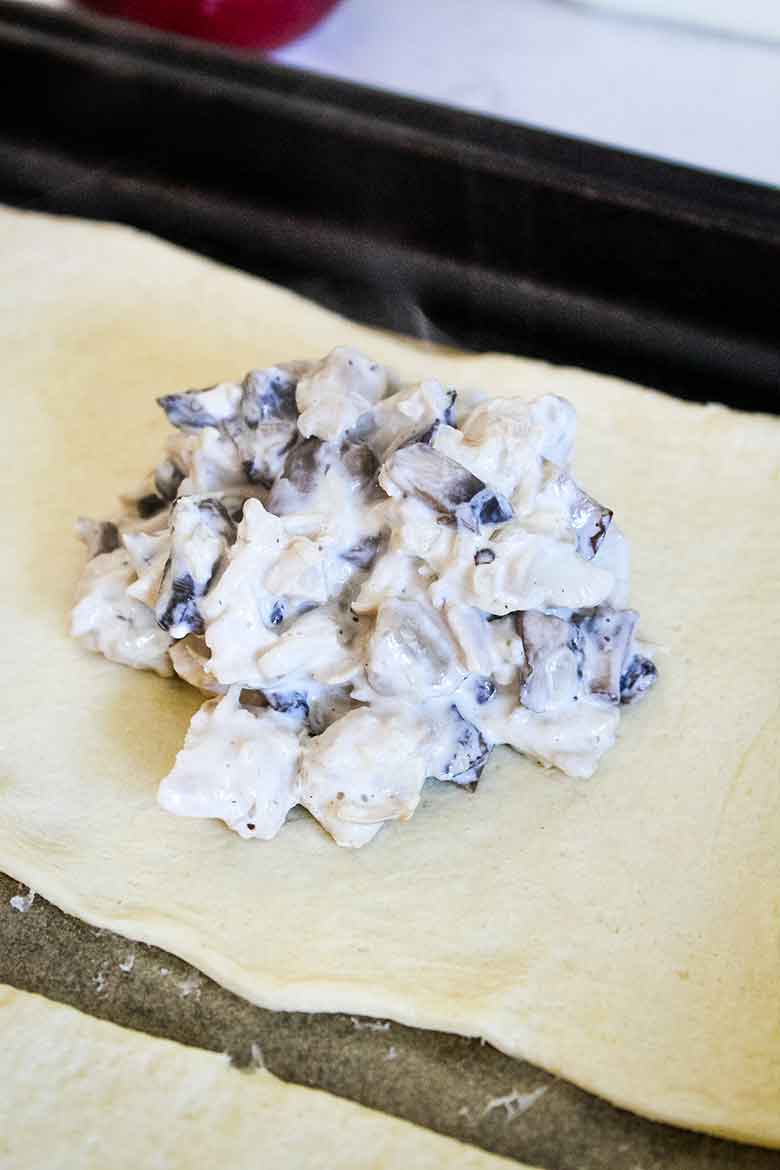
Creamy chicken and mushroom filling on crescent roll dough before shaping into a baseball.

Key Ingredients for Creamy Chicken Crescent Rolls

See the recipe card below for a full list of ingredients and instructions.

  • Chicken breast: cooked and diced chicken creates a hearty filling.
  • Fresh mushrooms: add savory depth and pair perfectly with the creamy center.
  • Cream cheese: makes the filling smooth and flavorful.
  • Crescent roll dough: the shortcut that gives these their signature shape.
  • Seasoning: minced onion, garlic powder, salt, and pepper bring everything together.

Ingredient Substitutions

  • Turkey in place of chicken for a post holiday twist.
  • Full fat cream cheese instead of reduced fat for a richer filling.
  • Crushed buttery crackers instead of seasoned breadcrumbs on top.

Variations on Chicken Crescent Rolls

  • Cheesy Broccoli Version: stir in chopped steamed broccoli and a handful of cheddar cheese.
  • Jalapeno Popper Style: add minced jalapeno and a small amount of cooked bacon to the filling.
  • Spinach Mushroom: fold in wilted spinach for a veggie-forward twists.
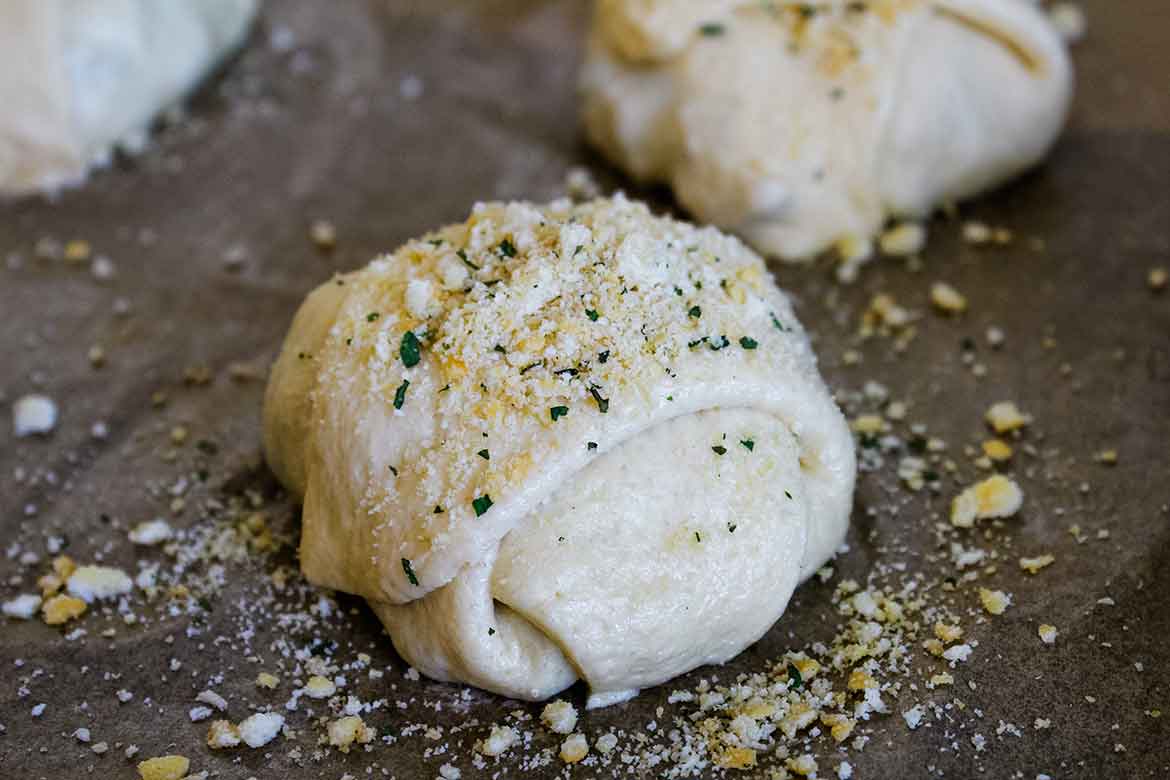
Unbaked chicken baseballs on a parchment lined baking sheet topped with seasoned bread crumbs.

Tips for the Best Creamy Chicken Filling

  • Dry the mushrooms well by cooking off all their moisture first for better flavor.
  • Seal the dough completely so your Chicken Baseballs stay stuffed as they bake.
  • Use freshly cooked chicken for the best texture and seasoning control.
Golden chicken crescent rolls with a creamy chicken mushroom filling topped with colden crumbs and seasoning on a parchment lined baking sheet.

How to Store and Reheat

Stor lefrtover chicken crescent rolls in an airtight container in the refrigerator for up to 3 days. For best reheating, warm in a 325°F oven for 10-12 minutes until heated through. This keeps the crescent dough crisp and prefents the filling from becoming too soft.

Serve With...

These Chicken Crescent Rolls pair beautifully with recipes already on my site. Try them with my Air Fryer Frozen Green Beans, or Air Fryer Corn on the Cob.

More Easy Chicken Dinner Recipes You'll Love

If you enjoy these stuffed crescent rolls, you might also like my Spicy BBQ Chicken Crescents, Air Fryer General Tso Chicken, Slow Cooker Green Chicken Chili, and Chipotle Chicken - Easy Skillet Recipe.

Baked Chicken Baseball cut in half to show filling.

When you make this recipe, please comment below and let me know what you think. I'd love it if you tag me on Instagram @grumpyshoneybunch or #grumpyshoneybunch so I can see your photos!

If you love this recipe, please leave a ⭐⭐⭐⭐⭐ rating

📖 Recipe

Chicken baseballs on a turquoise plate.

Chicken Crescent Rolls (Chicken Baseballs)

Shelby Law Ruttan
These Chicken Crescent Rolls bake into a golden, creamy entree with a tender filling and a crisp exterior. Known in my family as Chicken Baseballs, they make a cozy American style meal perfect for busy weeknights.
5 from 3 votes
Prevent your screen from going dark
Print FREE recipe card with your email address Pin Recipe Save Go to Collections
Prep Time 10 minutes mins
Cook Time 20 minutes mins
Total Time 30 minutes mins
Course Main Dish
Cuisine American
Servings 4
Calories 406 kcal

Equipment

  • cutting board
  • Sharp knife
  • Medium skillet
  • mixing bowls
  • Baking Sheet
  • Parchment Paper
  • Silicone spatula
  • Pastry brush

As an Amazon Associate I earn from qualifying purchases.

Ingredients
  

  • 8 ounces fresh sliced mushrooms
  • 2 tablespoons butter divided
  • 4 ounces reduced fat or fat free cream cheese
  • 2 tablespoons skim milk
  • 1½ teaspoon dried minced onion
  • ½ teaspoon garlic powder
  • ½ teaspoon salt
  • ½ teaspoon black pepper
  • 2 cups cooked chicken breast diced
  • 8 ounces reduced fat crescent rolls (1 tube)
  • 2 tablespoon Italian seasoned bread crumbs

Instructions
 

  • In a skillet, over medium heat, add 1 tablespoon butter and mushrooms. Cook until all water is cooked out and mushrooms become slightly brown. Add chicken and stir to combine. Remove from heat.
  • In mixing bowl, combine cream cheese, 1 tablespoon melted butter, 2 tablespoon milk, 1-½ teaspoon minced dried onion, ½ teaspoon garlic powder, ½ teaspoon salt, and ½ teaspoon black pepper. Mix until well blended. Pour mixture over chicken and stir until combined.
  • Separate crescent rolls into 4 rectangles and seal perforations. Spoon ½ cup of chicken mixture in center and of crescent roll rectangle. Pull opposite corners toward the center and seal dough to completely cover filling. The end result will be a baseball shape.
  • Place each chicken baseball on a baking sheet lined with parchment paper. Bake at
  • Mix together finely crushed crackers and dried parsley. Sprinkle each baseball. Bake at 350 degrees for 20 minutes.

Nutrition

Serving: 1gCalories: 406kcalCarbohydrates: 36gProtein: 29gFat: 15gSaturated Fat: 7gPolyunsaturated Fat: 1gMonounsaturated Fat: 3gTrans Fat: 0.2gCholesterol: 76mgSodium: 1000mgPotassium: 601mgFiber: 1gSugar: 9gVitamin A: 216IUVitamin C: 3mgCalcium: 62mgIron: 3mgNet Carbohydrates: 35g
Keyword Chicken Baseballs, Chicken Crescent Rolls, chicken stuffed crescent rolls, creamy chicken crescent rolls, easy chicken dinner
Tried this recipe?Mention @grumpyshoneybunch or tag #grumpyshoneybunch!

Slow Cooker Split Pea Soup with Sausage

February 10, 2008 by Shelby Law Ruttan 1 Comment

Slow Cooker Split Pea Soup featured image.

Slow Cooker Split Pea Soup is a delicious and warming soup recipe that will warm you up on the chilliest of days. Add some smoked sausage slices or leftover ham for a meaty treat that will make tummies happy.

Split Pea Soup with Sausage
[feast_advanced_jump_to]

A hot and steamy bowl of soup is a great lunch or a small cup is perfect as a dinner appetizer. For lunch, pair it up with a Homemade Sweet Dinner Roll and your good as gold.

🥣 Slow Cooker Soup

Making meals in the slow cooker is so convenient. If I need to leave the house for a few hours, the slow cooker can still do its work and have my soup ready by the time I get home. There is nothing more comforting on a chilly day than coming home to a hot and flavorful soup for dinner.

I grew up eating a lot of legumes. With Mom being vegetarian, she would fill us up on lentils, navy beans, and split peas. I ate a lot of lentil soup in my lifetime and I still love it today. It had been a while since I had eaten Split Pea Soup and wanted to make some that I didn't have to babysit on the stove. So, I pulled out the crockpot and slow cooker Split Pea Soup was dinner.

Ingredients for slow cooker soup recipe, split peas, bouillon cubes, herbs, diced potatoes, celery, onion, carrots, and slices of kielbasa sausage.
Ingredients for Slow Cooker Split Pea Soup with Sausage

🥘 Ingredients

Dried Split Peas: These can be found on the shelf in the grocery store where the dried beans can be found. Usually, in the same aisle, the canned goods are.
Chicken stock or broth: I love this brand. I like to use bone broth to get the best benefits I can from the bone, the collagen, and extra protein.

Smoked Sausage or Leftover Ham: I used smoked sausage in this recipe, but have been known to make split pea and ham soup with leftover ham. Try making this Cider Bourbon Glazed Ham for a Sunday dinner, then make soup with some of the leftovers.

Veggies: Onion, carrots, celery, and potatoes are common. If you don't have one, then just bulk up with the other. Potatoes, however, are pretty important in this soup, so don't skip those!

Spices: Bay leaves, garlic powder, and oregano. All shelf-stable items most people already have in their pantry.

Slow Cooker: I just use a basic slow cooker. Nothing fancy. I like to at least have a low, high, and warm setting on mine.

🔪 Instructions

  1. In a 5 quart slow cooker, combine the peas, water, sausage, bouillon, carrot, celery, potatoes, garlic powder, oregano, bay leaves, and onion.
  2. Cover, and cook on High for 4 to 5 hours. Remove bay leaves before ladling into bowls.
This recipe is as easy as placing all ingredients in the slow cooker and setting the time!

Top Tips

This slow cooker Split Pea Soup is a great recipe to make and forget until it's time to eat. I like to cook it on low for several hours, but you can cook it on high and have it ready in a shorter amount of time. Below are some important things to remember when making this slow cooker Split Pea Soup with sausage.

  • Be sure to rinse the split peas well. However, don't rinse them until you are ready to put them in the slow cooker. They will stick to each other in chunks if you do.
  • Since split peas are starchy, there is no need to thicken this soup with a thickening agent. It may not be as thick the day it is made, but it will be thicker the next day as it continues to thicken the longer it sits.
  • Soaking is common with many people, but it's not required. I do not soak my split peas. I rinse them then add them right to the pot.
  • Split pea soup freezes well. This is a big batch, so unless you have a big family, then you might want to freeze some so you don't get tired of eating it every day until it is gone.
  • Thermos meals are great for those who work outside in the cold and this split pea soup can be a welcome packed lunch!
Split Pea Soup ingredients in a slow cooker

📖 Variations

  • Use lentils in place of split peas.
  • Leave out the sausage and add a ham hock to the soup while it is cooking. When done, remove the meat from the ham hock and discard the bone and fat.
  • If you have leftover ham, add the ham bone and meat to the soup. Remove the bone before serving.
  • Make the soup in the instant pot instead of a slow cooker. Just add all of the ingredients as you would for the slow cooker recipe and set it on Manual for 15 minutes. Allow it to naturally release for 15 minutes before serving.
  • If you want to make it on the stovetop just add all ingredients to a large pot. Cover and cook over medium heat for about 30-40 minutes, or until the peas are tender, stirring occasionally.

Serving Suggestions

Split Pea Soup can be a meal on its own. However, it's sometimes nice to serve it with a small side. Homemade Soft White Bread, Homemade Buttermilk Biscuits, or a Homemade Sweet Dinner Roll would be a perfect side.

It is a sandwich you are hankering for, then these Pimento Tea Sandwiches or Grilled Tomato and Brie Sandwich would work.

Sliders also are a good idea. White Castle Like Sliders are made in the oven for ease or these oven-baked Ham and Swiss Sliders are also ideal.

More Slow Cooker Recipes

*If you made this Slow Cooker Split Pea Soup with Sausage, please leave a star rating*

📖 Recipe

Slow Cooker Split Pea Soup featured image.

Slow Cooker Split Pea and Sausage Soup

Shelby Law Ruttan
A slow cooker recipe with split peas and smoked sausage making a hearty and delicious soup recipe that the whole family will enjoy.
4.50 from 4 votes
Prevent your screen from going dark
Print FREE recipe card with your email address Pin Recipe Save Go to Collections
Prep Time 10 minutes mins
Cook Time 5 hours hrs
Total Time 5 hours hrs 10 minutes mins
Course Main Course
Cuisine American
Servings 8
Calories 306 kcal

As an Amazon Associate I earn from qualifying purchases.

Ingredients
  

  • 1 pound dried split peas
  • 10 cups water
  • 1 pound gluten-free smoked sausage of your choice sliced
  • 5 cubes chicken bouillon
  • 1 ½ cups chopped carrot
  • 1 cup chopped celery
  • 2 potatoes peeled and chopped
  • ½ teaspoon garlic powder
  • ½ teaspoon dried oregano
  • 2 bay leaves
  • 1 onion chopped

Instructions
 

  • In a 5 quart slow cooker, combine the peas, water, sausage, bouillon,
    carrot, celery, potatoes, garlic powder, oregano, bay leaves, and onion.
  • Cover, and cook on High for 4 to 5 hours. Remove bay leaves before ladling into bowls.

Nutrition

Serving: 1gCalories: 306kcalCarbohydrates: 26gProtein: 13gFat: 17gSaturated Fat: 5gPolyunsaturated Fat: 9gCholesterol: 35mgSodium: 819mgFiber: 7gSugar: 5g
Keyword Split Pea and Sausage Soup
Tried this recipe?Mention @grumpyshoneybunch or tag #grumpyshoneybunch!
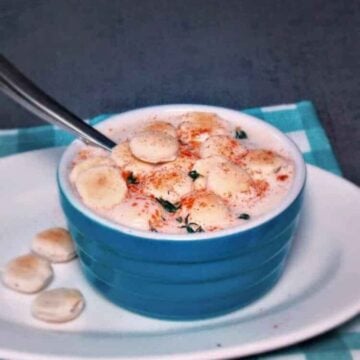
  • A blue ceramic bowl filled with creamy slow cooker clam chowder topped with several oyster crackers and a sprinkle of paprika, served with a spoon on a blue checkered napkin.
    Slow Cooker Clam Chowder
  • Slow Cooker Black-Eyed Peas with Ham Hock
  • Featured image for Mom's Crockpot Stuffing
    Momma Law's Crockpot Stuffing
  • Featured image for crockpot venison stew..
    Crockpot Venison Stew - Warm and Hearty

Buttermilk Blueberry Muffins

February 3, 2008 by Shelby Law Ruttan 2 Comments

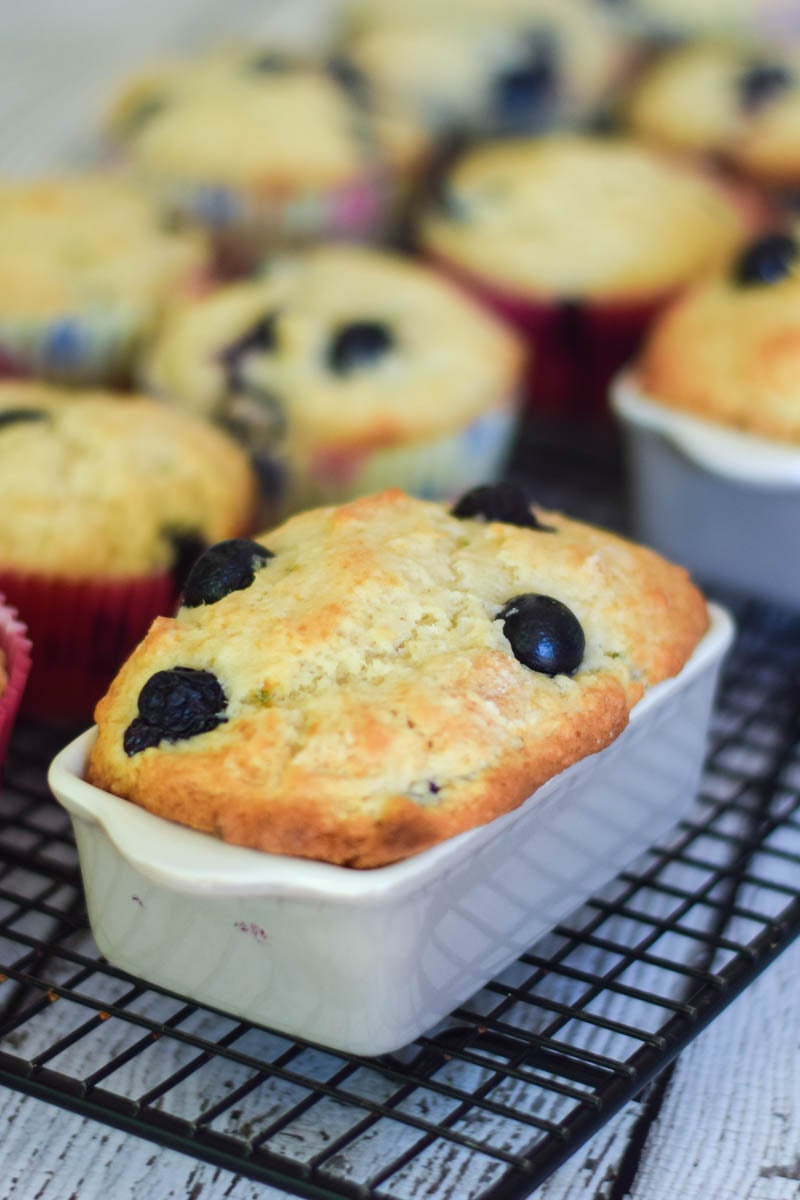
Buttermilk Blueberry Muffin in a ceramic loaf pan on a cooling rack.

These Buttermilk Blueberry Muffins are my go-to muffin recipe. The are lightly sweet with a hint of lime, made tender with buttermilk and busting with fresh blueberries. They can be a delicious part of your morning routine and are completely portable making them a great on the go breakfast recipe.

Buttermilk Blueberry Muffins in mini ceramic loaf pans with standard muffins in the background

Big, soft, fluffy and full of incredibly delicious good for you blueberries. You can feel good about eating these muffins knowing that the King of Antioxidants is a part of your routine.

These muffins were inspired by this Blueberry Muffins with Sour Cream recipe and are a part of a long line of blueberry recipes I have here on my website.

[feast_advanced_jump_to]

Why You'll Love Buttermilk Blueberry Muffins

Fresh blueberries: this recipe uses fresh blueberries that pop with a burst of flavor in every bite.

Healthier recipe: blueberries add a boost of fiber, vitamin C, K, and maganese making this a healthier choice for breakfast or snacking.

On the go: these make a great on the go breakfast for busy families! They also are a great addition to lunch boxes.

Buttermilk Blueberry Muffins in a 12 cup muffin pan.

Ingredients

  • Fresh Blueberries: These are the best choice if you have them. If not, frozen will work. Just be sure that you do not thaw them out first.
  • Buttermilk: The acidity in buttermilk helps to keep muffins moist and tender. I always use low-fat buttermilk, but non-fat can be substituted. I feel the tang of buttermilk really complements the blueberry muffin flavor.
  • All-purpose flour
  • Granulated white sugar
  • Baking powder
  • Baking soda
  • Salt
  • Lime zest
  • Large egg 
  • Extra-virgin olive oil
  • Pure vanilla extract

See recipe card below for amounts.

Instructions

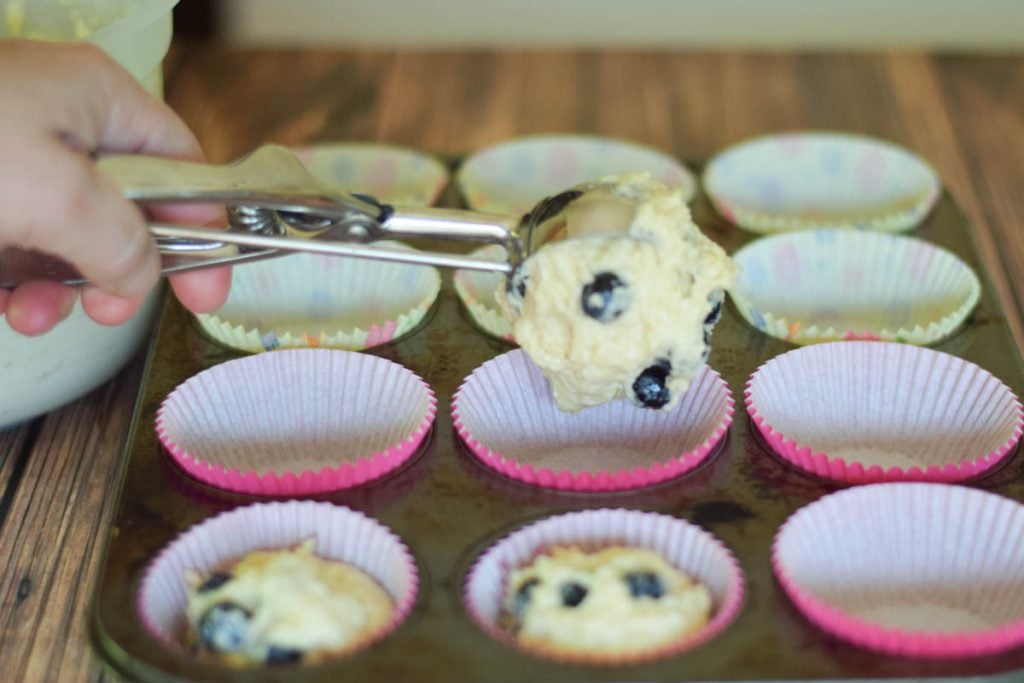
scooping the muffin batter into paper lined muffin pan
  1. Preheat oven to 375° F. Line the muffin pans with paper liners or coat with a non-stick cooking spray.
  2. In a large measuring bowl, whisk together the egg, buttermilk, oil, and vanilla extract.
  3. In another large bowl combine the flour, sugar, baking powder, baking soda, salt, and zest.
  4. Gently fold the blueberries into the flour mixture. With a rubber spatula fold the wet ingredients into the dry ingredients and stir only until the ingredients are combined. Do not over mix.
  5. Using a ¼ cup sized scoop, fill each muffin cup ¾ full with batter. Place in the oven and bake for 20 minutes, or until a toothpick inserted in the center of a muffin comes out clean
  6. Transfer to a wire rack and let cool for 10 minutes before removing from pan

Equipment

Muffin Pan: This muffin recipe makes 16 muffins. You need at least one 12 cup standard size muffin pan plus one 6 cup muffin pan. There are other options out there. My next choice is a mini ceramic loaf pan, which I used in the photos for this recipe.

Paper Liners: My favorite liner is a parchment paper liner.

Muffin Scoop: I use this ¼ cup sized scoop to portion the muffin batter into the baking cups.

Substitutions

Buttermilk substitute: Make your own buttermilk by adding 1 tablespoon of vinegar or lemon juice to a 1 cup measure. Then, fill the measuring cup up to 1 cup and allow it to sit for at least 5 minutes before using.

Fruit swap: you can swap out fresh raspberries, blueberries, chopped cherries or strawberries for the fresh blueberries.

Flavor swap: Swap the vanilla extract for almond extract.

Variations

Blueberry White Chocolate Muffins: stir in 1 cup white chocolate chips to the muffin batter.

Blueberry Nut: add ½ cup chopped pecans or almonds.

Glazed muffin top: mix the juice of one lime or lemon to 1 cup of powdered sugar, then dip the tops of the cooled muffin in the glaze. Set on a cooling rack to dry.

a single muffin with pink muffin wrapper and blue napkin in the background

Top Tip

When using muffin liners, go with parchment paper muffin liners or silicone liners. This prevents the muffin from sticking to the wrapper.

Storage

Store leftover blueberry muffins in an air tight container at room temperature up to 3 days. You can also store muffins in the freezer up to 2 months.

To reheat muffins, place thawed muffin in the air fryer or oven at 350 degrees for 5 minutes.

Related Recipes

This Peach Blueberry Burrata Quesadilla is different and delicious. If you haven't tried it, this is a must try recipe.

Cherry Blueberry Trifle is a delicious recipe to make the night before and let sit overnight for a morning breakfast.

Cornmeal Crepes with Ricotta Blueberry Filling is a sugar free breakfast we love to serve for Sunday brunch.

Blueberry Lemon Yogurt Cake is perfect for brunch or an afternoon snack with a hot cup of tea.

These Blueberry Coconut Muffins are a delicious combination.

Buttermilk Blueberry Muffins in mini ceramic loaf pans with standard muffins in the background

Don't forget to check out my Amazon storefront for some of my favorite products!

When you make this recipe, please comment below and let me know what you think. I'd love it if you tag me on Instagram @grumpyshoneybunch or #grumpyshoneybunch so I can see your photos!

If you love this recipe, please leave a ⭐⭐⭐⭐⭐ rating

📖 Recipe

Buttermilk Blueberry Muffin in a ceramic loaf pan on a cooling rack.

Buttermilk Blueberry Muffins

Shelby Law Ruttan
A tender and delicious muffin filled with blueberries make a perfect portable morning breakfast.
4.60 from 5 votes
Prevent your screen from going dark
Print FREE recipe card with your email address Pin Recipe Save Go to Collections
Prep Time 10 minutes mins
Cook Time 20 minutes mins
Total Time 30 minutes mins
Course Breakfast & Brunch
Cuisine American
Servings 16
Calories 175 kcal

As an Amazon Associate I earn from qualifying purchases.

Ingredients
  

  • 2½ cups all-purpose flour
  • ½ cup granulated white sugar
  • 2 teaspoons baking powder
  • ½ teaspoon baking soda
  • ¼ teaspoon salt
  • 1 teaspoon lime zest
  • 1 large egg , lightly beaten
  • 1 cup buttermilk
  • ½ cup extra-virgin olive oil
  • 1 teaspoon pure vanilla extract
  • 2 cups fresh or frozen berries

Instructions
 

  • Preheat oven to 375° F. Line the muffin pans with paper liners or coat with a non-stick cooking spray.
  • In a large measuring bowl, whisk together the egg, buttermilk, oil, and vanilla extract.
  • In another large bowl combine the flour, sugar, baking powder, baking soda, salt, and zest.
  • Gently fold the blueberries into the flour mixture. With a rubber spatula fold the wet ingredients into the dry ingredients and stir only until the ingredients are combined. Do not over mix.
  • Using a ¼ cup sized scoop, fill each muffin cup ¾ full with batter. Place in the oven and bake for 20 minutes, or until a toothpick inserted in the center of a muffin comes out clean
  • Transfer to a wire rack and let cool for 10 minutes before removing from pan.

Nutrition

Calories: 175kcalCarbohydrates: 24gProtein: 3gFat: 8gSaturated Fat: 1gPolyunsaturated Fat: 7gCholesterol: 12mgSodium: 168mgFiber: 1gSugar: 8g
Keyword Buttermilk Blueberry Muffins
Tried this recipe?Mention @grumpyshoneybunch or tag #grumpyshoneybunch!

Peppermint Hot Chocolate - Homemade Winter Cocoa

January 30, 2008 by Shelby Law Ruttan Leave a Comment

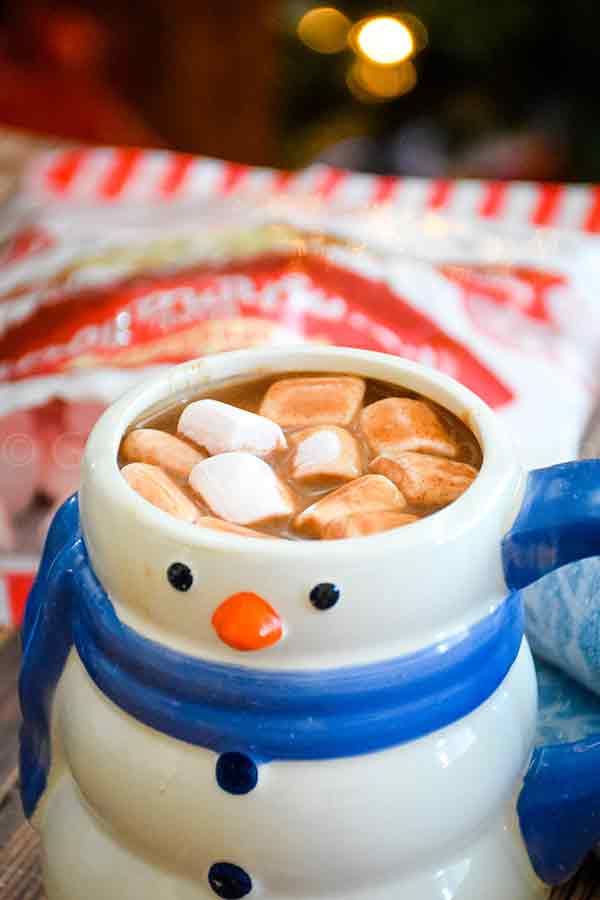
Sugar Free Creamy Hot Cocoa being poured into s snowman mug.

Peppermint Hot Chocolate is a cozy winter drink made with real chocolate, warm dairy, and a light peppermint touch that feels extra special on cold days. It's simple, rich, and the kind of recipe I've turned to over the years when I want something warm but still festive.

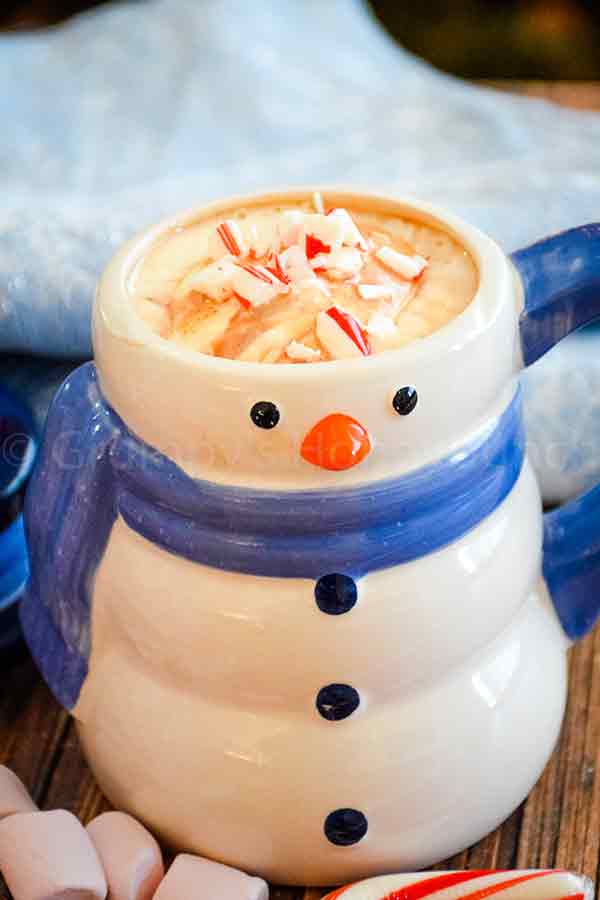
Creamy Hot Chocolate with crushed  peppermint on top in a snowman mug.

It takes me back to those winter nights when my boys and I would come inside from the cold and make hot cocoa together. This one reminds me of my chocolate peppermint treats, like my Junior Mint Brownies, just in a warm mug.

[feast_advanced_jump_to]

Why You'll Love Peppermint Hot Chocolate

Rich flavor: a creamy stovetop hot chocolate with deep chocolate taste.

Easy method: made in minutes with simple steps and everyday ingredients.

Winter twist: a holiday peppermint drink that feels seasonal without being limited to the holidays.

Peppermint Hot Chocolate being poured into a snowman mug with peppermint marshmallows and a red and white candy cane surrounding the mug.

Key Ingredients for Stovetop Hot Chocolate

See the recipe card below for a full list of ingredients and instructions.

  • Heavy cream: a creamy stovetop hot chocolate with deep chocolate taste.
  • Milk: Keeps the drink balanced and smooth.
  • Dark chocolate chips: melt into the base for rich chocolate flavor.
  • Peppermint extract: adds a gentle peppermint note that's not overpowering.
  • Powdered sugar: sweetens the cocoa with a smooth finish.

Ingredient Substitutions

  • Use semi-sweet chocolate chips instead of dark chocolate for a softer taste.
  • Replace heavy cream with half and half for a lighter drink.
  • Swap in vanilla extract for a classic hot chocolate flavor.
Close up image of a mug of peppermint hot chocolate.

Variations on Peppermint Hot Chocolate

  • White Chocolate Twist: make it with white chocolate chips for a sweeter mug.
  • Mocha Cocoa: add brewed espresso for a coffeehouse feel.
  • Extra Peppermint: add a touch more peppermint extract for stronger mint flavor.

Tips for Great Homemade Cocoa

  • Warm the mixture slowly to keep the chocolate from sticking.
  • Whisk often for a smooth texture.
  • For easy homemade cocoa, top with whipped cream or crushed peppermint.
A mug of creamy hot cocoa in a snowman mug with crushed peppermint on top.

What to Serve with Winter Drinks

Peppermint Hot Chocolate pairs well with treats like Chewy Mocha Toffee Chip Cookies or Triple Chocolate Biscotti with Almonds.

More Drink Recipes You'll Love

You may enjoy my Homemade Eggnog, Bailey's Irish Cream Coffee, Amaretto Coffee, and Salted Caramel Mocha Latte.

When you make this recipe, please comment below and let me know what you think. I'd love it if you tag me on Instagram @grumpyshoneybunch or #grumpyshoneybunch so I can see your photos!

If you love this recipe, please leave a ⭐⭐⭐⭐⭐ rating

📖 Recipe

Creamy Hot Cocoa being poured into a snowman mug

Peppermint Hot Chocolate

Shelby Law Ruttan
This Peppermint Hot Chocolate is a creamy winter drink with a soft peppermint note that brings comfort during the colder months.
4.67 from 3 votes
Prevent your screen from going dark
Print FREE recipe card with your email address Pin Recipe Save Go to Collections
Prep Time 5 minutes mins
Cook Time 5 minutes mins
Total Time 10 minutes mins
Course Beverages
Cuisine American
Servings 2
Calories 353 kcal

Equipment

  • Small saucepan
  • Hand whisk
  • Measuring cups
  • Measuring spoons
  • Heat-safe mugs

As an Amazon Associate I earn from qualifying purchases.

Ingredients
  

  • ¾ cup half and half
  • ¾ cup milk
  • 1 tablespoon powdered sugar
  • ⅓ cup dark chocolate chips
  • ¼ teaspoon peppermint extract
  • Whipped Topping optional
  • Crushed peppermint candy optional

Instructions
 

  • Add the heavy cream, milk, powdered sugar, chocolate chips, and peppermint extract to a small saucepan.
  • Placed over medium heat and bring to a simmer, whisking constantly.
  • Pour creamy hot cocoa in two mugs and serve with whipped cream and crushed peppermint if desired.

Nutrition

Calories: 353kcalCarbohydrates: 29gProtein: 8gFat: 23gSaturated Fat: 17gPolyunsaturated Fat: 1gMonounsaturated Fat: 4gCholesterol: 43mgSodium: 122mgPotassium: 448mgFiber: 1gSugar: 22gVitamin A: 472IUVitamin C: 1mgCalcium: 301mgIron: 0.4mgNet Carbohydrates: 28g
Keyword Creamy Hot Cocoa
Tried this recipe?Mention @grumpyshoneybunch or tag #grumpyshoneybunch!

Tofu Burger Recipe – Easy & Delicious Vegan Option

January 28, 2008 by Shelby Law Ruttan 6 Comments

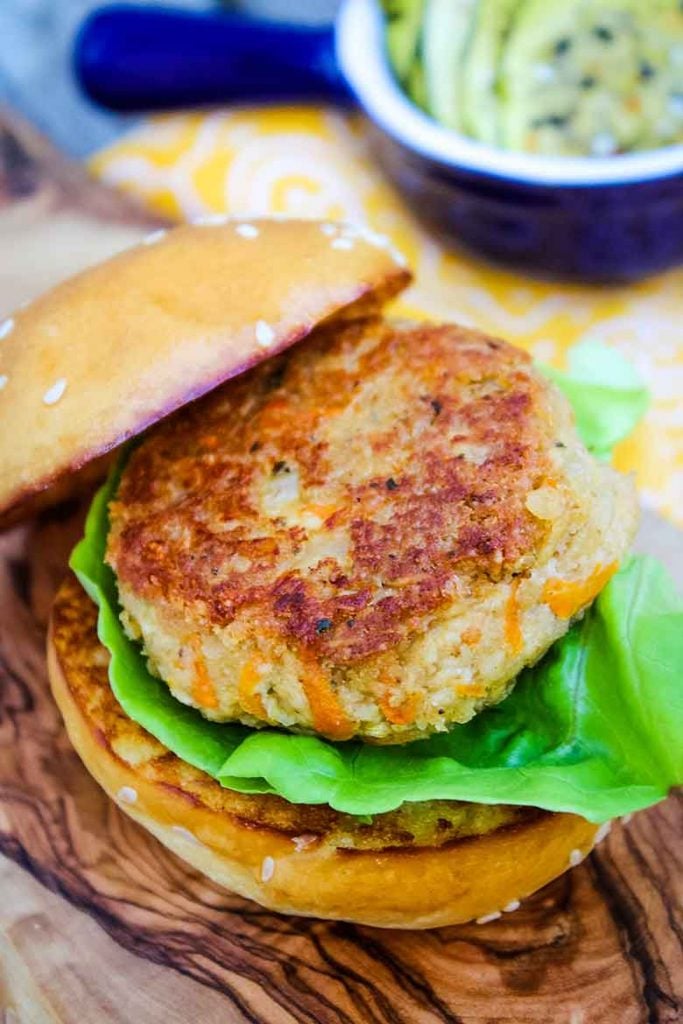
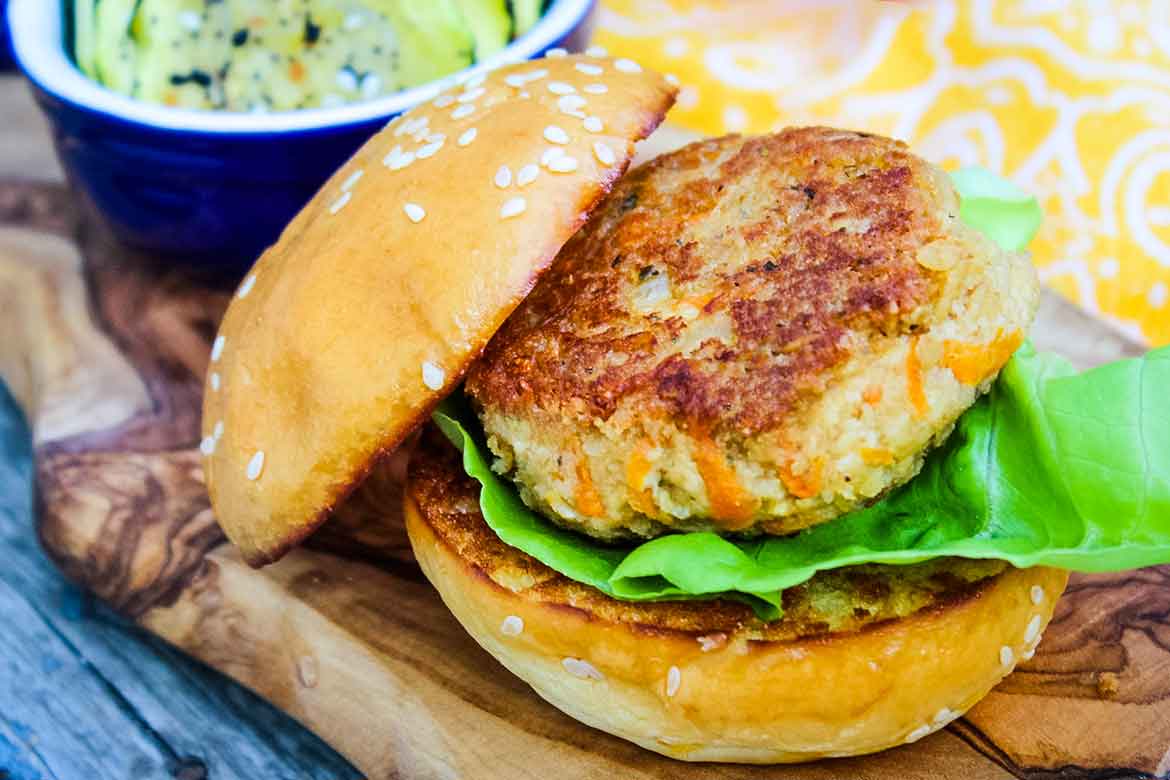
Tofu burger on a toasted bun with lettuce.

Here's a tofu burger recipe that's crispy on the outside, tender inside, and packed with flavor. If you're looking for a satisfying vegan tofu burger that's easy to make and can customize for keto tofu recipes, this is it!

Tofu Burgers on a mini bun with a side of zucchini chips

This recipe was inspired by classic homemade black bean burgers and the idea of turning seasoned mashed tofu into something hearty and skillet-fried. Think of it as a simpler take on a soy veggie burger, but with a protein-packed tofu base that holds together beautifully.

[feast_advanced_jump_to]

Why You'll Love this Tofu Burger Recipe

Crispy & Golden - A quick pan-fry gives it the perfect crust.

Customizable - Add your favorite seasonings or mix-ins.

High-Protein & Vegan - Great for plant-based and keto-friendly meals.

Ingredients

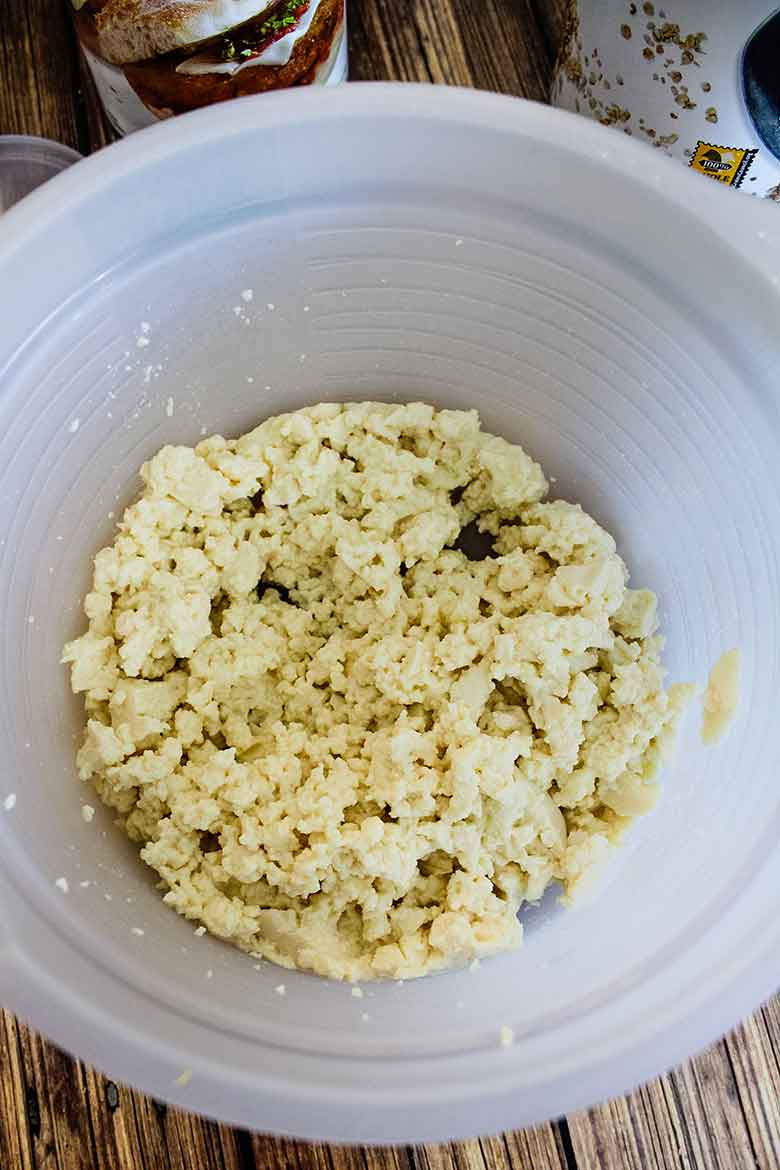
Soft mashed tofu in a mixing bowl.

Tofu can come in many forms. Soft, firm, and extra firm are some of the most popular choices. I always like to use the softer tofu as it blends well into the burgers.

Seasonings: I use carrots, onions, garlic powder, and vegetable bouillon concentrate.

Binder: oatmeal and breadcrumbs are used as a binder in these burgers.

How to Make Tofu Burgers

Sauteing veggies and boullion concentrate.

Saute veggies

In a large skillet, saute onions and carrots until softened. Add garlic powder, veggie bouillion and water, stirring to combine.

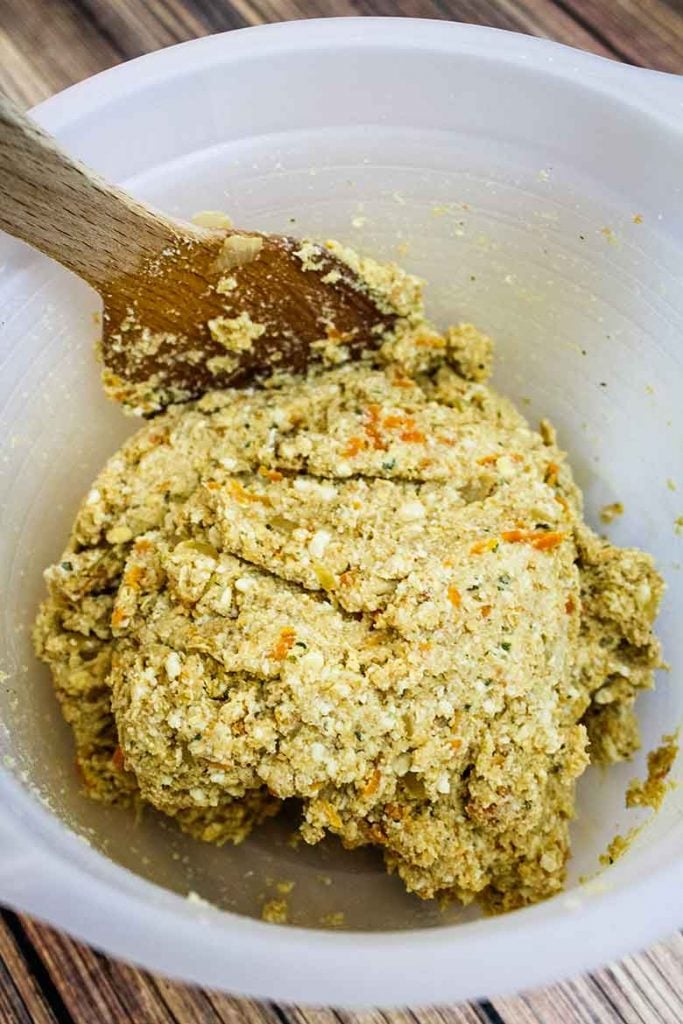
Mashed tofu mixed with sauteed onion, carrots and veggie broth concentrate.

Add veggie to tofu

Mash tofu and add veggie mixture to tofu. Stir in oatmeal and bread crumbs.

Shaped tofu burger before coating with flour.

Shape patties

Measure ¼ cup of tofu mixture and shape into patties.

Frying shaped tofu burgers in a skillet.

Pan fry

Wipe skillet clean and add oil. Pan fry tofu burgers on each side until golden brown and crispy.

The best way to cook this recipe is right in your skillet with some hot oil. These tofu burgers are freshly made patties that will not stand up to a grill. Rather, they would fall apart if you tried to grill them. Frying them in a skillet will give them a crispy exterior that helps to keep the burger's shape when it is hot. The inside will be hot and soft, and full of all the flavors you have added to the tofu.

When I make these Tofu Burgers, I like to make them into sliders, which is a ¼ cup scoop. Making them into sliders also helps the patty to keep its shape better. You can double the size for a full sized burger, however, it is more fragile this way due to the weight. As a result, you need to handle it carefully when making a sandwich.

Substitutions

Replace soft tofu with firm tofu - If you prefer a firmer texture, press and mash firm tofu instead.

Use almond flour instead of quick oats and breadcrumbs - Keeps it low-carb and works as a binding agent.

Swap Italian breadcrumbs with ground flaxseeds - A great gluten-free and keto-friendly alternative.

Recipe Variations

Spicy Tofu Burger - Add sriracha or chili flakes for extra heat.

BBQ-Style - Mix in some smoked paprika and brush with BBQ sauce before serving.

Mediterranean-Inspired - Add oregano, garlic, and sun-dried tomatoes.

Cheesy Vegan Tofu Burger - Stir in nutritional yeast for a cheesy, umami boost.

Top Tips for the Best Tofu Burgers

Season generously - Tofu absorbs flavors, so don't hold back.

Chill before cooking - Helps the patties firm up and hold their shape.

Use a non-stick skillet - Prevents sticking and gives a perfect golden crust.

How to Store

Freezer - Freeze on a baking sheet, then transfer to a freezer bag. Reheat in a skillet or oven.

Fridge - Store cooked patties in an airtight container for up to 4 days.

What to serve with Tofu Burgers

Serve on a dinner roll with your favorite toppings (including slices of garlic dill pickles!). If wanting to keep it keto, serve on this keto slider roll.

Baked Chipotle Avocado Fries or Air Fryer Frozen Fries make a perfect side.

A side of Amish Macaroni Salad or Classic Potato Salad is perfect for summer picnics

Tofu Burgers made into slider size on a wooden serving tray with zucchini chips in the background.
Related Recipes

  • Two soy burgers stacked on a slider roll garnished with sriracha aioli and dill pickles.
    Soy Burgers
  • Close up of a spicy black bean burger patty with visible corn and red bell pepper pieces, served on a sesame seed bun with fresh green leaf lettuce.
    Spicy Black Bean Burger Recipe
  • Featured image for portobello cheesesteak sandwich.
    Portobello Cheesesteak Sliders
  • Featured image for Cheese and Pepper French Bread Pizza.
    Cheese and Pepper French Bread Pizza

When you make this simple tofu burger recipe, please comment below and let me know what you think. I'd love it if you tag me on Instagram @grumpyshoneybunch or #grumpyshoneybunch so I can see your photos!

If you love this recipe, please leave a ⭐⭐⭐⭐⭐ rating

📖 Recipe

Tofu burger on a toasted bun with lettuce.

Tofu Burgers

Shelby Law Ruttan
These tofu burgers are crispy on the outside, packed with flavor, and easy to customize. A simple vegan and keto-friendly option for a delicious meal!
4.37 from 30 votes
Prevent your screen from going dark
Print FREE recipe card with your email address Pin Recipe Save Go to Collections
Prep Time 15 minutes mins
Cook Time 10 minutes mins
Total Time 25 minutes mins
Course Main Dish
Cuisine American
Servings 6
Calories 152 kcal

Equipment

  • Large skillet
  • mixing bowls
  • Wooden spoon
  • Turner

As an Amazon Associate I earn from qualifying purchases.

Ingredients
  

  • 1½ cup soft tofu mashed
  • ½ cup quick oats
  • ½ cup italian breadcrumbs
  • ⅓ cup onions chopped
  • ½½ cup shredded carrots
  • 1 teaspoon garlic powder
  • 1 tablespoon bouillon concentrate vegetable flavor
  • 2 tablespoon avocado oil divided

Instructions
 

  • In a large skillet over medium heat, saute the onion and carrots in 1 tablespoon avocado oil until tender. Stir in the garlic powder and bouillon concentrate.
  • In a large mixing bowl, combine the mashed tofu, quick oats, breadcrumbs, and onion mixture. Form into patties.
  • Wipe the skillet clean, and add the remaining avocado oil and heat until hot. Add tofu burgers and fry until browned and warmed thru. Use more avocado oil to fry as needed.

Video

Notes

The best way to cook this recipe is right in your skillet with some hot oil. These tofu burgers are freshly made patties that will not stand up to a grill. Rather, they would fall apart if you tried to grill them. Frying them in a skillet will give them a crispy exterior that helps to keep the burger's shape when it is hot. The inside will be hot and soft, and full of all the flavors you have added to the tofu.
When I make these Tofu Burgers, I like to make them into sliders, which is a ¼ cup scoop. Making them into sliders also helps the patty to keep its shape better. You can double the size for a full sized burger, however, it is more fragile this way due to the weight. As a result, you need to handle it carefully when making a sandwich.

How to Store

Freezer – Freeze on a baking sheet, then transfer to a freezer bag. Reheat in a skillet or oven.
Fridge – Store cooked patties in an airtight container for up to 4 days.

Nutrition

Serving: 1gCalories: 152kcalCarbohydrates: 16gProtein: 6gFat: 7gSaturated Fat: 1gPolyunsaturated Fat: 2gMonounsaturated Fat: 4gCholesterol: 0.2mgSodium: 371mgPotassium: 227mgFiber: 2gSugar: 3gVitamin A: 2961IUVitamin C: 1mgCalcium: 49mgIron: 2mgNet Carbohydrates: 14g
Keyword Tofu Burger Recipe, Tofu Burgers
Tried this recipe?Mention @grumpyshoneybunch or tag #grumpyshoneybunch!

Gobi Aloo

January 25, 2008 by Shelby Law Ruttan Leave a Comment

Gobi Aloo
Earlier this week I decided I had to try to make Gobi Aloo. I went to my first Indian restaurant about 6 months ago, and I have craved the food ever since. It is really disappointing that the restaurant is not open on a regular basis, because I have NOT mastered the art of Indian cooking, BUT I am not giving up on trying!

I love, love, love, Chicken Tikka Masala, but the one and only time I made it, I did not do that good of a job. So, Gobi Aloo, how many people can screw up spiced potatoes and cauliflower? Not me! It turned out so delish! We had enough for dinner, then I took the rest for lunch to work the next day!

Here is a photo of the dish....it just makes me drool!

New Years Eve 2007

December 31, 2007 by Shelby Law Ruttan Leave a Comment

New Years Eve 2007Its New Years Eve today. I've spoken with my Christopher and later will give Justin a call. In thinking about Chris, my little boy who I wasn't ready for, I can't help but thank God that I have him. He brought me so much joy. I remember thinking when I found out I was pregnant for him, how can I love another child as much as I love Justin. Little did I know that a mother could love so much. Chris was such a bubbly happy baby. He was always smiling with those beautiful dimples in his chubby little cheeks. He was the perfect baby from the day I brought him home. He slept and ate...and that's basically all he did! He became my roly poly cheerful little cherub. An talk about beautiful. He was a blonde haired, blue eyed, adorable child. He was so easy to love. From day one HE was mommy's boy. He loved to have me take video footage of him. I remember one day in particular he wasn't feeling too well. He was asleep on the couch and I went in with the video camera. I recorded his little soul as he was sleeping, capturing a moment that was so precious. A little later that afternoon after he woke up, he was feeling a bit better and wanted some chicken noodle soup. We went to the kitchen and I turned the tv on while I heated up the soup for him. He was too little to sit on his behind in the chair, so he knelt in the chair when I brought his soup to him. He started to eat his soup, and at about the same time Golden Girls came on the tv. He called out to me in his sweet little voice and said "Mommy! Golden Girls!" It was so precious for me to hear him sound like his self again and slurp on his soup.

My blonde haired, blue eyed boy has grown up to a 21 year old, tall, dark haired, hazel eyed boy. He still has those charming dimples and that breathtaking smile. I still worry about him. Maybe more now that I did then. Becoming an adult can be such a hard thing for children. I only hope I have done the right things, and that my little boy, who is so precious to me still - in every way - can become a man. I hope he can become a responsible person who will take care of himself, be happy, and actually strive to reach his dream.

Christmas Memories

December 27, 2007 by Shelby Law Ruttan Leave a Comment

Christmas MemoriesI have so many different memories that I have decided that I need to put them in writing. Today I will start with one of my most favorite memories of all time.

This is a Christmas memory of my children - specifically Justin Michael! Justin was in 1st or 2nd grade when he started to question whether there was a Santa Claus. He was taking a bath one day when he hit me with the question "Mom, does Santa buy Avon?" lol, he caught me by such surprise! I told him Santa got his gifts from everywhere! Well, I had been adamant that the kids were not getting game boys for Christmas and I decided it was time to put some belief back into my child's life. Both of my children wanted them badly, but I had told them the only way they would get a game boy would be if Santa brought it for them. Christmas morning came and Justin & Chris started to open their presents. When Justin opened his game boy - his proclamation was "There really is a Santa Claus! Even if for just a few more years, I put belief back into my son's life. To see their happiness and joy was the most rewarding present I ever could have had in my entire life. Now they are grown boys and to watch them with their struggles makes me wish they could be little again with no worries in the world.

  • « Previous Page
  • 1
  • …
  • 35
  • 36
  • 37
An image of Shelby Law Ruttan.

Hey, I'm Shelby

Shelby Law Ruttan is the cookbook author and food blogger behind HoneyB's Kitchen, where she shares scratch-made family recipes, comfort food, and easy home cooking inspired by generations of home cooks.

About me

Footer

↑ back to top

About

About Shelby Law Ruttan

Privacy Policy

Terms and Conditions of Use

Accessibility Statement

Contact Shelby

Contact

Work with me

As an Amazon Associate I earn from qualifying purchases.

Copyright © 2026 Foodie Pro on the Foodie Pro Theme

Rate This Recipe

Your vote:


A rating is required
A name is required
An email is required