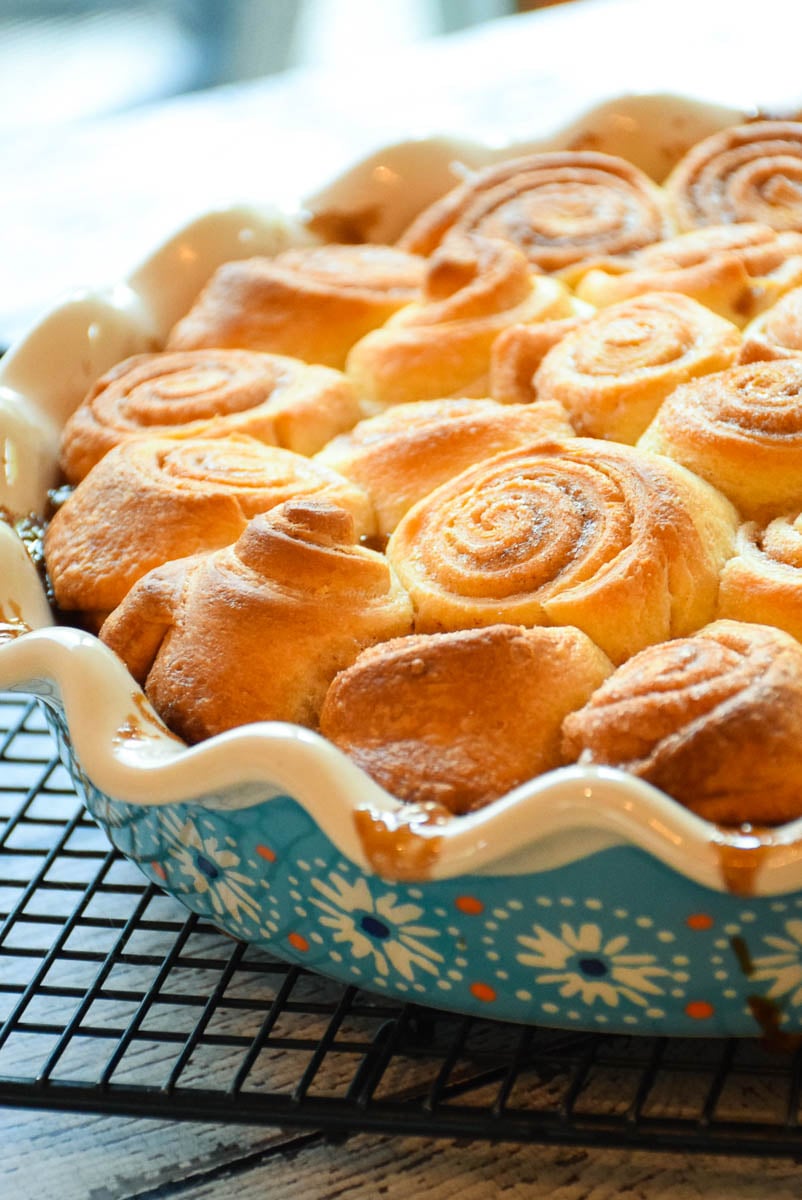
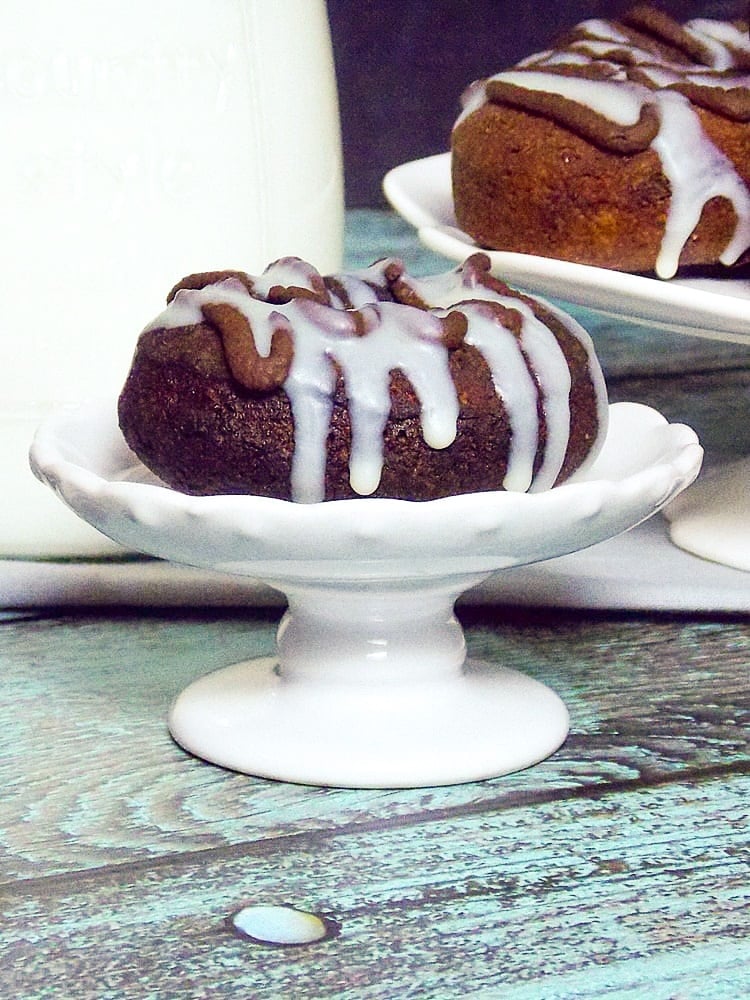
Indulge in the heavenly combination of warm cinnamon and sweet blueberry flavor with these easy recipe for Blueberry Cinnamon Rolls. Bursting with fruity goodness and a hint of spice, these fluffy blueberry rolls bring the traditional cinnamon buns to the next level.

❤️ Why you'll love it
Irresistible Flavor: fans of a gooey cinnamon roll will love the juicy blueberries and sweet cinnamon filling combination resulting in gooey, soft cinnamon rolls.
Quick and easy: These cinnamon rolls are made with a premade pizza dough that makes assembly quick and easy and no waiting while the dough rises.
Versatile and Customizable: You can easily customize the recipe by adding a drizzle blueberry jam, sprinkling some nuts on top, or even substituting the blueberries with other fruits like raspberries or strawberries.


🥘 Ingredients
Canned Pizza Dough: I used Pillsbury pizza dough in a can for this recipe.
All-purpose flour
Brown sugar
Ground cinnamon
Ground nutmeg
Unsalted butter
Blueberries: choose fresh juicy blueberries that are still firm to the touch.
Cream cheese
Powdered sugar
Vanilla extract
Lemon juice
Salt


🔪 Instructions
- Preheat oven to 350 degrees F and prepare a 9x13 baking dish with non-stick cooking spray.
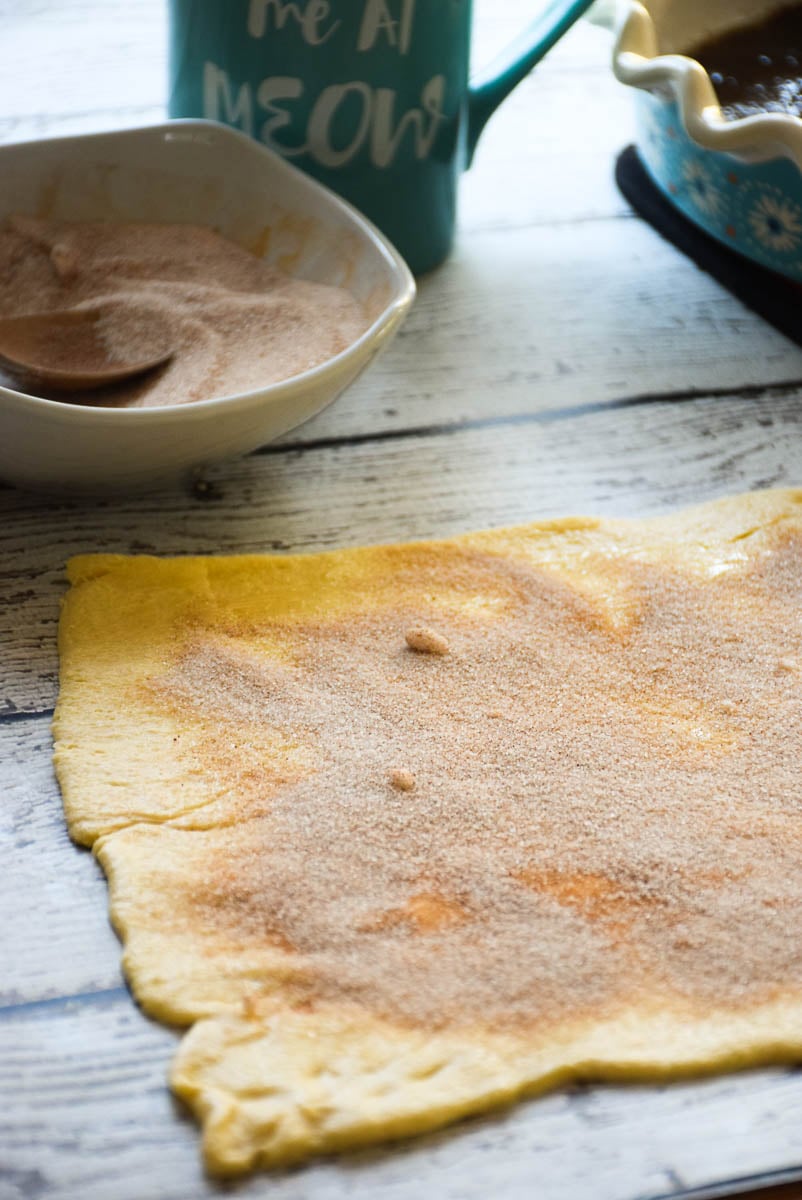
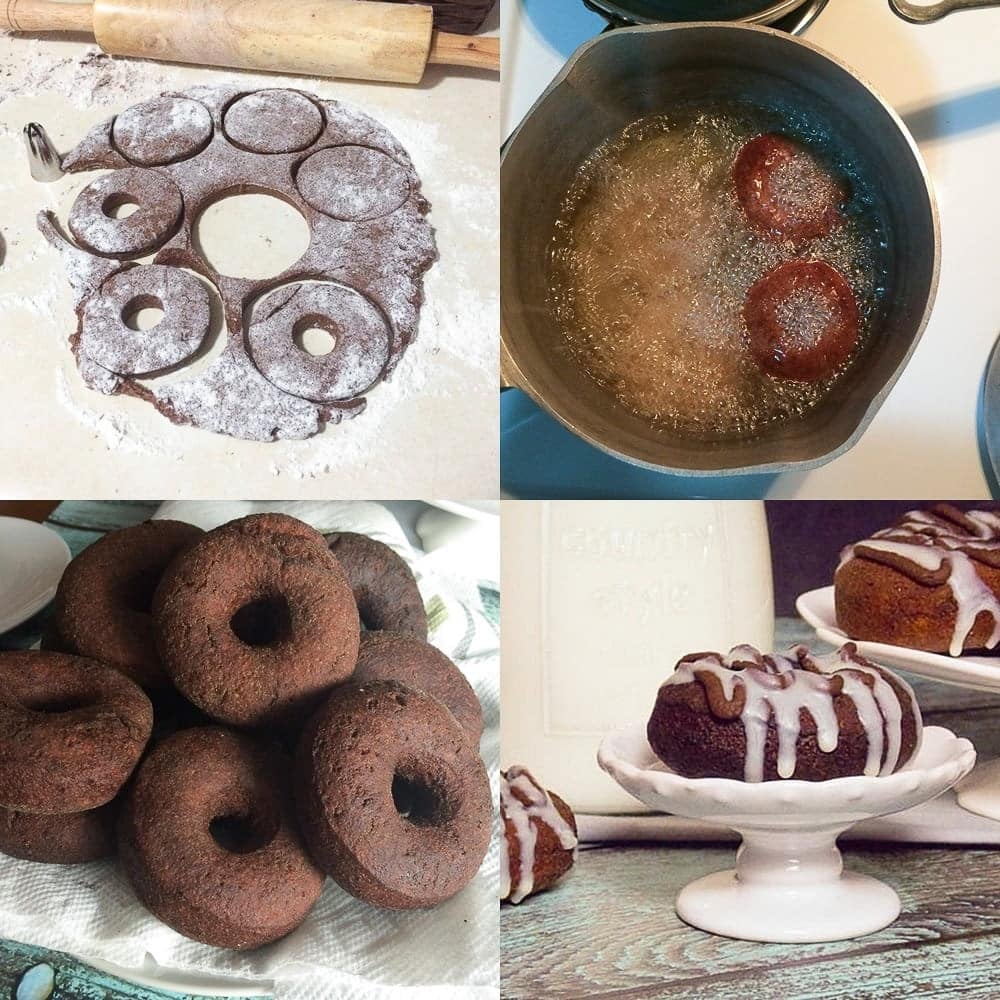
- Unwrap pizza dough from the can and lay flat on a lightly floured surface. Using a rolling pin, roll the dough slightly to flatten it out evenly.
- In a small bowl, combine brown sugar, cinnamon, nutmeg and melted butter.
- Spread brown sugar mixture evenly on top of the dough, Spreading evenly over the entire surface.
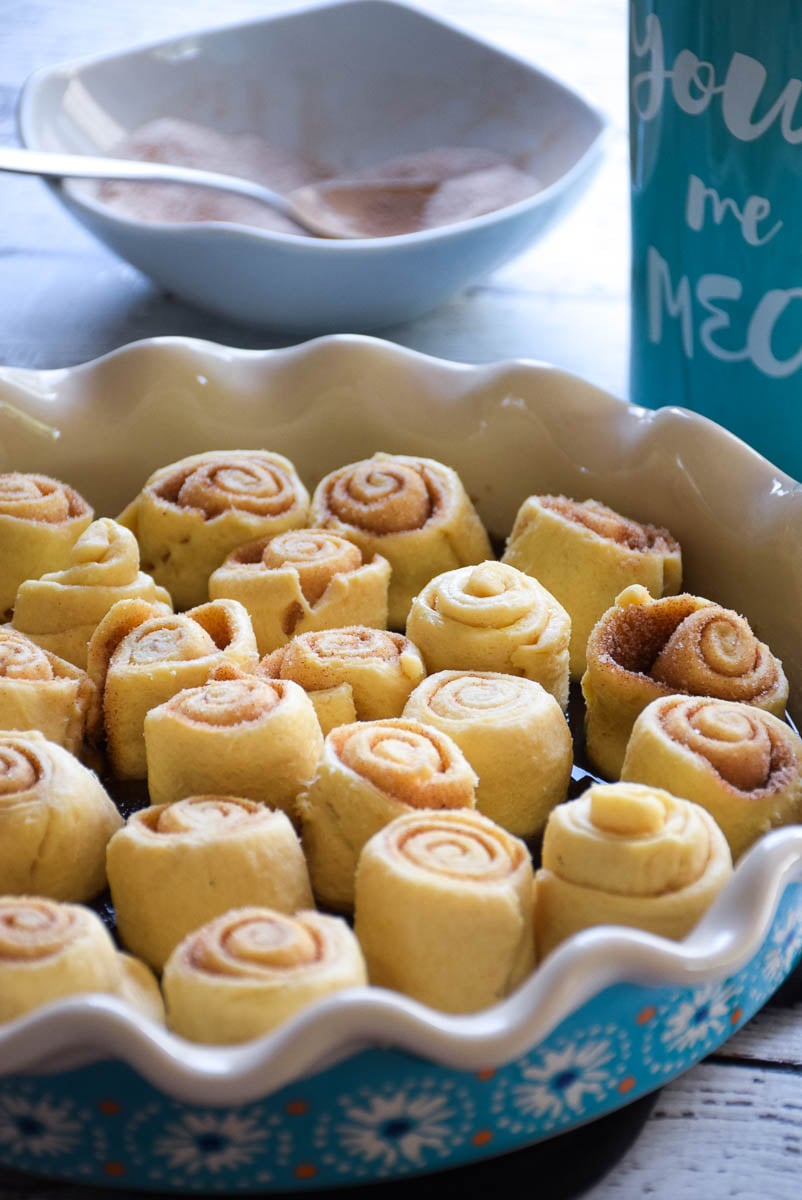
- Top sugar mixture with fresh blueberries, distributing evenly.
- Tuck one end of the dough in (longways) and roll tight until the entire log is formed. Some brown sugar mixture may fall out, that's okay.
- Using a sharp knife cut the cinnamon rolls into 8 equal pieces. Carefully hold each cinnamon roll together as you cut.
- Place each cut roll into the prepared baking dish, allowing rolls to touch slightly.
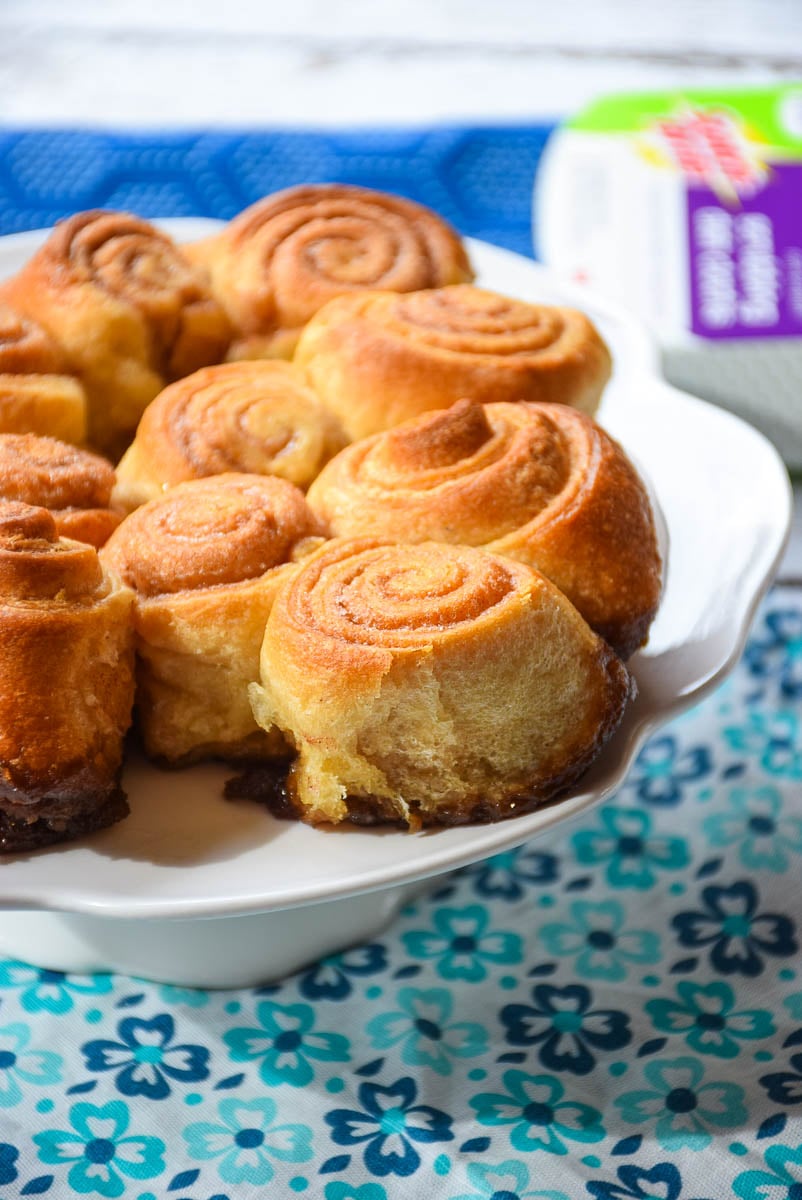
- Bake cinnamon rolls in preheated oven for 30 minutes or until the dough is cooked through and dough is lightly golden brown. Remove from oven and place on a cooling rack.
- Near the end of the cook time, begin to prepare the frosting.
- In a large bowl, add the softened butter, cream cheese, powdered sugar, vanilla extract, and lemon juice. Using an electric mixer, beat ingredients until smooth.
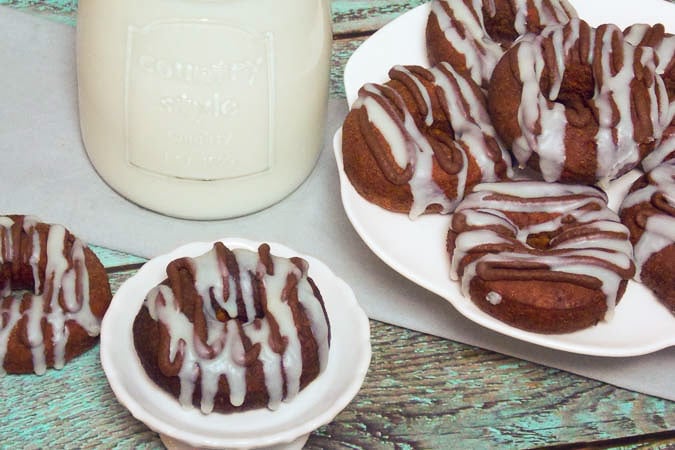
- Using offset spatula, spread cream cheese frosting over top of the sweet rolls immediately after they are out of the oven. Serve immediately.


🥄 Equipment
9 x 13 Baking pan
Rolling pin
Small bowl
Large bowl
Sharp knife
Electric mixer
Offset spatula
🥫Storage
Room temperature: store any leftover Blueberry Cinnamon Rolls in an airtight container at room temperature for up to 2 days.
Reheat: warm them up slightly in the microwave or oven and enjoy their deliciousness.

📖 Variations
- Substitute full crescent dough sheets in place of the pizza dough.
💭 Tips
- When cutting the cinnamon roll dough and placing them into the 9x13 baking dish, be careful to hold them together tightly, pinching them from all corners while transporting them.
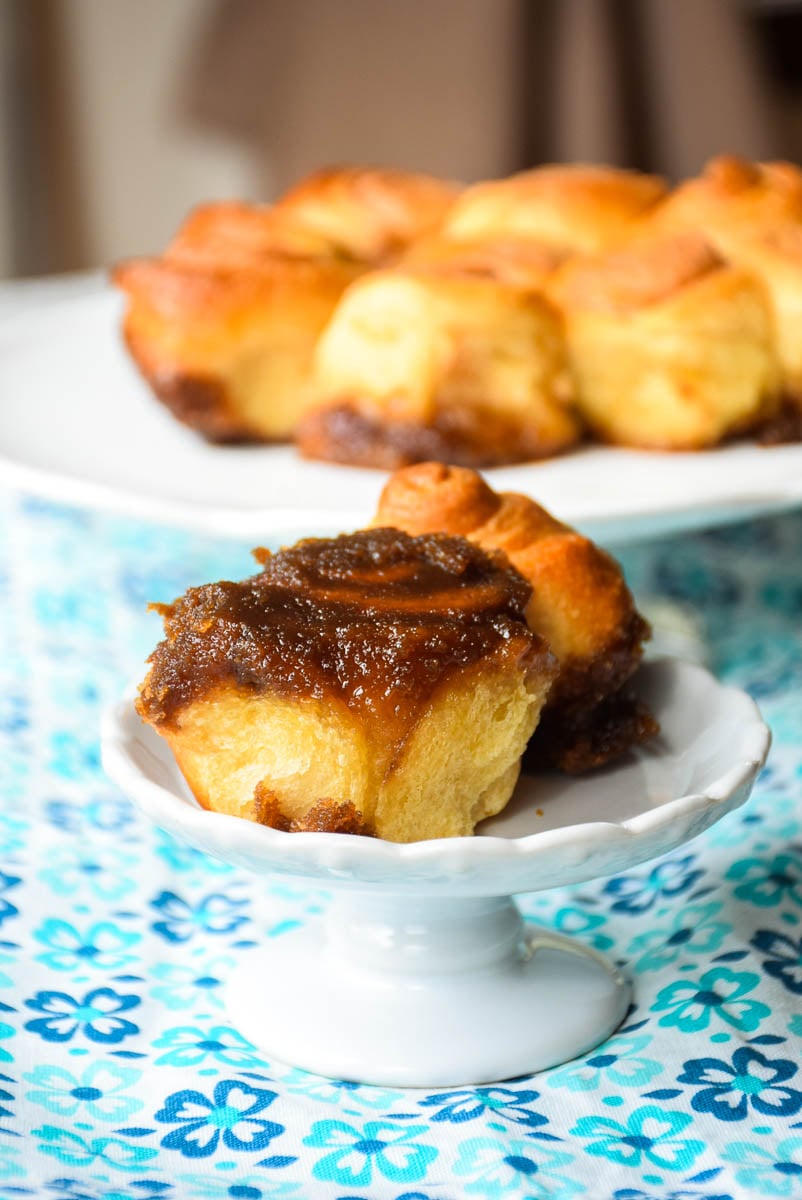
- Don't be alarmed by the juices that will accumulate in the baking pan when adding rolls to the pan, it will evaporate and cook into the rolls creating a flavorful sticky sweetness!
- The berries and cinnamon rolls mixture should be soft and "gooey" or "sticky" after baking.

🙋 FAQ's
Can I use frozen blueberries instead of fresh ones?
Yes, frozen blueberries can be used in this recipe. Just make sure to thaw and drain any liquid from the bowl and then pat them dry with a paper towel before topping the cinnamon sugar mixture.
How can I reheat the leftover cinnamon rolls?
To reheat the leftover cinnamon rolls, you can place them in a microwave-safe dish and warm them up for about 20-30 seconds per roll. Alternatively, you can preheat the oven to 350°F (175°C) and bake them for about 5-10 minutes until warmed through.
📚 Related Recipes
Blueberry fans will love the complimentary flavor of lemon and blueberries in these Soft Blueberry Cookies.
This delicious Blueberry Coffee Cake is made with cream cheese and has a wonderful texture.
Another great cinnamon roll recipe is this Apple Filled Cinnamon Rolls and they have a wonderful maple icing!
Blueberry Coffee Cake made with cream cheese has incredible texture and flavor.

🍽 Serve with..
Serve warm cinnamon rolls with a generous amount of cream cheese frosting. Blueberry cinnamon rolls are the perfect weekend brunch and great for special occasions like bridal showers and baby showers.
Don't forget to check out my Amazon storefront for some of my favorite products!
When you make this recipe, please comment below and let me know what you think. I'd love it if you tag me on Instagram @grumpyshoneybunch or #grumpyshoneybunch so I can see your photos!
If you love this recipe, please leave a ⭐⭐⭐⭐⭐ rating
📖 Recipe

Easy Blueberry Cinnamon Rolls
Equipment
- 9 x 13 baking pan
As an Amazon Associate I earn from qualifying purchases.
Ingredients
Cinnamon Rolls
- 13.8 ounces refrigerated pizza dough
- 1 cup brown sugar
- 3 tablespoons cinnamon
- 1 teaspoon nutmeg
- 3 tablespoons butter , softened
- 1 cup fresh blueberries
For the icing
- 2½ ounces cream cheese , softened
- 8 tablespoons unsalted butter , softened
- 3 cups powdered sugar
- 1 teaspoon vanilla extract
- 1 teaspoon lemon juice
- 1 pinch salt
Instructions
- Preheat oven to 350 degrees F and prepare a 9x13 baking dish with non-stick cooking spray.
- Unwrap pizza dough from the can and lay flat on a lightly floured surface. Using a rolling pin, roll the dough slightly to flatten it out evenly.
- In a small bowl, combine brown sugar, cinnamon, nutmeg and melted butter.
- Spread brown sugar mixture evenly on top of the dough, Spreading evenly over the entire surface.
- Top sugar mixture with fresh blueberries, distributing evenly.
- Tuck one end of the dough in (longways) and roll tight until the entire log is formed. Some brown sugar mixture may fall out, that's okay.
- Using a sharp knife cut the cinnamon rolls into 8 equal pieces. Carefully hold each cinnamon roll together as you cut.
- Place each cut roll into the prepared baking dish, allowing rolls to touch slightly.
- Bake cinnamon rolls in preheated oven for 30 minutes or until the dough is cooked through and dough is lightly golden brown. Remove from oven and place on a cooling rack.
- Near the end of the cook time, begin to prepare the frosting.
- In a large bowl, add the softened butter, cream cheese, powdered sugar, vanilla extract, and lemon juice. Using an electric mixer, beat ingredients until smooth.
- Using offset spatula, spread cream cheese frosting over top of the sweet rolls immediately after they are out of the oven. Serve immediately.