Grumpy's Honeybunch

  • Classic Comfort Food and Easy Keto Friendly Family Recipes
  • Recipes
    • Breakfast
    • Lunch
    • Dinner
    • Desserts
    • Low Carb Keto Recipes
  • Disclosure & Privacy Policy
menu icon
go to homepage
  • About
  • Recipes
  • Contact

search icon
Homepage link
  • About
  • Recipes
  • Contact

×
Home

Pepperoni Soft Pretzels - Keto Recipes

November 5, 2017 by Shelby Law Ruttan 22 Comments

These Pepperoni Pretzels are a gluten free pretzel recipe with a delicious buttery flavor, topped with pepperoni and cheese, and are reminiscent of the Auntie Anne's pretzels we always loved to treat ourselves to! These keto pretzels are, made with mozzarella, cream cheese, and almond flour along with some seasonings to boost the flavor!

Eating keto doesn't have to be complicated with this gluten free pretzel recipe. These pretzels loaded with so much cheesy goodness your family won't know it's low carb!

[feast_advanced_jump_to]


❤️ Why I Love This Recipe

✔️ These gluten-free soft pretzels make a great snack for the whole family and great for game day!

✔️ Keto pepperoni pretzels will keep you energized with 27g of protein per serving!

✔️ Reminiscent of Annie's mall pretzels, these gluten-free homemade pretzels are sure to satisfy.

🥘 Ingredients

Almond flour, the best gluten free flour that works well with mozzarella dough.

Baking powder

Onion powder

Garlic powder

Part-skim mozzarella cheese 

Full fat cream cheese 

Large eggs

Turkey pepperoni

Coarse salt

Keto Pepperoni Soft Pretzels

🔪 Instructions

  1. Preheat the oven to 425 degrees.
  2. In a large bowl, combine almond flour, baking powder, garlic powder, and onion powder. Stir to combine.
  3. Place the mozzarella and cream cheese in a microwave safe bowl and microwave for 90 seconds. Remove from the microwave, stir, then return to microwave for 60 seconds more.
  4. Add 2 of the eggs and the almond flour mixture to the cheese mixture, stirring until combined well a dough ball takes shape.
  5. Lightly flour a work surface with almond flour. Cut each piece of dough into 6 equal portions, then make dough ropes with each and for a pretzel shape. Place pretzels on a large baking sheet lined with a piece of parchment paper.
  6. Beat the remaining egg and brush egg wash over top of each pretzel. Place 5 slices pepperoni pieces over top of each pretzel and sprinkle with cheese and coarse ground salt if desired.
  7. Place the pretzels in the oven and bake for 12 minutes, or until golden brown.
  8. Remove from oven and cool pepperoni pretzels completely before removing from cookie sheet.
dough nuggets mad with gluten free pretzel recipe cut into portions.

🙋 Recipe FAQ's

Do you boil keto pretzels?

This recipe uses almond flour and mozzarella cheese dough so it is not boiled.

What is fathead dough?

Fathead dough is a gluten free low carb dough made with mozzarella cheese and almond flour.

How many carbs are in a keto pepperoni pretzel?

1 large pretzel is 2 servings, there are net carbs per serving.

A pair of hands rolling dough into a rope.

💭 Tips

  • Add a little warm water to your hands when forming the pretzel dough to prevent sticking.
  • Place the dough back in the microwave for 10 seconds if it cools down too quickly while mixing it together
  • Use a dough scraper to scrape dough together and to cut the pepperoni pretzels.

📖 Variations

  • Roll the pretzel dough into a log shape and cut it into 30 bite-sized pretzel nuggets, placing one slice of pepperoni on each nugget.
  • Make a sweet pretzel by eliminating the pepperoni and sprinkling the top of each pretzel with sugar free cinnamon sugar before baking.
  • Make these soft pretzels with your favorite toppings, try black olives, red onion slices, and parmesan cheese, or coarse sea salt added to the tops of the pretzels.
Fathead dough pretzels topped with pepperoni slices and mozzarella cheese.

🍽 Equipment

Mixing bowls

Wooden spoon

Large insulated baking sheet

Parchment paper

Serving Suggestions

Serve these easy pretzel recipe with a side of homemade pasta sauce or Chipotle Salad Dressing Recipe!

To reheat: Warm up in the oven or toaster oven at 350 degrees for 5 minutes.

Storage

Store pepperoni pretzels in an airtight container in the refrigerator up to 1 week and in the freezer up to 2 months.

Baked gluten free pretzel recipe cooling on a cooling rack.

Related Recipes

Wine Braised Short Rib Keto Pizza

Pulled Pork Pizza- Low Carb Keto Recipe

Keto Pigs in a Blanket with Everything Bagel Seasoning

Low-Carb Barbecue "Beef" Spirals

Low Carb Pizza Crust with Almond Flour


If you give this 4-bean salad a try, I'd love to hear how it turned out! Please leave a comment and ⭐⭐⭐⭐⭐ rating below to let me know if you kept the heat mild or went all in with the jalapenos. Don't forget to tag me on Instagram @grumpyshoneybunch so I can see your beautiful salad bowls!

📖 Recipe

Keto Pepperoni Soft Pretzels

Shelby Law Ruttan
Gone are the days of deprivation of soft pretzels! This buttery, soft, Keto recipe for Pepperoni Soft Pretzels are easy to make right at home!
5 from 3 votes
Prevent your screen from going dark
Print FREE recipe card with your email address Pin Recipe Save Go to Collections
Prep Time 10 minutes mins
Cook Time 14 minutes mins
Additional Time 30 minutes mins
Total Time 54 minutes mins
Course Keto Snacks
Cuisine American
Servings 12
Calories 272 kcal

Equipment

  • mixing bowls
  • Wooden spatula
  • Large insulated baking sheet
  • Parchment Paper

As an Amazon Associate I earn from qualifying purchases.

Ingredients
  

  • 2 cups almond flour
  • 1 tablespoon baking powder
  • 1 teaspoon onion powder
  • 1 teaspoon garlic powder
  • 3 cups mozzarella cheese shredded
  • 5 ounces cream cheese softened
  • 3 large eggs , divided
  • 30 thin slices turkey pepperoni
  • ¼ teaspoon coarse salt

Instructions
 

  • Preheat oven to 425 degrees.
  • In a medium sized bowl, combine almond flour, baking powder, garlic powder, and onion powder. Stir to combine.
  • Place mozzarella and cream cheese in microwave safe bowl and microwave for 90 seconds. Remove from microwave, stir, then return to microwave for 60 seconds more.
  • Add to the cheese, two of the eggs and the almond flour mixture, stirring until combined well. A dough ball will magically take shape!
  • Divide dough into 6 pieces, then roll each piece into a rope and shape as a pretzel.
  • Beat remaining egg and brush over top of pretzel dough. Place pepperoni slices over top of pretzel and a little sprinkling of cheese and coarse ground salt if desired.
  • Place in oven and bake for 12-14 minutes, until golden brown.
  • Remove from oven and let cool completely before removing from cookie sheet.
  • Can store in refrigerator for up to 1 week.

Notes

This recipe makes 6 large pretzels. 1 pretzel is 2 servings. 
 

Nutrition

Serving: 1pretzelCalories: 272kcalCarbohydrates: 6gProtein: 13gFat: 23gSaturated Fat: 8gPolyunsaturated Fat: 1gMonounsaturated Fat: 4gTrans Fat: 1gCholesterol: 81mgSodium: 472mgPotassium: 72mgFiber: 2gSugar: 1gVitamin A: 407IUVitamin C: 1mgCalcium: 259mgIron: 1mg
Keyword Keto Pepperoni Soft Pretzels
Tried this recipe?Mention @grumpyshoneybunch or tag #grumpyshoneybunch!

Crispy Sage and Prosciutto Endive Appetizers

November 4, 2017 by Shelby Law Ruttan 11 Comments

Crispy Sage Prociutto Endive Appetize3rs on a white plate.

These Crispy Sage and Prosciutto Endive Appetizers are bites of crispy, creamy, sweet, and salty appetizers making magic in your mouth! The combination flavors and textures are so delicious your guests will keep coming back for more.

You don't have to be keto to enjoy these appetizers! However, this recipe totally fits the keto diet lifestyle. They are only 2 net carbs per serving! If you are not keto, you can skip the Yacon syrup and use honey instead. Either way, these are delicious bites you don't want to miss out on!

Crispy Sage and Prosciutto Endive Appetizers

Prosciutto Endive Appetizers for the Keto Diet

With our low carb lifestyle, I was at a quandary as to what I would do to replace the cheese and cracker appetizers I love to serve over the holidays. Then, when shopping at Shop-Rite for my groceries last week, I came across some endive. ]

Endive is fairly tasteless, and like it's flavor, it doesn't lend a ton of nutrition, however it does provide you with a good amount of vitamin K and they are packed with fiber. This basically negates the carb count and makes this great for Keto!

ingredients for appetizer recipe

A ton of flavor and mouth feels!

I have a huge affection for browned butter, crispy fried sage, and crispy cooked prosciutto. When I saw the Joan of Arc Goat Cheese in the cheese case, I knew I was going to somehow combine these flavors together.

Goat cheese is very distinct in its flavor and for some, it's an acquired taste. For years I wouldn't eat it. I didn't think I liked it. Then, one day I decided to give it a try again. When I did, I realized I actually LOVED goat cheese! Now I can't get enough of it.

Crispy Sage and Prosciutto Endive Appetizers

The holidays are a very important time of year for many people. It is a time we use to be with our loved ones, share food, laughs, and reminisce of old times! I love making it even more special with gorgeous and tasty bites of food!

More cheese appetizer recipes you may like

If you are like we are, you are a huge fan of cheese. Besides this Crispy Sage and Prosciutto Endive Appetizers, we also love these Cranberry Pistachio Goat Cheese Bites.

My Mom's Cheese Ball Recipe has been a favorite of mine since I was a young girl and I make this a few times every holiday season!

Beer Cheese Dip with Bacon is an absolutely mouthwatering dip. The flavor of the cheese, beer, and bacon combined are irresistible!

*If you made this recipe for Crispy Sage and Prosciutto Endive Appetizers, please leave a star rating*

📖 Recipe

Crispy Sage Prociutto Endive Appetize3rs on a white plate.

Crispy Sage and Prosciutto Endive Appetizers

Shelby Law Ruttan
Goat cheese filled endive has a salty, sweet, and savory bite all in one. These are great holiday party appetizers!
5 from 1 vote
Prevent your screen from going dark
Print FREE recipe card with your email address Pin Recipe Save Go to Collections
Prep Time 15 minutes mins
Cook Time 5 minutes mins
Total Time 20 minutes mins
Course Keto Appetizers
Cuisine American
Servings 8 people
Calories 94.6 kcal

As an Amazon Associate I earn from qualifying purchases.

Ingredients
  

  • 4 ounces goat cheese
  • 4 slices prosciutto diced
  • 1 tablespoon salted butter
  • ½ cup fresh sage leaves
  • 1-½ tablespoons Yacon Syrup
  • 3 small heads of endive

Instructions
 

  • In a large skillet over medium-high heat, cook prosciutto until crispy. Remove from skillet and set aside.
  • In the same skillet, add butter and bring to a bubble. Add sage leaves and stir and cook until just browned. Do this quickly and over a lower heat so you don't burn your butter. Remove leaves and set aside on a paper towel.
  • Cut endive roots and remove leaves. Wash produce and pat dry. Assemble bites by placing crumbled goat cheese in a boat. Drizzle with Yacon Syrup and top with crispy prosciutto and sage leaves.

Video

Nutrition

Serving: 1gCalories: 94.6kcalCarbohydrates: 7gProtein: 5.3gFat: 5.4gSaturated Fat: 3.2gSodium: 173.7mgFiber: 5g
Keyword sage and prosciutto endive appetizers
Tried this recipe?Mention @grumpyshoneybunch or tag #grumpyshoneybunch!

Baked Brie with Maple Pecan Topping

October 15, 2017 by Shelby Law Ruttan 6 Comments

Brie with Sugar Free Maple Pecan Topping-
With the entrance of fall in all it's glorious colors and crisp cool air, I wanted to share with you this recipe for Baked Brie with Maple Pecan Topping. This sugar free recipe fits perfectly into the fall theme and upcoming holidays and I love that it is keto friendly, sugar free, and pairs perfectly with a glass of Rosé! You definitely will want to #Fallintorosé this year!
Baked Bree with Maple Pecan Topping Sugar Free
Over this last summer, I fell in love with Rosé. It was the perfect, crisp and refreshing beverage to relax with at the end of the day. Now that fall is here, I want to continue to enjoy it! I'm not ready to give up my Rosé, I just have to treat it as a special occasion treat! Today, I am here to show you how to have your Rosé in the fall and throughout the holidays :).
Brie with Sugar Free Maple Pecan Topping-
The Wines of Provence, #Mastersofrosé, have certainly captured my attention. They are the first export into the U.S. market both in volume and value and 16 million bottles are exported into the United States. Nearly ½ of rose consumed in the U.S. comes from Provence! This French wine with its flavor and beauty has totally won me over!

Brie with Sugar Free Maple Pecan Topping

If you've been following me on Facebook and Instagram, then you have noticed our diet has changed and we are living the sugar free, low carb way. So, to pair with our Rosé Wines of Provence, I prepared this fall themed treat made with sugar free pecan maple topping, served over top of a warm baked brie. To go with the brie, I made homemade almond flour crackers, served with some salty, brined olives, and some cheddar cheese slices (for the more picky cheese eaters!)

Baked Brie with Sugar Free Maple Pecan Topping

The Rosé Wines of Provence gives an intimate feel. Something that is perfect for small family gatherings, or even just for a romantic evening at home with your Grumpy. The French wine with the fall theme just added to this warming atmosphere. The color of the Rosé is absolutely beautiful and in my opinion, complements the fall in color as well as flavor!
These Rosé Wines of Provence match our casual lifestyle way of life. This premium, elegant wine fits perfectly with our simple lifestyle. Trendy without a lot of lush, that's my favorite way to live!

📖 Recipe

Baked Brie with Maple Pecan Topping – Sugar Free

Shelby Law Ruttan
A taste of fall entertaining, This sugar free recipe fits perfectly into the fall theme and upcoming holidays and I love that it is keto friendly, sugar free, and pairs perfectly with a glass of Rosé!
No ratings yet
Prevent your screen from going dark
Print FREE recipe card with your email address Pin Recipe Save Go to Collections
Prep Time 5 minutes mins
Cook Time 30 minutes mins
Total Time 35 minutes mins
Course Keto Appetizers
Cuisine American
Servings 10 servings
Calories 76 kcal

As an Amazon Associate I earn from qualifying purchases.

Ingredients
  

  • 8 ounces brie round
  • 1 cup powdered erythritol
  • 1 cup water
  • 1½ teaspoons mapleine extract
  • ½ teaspoon xanthan gum

Instructions
 

  • Preheat oven to 350 degrees.
  • Place Brie on cookie sheet lined with parchment paper. Place in oven and bake for 20 minutes.
  • While Brie is baking, combine erythritol, water, and mapleine extract in a small sauce pan. Stir well to combine. Bring to a boil and then reduce to a slow simmer. Simmer for about 5 minutes.
  • Remove syrup from heat and carefully transfer to a blender. Sprinkle 1;2 teaspoon xanthan gum over top of hot syrup. (do NOT pour). Immediately blend on high for about 2 minutes. Sprinkle second ½ teaspoon of xanthan gum over top of syrup mixture. Blend on high again for 2 minutes more. mixture will be thick.
  • Transfer Brie to serving plate. Pour syrup over hot brie and sprinkle with chopped roasted pecans.
  • Serve with crackers and fruit.

Notes

Xanthan Gum can be tricky. Be sure to lightly sprinkle over your syrup and stir well to combine.

Nutrition

Serving: 1gCalories: 76kcalCarbohydrates: 1gProtein: 5gFat: 6gSaturated Fat: 4gPolyunsaturated Fat: 1gMonounsaturated Fat: 2gCholesterol: 23mgSodium: 148mgPotassium: 35mgFiber: 1gSugar: 1gVitamin A: 134IUCalcium: 42mgIron: 1mg
Keyword Baked Brie
Tried this recipe?Mention @grumpyshoneybunch or tag #grumpyshoneybunch!
**This post may contain affiliate links for products used in the recipe.

Pin it! Baked Brie with Maple Pecan Topping!

Baked Brie with Sugar Free Maple Pecan Topping

Boneless Chicken Wings (Air Fryer, Low Carb)

October 10, 2017 by Shelby Law Ruttan 3 Comments

Featured image for air fryer boneless wings.

These Boneless Chicken Wings are made with chicken tenders coated in pork rinds and cooked in the air fryer until crisp and golden. They work just as well for an easy weeknight dinner as they do for game day when you want something crunchy without the carbs.

A plate with 6 boneless chicken wings that are cooked with crispy outside coating and a side of blurred celery to the back left of the plate.

I like recipes like this when I want big flavor without a lot of prep, and this one reminds me of the simple chicken dinners I've leaned on over the years. If you enjoy low carb air fryer recipes, this fits right in with those go-to favorites.

[feast_advanced_jump_to]

Why You'll Love These Boneless Chicken Wings

Crispy coating: pork rinds give you a crunchy bite without breading or flour.

Easy prep: a quick egg dip and coating is all it takes before they hit the air fryer.

Low carb: these boneless chicken wings come in at about 1 net carb per serving, depending on the pork rinds you use.

Key Ingredients for Low Carb Chicken Wings

Raw chicken strips coated in pork rinds on an air fryer tray ready to cook in the air fryer.

See the recipe card below for a full list of ingredients and instructions.

  • Chicken tenders: naturally boneless and the perfect size for wing-style bites.
  • Pork rinds: create a crunchy coating that keeps this recipe keto friendly.
  • Egg: helps the pork rinds stick evenly to the chicken.

Ingredient Substitutions

  • Chicken breast cut into strips can be used instead of tenders.
  • Plain or flavored pork rinds both work, just check carb counts on flavored varieties.
  • An egg wash can be swapped with a light brush of mayonnaise.
Five golden brown boneless chicken wings in an air fryer basket.

Variations on Boneless Chicken Wings with Pork Rinds

  • Toss the cooked chicken in buffalo-style sauce for a classic wing flavor.
  • Add grated parmesan to the pork rind coating for a richer finish.
  • Mix your own seasoning blend with garlic powder, paprika, or use this homemade taco seasoning combined with the pork rinds before coating.

Tips for Crispy Air Fryer Chicken Tenders

  • Crush the pork rinds very fine so the coating sticks evenly.
  • Don't overcrowd the air fryer rack or the chicken won't crisp properly.
  • Flip halfway through cooking to keep the coating crunchy on all sides.

How to Store and Reheat

Store leftover boneless chicken wings in an airtight container in the refrigerator for up to 3 days. Reheat in the air fryer at 375°F for a few minutes until warmed through and crisp again.

A plate with 6 boneless chicken wings that are cooked with crispy outside coating and a side of blurred celery to the back left of the plate.

Serving Suggestions for Boneless Chicken Wings

Serve these boneless chicken wings with Spicy Ranchero Sauce, Ranch Dressing, or Chipotle Dressing for dipping. They pair well with a simple salad or roasted vegetables like my Keto Roasted Radishes or Air Fryer Asparagus for dinner and shine on a platter for game day spreads.

If you are serving these for a party or relaxing weekend meal, don't forget the drinks! You can keep the whole meal keto-friendly by checking out this guide to the best low carb beers. Options like Michelob Ultra (2.6g carbs) or Bud Light Next (0 carbs) are great ways to enjoy a "wing night" vibe without the extra carbs.

More Recipes You'll Love

If you enjoy these boneless chicken wings, you might want to try some of my other low carb air fryer recipes and game day favorites like Keto Coconut Shrimp and Air Fryer Shishito Peppers. Or try my Philly Cheesesteak Dip with pork rind dippers, and Keto Pigs in a Blanket.

I love seeing what you're cooking! If you try these boneless wings, leave a comment below along with a ⭐⭐⭐⭐⭐ rating to let me know how they turned out. Don't forget to tag @grumpyshoneybunch on Instagram so I can share your photos!

📖 Recipe

Featured image for air fryer boneless wings.

Boneless Chicken Wings (Air Fryer, Low Carb)

Shelby Law Ruttan
These Air Fryer Boneless Chicken Wings are the ultimate low-carb comfort food. Using a crispy pork rind coating, these keto-friendly wings cook up golden and crunch in just 20 minutes without any flour or deep frying. Perfect for a quick weeknight dinner or a guilt-free game day appetizer.
4.60 from 5 votes
Prevent your screen from going dark
Print FREE recipe card with your email address Pin Recipe Save Go to Collections
Prep Time 10 minutes mins
Cook Time 20 minutes mins
Total Time 30 minutes mins
Course Appetizers, Keto Appetizers, Keto Main Dish, Main Dish
Cuisine American
Servings 4 servings
Calories 301 kcal

Equipment

  • Air Fryer
  • mixing bowls
  • Tongs

As an Amazon Associate I earn from qualifying purchases.

Ingredients
  

  • 1 pound chicken tenders
  • 4 ounces pork rinds crushed fine
  • 1 large egg beaten

Instructions
 

  • Using a pair of tongs, place the 1 large egg in a large bowl and whisk until foamy. Place 4 ounces pork rinds in a separate bowl. Dip 1 pound chicken tenders in egg wash. Turn to coat.
  • Transfer the chicken to the ground pork rinds. Turn to coat.
  • Place the pork rind coated chicken tender on the air fryer rack. Repeat with remaining chicken tenders. Air fryer for 25 minutes at 400°, turning over half way thru cooking.

Video

Nutrition

Calories: 301kcalCarbohydrates: 0.1gProtein: 43gFat: 13gSaturated Fat: 4gPolyunsaturated Fat: 1gMonounsaturated Fat: 1gTrans Fat: 0.02gCholesterol: 146mgSodium: 670mgPotassium: 437mgSugar: 0.05gVitamin A: 116IUVitamin C: 2mgCalcium: 21mgIron: 1mgNet Carbohydrates: 0.1g
Keyword air fryer keto chicken, air fryer pork rind chicken tenders, Bonless Chicken Wings, chicken tenders with pork rinds, keto chicken tenders, low carb chicken tenders, pork rind crusted chicken
Tried this recipe?Mention @grumpyshoneybunch or tag #grumpyshoneybunch!
  • Close up of sweet chili chipotle wings on a white rectangular plate, garnished with chopped fresh cilantro. The wings are coated in a glossy, reddish orange sauce with visible seasoning.
    Sweet Chili Chipotle Wings (Baked & Saucy)
  • Best Crispy Baked Sweet Hot Chicken Wings
  • Extra Crispy Maple Hot Wings - Double Crunch
  • Blue Cheese Stuffed Chicken Breast Recipe

Caramel Apple Butter

September 29, 2017 by Shelby Law Ruttan 12 Comments

Slow Cooker Caramel Apple Butter

There's something comforting about a slow simmered spread like this Caramel Apple Butter. It's rich, warmly spiced, and makes the perfect topping for toast, pancakes, or even a spoonful right out of the jar.

Overhead image of Slow Cooker Caramel Apple Butter in a glass jar.

This recipe reminds me of fall days in upstate New York when the house filled the sweet scent of apples and cinnamon. It's a simple recipe that transforms everyday apples into something special, much like my Mom's Apple Pie Filling in a Jar that has become a family favorite for years.

[feast_advanced_jump_to]

Why You'll Love This Recipe

Slow simmered: the slow cooker does all the work, deepening the flavor and texture.

Perfectly spiced: cinnamon and cloves add cozy warmth to every bite.

Caramel twist: melty caramel bits stirred in at the end make this apple butter extra indulgent.

Versatile spread: delicious on biscuits toast, or swirled into yogurt or oatmeal.

Key Ingredients for Spiced Apple Butter

See the recipe card below for a complete list of ingredients and instructions.

A bottle of vanilla extract and a bottle of almond extract with a stack of red apples in the background.
  • Apples: the heart of the recipe, bringing natural sweetness and soft texture once cooked down.
  • Sugar: balances the tartness of the apples and gives the butter its glossy finish.
  • Cinnamon and cloves: warm spices that highlight the fall flavor profile.
  • Vanilla extract: adds a smooth, sweet depth to the spread.
  • Caramel bits: stirred in at the end for a rich caramel flavor that pairs beautifully with apples.

Ingredient Substitutions

  • Use brown sugar instead of granulated for a deeper molasses note.
  • Swap apple pie spice for the cinnamon and cloves to simplify.
  • Replace caramel bits with ½ cup of caramel sauce stirred in at the end.
Upclose image of diced apples simmering in a pot.

Variations on Caramel Apple Butter

  • Maple version: stir in 3 tablespoons of pure maple syrup instead of the caramel bits for extra sweetness.
  • Chunky style: skip blending at the end and enjoy it with a rustic, chunky texture.
  • Spiked spread: add a splash of bourbon, spiced rum, or Fireball liquor for a grown-up twist.

Tips for Perfect Slow Cooker Apple Butter

  • Vent the lid: keep the lid off during the last hour so the mixture thickens.
  • Taste and adjust: apples vary in sweetness so add more sugar or spice if needed.
  • Blend if you like: for a smoother spread, use an immersion blender after cooking.

How To Store

Refrigerate your apple butter in airtight jars for up to 2 weeks. For longer storage, freeze in smaller containers for up to 3 months.

Caramel Apple Butter in a blender cup.

Serve With...

Spread this slow cooker caramel apple butter on Homemade Fluffy Biscuits, spoon over Applesauce Muffins, or swirl it into a bowl of hot oatmeal. It is also as a spread inside my Apple Butter Pecan Sticky Buns.

More Easy Apple Recipes

If you love fall fruit recipes, try my Apple Hand Pies made in the air fryer, or my Classic Homemade Apple Pie. Salted caramel fans will love this Salted Caramel Apple Cake with Toasted Walnuts and this Apple Upside Down Cake is a delicious fall take on a classic.

When you make this recipe, please comment below and let me know what you think. I'd love it if you tag me on Instagram @grumpyshoneybunch or #grumpyshoneybunch so I can see your photos!

If you love this recipe, please leave a ⭐⭐⭐⭐⭐ rating

📖 Recipe

Slow cooker apple butter.

Slow Cooker Caramel Apple Butter

Shelby Law Ruttan
This caramel apple butter is a sweet and spiced spread made in the slow cooker with apples, cinnamon, cloves, and a swirl of caramel for a cozy fall treat.
4.50 from 2 votes
Prevent your screen from going dark
Print FREE recipe card with your email address Pin Recipe Save Go to Collections
Prep Time 20 minutes mins
Cook Time 8 hours hrs
Total Time 8 hours hrs 20 minutes mins
Course Slow Cooker
Cuisine American
Servings 16
Calories 170 kcal

Equipment

  • Dutch oven
  • Slow cooker
  • Wooden spoon
  • Sharp knife
  • cutting board
  • Blender

As an Amazon Associate I earn from qualifying purchases.

Ingredients
  

  • 3 pounds apples peeled, cored, and finely chopped
  • 2 cups granulated sugar
  • 2 teaspoons ground cinnamon
  • ½ teaspoons ground cloves
  • 1 teaspoon vanilla extract
  • ½ teaspoon salt
  • ½ cup caramel bits

Instructions
 

  • Place apples in large dutch oven over medium heat. Cook until apples start to break down, then simmer for about 10 minutes.
  • Stir in remaining ingredients except for the caramel bits, then transfer to slow cooker. Cook on low setting for 8-10 hours.
  • During the last hour, stir in the caramel bits. Do not replace cover slow cooker, rather let it cook the last hour with the lid off.
  • Once the apple butter has cooled, place in refrigerator to cool. You can now eat it as is, or you can blend it to make the consistency more smooth and buttery.

Nutrition

Calories: 170kcalCarbohydrates: 43gProtein: 1gFat: 1gSaturated Fat: 0.2gPolyunsaturated Fat: 0.3gMonounsaturated Fat: 0.1gCholesterol: 1mgSodium: 92mgPotassium: 109mgFiber: 2gSugar: 39gVitamin A: 50IUVitamin C: 4mgCalcium: 19mgIron: 0.2mgNet Carbohydrates: 40g
Keyword apple butter with caramel, Caramel Apple Butter, easy apple recipes, homemade apple butter, Slow Cooker Apple Butter, spiced apple butter
Tried this recipe?Mention @grumpyshoneybunch or tag #grumpyshoneybunch!

Salted Caramel Apple Cake with Toasted Walnuts

September 25, 2017 by Shelby Law Ruttan 29 Comments

This Salted Caramel Apple Cake is the perfect fall treat with a dense cake that has apple slices baked right in. This easy recipe is topped with caramel sauce and toasted walnuts with a finishing touch of fleur de sel.

Overhead shot of a baked cake topped with caramel and walnuts on a green platter.

I make this lightly spiced apple cake recipe every fall as soon as the apple orchard is producing fresh apples. It makes a great special dessert for guests, or a fall birthday cake for that special someone.

[feast_advanced_jump_to]

❤️ Why you'll love it

✔️ This decadent Salted Caramel Apple Cake will serve up to 12 people and makes a great birthday cake or Sunday dinner cake.

✔️ The cake batter bakes around the apples in the top of the cake and the salted caramel sauce nestles into any holes next to the apples.

✔️ It is a single layer scratch cake that will impress guests.

A stack of 4 red apples.

🥘 Ingredients

Toasted walnuts, see tip on how to quickly and effortlessly toast walnuts in the air fryer.

Grey sea salt, I love the packaging for these sea salts, and they last a long time as well.

Caramels, this is the brand of caramels I like to use. They also have these caramel bits that are easy to substitute (they don't need to be unwrapped).

Heavy cream, this is the ingredient that will smooth out and thin down the caramels.

Granulated sugar, room temperature butter, vanilla extract, and large eggs make the wet portion of the cake batter.

All purpose flour, baking powder, ground cinnamon, and salt are whisked together and added to the butter mixture alternately with the sour cream.

Sour cream is added alternately with the flour mixture to the wet batter.

A hand pressing an apple slice into the cake batter.

🔪 Instructions

For the cake

  • Preheat oven to 350 degrees F.
  • Lightly grease a 9" round cake pan at least 2" deep; or a 9" springform pan.
  • In a large mixing bowl using a hand mixer, beat together the sugar, butter, and vanilla on medium high speed until smooth and creamy.
  • Add the eggs to the butter mixture 1 at a time. Beat till thoroughly combined.
  • In a medium bowl, add the flour, baking powder, cinnamon, and salt. Whisk to combine.
  • Stir the dry ingredients to the wet ingredients alternately with the sour cream, using low speed on the mixer. The batter will be stiff.
  • Spoon the batter into the prepared pan, smoothing the top with a spatula to even out as much as possible.

For the apple filling

  • Place the apple wedges in a medium bowl and add the sugar and cinnamon. Toss the apple mixture with the vanilla until apples are thoroughly coated.
  • Arrange apples on top of cake batter, pushing them into the batter gently so they're partially submerged.
  • Bake the cake for 65 minutes, till it's golden brown on top and a toothpick or cake tester inserted into the center comes out clean.
  • Remove the cake from the oven, and turn it out onto a wire rack apple-side up. Cool completely.

For the salted caramel topping

  • Place the caramels and heavy cream in a microwave-safe bowl, and heat until the cream is showing bubbles, and the caramel is soft. Stir the caramel and cream until smooth. (I did this in 3-30 second intervals)
  • Spoon the caramel over the cooled cake, dripping it down into the crevices around the apples.
  • Scatter the walnuts on top. Sprinkle lightly with very coarse sea salt flakes if desired.
Baked cake in a red springform pan with the apple slices in a circle around the top of the cake.

🍽 EQUIPMENT

Electric Hand Mixer, this is the one I own.

Large mixing bowls, one for the dry mixture and one for the wet mixture.

Springform cake pan for easy release. I use one similar to this one.

🥫Storage

Store cake in an airtight container on the counter up to 4 days, in the fridge up to 1 week, and in the freezer up to 3 months.

📖 Variations

  • Substitute pear slices for the apple slices.
  • Use a purchased caramel sauce or dulce de leche in place of making the homemade caramel topping.
  • Greek yogurt can be used in place of sour cream.
Salted Caramel Apple Cake on a green cake plate.


💭 Tips

  • Use a springform pan to bake the cake. This allows the cake to easily be removed whole from the pan.
  • Toast the walnuts in the air fryer. It only takes about 2 minutes on the air fry setting and 400 degree temperature.
  • I do not recommend using lower fat sour cream for this recipe. Doing so may cause a dry cake.

📚 Related Recipes

Everyone loves these Chocolate Coated Caramel Apples!

Caramel Apple Cheese Danish is a perfect brunch recipe.

Try these Apple Dumplings with Salted Caramel Rum Sauce or Caramel Apple Dessert Pizza for your next family dessert.

Salted caramel fans will LOVE these Sweet and Salty Caramel Popcorn Balls.

Apple Walnut Coffee Cake is great for breakfast or snacking.

🍽 Serve with...

Serve this Caramel Apple Cake recipe with a scoop of vanilla ice cream!

A slice of caramel apple cake with salted caramel and toasted walnut topping with the whole cake blurred in the background.

Don't forget to check out my Amazon storefront for some of my favorite products!

When you make this recipe, please comment below and let me know what you think. I'd love it if you tag me on Instagram @grumpyshoneybunch or #grumpyshoneybunch so I can see your photos!

If you love this recipe, please leave a ⭐⭐⭐⭐⭐ rating

📖 Recipe

Salted Caramel Apple Cake with Toasted Walnuts

Shelby Law Ruttan
A dense vanilla flavored cake batter with apple slices nested and baked in the batter then topped with a salted caramel drizzle and toasted walnuts.
4.84 from 12 votes
Prevent your screen from going dark
Print FREE recipe card with your email address Pin Recipe Save Go to Collections
Prep Time 20 minutes mins
Cook Time 1 hour hr 5 minutes mins
Total Time 1 hour hr 25 minutes mins
Course Desserts
Cuisine American
Servings 12
Calories 394 kcal

Equipment

  • Electric hand mixer
  • Springform cake pan
  • mixing bowls
  • Rubber scraper

As an Amazon Associate I earn from qualifying purchases.

Ingredients
  

FOR THE TOPPING

  • ½ cup walnuts
  • 1 teaspoon grey sea salt
  • 20 caramels
  • 3 tablespoons heavy cream

FOR THE CAKE

  • 1 cup granulated sugar
  • ½ cup butter
  • ½ teaspoon ground cinnamon
  • 1¾ teaspoons baking powder
  • ½ teaspoon salt
  • 1 teaspoon vanilla extract
  • 2 large eggs
  • ½ cup sour cream
  • 2 cups flour

FOR THE FILLING

  • 2 large apples peeled, cored, cut into 8 wedges each
  • 2 tablespoons sugar
  • 1 teaspoon vanilla extract
  • ½ cup sour cream

Instructions
 

For the cake

  • Preheat the oven to 350.
  • Lightly grease a 9" round cake pan at least 2" deep; or a 9" springform pan.
  • In a large mixing bowl using a hand mixer, beat together the sugar, butter, and vanilla on medium high speed until smooth and creamy.
  • Add the eggs 1 at a time. Beat till thoroughly combined.
  • In another large mixing bowl, add the flour, baking powder, cinnamon, and salt. Whisk to combine.
  • Stir the flour mixture to the egg mixture alternately with the sour cream, using low speed on the mixer. The batter will be stiff.
  • Spoon the batter into the prepared pan, smoothing the top with a spatula to even out as much as possible.

For the apple filling

  • Plass the apple wedges in a mixing bowl and add the sugar Toss the apple wedges with the sugar and vanilla until apples are thoroughly coated.
  • Arrange the apples on top of the cake batter, pushing them into the batter gently so they're partially submerged.
  • Bake the cake for 65 minutes till it's golden brown on top and a toothpick or cake tester inserted into the center comes out clean.
  • Remove the cake from the oven, and turn it out onto a rack, apple-side up.

For the caramel topping

  • Place the caramels and heavy cream in a microwave-safe bowl, and heat until the cream is showing bubbles, and the caramel is soft. Stir the caramel and cream until smooth. (I did this in 3-30 second intervals)
  • Spoon the caramel over the cake, dripping it down into the crevices around the apples.
  • Scatter the walnuts on top. Sprinkle lightly with very coarse sea salt flakes if desired.

Nutrition

Serving: 1gCalories: 394kcalCarbohydrates: 54gProtein: 5gFat: 18gSaturated Fat: 9gPolyunsaturated Fat: 4gMonounsaturated Fat: 4gTrans Fat: 1gCholesterol: 64mgSodium: 489mgPotassium: 163mgFiber: 2gSugar: 34gVitamin A: 479IUVitamin C: 2mgCalcium: 99mgIron: 1mg
Keyword Salted Caramel Apple Cake
Tried this recipe?Mention @grumpyshoneybunch or tag #grumpyshoneybunch!

Easy Pickled Red Onions

September 15, 2017 by Shelby Law Ruttan 4 Comments

Quick Pickled Red Onions

A quick way to enjoy a topping for your hamburger, hotdog, or street taco. Anything you want to enjoy a little pickled punch on! Easy Pickled Red Onions are not only pretty to look at, but are not too strong (heat wise) and add some yummy condiment tang to your food!

Quick Pickled Red Onions

The only thing I ever had pickled growing up were cucumbers, peppers, and mixed veggies. But never a red onion.  Now, as an adult, I really only have eaten them as a topping or on a salad anytime I ate out. So, when I knew I would be making some street tacos, I knew I wanted to try my hand at pickling my own red onions.

Quick Pickled Red Onions

I can't believe how quickly these onions were "pickled". Although we were able to enjoy these only after about an hour, the longer they set, the prettier they get. I highly recommend only making the one onion though, unless you plan to be eating a lot of them!

Quick Pickled Red Onions

I highly recommend the OXO Good Grips V Blade Mandoline slicer that to make slicing the onions nice and thin very easy! However, you can still cut them thinly with a regular knife. I love to use my ceramic knife for little jobs and it is what I used to whenever I don't feel like pulling the Mandoline out!

Quick Pickled Red Onions

These Pickled Red Onions will store in your refrigerator for up to two weeks. The longer they sit, the redder they get!

[amd-yrecipe-recipe:57]

Pin it! Easy Pickled Red Onions

Easy Pickled Red Onions

📖 Recipe

Quick Pickled Red Onions

Easy Pickled Red Onions

Shelby Law Ruttan
An easy to make recipe for a super tasty condiment that is great for sandwiches, tacos, and more.
No ratings yet
Prevent your screen from going dark
Print FREE recipe card with your email address Pin Recipe Save Go to Collections
Prep Time 5 minutes mins
Cook Time 1 hour hr
Total Time 1 hour hr 5 minutes mins
Course Keto Condiments
Cuisine American
Servings 8 servings
Calories 10 kcal

As an Amazon Associate I earn from qualifying purchases.

Ingredients
  

  • 1 large red onion
  • ¾ cup apple cider vinegar
  • 1 tablespoon monkfruit
  • 1½ teaspoon kosher salt

Instructions
 

  • Whisk first 3 ingredients and 1 cup water in a small bowl until sugar and salt dissolve.
  • Place onion in a jar; pour vinegar mixture over. Let sit at room temperature for 1 hour.
  • Cover and chill.
  • Can be stored for up to 2 weeks in refrigerator. . Drain onions before using.

Notes

Regular sugar can be substituted for the monkfruit on a 1:1 ratio. The recipe will no longer be keto if using regular sugar.

Nutrition

Serving: 1gCalories: 10kcalCarbohydrates: 1gProtein: 1gFat: 1gSaturated Fat: 1gPolyunsaturated Fat: 1gMonounsaturated Fat: 1gSodium: 438mgPotassium: 37mgFiber: 1gSugar: 1gVitamin A: 1IUVitamin C: 1mgCalcium: 5mgIron: 1mg
Keyword Easy Pickled Red Onions
Tried this recipe?Mention @grumpyshoneybunch or tag #grumpyshoneybunch!

Chocolate Peanut Butter Truffle Cupcakes

September 12, 2017 by Shelby Law Ruttan 8 Comments

Chocolate Peanut Butter Truffle Cupcakes

-Chocolate Peanut Butter Truffle Cupcakes are chocolate cake surrounding a fudgy, delicious peanut butter truffle filling and frosted with a luscious peanut butter frosting.
Chocolate Peanut Butter Truffle Cupcakes

I love the fall season. The temperatures drop just enough during the day to make it comfortable. The colors of fall are gorgeous and the fall air makes me want to sit down on my deck and enjoy the season with a nice hot cup of coffee and a delicious, peanut butter truffle filled chocolate cupcake topped with a creamy peanut butter frosting!

Chocolate Peanut Butter Truffle Cupcakes

Get inspired by chocolate and peanut butter truffle flavors!

I'm completely inspired to get in my kitchen in the fall. That inspiration includes consuming fall flavors on a regular basis! While baking these cupcakes, I enjoyed the International Delight® Pumpkin Pie Spice creamer in my coffee to help add to that inspiration and enjoy the creamy swirl of seasonal spice in my hot mug!

Chocolate Peanut Butter Truffle Cupcakes

These chocolate peanut butter molten cupcakes are quite easy to make. I made the peanut butter truffle with some peanut butter flavored chips, some of the International Delight® REESE'S Peanut Butter Cup creamer with a little bit of heavy cream. Oh my, the truffle part alone was good enough to just eat by itself!

Chocolate Peanut Butter Truffle Cupcakes

Once the truffle filling is chilled, it is then shaped into a ball before placing in the center of the cupcake batter. The cupcake batter is pretty special in its own right too! I used the International Delight® REESE'S Peanut Butter Cup creamer in the cake, along with coffee! The flavor is incredible and texture was spot on.

Chocolate Peanut Butter Truffle Cupcakes

These cupcakes are frosted with a creamy peanut butter frosting then decorated them with some fall colored sugar crystals. They make a great side to your mid-morning or early afternoon cup of coffee! Hey, they even make a great after dinner dessert with your special cuppa!

Chocolate Peanut Butter Truffle Cupcakes

If you love International Delight® seasonal creamers as much as we do, then be sure to follow them on their social media channels! You can find them on: Facebook | Twitter | Instagram

Now, head on into your kitchen, make that steamy cup of coffee, flavor it with some International Delight® Pumpkin Pie Spice creamer and start baking 🙂Chocolate Peanut Butter Truffle Cupcakes

*If you made this recipe for Chocolate Peanut Butter Truffle Cupcakes, please give them a star rating*

📖 Recipe

Chocolate Peanut Butter Truffle Cupcakes

Chocolate Peanut Butter Truffle Cupcakes

Shelby Law Ruttan
Chocolate cupcakes with a peanut butter truffle baked inside and frosted with peanut butter frosting.
No ratings yet
Prevent your screen from going dark
Print FREE recipe card with your email address Pin Recipe Save Go to Collections
Prep Time 20 minutes mins
Cook Time 30 minutes mins
Total Time 50 minutes mins
Course Desserts
Cuisine American
Servings 12
Calories 482 kcal

As an Amazon Associate I earn from qualifying purchases.

Ingredients
  

For the cupcakes

  • 2 cups sugar
  • 2 ¾ cups flour
  • ¾ cup cocoa powder
  • ½ teaspoon salt
  • ½ teaspoon baking soda
  • ½ teaspoon baking powder
  • ½ cup canola oil
  • 1 teaspoon vanilla
  • 1 cup buttermilk
  • ½ cup strong brewed coffee chilled
  • ½ cup International Delight® REESE'S Peanut Butter Cup
  • 2 large eggs

For the Molten Peanut Butter Filling

  • 1 ½ cups peanut butter flavored chips
  • ½ cup International Delight® REESE'S Peanut Butter Cup creamer
  • ¼ cup whipping cream

For the Frosting

  • 1 stick 8 tablespoons unsalted butter, at room temperature
  • ¼ cup smooth peanut butter
  • 2 ½ cups confectioner sugar
  • 3 tablespoons whipping cream
  • Fall colored sugar crystals optional

Instructions
 

  • Over medium low heat in a small saucepan, combine creamer, whipping cream, and peanut butter flavored chips until smooth. Remove from heat and transfer to a small bowl to cool.

Refrigerate until firm. Once firm, shape into ½ tablespoon sized balls. Keep refrigerated until ready to use.To Prepare the cupcakes:

  • Preheat oven to 350 degrees. Place cupcake liners in cupcake pan.
  • Sift together sugar through baking powder. Set aside.
  • Whisk together oil, vanilla, buttermilk, coffee, creamer, and eggs until well combined.
  • Add wet ingredients to dry ingredients and using a hand mixer, blend together until well combined.
  • Place about 2 tablespoons batter in bottom of cupcake liner.
  • Place peanut butter truffle in center of batter and top with more cupcake batter until cupcake well is about ⅔ full.
  • Bake at 350 for 25-30 minutes or until cupcake bounces back when touched slightly. Remove from oven and cool until ready to frost.
  • While cupcakes are baking, prepare frosting. Cream together peanut butter, butter, confectioners sugar and whipping cream. Add the whipping cream 1 tablespoon at a time until frosting is of spreading/decorating consistency.
  • Frost completely cooled cupcakes and decorate with fall colored sugar crystals.

Nutrition

Serving: 1gCalories: 482kcalCarbohydrates: 58gProtein: 6gFat: 26gCholesterol: 57mgSodium: 239mgFiber: 3gSugar: 43g
Keyword Chocolate Peanut Butter Truffle Cupcakes
Tried this recipe?Mention @grumpyshoneybunch or tag #grumpyshoneybunch!

Vegetarian Pulled Pork Potato Skins

September 6, 2017 by Shelby Law Ruttan 5 Comments

Featured Image for Veggie Pulled Pork Potato Skin

If you love pulled pork but are trying to eat less meat, then you will want to try these Vegetarian Pulled Pork Potato Skins made with jackfruit and barbecue sauce! Easy to make and delicious, these potato skins are perfect for barbecues, picnics, or cut into smaller pieces for a game day appetizer!

BBQ Veggie Pulled Pork Potato Skins on a wooden tray.

Save this recipe by clicking on the ❤️ heart on the left-hand side of the screen or in the recipe card.

This recipe was inspired by my Spicy Poutine Potato Skins recipe! I am always trying to find ways to fancy up my loaded potato skins.

Vegetarian Pulled Pork Potato Skins

  • Made with only 5 ingredients, these are easy and quick to throw together!
  • They are a huge hit and perfect appetizer to serve for football season!
  • It's versatile! You can sub shredded pork or barbecue chicken if you aren't vegetarian.

Ingredients

This is an overview of the ingredients. See the recipe card below for amounts and instructions.

MorningStar Farms Veggie Pulled Pork bag with scooped out potato skins
  • Jackfruit: you can buy the canned or frozen jackfruit. I find it at Trader Joes and it can easily be bought from Amazon.
  • Barbecue sauce: use your favorite sauce - my choice is Sweet Baby Ray's!
  • 6 baked russet potatoes
  • Jalapeno pepper: this is optional but fans of sweet heat will wanna be sure to use it!
  • Mexican blend cheese or cheddar cheese

*NOTE: Morningstar Farms no longer makes the frozen jackfruit product.

Instructions

Baked potato shell on a baking sheet.

Scoop potato flesh and pre-bake shells.

Jackfruit and bbq sauce in a mixing bowl.

Mix together jackfruit and barbecue sauce.

Baked potato shell stuffed with bbq jackfruit and topped with cheese and jalapeno slice.

Stuff potatoes and top off with cheese and jalapeno slice.

Overhead shot of baked pulled pork potato skin.

Bake 15 minutes, til cheese has melted.

  1. Preheat oven to 350 degrees F. Remove potato flesh from center of baked potato leaving about ½ inch of potato in shell. Place potato skins on a large baking sheet and coat with butter spray. Bake for 10-15 minutes, until inside starts to to turn golden brown.
  2. While potato skins are pre-baking, mix together the jackfruit mixture. If using frozen jackfruit, be sure it has been thawed and drained, if using canned jackfruit, drain it will. Place vegan pulled pork in a microwave safe dish. Toss with ¾ cup of your favorite BBQ Sauce.
  3. Leave crispy potato skins on baking sheet and fill each potato half with vegan pulled pork mixture. Top each potato skin with ¼ cup shredded cheese and jalapeno pepper (if using).
  4. Bake for 15 minutes, until cheese has begun to melt and starts to brown slightly.

Substitutions

If you know how to make the recipe fit a certain diet, let the reader know here. Don't fake it - only provide guidance on topics you have actual experience with.

  • Vegan Potato Skins - instead of regular cheese, use a plant based cheese in it's place or stir ¼ cup nutritional yeast flakes into the jackfruit mixture to add a cheesy flavor.
  • Flavor swap - use buffalo sauce in place of barbecue sauce.
  • Meat alternative - meat eaters can. easily substitute shredded pork or chicken for the jackfruit.

Variations

Don't like jackfruit or want to try something different? How about some of the variations below that suit your tastes?

  • Protein boost - add a 1 cup black beans to the jackfruit mixture
  • Potato Swap - substitute sweet potatoes for the russet potatoes 

Try out these Stuffed Sweet Potatoes made in the air fryer!

Veggie Pulled Pork Potato Skins

Storage

Store leftovers in an airtight container in the refrigerator up to 3 days or in the freezer up to 3 months. To reheat, place frozen pulled pork potato skins on a baking sheet and bake at 350 degrees F until warmed through.

Top tip

Save the scooped out potato flesh to make Mom's Skillet Home Fries or this Classic Potato Salad.

What is jackfruit?

Jackfruit is a tropical fruit that has stringy pods on the inside. When underripe, these pods can be used to make recipes that replace pulled pork or chicken. You can find it canned from Whole foods, Trader Joes, or Amazon. As plant based foods become more popular, this product may become more widely available in regular grocery stores.

BBQ Veggie Pulled Pork Potato Skins

Related Recipes

  • Featured Image for Low Carb Beef Spirals.
    Low Carb Barbecue Beef Pinwheels
  • Vegetarian meatloaf featured image.
    Vegetarian Meatloaf -Easy and Delicious
  • Featured Image for Mom's Vegetarian Meatballs Recipe.
    Mom's Vegetarian Meatballs
  • Vegetarian Chicken Fried Steaks

Don't forget to check out my Amazon storefront for some of my favorite products!

When you make this vegetarian pulled pork potato skin, please comment below and let me know what you think. I'd love it if you tag me on Instagram @grumpyshoneybunch or #grumpyshoneybunch so I can see your photos!

If you love this recipe, please leave a ⭐⭐⭐⭐⭐ rating

📖 Recipe

Featured Image for Veggie Pulled Pork Potato Skin

BBQ Veggie Pulled Pork Potato Skins

Shelby Law Ruttan
Sweet and spicy jackfruit tossed with barbecue sauce fills a russet potato shell and is topped with cheese before baking to crispy goodness!
5 from 1 vote
Prevent your screen from going dark
Print FREE recipe card with your email address Pin Recipe Save Go to Collections
Prep Time 1 hour hr 15 minutes mins
Cook Time 15 minutes mins
Total Time 1 hour hr 30 minutes mins
Course Appetizers
Cuisine American
Servings 6
Calories 376 kcal

Equipment

  • Large baking sheet
  • mixing bowl
  • Wooden spoon

As an Amazon Associate I earn from qualifying purchases.

Ingredients
  

  • 10 ounces jackfruit
  • 1 tablespoon water
  • ¾ cup barbecue sauce
  • 6 medium russet baking potatoes , baked and cooled
  • 1 jalapeno pepper , thinly sliced
  • 1½ cups mexican blend shredded cheese

Instructions
 

To prepare potatoes:

  • Wash potatoes and pierce with fork 3-4 times. Coat with cooking spray, season with salt and pepper, and bake at 350 degrees for 50 minutes, or until tender when squeezed slightly. Let cool until easy to handle. Slice baked potatoes in half and using a tablespoon, remove pulp from center, leaving about ½ inch of potato in shell. Spray potatoes with butter spray and bake about 10-15 minutes, until inside starts to brown.
  • To prepare Veggie Pulled Pork (using microwave method)
  • Place frozen Veggie Pulled Pork in microwave safe dish. Pour over 1 tablespoon water, cover with paper towel, and microwave for 3 to 3-½ minutes. Toss with ¾ cup of your favorite BBQ Sauce.

To prepare potato skins:

  • Leave potato skins on baking sheet and fill with fillings as follows: Divide veggie pulled pork between baked potato skins evenly. Top each potato skin with ¼ cup mexican blend shredded cheese. Then top with 1 slice jalapeno pepper.

Oven Method:

  • Place baking sheet with potato skins in oven and bake at 350 degrees for 10-15 minutes, until cheese has begun to soften and melt.

Grill Method:

  • Place potato skins over indirect heat, on a grill that is heated to 350 degrees. Grill for 10-15 minutes, until cheese has begun to soften and melt.
  • To Serve: Carefully remove BBQ Veggie Pulled Pork Potato Skins from heat source and place on serving trays.

Nutrition

Serving: 1potato skinCalories: 376kcalCarbohydrates: 65gProtein: 12gFat: 9gSaturated Fat: 5gPolyunsaturated Fat: 1gMonounsaturated Fat: 2gCholesterol: 27mgSodium: 574mgPotassium: 1212mgFiber: 4gSugar: 23gVitamin A: 344IUVitamin C: 22mgCalcium: 236mgIron: 2mg
Keyword jackfruit pulled pork, vegetarian pulled pork potato skins
Tried this recipe?Mention @grumpyshoneybunch or tag #grumpyshoneybunch!

Top 10 Best Blueberry Recipes

August 30, 2017 by Shelby Law Ruttan 2 Comments

A stack of Soft and tender Blueberry Cookies with Lemon Glaze

It is no secret that I am a huge fan of blueberries.I proclaimed my love for blueberries in the very beginning of my blogging days - almost 10 years ago! I can't believe my blog will be 10 years old this December! Because of this, I want to share with you a round-up of  my Top 10 Best Blueberry Recipes that I love to make and eat right here on Grumpy's Honeybunch!

Soft Blueberry Cookies

Without a doubt, the recipe for Soft Blueberry Cookies is my very favorite and for a few reasons. First of all, because the base recipe originated from one of my Nanny's soft cookie recipes. Second of all they have blueberries in them! Lastly, because they are soft and delicious and are only the best cookie I have ever eaten! Obviously, it is a favorite of my readers also because it is my most popular recipe here on the blog!

Peach Blueberry Burrata Quesadilla

If someone asked me, out of all the blueberry recipes on your blog, which one would you make after your Soft Blueberry Cookies ('cause lets face it, that is the one I always want to make first), it would have to be this recipe for Peach Blueberry Burrata Quesadilla. The creamy slightly salty burrata cheese combined with sweet blueberries and peaches wrapped up in a crispy quesadilla is to die for! If you haven't tried this combination, then you must do so soon!

Fluffy Blueberry Pancakes

I have been known to call our house the "pancake house". Basically because Grumpy loves pancakes. He's not as fond of blueberry pancakes as I am, but hey, it's easy to improvise if he's not feeling the berry. These Fluffy Blueberry Lemon Pancakes are my favorite recipe for pancakes. The lemon zest in the batter with blueberries really sets off the tastebuds!

What I love about this Cherry Blueberry Trifle is the fact that you can, and we did eat it for breakfast or dessert! As a matter of fact, Grumpy loves this so much that when I first made it he insisted he have it every morning for breakfast! Not only is it delicious, but it is super easy to make ahead of time (like the night before) and just take out of the fridge in the morning to eat. Yes, you really want to try this one too!

Blueberry Basil Cosmopolitan

It would not be the Grumpy Household if I didn't have a cocktail made with blueberries. After all, we love our cocktails! This Blueberry Basil Cosmopolitan is refreshing, summery, and delicious. Perfect to make during blueberry season!

Buttermilk Blueberry Muffins

When I first started blogging, it was my habit to make muffins on a regular basis. I would keep a few out for Grumpy and I, and the rest would go with me to work for the students and faculty to enjoy. Grumpy used to tell me they only loved me for my muffins. I disagree! I think they loved me for me too (but I think they do miss my muffins!) These Buttermilk Blueberry Muffins are the best blueberry muffin ever. I highly recommend you make this recipe ASAP.

Blueberry Scones

Speaking of baking, blueberries and breakfast are a perfect match because they not only go great in muffins, but go great in scones! These are The Best Ever Blueberry Scones! Crispy outside, flaky inside with that burst of blueberry and lemon glaze. What's not to be perfect about them!

Blueberry Almond Cream Tart

If you want easy and elegant, there is nothing easier, more elegant, or tastier than puff pastry dough. Just bake up a sheet and spread with the cream topping and sprinkle with blueberries, almonds, and a glaze. Blueberry Almond Cream Tart is so delicious that I'm ashamed  proud to admit that Grumpy and I ate the whole thing ourselves the morning I made it. Yeah. You definitely want company around to help you eat this or you will probably do the same thing (or maybe you don't care?).

This Red, White, and Blueberry Pie is Grumpy's personal favorite. He would eat this whole thing by himself if I let him! Simple baked pie crust with no bake filling and a special surprise on the bottom layer!

Last but not least is this Blueberry French Toast Souffle. As a child I always preferred french toast over pancakes. Still kinda do, I just don't eat either very often anymore. Keeping the carb count low is important in our house these days so any and all of these treats are eaten in moderation. However, for a special weekend brunch, this is a must make! Make it individually or in a casserole, either way, whoever you're serving this to will feel very special!

Which one of my Best Blueberry Recipes will you make first?

Need more Blueberry Recipe inspiration? Be sure to follow my Pinterest Board for Blueberry Love!

PIN IT! Top 10 Best Blueberry Recipes on Grumpy's Honeybunch

Top 10 Best Blueberry Recipes

Beef and Butternut Chili

August 21, 2017 by Shelby Law Ruttan 9 Comments

Beef and Butternut Chili

Beef and Butternut Chili is a filling and satisfying dish that is bursting with flavor and melt in your mouth pieces of chuck steak! Super tender tender beef, sweet butternut squash, and carrots put this chili over the top delicious!

Beef and Butternut Chili

Just a few weeks ago I was lucky enough to have a one on one farm tour with John and Kathi Wagner, the home of JKW Polled Herefords sponsored by the New York Beef Council.

I received compensation for writing this post from New York Beef Council.  All thoughts and opinions are my own.

Beef and Butternut Chili

John and Kathi's homestead is just south of my home, about a 20 minute drive, right in the foothills of the Catskill Mountains. What a gorgeous view they have from their home.

Beef and Butternut Chili

The glorious view on the opposite side of John and Kathi's home, is the old homestead of John's family. They don't own this property anymore, but if they had of, I would have LOVED to have had a tour of that home!

This farm has been in business since the 1780's. A 3rd generation farm, whose origin was a dairy farm. John and Kathi however moved out of the dairy farming industry and went into raising beef cattle. They produce seed stock which is farming a supply of animals for breeding purposes.

I am super impressed with the knowledge and in awe of the work that John and Kathi do on their farm. They are farmers who love what they do, who love their animals, and who want to provide the best then can for the future consumers. I may  have grown up in the dairy industry (which is very different from this!) but the passion is still the same for the farmers in the beef industry as it is in the dairy industry!

Beef Cattle

Being a farmer raising cattle for seed stock requires a lot of work and knowledge. Breeding season is from May to July during which time there is a bull in with the cows. Then in the fall, the cows have a pregnancy check and calving season is from January thru March.

While the cows are in the pasture with their babies, they are fed by their mommas. One particular baby that the Wagners have this year is an orphan who has been bottle fed since birth. This little baby looks to the people as her momma and you should see her come on the run when she sees them!

Water Tank

Caring for the animals also means making sure they have a good source of water and feed. The Wagners have water tanks that hold a 1000 pounds of water along with four large pastures that they rotate the cattle in. In the field I was able to mingle with the cattle and I also leared the term "Black Baldies". This is a cow with a black body and white face and is a crossbred Angus to Herford. The Black Baldie are known as efficient maternal and feeder cattle.

I learned terms like "work the animals" and "handling". The cattle go through 2 different rounds of immunizations, testings, and pregnancy checks. Weighed at birth, during weaning, and when they are yearlings. Babies have to nurse from their momma within 6 hours and have their navels dipped within 24 hours. The bull calves are castrated unless they are going to be used for breeding in the future.

Steak with Blue Cheese Butter

At the end of the day, we were treated to a delicious meal made by Jean O'Toole, Executive Director of the New York Beef Council. During our dinner conversation I learned about the "hot beef sundae". This dish is pretty much like a mashed potato bowl with beef and gravy, topped with a cherry tomato. I almost made that recipe for you to share, but decided that I felt more like a spicy chili recipe! However, I still make blog about the hot beef sundae in the future!

Beef and Butternut Chili

Having this "farm to table experience" showed me just how much goes into making sure our food is safe for consumption as well as the love put into the work of raising the cattle. For this I am very appreciative and am so glad I am able to share with you a piece of my experience!

Beef and Butternut Chili should be the next recipe you make your family! Pair the chili with some Cheesy Italian Bread on the side and some Soft Blueberry Cookies for dessert!

📖 Recipe

Beef and Butternut Chili

Beef and Butternut Squash Chili

Shelby Law Ruttan
A delicious sweet and savory beef stew recipe with butternut squash pieces and warm spices in a tomato based broth. Beef and Butternut Squash Chili is a delicious warm and comforting fall recipe.
5 from 1 vote
Prevent your screen from going dark
Print FREE recipe card with your email address Pin Recipe Save Go to Collections
Prep Time 30 minutes mins
Cook Time 2 hours hrs 40 minutes mins
Total Time 3 hours hrs 10 minutes mins
Course Main Dish
Cuisine American
Servings 6
Calories 382 kcal

As an Amazon Associate I earn from qualifying purchases.

Ingredients
  

  • Cooking spray
  • 1 tablespoon canola oil , divided
  • 1½ pounds lean boneless chuck steak , trimmed and cut into ½ inch cubes
  • ¾ teaspoon salt
  • 1 cup chopped onion
  • ½ cup green bell pepper , diced
  • 2 tablespoons tomato paste
  • 4 cloves garlic , minced
  • ½ jalapeno chili pepper , diced
  • ⅔ cup dry red wine
  • 1½ teaspoons ground ancho chili pepper
  • 1 teaspoon dried oregano
  • ½ teaspoon ground red pepper
  • 1 teaspoon ground cumin
  • ¼ teaspoon ground cinnamon
  • 1 tablespoon cocoa powder
  • 1 tablespoon brown sugar
  • 28 ounce whole tomatoes , undrained and chopped
  • 15 ounce kidney beans , rinsed and drained
  • 2 cups peeled and cubed butternut squash
  • 1 cup chopped carrots
  • 2 tablespoons fresh cilantro optional

Instructions
 

  • Heat a large dutch oven over medium-high heat. Coat pan with cooking spray and add 1 teaspoon oil. Add been to the pan and sprinkle with salt. Saute 8 minutes, turning to brown on all sides. Remove beef.
  • Add 2 teaspoons of oil to the pan. Add onion and bell pepper. Saute 3 minutes.
  • Stir in the tomato paste, garlic, and jalapeno. Saute 2 minutes, stirring constantly.
  • Add the wine and bring the mixture to a boil and scrape the pan. Cook 2 minutes. Return beef to pan.
  • Stir in the spices and add the tomatoes and kidney beans to the pan and bring to a boil. Cover, reduce heat to medium and simmer for 1 hour.
  • Add Butternut squash and carrots. Simmer for 1 more hour or until vegetables are tender.
  • Serve with fresh cilantro (if using)

Nutrition

Calories: 382kcalCarbohydrates: 38gProtein: 33gFat: 11gSaturated Fat: 4gPolyunsaturated Fat: 2gMonounsaturated Fat: 5gTrans Fat: 0.4gCholesterol: 78mgSodium: 634mgPotassium: 1373mgFiber: 10gSugar: 10gVitamin A: 9063IUVitamin C: 40mgCalcium: 135mgIron: 7mgNet Carbohydrates: 28g
Keyword Beef and Butternut Chili, Beef and Butternut Squash Chili
Tried this recipe?Mention @grumpyshoneybunch or tag #grumpyshoneybunch!

Sweet and Spicy Beef Kabobs

July 27, 2017 by Shelby Law Ruttan 2 Comments

Beef Kabobs marinated in a sweet and spicy sauce, then skewered and grilled with pineapple, sweet peppers, red onion and mushrooms. Perfect as a main or serve as an appetizer to party guests.

Grilled Sweet and Spicy Beef Kabobs on skewers with pineapple and red pepper

If you are looking for a sweet and spicy marinade for steak, then this recipe is your one stop shop! We love grilled beef kabobs and this recipe is one of the tastiest summertime dinners!

Grilled Beef Kabobs for Dinner!

I am so addicted to that sweet heat flavor. The spice complements the sweetness and adds an element of delicious! That is why these Sweet and Spicy Beef Kabobs are on my grill every summer!

I was browsing the Certified Angus Beef brand website and I came across a recipe for Grilled Hawaiian Beef Kabobs. I loved the pineapple in that recipe. And, while we are keto and low carb for the most part, I am willing to add a higher carb fruit to our diet once in a while.

I kept this recipe low carb by changing it up some and using sugar-free sweeteners. Adding an element of spice to the marinade was something I just naturally do!

Skewers of Beef, Pineapple, Red Onion, and Red Bell Pepper on the grill

FAQ's

How long do you marinate the beef steak for?

The steak can be marinated at least 30 minutes and up to 4 hours.

Can you marinate beef steak for too long?

Yes, you can! Tha marinade only penetrates the outer edges of the meat. If marinated for too long, the meat can become mealy and mushy on the exterior without softening the interior at all. For a beef kabob, you should not marinate the beef longer than 4 hours.

Do I need to season the beef kabob after cooking?

The marinade is on the outer surface of the meat and provides flavoring to the outer layer. There is no need to season the meat again.

upclose shot of Sweet and Spicy Beef Kabobs

How to make Kebabs

This recipe is so simple! You will need fresh pineapple pieces, button mushrooms, red bell pepper and red onion.

prepped ingredients for the marinade recipe

I recommend fresh pineapple because it will hold up on the grill better than a piece of canned pineapple. The meat will go in the marinade mixture and sit for at least 30 minutes.

skewered beef kabobs before cooking on the grill

Once the beef is done marinating, you will thread the fruit, veggies, and meat alternately onto your skewers.

cooking the kabobs on the grill

Place the skewers on a hot grill and cook for 4-8 minutes or, until beef has reached desired doneness.

plated kabobs without the skewer

This recipe makes for a super colorful plate of food! It's so bright and festive and perfect for a light evening meal!

Top Tips

  • I like to use a tender cut of meat for beef kabobs. Certified Angus Beef® brand sirloin steak or tips was my choice for this particular recipe.
  • Use good skewers. Metal is great, but you can use wooden or bamboo skewers, just be sure to soak them in water for at least 30 minutes before threading your ingredients onto it.
  • Use a marinade that give a great exterior kick of flavor! After all, that is what a marinade is for. They usually consists of fat (oil), acid (citrus), and flavorings (your choice of herbs and spices).

What to serve with Beef Kabobs

Whenever we kabob, it's usually a party of sorts! Even if it is just Grumpy and me! I like to serve these Sweet and Spicy Beef Kabobs with a Strawberry Vodka Mojito. Then for dessert, these Chocolate Peanut Butter Cheesecake!

If your looking for another great marinade to try on your beef kabobs, check out this recipe for Balsamic and Red Wine Steak Marinade!

Related Recipes

This Air Fryer Roast Beef is another great way to cook beef and is super easy to make.

Grilled Reuben Burgers on Buttered Rye Toast takes the Reuben to a whole new level!

Beef Fingers Cooked on a Himalayan Salt Block can be done on the grill or in the oven.


Don't forget to check out my Amazon storefront for some of my favorite products!

When you make this recipe, please comment below and let me know what you think. I'd love it if you tag me on Instagram @grumpyshoneybunch or #grumpyshoneybunch so I can see your photos!

If you love this recipe, please leave a ⭐⭐⭐⭐⭐ rating

📖 Recipe

Beef Kabobs with Sweet and Spicy Marinade

Shelby Law Ruttan
Sweet and Spicy Beef Kabobs on the grill with fresh pineapple, mushrooms and onions!
5 from 1 vote
Prevent your screen from going dark
Print FREE recipe card with your email address Pin Recipe Save Go to Collections
Prep Time 20 minutes mins
Cook Time 8 minutes mins
Marinate Time 4 hours hrs
Total Time 4 hours hrs 28 minutes mins
Course Main Dish
Cuisine American
Servings 8
Calories 202 kcal

As an Amazon Associate I earn from qualifying purchases.

Ingredients
  

For the Marinade

  • 3 tablespoon Swerve Brown
  • 3 tablespoon soy sauce
  • 2 tablespoon lime juice
  • 1 teaspoon sriracha sauce
  • 1 clove minced garlic

For the Kabobs

  • 2 lbs Certified Angus Beef ® top sirloin steak cut into 1 ¼-inch cubes
  • 1 large red onion cut into 1 ¼-inch pieces
  • 2 large red bell peppers seeded and cut into 1 ¼-inch pieces
  • 2 cups fresh pineapple cut into 1 ¼-inch cubes
  • 8 oz button mushrooms

Instructions
 

  • Make the Marinade
  • Whisk together the lime juice, soy sauce, black bean chili sauce, minced garlic and brown sugar.
  • Add beef cubes to marinade. Cover and refrigerate at least 4 hours.
  • Prepare and Grill the Beef Kabobs
  • If using bamboo kabob skewers, soak in water overnight.
  • Assemble kabobs alternating meat and vegetables as desired.
  • Preheat grill to medium high.
  • Grill 4 to 8 minutes for medium rare or until meat is at desired doneness.
  • Be sure to rotate kabobs on the grill frequently.

Nutrition

Serving: 1kabobCalories: 202kcalCarbohydrates: 11gProtein: 26gFat: 6gCholesterol: 350mgSodium: 268mgFiber: 2gSugar: 7g
Keyword Beef Kabobs, Grilled Beef Kabobs, Spicy Marinade for Steak, Steak Marinade
Tried this recipe?Mention @grumpyshoneybunch or tag #grumpyshoneybunch!

Jalapeno Creamed Corn with Chai Sweet Chili Shrimp

July 23, 2017 by Shelby Law Ruttan 10 Comments

Jalapeno Creamed Corn with Sweet Chili Shrimp.

Delicious and easy to make, this Jalapeno Creamed Corn recipe makes a great base layer for Chai Sweet Chili Shrimp. The creamy corn has just a little hint of jalapeno flavor and the butter sauteed shrimp are lightly tossed with a bottled sauce that has some kickin' sweet heat!

Jalapeno Creamed Corn

If you are anything like me, then you do not like eating foods out of a can. That is the only way I have ever had creamed corn when I was growing up.  The tinny taste of canned creamed corn is very unappealing to me. I love corn so much though I wanted to give it a try home made from the fresh ears of corn that are on the market in abundance right now.

Jalapeno Creamed Corn

Let me tell you, making your own jalapeno creamed corn is not time consuming at all. It is so very easy to do and the flavor is far superior than what you're going to get by grabbing a can opener and cutting through tin! This is so fresh, delicious, and sweet! Of course, because I am also a person who loves to add some heat to their sweet, I decided to try it with some fresh jalapeno also. Not a mistake my friends. Not at all!

Jalapeno Creamed Corn with Chai Sweet Chili Shrimp

This Chai Sweet Chili sauce is the magic that I used on my shrimp. This is delicious stuff! You can get it from Intensity Academy (not a paid link)

Jalapeno Creamed Corn

I sauteed the shrimp with a little butter and tossed with a couple tablespoons of that yummy sauce. It was perfection!

Jalapeno Creamed Corn

I think you could probably make this and freeze it although I haven't tried yet. If I do I will come back and make note for any who may wonder. Sometimes food that has been thickened with a cornstarch or flour will be watery after freezing. My mom does freeze corn, but not prepared creamed corn. You could definitely freeze your corn after you've cut it and then use it later to make the creamed corn. If anyone else knows how it works, feel free to leave me a comment to let me know!

📖 Recipe

Jalapeno Creamed Corn

Jalapeno Creamed Corn with Chai Sweet Chili Shrimp

Shelby Law Ruttan
Fresh sweet corn simmered in a cream sauce and topped with a sweet and spicy sauteed shrimp.
No ratings yet
Prevent your screen from going dark
Print FREE recipe card with your email address Pin Recipe Save Go to Collections
Prep Time 15 minutes mins
Cook Time 10 minutes mins
Total Time 25 minutes mins
Course Main Dish
Cuisine American
Servings 4 servings
Calories 249 kcal

As an Amazon Associate I earn from qualifying purchases.

Ingredients
  

  • 7 ears corn
  • 1 jalapeno deseeded and diced
  • 1½ cups low-fat milk
  • 2 tbsps cornstarch
  • 2½ tablespoon butter divided
  • ½ teaspoon salt
  • 1 lb raw large shrimp peeled and deveined
  • 2 tablespoon Chai Sweet Chili Sauce
  • 2 tablespoon Fresh chopped cilantro

Instructions
 

For the Corn:

  • Cut the corn from the cob and reserve ½ cup to set aside. You should have about 3 cups of corn left. Pulse 3 cups of corn kernels in a food processor until almost creamy. 5 or 6 pulses. Take corn husks and using the dull side of a knife, scrape the cobs to remove the corn milk and pulp. Discard cobs. Place pulsed corn with the corn milk and pulp n a saucepan. Add jalapeno, milk and cornstarch to pan. Bring wo a simmer over medium heat, stirring often. Reduce heat to low and simmer, stirring occasionally until thickened (about 5 minutes). Stir in 1 tablespoon butter and ½ teaspoon salt.

For the Shrimp:

  • Place 1-½ tablespoons butter in how skillet. Once butter has melted, add fresh shrimp and cook until no longer opaque, stirring occasionally, about 5-6 minutes. Toss cooked shrimp with Chai Sweet Chili Sauce.

To Serve:

  • Divide creamed corn into 4 serving bowls. Divide shrimp between serving bowls and place on top of creamed corn. Using a small teaspoon, pour little dots of Chai Chili sauce over top of creamed corn mixture. Garnish with fresh chopped cilantro if desired.

Notes

While I recommend the Chai Sweet Chili sauce, you can substitute any sweet chili sauce to your liking for the sauce I used in this recipe. The Chai Sweet Chili sauce is not as sweet as some sauces (my preference) and has a bit more of a kick.

Nutrition

Serving: 1gCalories: 249kcalCarbohydrates: 13gProtein: 26gFat: 10gSaturated Fat: 5gPolyunsaturated Fat: 1gMonounsaturated Fat: 2gTrans Fat: 1gCholesterol: 309mgSodium: 1359mgPotassium: 239mgFiber: 1gSugar: 9gVitamin A: 448IUVitamin C: 9mgCalcium: 278mgIron: 2mg
Keyword Jalapeno Creamed Corn
Tried this recipe?Mention @grumpyshoneybunch or tag #grumpyshoneybunch!

For a great summertime dessert, try these Berry Swirled Cheesecake Pops!

PIN IT! Jalapeno Creamed Corn with Chai Sweet Chili ShrimpJalapeno Creamed Corn

10 Must Make Gourmet Summer Burger Recipes

July 19, 2017 by Shelby Law Ruttan 8 Comments

Featured Image for Steakhouse Bacon Cheeseburger.

Burgers are rockin' our grill this summer. We have been eating burgers of some kind at least 2-3 times a week just because they are so easy to do on weeknights. Since we are enjoying them so much, I decided to share with you 10 of the most appealing Gourmet Summer Burger Recipes from fellow blogging friends!

Gourmet Summer Burger Recipes
Big, juicy, and beefy! This is made gourmet with the Sweet Black Pepper Bacon, that totally puts this burger over the top! (click photo for link to recipe)

What makes a burger gourmet? Well, I believe it is a gourmet burger when it has a topping outside of the ordinary. Ok, then what is ordinary? I would say your basic, ketchup, mustard, pickles. When you add lettuce and tomato it becomes "deluxe". So, with that said, let me share with you what I feel are some of the most mouthwatering Gourmet Burger Recipes on the Blogsphere!

Gourmet Summer Burger Recipes

Cupcakes and Kale Chips offers up a French Onion Soup au Gratin Burger full of flavor! Topped with French Onion spread and Gruyere cheese, you'll be scrambling for a bite of this juicy burger this summer!

Gourmet Summer Burger Recipes

This Southwest Santa Fe Burger from The Heritage Cook knows how to fill a burger up with some incredible flavor also! With carmelized onions green chili topping, cheese and green chili aioli, she has me drooling and dying to try this burger!

Gourmet Summer Burger Recipes

Renee's Kitchen Adventures has a Asian style gourmet burger! Hello Korean BBQ Burgers with Kimchi Cucumbers! So much yumminess your eyes will be rolling in ecstasy!!

Gourmet Summer Burger Recipes

Made gourmet with guacamole,cilantro, and lime! These Guacamole Cilantro Lime Cheeseburgers from Life Tastes Good has flavors that are irresistible if you are an avocado fan (like me!)!

Summer Gourmet Burger Recipes

Yes, you can have gourmet burgers with bread instead! The Italian flavors of basil, fresh tomato and pesto and burrata, Tracy's Caprese Burger is stuffed (literally!) with cheesy delicious flavors!

Gourmet Summer Burger Recipes

This Cherry Habanero Burger from Having Fun Saving & Cooking is made gourmet by the Cherry Habanero Jam. Just those three words have me drooling and imagining the flavor!

Summer Gourmet Burgers

Gastro Pub Cab and Blue Burger is a tasty inspiration of Go Epicurista! Her "grown up" burger will inspire you to continue to eat burgers without ketchup! My mouth is watering just looking at this photo!

Summer Gourmet Burger Recipes

The Dominican Chimichurri Burger is the creation of The Crumby Kitchen's hubby! Don't let the name fool you into thinking there is Chimichurri sauce on this burger. Erica tells you to just call this guy the "Chimi" which in the Dominican is late night street food! Me? I call it gourmet! 🙂

Gourmet Summer Burger Recipes

Italian Pesto Burger from That Skinny Chick can Bake is a burger flavored with pesto and topped with crispy prosciutto and mozzarella! A gourmet burger you can definitely get your Italian on with!

I guarantee I will be making every one of these burgers before my summer is over with! The hardest part is deciding which one and the even harder part is I find more and more gourmet burgers that I want to try, so this may not be the last burger post you see from me! Which one will you make first?

Pin it! 10 Must Make Gourmet Summer Burger Recipes!

Summer Gourmet Burger Recipes

Grilled Reuben Burgers on Buttered Rye Toast

July 9, 2017 by Shelby Law Ruttan 15 Comments

Grilled reuben burger on rye toasted bread.

Grilled Reuben Burgers smothered in sauerkraut, Havarti cheese, and Thousand Island dressing sandwiched between toasted buttery rye bread may be a little on the messy side but it's on the most delicious side of messy!

Be sure to provide plenty of napkins to keep that mess in check. Make it even more delicious by pairing it with a glass of CK Mondavi and Family Merlot!

This post for Grilled Reuben Burgers was written as part of the CK Mondavi Ambassador program. All opinions are my own. #SummerBurgers #CKMondaviandFamily #CKSummerWines

Grilled Reuben Burger

In May 2017 CK Mondavi came out with new packaging that gives a nod to their family heritage and tradition, as well as modernizing their look. Now known as CK Mondavi and Family, this is still great wine, just with a brand new look. 

Recently, I had the opportunity to sit and enjoy a meal with Janice Mondavi and part of her team. We went over their wines, did tastings and heard the CK Mondavi story. I love the pride and love this family has for producing a great quality wine and carrying on family tradition.

CK Mondavi Merlot label

To celebrate summer, CK Mondavi is doing summer in-store promotions for burgers, buns, cheese and charcoal. Look for in-store promotions wherever you can find CK Mondavi and Family wines! To assist in this celebration, I am today bringing you a burger recipe that you are going to want to try soon!

CK Mondavi and Family bottle cap

My #SummerBurger recipe includes flavors I have loved ever since I was a teen! I remember standing in line at a church camp meeting years ago to order a Reuben Sandwich from the Camp Cherokee Cabin. My mouth just waters now thinking about it!

Grilled Reuben Burger

Grilled buttery bread, creamy and sweet Thousand Island Dressing, and creamy Havarti Cheese are the components of this sandwich, along with the delicious ground beef makes this a Grilled Reuben Burger you won't forget!

raw burger patty

I didn't put any seasonings of any kind in the beef. I used 80/20 Certified Angus Ground Chuck sprinkled with a little salt and pepper before grilling.

TIP: For evenly cooked  Burgers, place a thumbprint indentation in the center of your burger when forming patties.

Grilled Reuben Burger

After flipping the burger, place the sauerkraut on top to warm it up while cooking the other side. About a minute or two before removing the burgers, place my cheese on top of the sauerkraut and turn heat off. This ensures melty cheese and no cold bites in the midst of your hot burger!

Grilled Reuben Burgers

Sandwich this juicy, delicious burger with some buttery, toasted Rye bread. Next, top it off with some Thousand Island Dressing for the finishing touch! Serve up some air-fried french fries, extra bread and butter pickles and more dressing for dipping your fries in!

Grilled Reuben Burgers

Try this Flag Cheesecake, for a perfect summertime dessert to enjoy after this Grilled Reuben Burger meal! Or, if you're in the mood for a cookie, how about Nanny's Sugar Cookies with Orange Moscato Frosting!

Be sure to follow CK Mondavi and Family on all their social channels!

Website | Instagram | Pinterest | Facebook | Twitter

 *If you made this Grilled Reuben Burger, please give it a star rating*

📖 Recipe

Grilled Reuben Burger

Grilled Reuben Burgers

Shelby Law Ruttan
A juicy beef burger with sauerkraut, cheese, and thousand island dressing is sandwiched between buttered and grilled rye bread!
4.67 from 12 votes
Prevent your screen from going dark
Print FREE recipe card with your email address Pin Recipe Save Go to Collections
Prep Time 10 minutes mins
Cook Time 8 minutes mins
Total Time 18 minutes mins
Course Main Dish
Cuisine American
Servings 4
Calories 815 kcal

As an Amazon Associate I earn from qualifying purchases.

Ingredients
  

  • 1½ lb 80% lean ground chuck

For the Dressing:

  • ½ cup mayonnaise
  • 2 tablespoons ketchup
  • 2 tablespoons sweet pickle relish
  • 2 teaspoons finely diced shallot
  • ⅛ teaspoon salt , or to taste

For the topping

  • ½ cup sauerkraut
  • 4 oz havarti Cheese sliced
  • 4 slices rye bread

Instructions
 

FOR THE DRESSING

  • Stir together the mayonnaise, ketchup, sweet pickle relish, diced shallot and salt. Store in the refrigerator until ready to use.

FOR THE BURGERS

  • Shape the ground beef into four 6 ounce patties. Sprinkle the patties with salt and pepper. Cook on the grill for 3 minutes on each side, until you have reached desired doneness.
  • The last few minutes on the grill, place the sauerkraut on top of the burger. Place the cheese on top of the sauerkraut.
  • Serve with 1 tablespoon of burger sauce on toasted toasted rye bread.

Nutrition

Calories: 815kcalCarbohydrates: 19gProtein: 39gFat: 64gSaturated Fat: 21gPolyunsaturated Fat: 14gMonounsaturated Fat: 22gTrans Fat: 2gCholesterol: 157mgSodium: 953mgPotassium: 582mgFiber: 2gSugar: 4gVitamin A: 313IUVitamin C: 3mgCalcium: 235mgIron: 5mg
Keyword Grilled Reuben Burger, Reuben Burger
Tried this recipe?Mention @grumpyshoneybunch or tag #grumpyshoneybunch!

Barbecue Bean Bake

July 6, 2017 by Shelby Law Ruttan 12 Comments

Barbecue Bean Bake

What could be more hearty and delicious, not to mention filling and satisfying, than a serving of One-Stop Barbecue Bean Bake? Full of of Certified Angus Beef® brand ground beef and a ton of flavor. Even cooked on  your stove, you can feel like you're out in the range with the cowboys at the end of a long hard working day!

Barbecue Bean Bake

I am a paid influencer for Certified Angus Beef® brand through Sunday Supper Movement. All opinions are mine alone.

It is hard to believe that just a couple of weeks ago I was on my journey to Kansas with a group of Certified Angus Beef® brand influencers. We were on our way to learning a whole new lifestyle and means of living for the western cowboy.

Barbecue Bean Bake
Certified Angus Beef has made it their mission to educate their influencers on how their beef is brought from gate to plate. We met first with Debbie Lyons-Blythe, who is a cattle rancher who raises cattle (and kids!).  Debbie extended her hospitality to us and served a delicious luncheon at her home as a start of our day on the ranch.

Barbecue Bean Bake
We later took a tour of the Tiffany Cattle Company where we learned about how the cattle are cared for and fed. Who knew what a big process it was! We were shown the "kitchenaid mixer" for the cattle feed and how it works to bring together different types and ratios of feed for the cattle. I was also very impressed to learn that there are built in water vats in each lot of cattle and that those water vats are scrubbed clean weekly! While a lot of it was new to me, some of it was similar to my home state. It just felt like it was on a much larger scale!

Barbecue Bean Bake
Our next stop was a hayride to the range where we would meet the cattle and the cowboys, make biscuits with Kent Rollins, and walk among the wildflowers while identifying them. Next came our dinner of Cowboy Ribeye, Barbecue Baked Beans, and a delicious hominy recipe!

Barbecue Bean Bake
I could almost imagine myself thrown years back into the old west days when I see the cattle roaming free on the range. Like they were right in harmony with the cowboys (and girls) who were out there rounding them up. They grazed in the grass while the rest of us enjoyed a Chuckwagon meal provided by none other than Kent Rollin's.

Barbecue Bean Bake
Every part of this trip was exciting, but the surprise was we were also going to get a chance to visit the Lodge where Pioneer Woman films her Food Network show! The view of the Drummond Oklahoma Ranch is breathtaking. The perfect ending to the weekend was a visit to the Mercantile, a surprise visit from Ladd Drummond himself, and a delicious homestyle meal served right there at the Mercantile before we headed back to Kansas and our trek home.

Barbecue Bean Bake
To share my enthusiasm of my visit and to try and relive it just a little bit with Grumpy, I made a recipe from Kent Rollin's cookbook that I am sharing with you today. Because we are just two hard working people, I cut his recipe in half but still made slight adjustments to the amount of ingredients (such as the chilis!)

Barbecue Bean Bake
Let me leave you with one last photo of the trip that will hold great memories for all of us for a very long time!

These beans would go great with Skillet Jalapeno Cornbread!

This post contains an affiliate link for Cowboy Kent Rollins cookbook.

📖 Recipe

Barbecue Bean Bake

Barbecue Bean Bake

Shelby Law Ruttan
The perfect side dish to any barbecue and full of ground beef and flavor.
5 from 1 vote
Prevent your screen from going dark
Print FREE recipe card with your email address Pin Recipe Save Go to Collections
Prep Time 10 minutes mins
Cook Time 30 minutes mins
Total Time 40 minutes mins
Course Beef Recipes
Cuisine American
Servings 6
Calories 377 kcal

As an Amazon Associate I earn from qualifying purchases.

Ingredients
  

  • 1 lb Certified Angus Beef® brand 80% ground beef
  • salt and pepper
  • 1 medium onion chopped
  • 1 large jalapeno diced
  • 1 15 oz can pork and beans
  • ½ cup barbecue sauce
  • 1 7 ounce can green chilies
  • ¾ ounce chili seasoning
  • 1 tablespoon stone ground mustard

Instructions
 

  • Preheat oven to 350 degrees. Place ground beef in cast iron skillet and cook over medium heat until beef begins to brown.
  • Add onion and jalapeno and cook until onions begin to turn translucent.
  • Add pork and beans, barbecue sauce, green chilies, chili seasoning, and mustard.
  • Place skillet in oven and bake for 30 minutes. Let cool at least 10 minutes before serving


Notes

The original recipe also added ketchup to the pan. I skipped out on this as I didn't feel it needed it for our tastes. Please help yourself to my recipe and also, grab Kent's cookbook and the full experience of all his Cowboy Cooking recipes!

Nutrition

Serving: 1gCalories: 377kcalCarbohydrates: 21gProtein: 28gFat: 20gSaturated Fat: 7gPolyunsaturated Fat: 9gCholesterol: 86mgSodium: 610mgFiber: 3gSugar: 9g
Keyword Barbecue Bean Bake
Tried this recipe?Mention @grumpyshoneybunch or tag #grumpyshoneybunch!

Peach Sangria - Sparkling Summer Beverage

July 3, 2017 by Shelby Law Ruttan 5 Comments

A glass of peach sangria in a clear footed glass with fresh peach and blueberries in the drink.

This Sparkling Peach Sangria is full of peachy deliciousness! If you are looking to sweeten your summer celebrations, this fruity wine cocktail is sure to do the job!

Overhead image of Peach Sangria with slices of peach, blueberries, and lime.

Save this recipe by clicking on the ❤️ heart on the left-hand side of the screen or in the recipe card.

Summertime means cool and refreshing beverages and sometimes those beverages are spiked! I love to think of sitting on my deck, watching nature, and sipping on a sparkling Peach Sangria. Peaches are so refreshing and just the aroma makes me feel good.

This recipe is inspired by my Watermelon Lime Berry Sangria, another fruit packed boozy drink for summer!

[feast_advanced_jump_to]

    Why You'll Love Peach Sangria

    • Peach Sangria is cool and refreshing and it topped off with peach sparkling water for that extra peachy flavor!
    • It's perfect for entertaining or just enjoying with your significant other on a hot summer night!
    • It's easy to make and you can make it ahead of time!

    Ingredients

    Fresh peaches cut into slices.

    This delicious chilled adult beverage is made with peach rum, peach schnapps, peach-flavored syrup, and sparkling peach flavored water. Add fresh peaches and blueberries for a gorgeous sangria.

    For this sangria recipe, I used a sauvignon blanc. Sauvignon blanc is a dry white wine with peach essence that I thought would go nicely with this peach sangria. You will need:

    As an Amazon Associate I earn from qualifying purchases.

    • Yellow or White Peaches: Fresh sliced peaches have the best flavor.
    • Blueberries: These complement the peaches and give a pretty color contrast.
    • Peach Syrup: Most sangria recipes call for simple syrup to add a little sweet to the spiked drink. I went with a peach syrup to give it more of a peachy punch.
    • Dry White Wine
    • Peach Rum: This is a lightly sweetened and aromatic peach liqueur.
    • Sparkling Peach Water
    • Large Glass Pitcher: perfect for showcasing the beauty of the peach sangria

    How to Make Peach Sangria

    1. Place sliced peaches and blueberries in a large pitcher.
    2. Pour peach syrup, rum, wine, and sparkling water over the top of the fruit. Stir and refrigerate until ready to serve, at least 2 hours, until cold.
    Overhead image of a glass of fruity sangria.

    Substitutions

    Just because you don't have the exact same ingredients I used doesn't mean you can't make this peach sangria! Follow the instructions below to make your own version!

    • White Rum - if peach rum is hard to find, substitute white rum or you can use peach schnapps.
    • Lower Sugar - substitute a sugar free peach syrup to reduce sugar content.
    • Club Soda - can't find peach sparkling water? No problem, use club soda in it's place.

    Variations

    Giving the visitor ideas on how they can change this recipe to better suit their dinner guests, or their cultural cuisine, is a great way to increase the chances they make the recipe.

    • Raspberry Lime Sangria: use raspberry syrup and a squirt of lime juice. Add fresh or frozen raspberries and lime slices to the sangria
    • Frozen Sangria - eliminate the sparkling water and use peach flavored water (non-sparkling) to prevent overflowing beverages
    • Virgin Drink - skip the wine and rum and use all sparkling peach juice

    Top Tip

    Use frozen peaches and blueberries to help keep the drink cool longer!

    Sparkling Peach Sangria

    Related Recipes

    • Side view of a frozen mango colada with an orange and lime wheel on top of the glass.
      Mango Colada
    • Black cherry mojito featured image.
      Black Cherry Mojito
    • featured image
      Blended Pina Colada Recipe
    • Featured image for Coconut Lime Refresher with Rum
      Coconut Lime Rum Drink

    Don't forget to check out my Amazon storefront for some of my favorite products!

    When you make this chicken bagel melt recipe, please comment below and let me know what you think. I'd love it if you tag me on Instagram @grumpyshoneybunch or #grumpyshoneybunch so I can see your photos!

    If you love this recipe, please leave a ⭐⭐⭐⭐⭐ rating

    📖 Recipe

    A glass of peach sangria in a clear footed glass with fresh peach and blueberries in the drink.

    Peach Sangria

    Shelby Law Ruttan
    A refreshing and peachy chilled summer sangria made with crispy white wine, peach syrup, and peach flavored rum!
    No ratings yet
    Prevent your screen from going dark
    Print FREE recipe card with your email address Pin Recipe Save Go to Collections
    Prep Time 10 minutes mins
    Recommended Chill Time 2 hours hrs
    Total Time 2 hours hrs 10 minutes mins
    Course Beverages
    Cuisine American
    Servings 5 servings
    Calories 271 kcal

    As an Amazon Associate I earn from qualifying purchases.

    Ingredients
      

    • 4 cups dry white wine
    • ½ cup Torani Peach Syrup
    • ½ cup peach-flavored rum
    • ½ cup sparkling peach water
    • 2 large peaches sliced
    • ½ cup blueberries

    Instructions
     

    • Place sliced peaches and blueberries in a large pitcher.
    • Pour peach syrup, rum, wine, and sparkling water over the top of the fruit. Stir and refrigerate until ready to serve, at least 2 hours, until cold.

    Notes

    The longer the sangria sits, the more color will develop in the sangria. If you like the color, I recommend making it a day ahead and leaving the sparkling water out until right before serving.

    Nutrition

    Serving: 1gCalories: 271kcalCarbohydrates: 30gProtein: 1gSodium: 22mgFiber: 2gSugar: 20g
    Keyword peach sangria
    Tried this recipe?Mention @grumpyshoneybunch or tag #grumpyshoneybunch!

    Wave Your Flag Cheesecake

    June 30, 2017 by Shelby Law Ruttan 1 Comment

    Featured image for wave your flag cheesecake.

    This recipe for Wave your Flag Cheesecake is sponsored by Kraft-Heinz. All opinions are my own.

    This Wave Your Flag Cheesecake recipe is the perfect showstopper to start your summer off right by wowing your family and friends with this no bake dessert! It is sure to please and super easy to make.

    This recipes are perfect for all occasions, starting off with the first major holiday of summer, the 4th of July! Of course, you don't want to forget to wow your friends for birthdays, picnics or family reunions!

    Wave Your Flag Cheesecake
    [feast_advanced_jump_to]

    ❤️ Why you'll love it

    ✔️ Wave your Flag Cheesecake will take center stage at your next bbq! No need to heat up the kitchen with this cheesecake dessert!

    ✔️ It is a super easy semi-homemade recipe with store bought pound cake, jello, and fruit all layered with a cheesecake filling

    ✔️ This cheesecake makes meal planning easy by saving time and money and there is no need to turn on the oven for this no bake cheesecake!

    Wave Your Flag Cheesecake

    🥘 Ingredients

    Cool whip whipped topping

    Jello Strawberry Flavor Gelatin

    Philadelphia Cream Cheese , softened

    Prepared pound cake

    Strawberries, to make the stripes on the flag

    Boiling water, Ice cubes, cold water all for making the gelatin.

    Blueberries, to arrange in the upper right hand corner of the flag.

    Sugar

    🔪 Instructions

    FOR THE CAKE

    1. Cut 1 cup strawberries into slices and halve remaining strawberries in half.
    2. Add the boiling water to the gelatin in large bowl and stir until dissolved.
    3. Add the ice to cold water to make 2 cups, add ice mixture to gelatin and stir until melted.
    4. Refrigerate gelatin for 5 minutes, or until the jello has slightly thickened.
    5. Cut the pound cake into slices and line the bottom of 13 x 9 dish.
    6. Stir the sliced strawberries and 1 cup of blueberries into the gelatin, then spoon over cake.
    7. Refrigerate for 4 hours or until gelatin is firm.

    FOR THE TOPPING

    1. In a large bowl, using a hand mixer on medium speed, beat cream cheese and sugar until creamy. Fold in the cool whip.
    2. Spread the cream cheese mixture over the gelatin. Arrange blueberries in a square in the upper left hand corner of the pan. Then arrange strawberry halves in strips across the dish making a flag cheesecake wave.
    Pound cake slices in the bottom of a glass cake dish.

    🥄 Equipment

    Cutting board

    Chef knife

    Large bowl

    13 x 9 baking dish

    Large spoon

    🥫Storage

    Store leftover cheesecake in the fridge up to 5 days.

    Gelatin with blueberries and strawberries in a clear glass bowl.

    📖 Variations

    • Substitute blue raspberry gelatin for the strawberry gelatin.
    • Angel food cake can be used in place of pound cake.

    💭 Tips

    • Cut the pound cake into 10 even slices. This fill ensure the bottom of the 13 x 9 dish is completely covered.
    Partially assembled flag cheesecake.

    📚 Related Recipes

    Jello Poke Cake is a delicious cake made with gelatin and frosted with cool whip topping.

    Red, White, and Blueberry Pie is another great summer dessert

    🍽 Serve with…

    Serve wave your flag cheesecake at your next cookout along with Barbeque Bacon Cheeseburgers and Red White and Blue Potato Salad.

    Wave Your Flag Cheesecake

    Don't forget to check out my Amazon storefront for some of my favorite products!

    When you make this recipe, please comment below and let me know what you think. I'd love it if you tag me on Instagram @grumpyshoneybunch or #grumpyshoneybunch so I can see your photos!

    If you love this recipe, please leave a ⭐⭐⭐⭐⭐ rating

    📖 Recipe

    Featured image for wave your flag cheesecake.

    Wave your Flag Cheesecake

    Shelby Law Ruttan
    Wave your Flag Cheesecake is an easy to make no bake cheesecake dessert perfect for the memorial day, 4th of july, and labor day as well as all summer long.
    5 from 1 vote
    Prevent your screen from going dark
    Print FREE recipe card with your email address Pin Recipe Save Go to Collections
    Prep Time 20 minutes mins
    Cook Time 4 hours hrs
    Total Time 4 hours hrs 20 minutes mins
    Course Desserts
    Cuisine American
    Servings 20
    Calories 197 kcal

    As an Amazon Associate I earn from qualifying purchases.

    Ingredients
      

    • 8 ounces cool whip topping , thawed
    • 6 ounces JELLO-Strawberry Flavor Gelatin (two 3-ounce packages)
    • 16 ounces PHILADELPHIA Cream Cheese , softened
    • 10.75 ounces pound cake , cut into 10 slices
    • 4 cups strawberries , divided
    • 1½ cups boiling water
    • ice cubes
    • 1 cup cold water
    • 1⅓ cups blueberries , divided
    • ¼ cup sugar

    Instructions
     

    FOR THE CAKE

    • Slice 1 cup of the strawberries and cut the remaining strawberries in half.
    • Add the boiling water to the gelatin in large bowl and stir until dissolved.
    • Add the ice to cold water to make 2 cups, add to the gelatin and stir until melted.
    • Refrigerate for 5 minutes or until the jello has slightly thickened. Line the bottom of 13 x 9 dish with the pound cake.
    • Stir the sliced strawberries and 1 cup of blueberries into the gelatin, then spoon the gelatin mixture onto the cake.
    • Refrigerate for 4 hours or until gelatin is firm.

    FOR THE TOPPING

    • Whisk the cream cheese and sugar together in large bowl until creamy. Stir in the cool whip.
    • Spread the cream cheese mixture over the gelatin and decorate with strawberries and blueberries.

    Nutrition

    Serving: 1gCalories: 197kcalCarbohydrates: 27gProtein: 3gFat: 9gSaturated Fat: 5gPolyunsaturated Fat: 1gMonounsaturated Fat: 2gCholesterol: 40mgSodium: 214mgPotassium: 110mgFiber: 1gSugar: 20gVitamin A: 357IUVitamin C: 18mgCalcium: 50mgIron: 1mg
    Keyword Wave your Flag Cheesecake
    Tried this recipe?Mention @grumpyshoneybunch or tag #grumpyshoneybunch!

    Slow Cooker BBQ Beef Brisket Sandwiches

    June 25, 2017 by Shelby Law Ruttan 13 Comments

    Slow Cooker BBQ Brisket Sandwiches

    BBQ Beef Brisket Sandwiches are full of melt in your mouth flavor, a little sweet, a little heat and sandwiched between a hearty bun that has been toasted with butter, garlic, and parmesan cheese! A hearty sandwich fit enough to fill up the hungriest of cowboy sized appetites.BBQ Beef Brisket Sandwiches

    This week the Sunday Supper Tastemakers are celebrating Cowboy Cooking! Thanks goes to Cindy Kerschner of Cindy's Recipes and Writings for being our host for this event!

    BBQ Beef Brisket Sandwiches

    While I did not grow up on a cattle ranch, I did grow up in the New York dairy farm industry. My dad had a huge passion for farming as well as his dad, my mom's dad, and her brothers. My own dad didn't get to pursue his farming dream until he retired from the zinc mines in 1981 (the year I graduated high school!) That didn't mean I didn't have my share of haying season, barn cleaning and milking of the cows! I was and still am proud to be a farmer's daughter!

    This weekend I had the opportunity to visit Debbie Lyons-Blythe (Kids, Cows, and Grass), meet her family and visit the Family Ranch in Kansas as well as tour the Tiffany Cattle Company and get a taste of cowboy ranch recipes with Kent Rollins. I realized just how different farming in the west is than farming in the east! I have to say I am in love with Kansas after this trip and feel so honored to have been one who was able to attend!

    Now that I know what works up that big cowboy hunger, I can appreciate the recipes more! So, after your long hard day of rustlin' cattle, mixing feed, or harvesting crops, you will want a Certified Angus Beef® brand BBQ Beef Brisket Sandwich, the #BestBeef! Be sure to grab the recipe and give it a try!

    More hearty sandwich recipes

    • Cowboy Burgers by Home Sweet Homestead
    • Grilled Butter Burgers by That Skinny Chick Can Bake
    • Open Faced Steak Sandwich by Daily Dish Recipes
    • Slow Cooker Steak Sandwiches by Restless Chipotle

    📖 Recipe

    Slow Cooker BBQ Brisket

    Shelby Law Ruttan
    Sweet and Smoky slow cooked beef brisket that is perfect for sandwiches!
    5 from 1 vote
    Prevent your screen from going dark
    Print FREE recipe card with your email address Pin Recipe Save Go to Collections
    Prep Time 10 hours hrs
    Cook Time 10 hours hrs
    Total Time 20 hours hrs
    Course Main Dish
    Cuisine Tex-Mex
    Servings 18
    Calories 437 kcal

    As an Amazon Associate I earn from qualifying purchases.

    Ingredients
      

    For the Sauce

    • 1-½ cups ketchup
    • ⅓ cup packed dark brown sugar
    • ½ cup water
    • ¼ cup finely chopped onion
    • 3 tablespoons cider vinegar
    • 3 tablespoons Worcestershire sauce
    • 2 chipotles in adobo sauce finely chopped
    • 1 teaspoon garlic powder
    • ¾ teaspoon freshly ground black pepper

    For the dry rub

    • 4 tablespoons paprika
    • 1 tablespoon chili powder
    • 1 tablespoon ground cumin
    • 1 tablespoon packed dark brown sugar
    • 1 tablespoon salt
    • 1 teaspoon cayenne pepper
    • 1 teaspoon garlic powder
    • 1 teaspoon freshly ground black pepper plus more as needed
    • 1-5 lb Certified Angus Beef® brand Beef Brisket

    Instructions
     

    • Place all of the sauce ingredients in a large slow cooker. Stir until well combined.
    • Place all of the dry rub ingredients in a bowl and stir to combine.
    • Pat beef brisket lightly with paper towel to remove dampness.
    • Rub the dry rub over the brisket, massaging it well all over the top, bottom, and sides.
    • Transfer the brisket into the slow cooker and cover with lid.
    • Cook on low setting for 10 hours.
    • Remove beef from slow cooker and cut in slices. Return slices to the sauce in slow cooker.and combine meat and sauce.
    • Serve over hearty rolls with your favorite side (Grumpy loves coleslaw!)

    Notes

    Nutrition Information does not include the bread rolls.

    Nutrition

    Serving: 1gCalories: 437kcalCarbohydrates: 14gProtein: 35gFat: 26gSaturated Fat: 10gPolyunsaturated Fat: 12gCholesterol: 115mgSodium: 728mgFiber: 1gSugar: 10g
    Keyword Slow Cooker BBQ Beef Brisket
    Tried this recipe?Mention @grumpyshoneybunch or tag #grumpyshoneybunch!

    Berry Swirled Cheesecake Popsicles

    June 22, 2017 by Shelby Law Ruttan 3 Comments

    Overhead shot of berry swirled cheesecake popsicles on a white wooden surface, surrounded by fresh strawberries and blueberries.

    Berry Swirled Cheesecake Popsicles are a creamy, fruity frozen treat that combines rich cheesecake flavor with swirls of fresh summer berries. These easy to make frozen pudding pops are lower in sugar, kid friendly, and perfect for hot days when you want something cool and satisfying straight from the freezer.

    Overhead shot of berry swirled cheesecake popsicles on a white wooden surface, surrounded by fresh strawberries and blueberries.

    I've always loved the flavor of cheesecake paired with fruit, and these pops were inspired by that classic combo, and maybe a little by my love for chilled desserts and my NY Cheesecake topped with cherries.

    These frozen cheesecake popsicles are a fun way to enjoy those flavors without turning on the oven and are a delicious addition to your summertime treat fare.

    [feast_advanced_jump_to]

    Why You'll Love These Popsicles

    Lower in sugar and carbs thanks to sugar-free pudding and real fruit puree.

    Super simple to make with only a few ingredients.

    A refreshing treat that's both creamy and fruity, perfect for summertime.

    Popsicles in a green mold base with yellow and green tops, featuring swirls of red and purples berries in a creamy base.

    Key Ingredients

    Sugar-free Cheesecake Pudding Mix: Adds all the creamy cheesecake flavor without the extra sugar.

    Milk (1% or your choice): Blends with the pudding to create a smooth, frozen texture.

    Fresh Strawberries & Blueberries: Pureed and swirled in for bright berry flavor and natural sweetness.

    Graham Cracker Crumbs: A sprinkle on the bottom of the mold gives you that classic cheesecake crust feel.

    Popsicles in a mold without handles, showing visible swirls of blueberry and strawberry over a creamy cheesecake base.

    Ingredient Substitutions

    Mixed Berries: You can swap in raspberries, blackberries, or a combination for different flavor profiles.

    Graham Cracker Crumbs: Try crusted vanilla wafers, shortbread cookies, or skip the crumbs entirely.

    Cheesecake Pudding Mix: If you can't find cheesecake flavor, use vanilla or white chocolate pudding for a similar creamy base.

    Recipe Variations

    Rhubarb Swirl: Try using Mom's Rhubarb Sauce instead of berries.

    Tropical Cheesecake Pops: Use mango or pineapple puree for a tropical twist.

    Chocolate Cheesecake Pops: Use a chocolate pudding mix in place of the cheesecake flavored pudding mix.

    Popsicles in a mold before freezing, topped with crumbled graham cracker crust over visible berry and cheesecake layers.

    Top Tips

    • Puree the fruit until completely smooth for a better swirl and freeze texture.
    • Layer the pudding and fruit mixture gradually for more defined swirls.
    • Let popsicles sit at room temp for 2-3 minutes before removing them from the mold.
    Berry Swirled Cheesecake Pops

    Storage Tips

    Keep the popsicles in the freezer for up to 2 weeks.

    Serve with...

    Serve these Berry Swirled Cheesecake Popsicles on their own, or alongside a tray of Low Carb Lemon Curd Thumbprint Cookies!

    More Frozen Treats

    If you love to stay cool with frozen treats, then you may want to try some of these other cool recipes on my website:

    • Paula Deens Key Lime Pie
    • No Bake Peanut Butter Pie
    • Chocolate Peanut Butter Cheesecake
    • No Churn Coffee Ice Cream
    Berry Swirled Cheesecake Pops

    When you make this recipe, please comment below and let me know what you think. I'd love it if you tag me on Instagram @grumpyshoneybunch or #grumpyshoneybunch so I can see your photos!

    If you love this recipe, please leave a ⭐⭐⭐⭐⭐ rating

    📖 Recipe

    Overhead shot of berry swirled cheesecake popsicles on a white wooden surface, surrounded by fresh strawberries and blueberries.

    Berry Swirled Cheesecake Popsicles

    Shelby Law Ruttan
    Creamy, frozen cheesecake pudding layered with swirls of fresh strawberry and blueberry puree make these Berry Swirled Cheesecake Popsicles a refreshing dessert on a stick. They're lower in sugar, easy to prep ahead, and full of flavor for summer snacking.
    5 from 1 vote
    Prevent your screen from going dark
    Print FREE recipe card with your email address Pin Recipe Save Go to Collections
    Prep Time 10 minutes mins
    Cook Time 0 minutes mins
    Freezer Time 12 hours hrs
    Total Time 12 hours hrs 10 minutes mins
    Course Snack
    Cuisine American
    Servings 6 pops
    Calories 102 kcal

    Equipment

    • Popsicle Mold Set
    • Blender , or food processor
    • Large mixing bowl
    • Spoon , or spatula

    As an Amazon Associate I earn from qualifying purchases.

    Ingredients
      

    • ½ cup chopped fresh strawberries
    • ½ cup fresh blueberries
    • 1 tablespoons granulated sugar-free sweetener
    • 28 grams sugar-free reduced calorie cheesecake instant pudding mix (1 box of 4 servings)
    • 2 cups fat free milk
    • ½ cup crushed graham crackers
    • 1 tablespoon butter melted

    Instructions
     

    • In a food processor, combine strawberries and ½ tablespoon splenda. Cover and process until smooth. Transfer to small bowl. Repeat with blueberries.
    • In a bowl, whisk together pudding mix and milk for 2 minutes, or until thick.
    • Spoon pudding mixture into ice-pop molds. Top with pureed fruit. Swirl slightly with knife.
    • In a small bowl, combine graham crackers and melted butter. Top fruit layer evenly with crumbs.
    • Insert sticks into molds. Freeze overnight, or until firm.

    Nutrition

    Serving: 1gCalories: 102kcalCarbohydrates: 18gProtein: 4gFat: 3gSaturated Fat: 1gPolyunsaturated Fat: 0.1gMonounsaturated Fat: 1gTrans Fat: 0.1gCholesterol: 7mgSodium: 285mgPotassium: 178mgFiber: 1gSugar: 8gVitamin A: 233IUVitamin C: 8mgCalcium: 117mgIron: 0.4mgNet Carbohydrates: 15g
    Keyword Cheesecake Pops
    Tried this recipe?Mention @grumpyshoneybunch or tag #grumpyshoneybunch!

    Bacon Grilled Cheese with Jalapeno and Rhubarb Sauce

    June 19, 2017 by Shelby Law Ruttan 24 Comments

    Upclose image of bacon grilled cheese sandwich with rhubarb sauce and jalapeno.

    This Bacon Grilled Cheese Sandwich blends the flavors of crispy bacon and sharp cheddar with a little sweet rhubarb sauce and a hint of jalapeno heat. Toasted with some salty butter until nice and crisp, this amazing combination of a grilled cheese sandwich is a perfect rhubarb recipe to make for lunch or a light dinner for your family!

    Bacon Jalapeno Cheddar Grilled Cheese cut in half and stacked.

    Your next meal just became tastier and a little more grown up with this combination of spicy, sweet, salty, and crispy grilled cheese sandwich! This sandwich would also make a delicious appetizer for an adult party. Just grill it up until it's crispy and brown and serve it with a little extra rhubarb sauce on the side for dipping!

    [feast_advanced_jump_to]

    Incorporating Rhubarb into my recipes

    I love rhubarb recipes. I also love jalapenos, bacon, and cheese. Because of this, I am always thinking of ways that I can create new and delicious recipes that bring together the flavors and textures of these ingredients.

    Since I have my own rhubarb plants, and have plenty of Rhubarb Sauce on hand, I have been coming up with new rhubarb recipes to use it in. Often, I will just spread it on toast or make my recipe for Rhubarb Chia Pudding. While thinking about what I could make with the ingredients I had on hand, thoughts of a Strawberry Habanero Monte Cristo came to mind. I immediately knew I had to make a recipe with sweet heat!

    Bacon Cheddar Jalapeno Grilled Cheese on a wooden cutting board.

    Grilled Cheese Sandwich FAQ

    What is the best cheese to use in a grilled cheese sandwich?

    The best cheese to use is going to depend on what you are looking to get from your grilled cheese sandwich. If you're looking for melty and creamy, then a blue cheese is great. Stringy and mild? Go with Colby Jack or Mozzarella. Because I was looking for a bold cheese to compliment the rhubarb sauce, I went with a bold cheddar for this particular recipe.

    What is the best bread to make a grilled cheese sandwich with?

    The best bread is going to be a sturdy slice of bread. My very favorite is a Tuscan pane bread I buy right at Trader Joes.  Something with a little bit of crust to it. Because a grilled cheese sandwich should not be soggy, I do not recommend a loaf of bread you find in the grocery aisle! Try something from the bakery instead.

    Why did my grilled cheese sandwich get soggy?

    From my experience, a grilled cheese sandwich will get soggy for a few reasons. The first one being the type of bread you used (see Q2), and the second one being the fillings. You need to be sure you are using the right proportions. Any type of filling that releases liquid is going to add moisture to your grilled cheese. This is why I keep the rhubarb sauce to a thin layer in this sandwich and offer a side of sauce for people who like to have something to dip their grilled cheese sandwich in!

    How to Make Bacon Grilled Cheese Sandwiches

    It all starts with great quality cheese. For us, that is Cabot. It is the brand we love the most. Skip out on the pre-sliced cheese that is individually packaged. You know, the kind that has the word "processed" in it.

    Sandwich ingredients: rhubarb sauce recipe, bacon, cheese, jalapeno, and bread slices.

    Next, you want to be sure you have the perfect thickness of cheese slices for your sandwich. I have this handy little Thick and Thin Cheese Slicer (affiliate link) that slices your cheese into the perfect slices! You can cut your slices thin, or thick. For this grilled cheese sandwich, I used the thick side. I like using the thin side to slice cheese for omelettes!

    Photo of thick and thin cheese slicer with sliced cheese in the background.

    The bread is the next important ingredient in this recipe. It needs to be sturdy and hold up well to fillings that will melt and get gooey. I chose a hearty whole grain bread for this recipe, but my very favorite is a Tuscan Pane bread. Something that is not super soft.

    One slice of bread topped with cheddar cheese, rhubarb sauce, and jalapeno slices.

    Both slices of bread will need to have one side spread with real butter. None of this margarine stuff will work. It has water in it and believe me, it will aid in a soggy sandwich.

    Bottom layer of sandwich with bacon on top of rhubarb sauce recipe and jalapenos.

    This sandwich starts with a layer of cheese on the bottom, then a layer of rhubarb sauce, fresh jalapeno slices, crispy bacon, then more cheese!

    Bread slice with cheese, rhubarb recipe for sauce layer, bacon, jalapeno and cheese.

    Grill up both sides until toasty and cheese is melty and soft. Cut in half and enjoy with more rhubarb sauce if desired!

    Fully assembled grilled cheese sandwich before cutting.

    Tips for the best Grilled Cheese Sandwich

    • Have your burner set to medium low and watch the bread carefully.
    • Bring your ingredients to room temperature first!
    • If you have a thicker sandwich, cover your pan with a lid to trap a little bit of heat for a brief period. This will assist in forcing the heat to stay in the pan and around your sandwich, causing the cheese to melt easier.
    • I sliced my cheese for this recipe, but you can also shred it. Shredding will break it up and cause air to circulate around it and make it melt faster and easier.
    • Don't use too much cheese! More is not always better. The more you add, the longer it will take to melt. You want just enough for the cheese to get melty and your bread to get toasty!

    What to serve with a Bacon Grilled Cheese

    A grilled cheese sandwich with a mouthful of flavors doesn't need anything spectacular to accompany it. You don't what to outshine the hero of your meal. A serving of potato chips and a few pickles from this Crisp Sweet Pickles Recipe is all you really need!

    More Sandwich Recipes

    • Two cheesy ground beef sliders on a wooden plate, filled with ground beef, melted cheese, and bacon, topped with golden everything bagel seasoned buns.
      Bacon Cheeseburger Ground Beef Sliders
    • French Onion Grilled Cheese Featured Image.
      Caramelized Onion Grilled Cheese with Mushrooms
    • Grilled Asparagus, Taleggio, and Fried Egg Panini
      Grilled Asparagus, Taleggio, and Fried Egg Panini
    • Slow Cooker BBQ Brisket Sandwiches
      Slow Cooker BBQ Beef Brisket Sandwiches

    When you make this recipe, please comment below and let me know what you think. I'd love it if you tag me on Instagram @grumpyshoneybunch or #grumpyshoneybunch so I can see your photos!

    If you love this recipe, please leave a ⭐⭐⭐⭐⭐ rating

    📖 Recipe

    Upclose image of bacon grilled cheese sandwich with rhubarb sauce and jalapeno.

    Grilled Cheese Sandwich with Bacon, Jalapeno and Rhubarb Sauce

    Shelby Law Ruttan
    A grilled cheese sandwich made grown up style! With crispy bacon, creamy cheddar cheese, jalapenos and rhubarb sauce all sandwiched between two buttery toasted slices of bread!
    4.50 from 2 votes
    Prevent your screen from going dark
    Print FREE recipe card with your email address Pin Recipe Save Go to Collections
    Prep Time 5 minutes mins
    Cook Time 7 minutes mins
    Total Time 12 minutes mins
    Course Main Dish
    Cuisine American
    Servings 1
    Calories 474 kcal

    As an Amazon Associate I earn from qualifying purchases.

    Ingredients
      

    • 2 slices hearty bread
    • 1 ounce thinly sliced Cabot Sharp Cheddar Cheese
    • 1 tablespoon [rhubarb sauce]
    • 2 slices crisp cooked bacon
    • ¼ cup jalapeno slices add more or less to accommodate taste
    • 2 teaspoon butter

    Instructions
     

    • On bottom slice of sandwich, layer as follows: ½ ounce cheese, 1 tablespoon rhubarb sauce, jalapeno slices, bacon, and the last ½ ounce of cheese.
    • Place about 1 teaspoon butter in skillet over medium heat and let melt until bubbly.
    • Lay bottom slice of sandwich with fillings on top of hot butter. Top with 2nd slice of bread, spread with 1 teaspoon of butter (butter side up).
    • When bread is toasty on bottom, carefully flip sandwich over and continue to cook until bottom slice is browned and cheese is melty.
    • Remove from pan, let cool 1-2 minutes, then slice in half and serve with side of rhubarb sauce if desired

    Nutrition

    Serving: 1sandwichCalories: 474kcalCarbohydrates: 51gProtein: 19gFat: 24gSaturated Fat: 12gPolyunsaturated Fat: 1gTrans Fat: 4gCholesterol: 61mgSodium: 854mgFiber: 1gSugar: 13g
    Keyword Grilled Cheese Sandwich, Jalapeno Grilled Cheese, Rhubarb Recipes
    Tried this recipe?Mention @grumpyshoneybunch or tag #grumpyshoneybunch!

    Mom's Italian Style Deviled Eggs

    June 7, 2017 by Shelby Law Ruttan 17 Comments

    Mom's Italian Style Deviled Eggs

    Everyone loves to see deviled eggs on the menu and Mom's Italian Style Deviled Eggs are no exception! They are full of flavor from fresh garlic and cayenne pepper giving them a tangy, addicting bite. They are naturally low in carbs and high in fat, making this a great food to add to your Keto, Low Carb High Fat Diet!

    Italian Style Deviled Eggs


    Don't you love this Acaia Wood Serving Tray? I know I do!

    My friend Claudia, who writes the blog What's Cookin' Italian Style recently sent me her new cookbook to review. I met her online in 2009 and have made a few of her recipes from her blog. One in particular that we loved was Cajun Shrimp with Linguini and Creamy Parmesan Sauce!


    Mom's Italian Style Deviled Eggs

    Claudia's cookbook is everything you need for authentic Italian Recipes. I am so excited to have had the opportunity to try out some recipes for her!


    Italian Style Deviled Eggs

    Heartfelt and definitely made with love recipes, her cookbook is a treasure to have in your home. It epitomizes deep family roots with a strong love for food and feeding those you love!

    We couldn't pass up trying Mom's Italian Style Steak either! Stuffed with fresh garlic and brushed with an Italian marinade, this will cook up nicely on your grill or seared hot in a grill pan and finished off in your oven!

    Mom's Italian Style Deviled Eggs

    If you're interested in Claudia's cookbook, you can buy it HERE. Be sure to follow Claudia on her social media channels so you don't miss one delicious bite! Pinterest | Facebook | Twitter | YouTube | Google+ | Instagram

    📖 Recipe

    Mom's Italian Style Deviled Eggs

    Mom’s Italian Style Deviled Eggs

    Claudia Lamascolo
    Mom's Italian Style Deviled Eggs are full of flavor from fresh garlic and cayenne pepper giving them a tangy, addicting bite.
    4.75 from 4 votes
    Prevent your screen from going dark
    Print FREE recipe card with your email address Pin Recipe Save Go to Collections
    Prep Time 40 minutes mins
    Total Time 40 minutes mins
    Course Appetizers
    Cuisine Italian
    Servings 6
    Calories 205 kcal

    As an Amazon Associate I earn from qualifying purchases.

    Ingredients
      

    • 6 Hard Boiled Eggs
    • ½ cup mayonnaise
    • 1 tablespoon spicy brown mustard
    • 1 teaspoon fresh minced garlic
    • ⅛ teaspoon Cayenne pepper
    • ½ teaspoon Paprika
    • 1 tablespoon Freshly chopped parsley

    Instructions
     

    • Place eggs in large saucepan and cover with cold water. Place on burner over medium high heat and cover saucepan with lid. Bring eggs just to the boiling point. Leaving the saucepan on the burner, turn off the heat and let sit for 15 minutes. Drain, then rinse in cold water.
    • Peel the shell off the egg. Cut each egg in half and scoop out the yolk into a small bowl.
    • Place empty whites of the egg halves on a plate.
    • In a small bowl, mash the yolks. Add mayonnaise, garlic, mustard, spice and mix together until well blended with no lumps.
    • Open zip lock bag or pastry bag fitted with piping tip. Place egg yolk mixture in the bag. Pip yolk mixture into the egg white shells to make a swirl effect.
    • Garnish with sprinkles of parsley and paprika on top of each egg. Refrigerate covered until cold. Serve.

    Notes

    1 quart sized zip lock bag or piping bag with large star tip

    Nutrition

    Serving: 2egg halvesCalories: 205kcalCarbohydrates: 1gProtein: 7gFat: 19gSaturated Fat: 4gPolyunsaturated Fat: 14gCholesterol: 194mgSodium: 208mgSugar: 1g
    Keyword Deviled Eggs, Eggs, Italian Recipe, Italian Style, Mom's Recipe
    Tried this recipe?Mention @grumpyshoneybunch or tag #grumpyshoneybunch!

    Pin it! Mom's Italian Style Deviled Eggs

    Mom's Italian Style Deviled Eggs

    Disclosure: I received a copy of Claudia's cookbook in exchange for a review on my blog. This post contains affiliate links for products I love to use and want to share with you!

    Easy Rhubarb Sauce Recipe

    June 4, 2017 by Shelby Law Ruttan 80 Comments

    Featured image for Mom's Rhubarb Sauce.

    This Rhubarb Sauce Recipe is a cherished family favorite, passed down from my mom. It is a simple, 5-ingredient recipe that yields a deliciously sweet and tangy sauce in just 20 minutes, making it the ultimate topping desserts or a treat on its own.

    Jar of thick homemade rhubarb sauce with a spoon inside, sitting on a rustic surface next to a navy and white star-patterned kitchen towel.

    Rhubarb always reminds me of home. Every spring, my mom would head out to our big patch with a paring knife to harvest fresh stalks for this homemade rhubarb sauce. It was a seasonal staple in our kitchen along with a warm Rhubarb Pie!

    [feast_advanced_jump_to]

    Why You'll Love This Easy Rhubarb Sauce

    • Quick and simple: this homemade rhubarb sauce comes together in just 20 minutes with only 5 pantry-staple ingredients.
    • Perfectly balanced: the recipe delivers a classic sweet and tangy flavor profile that tastes just like the version Mom used to make.
    • Incredibly versatile: it's the ultimate topping for vanilla ice cream, yogurt, and pancakes, or even as a savory glaze for pork and chicken
    • Diet friendly: you can easily adjust the sugar levels to your preference or use a natural sweetener for a sugar-free option.

    Key Ingredients for this Rhubarb Sauce Recipe

    See the recipe card below for a full list of ingredients and instructions.

    Freshly harvested rhubarb stalks with green leaves laid out on grass in bright sunlight.
    • Rhubarb: the base of the recipe, provides the distinct tart flavor and thick texture as it breaks down during cooking.
    • Granulated sugar: acts as the primary sweetener to balance the natural tartness of the stalks.
    • Vanilla extract: my twist on mom's recipe, this is stirred in at the end to enhance the overall sweetness and add a warm aromatic depth to the sauce.
    • Salt: a pinch is used to heighten the other flavors and provide a more balanced flavor.

    Rhubarb Sauce Sweetener Alternatives

    • Brown sugar or maple syrup: these can be used as a 1:1 replacement for white sugar to give the sauce a deeper, more caramel-like flavor.
    • Honey: a great natural alternative; use about 1 tablespoon of honey for every tablespoon of sugar, but you may want to start with less and adjust to taste.
    • Sugar-free options: you can use zero-calorie sweeteners like Stevia or Allulose. Popular brands like Truvia also work well as a direct cup-for-cup replacement.

    Easy Rhubarb Sauce Variations

    • Strawberry Rhubarb Sauce: Replace half of the rhubarb with fresh or frozen strawberries for a sweeter, classic fruit pairing.
    • Citrus Infusion: swap the vanilla extract for 1 tablespoon of lemon juice and 1 teaspoon of lemon zest to give the sauce a bright, zesty finish.
    • Spiced Rhubarb: add ½ teaspoon of ground cinnamon or a pinch of fresh ginger during the simmering process for a warm, cozy flavor profile.

    Expert Rhubarb Tips and Tricks

    • Safety first: Always discard rhubarb leaves immediately, as they are toxic and should not be consumed.
    • Harvesting tip: for the best regrowth, pull rhubarb stalks from the base of the plant instead of cutting them.
    • Color secret: Both red and green stalks work perfectly, but using deep red stalks will give your sauce a more vibrant, pink hue.
    • Texture control: for a chunkier sauce, simmer for a few minutes less; for a smooth, jam like consistency, cook until the stalks completely break down.
    Spoonful of thick homemade rhubarb sauce held over an open jar, with a blue and white star-patterned towel in the background.

    How to Store

    Store the sauce in an airtight container in the refrigerator for up to one week. For longer storage, freeze in freezer-safe containers for up to three months.

    Common Questions About Rhubarb Sauce

    Can you freeze rhubarb sauce?

    Homemade rhubarb sauce freezes beautifully. Allow it to cool completely, then transfer to an airtight, freezer-safe container. It will stay fresh for up to 3 months.

    Can I use frozen rhubarb?

    Absolutely. You can use frozen rhubarb in place of fresh. For the best consistency, thaw the rhubarb first and drain off any excess liquid before you begin cooking.

    Can you can rhubarb sauce?

    Yes, you can. Since rhubarb is high-acid, you can preserve it by canning, but you should follow the MSU's recommendations for canning rhubarb.

    Overhead view of a jar filled with chunky homemade rhubarb sauce, with a spoon inside and a blue and white star-patterned towel nearby.

    Creative Ways to Use Homemade Rhubarb Sauce

    This versatile rhubarb sauce recipe is more than just a dessert topping. Try swirling it into a bowl of creamy Greek yogurt for a tart breakfast treat, or spread a thick layer over warm, buttery homemade Homemade biscuits or toasted Soft White Bread.

    For a mroe creative twist, use the sauce as a filling for flaky pastries and tarts. It also excels in savory dishes, serving as a bright, tangy contrast when paired with roasted meats like pork loin or grilled chicken.

    If You Love Rhubarb Recipes, Try These Next!

    If you enjoyed this sauce, there are plenty of other ways to use fresh stalks from the garden. You can try a decadent Rhubarb Cheesecake for a show stopping dessert or bake a batch of Rhubarb Cookies with Lemon Glaze for a zesty treat.

    For something refreshing, this Rhubarb Lemonade is a perfect summertime drink. Finally, if you want a twist on the original, this Strawberry Rhubarb Compote offers a naturally sweet variation of the classic flavor.

    I'd love to hear how your rhubarb sauce turned out! Did you enjoy it plain or as a topping? Please leave a comment and star rating below - your feedback helps other readers find and enjoy this recipe too!

    📖 Recipe

    Featured image for Mom's Rhubarb Sauce.

    Easy Rhubarb Sauce Recipe

    Shelby Law Ruttan
    This Easy Rhubarb Sauce is a 5-ingredient recipe that perfectly balances sweet and tangy flavors in just 20 minutes. Whether you're using fresh spring stalks or frozen rhubarb, this versatile sauce is an old-fashioned favorite that tastes just like the version Mom used to make. It's the ideal topping for yogurt and biscuits or even as a savory glaze for roasted meats.
    4.24 from 242 votes
    Prevent your screen from going dark
    Print FREE recipe card with your email address Pin Recipe Save Go to Collections
    Prep Time 10 minutes mins
    Cook Time 10 minutes mins
    Total Time 20 minutes mins
    Course Condiments
    Cuisine American
    Servings 16
    Calories 43 kcal

    Equipment

    • Large saucepan
    • Pairing knife
    • Measuring cups
    • Measuring spoons
    • Wooden spoon
    • Airtight glass jars

    As an Amazon Associate I earn from qualifying purchases.

    Ingredients
      

    • 4 cups rhubarb diced
    • ½ cup water
    • ½ teaspoon salt
    • ¾ cup granulated sugar
    • 1 teaspoon vanilla extract (optional)

    Instructions
     

    • In a large saucepan, stir together the diced rhubarb, water, granulated sugar, and salt over medium-high heat.
    • Bring the mixture to a boil, then immediately reduce the heat to medium-low. Simmer for approximately 10 minutes, stirring occasionally, until the rhubarb has broken down and reached your desired thickness.
    • Remove the pan from the heat and stir in the vanilla extract (if using). Allow the sauce to cool completely at room temperature before transferring it to an airtight container for refrigeration.

    Notes

    Serving amounts are approximate.

    Nutrition

    Serving: 2tablespoonsCalories: 43kcalCarbohydrates: 11gProtein: 1gFat: 1gSaturated Fat: 1gSodium: 74mgPotassium: 88mgFiber: 1gSugar: 10gVitamin A: 31IUVitamin C: 2mgCalcium: 27mgIron: 1mg
    Keyword homemade rhubarb sauce, Rhubarb Recipe, rhubarb sauce, Rhubarb Sauce Recipe
    Tried this recipe?Mention @grumpyshoneybunch or tag #grumpyshoneybunch!

    Barbeque Bacon Cheeseburger Steakhouse Style

    May 23, 2017 by Shelby Law Ruttan 14 Comments

    Featured Image for Steakhouse Bacon Cheeseburger.

    This Steakhouse Barbeque Bacon Cheeseburger is full of flavor and topped with sharp cheddar cheese, lettuce and tomato. The finishing touch is the sweet black pepper bacon, knocking this gourmet burger right out of the ballpark!

    For every Memorial Day summer kickoff, the first answer to "what are we grilling" is always burgers! Everyone loves a big, juicy steakhouse barbeque bacon cheeseburger that is full of flavor, holds together well and is easy to hold in your hands.

    One assembled burger with bacon, lettuce and tomato on a bun.
    [feast_advanced_jump_to]

    ❤️ Why you'll love it

    ✔️ It is a big juicy burger with minimal ingredients and a ton of flavor!

    ✔️ The sweet black pepper bacon on the burger is so delicious and makes you

    ✔️ It is a hearty bbq bacon cheeseburger that will satisfy hunger and and the aromas from the grill will remind you of a Steakhouse!

    🥘 Ingredients

    Soy Sauce - this adds that "umami" taste to your burger. Helping to round out the flavors.

    Ground beef - I always go with an 80/20 ratio. The fat adds flavor and aids in keeping that burger from drying out.

    Parmesan cheese - buy the fresh cheese wedge over the dry grated cheese.

    Thick Cut Bacon, to add to the meaty deliciousness of this bbq cheeseburger!

    Black Peppercorns, to season the bacon

    Raw Sugar, to caramelize the bacon

    Cheddar cheese, to top the burger

    Hamburger rolls buy a good sturdy roll or make your own hamburger buns.

    Optional toppings: barbecue sauce, lettuce, tomato, onion

    Steakhouse barbecue bacon cheeseburger on the grill with cheddar cheese topping.

    🔪 Instructions

    1. In a large bowl mix together ground beef, soy sauce, and parmesan cheese. Shape about ⅓ cup of burger mixture into 1 patty. Place burger in refrigerator and chill for 30 minutes.
    2. Preheat oven to 350 degrees.
    3. Lay bacon strips onto a cookie sheet lined with parchment paper. Sprinkle with freshly ground black pepper and raw sugar. Bake in oven until crispy. Watch carefully so sugar does not burn.
    4. Begin checking bacon after 10 minutes in the oven. Depending on the thickness of your bacon, this will be ready in about 15-20 minutes. Remove the bacon from oven and set aside.
    5. Preheat grill for burgers. Once grill is hot, place burgers on grill and cook for about 10 minutes on each side or until temperature is at least 145 (for medium rare), 160 (for medium), or 170 (for well done).
    6. Turn off grill and place a slice of cheese on top of each burger. Close lid and let sit for 5 minutes to allow cheese to melt some. Remove from grill.
    7. Serve with bacon, lettuce, onion, and tomato (if using).
    Grilled burgers topped with cheese on a white plate.

    🥄 Equipment

    Gas grill (or charcoal grill)

    Barbecue basting mop

    Parchment paper

    Baking sheet

    Instant read thermometer

    🥫Storage

    Store any leftover cheeseburgers in an airtight container in the fridge up to 4 days.

    Gourmet Summer Burger Recipes

    📖 Variations

    • Skip the lettuce and tomato and top with the sweet black pepper bacon and grilled onions.
    • Top with a smoky black pepper mayo. Mix 1 teaspoon fresh ground black pepper into ½ cup mayonnaise.
    • Top with fried onion rings or tater tots, or these crispy cheese chips.
    • Substitute brown sugar for raw sugar when making the sweet black pepper bacon.

    💭 Tips

    • Use fresh ground beef and stick with 80/20 fat ratio to keep moisture and flavor.
    • Keep the seasoning simple. Over seasoning will ruin a good burger.
    • Always shape the steakhouse burger patties larger than the bun you plan to put it in. The meat will shrink as it cooks.
    • Make an indent in the center of the burger with your thumb. This aids in cooking the burger evenly.
    • Do not flip the burgers more than once! Flipping the burgers over and over again will make them tough.
    • Use a sturdy burger bun that will hold up to the bacon cheeseburgers. We love a good bakery quality brioche bun!
    • Check for doneness with an instant read thermometer.
    • Grill those burger buns. Spread butter on the bun and place them butter side down on the grill or on a griddle. Toast until golden.

    📚 Related Recipes

    Shrimp Topped Burger is a juicy grilled beef burger topped with grilled bacon wrapped shrimp and a spicy horseradish sauce.

    Grilled Reuben Burgers is one of my very favorites. All the flavor of a Reuben sandwiched between grilled sturdy bread slices.

    Cheddar Jalapeño Burgers are sausage burgers topped with sweet and spicy flavors.

    Bourbon Caramelized Onion and Blue Burger are bourbon infused beef burgers topped with caramelized onions and blue cheese.

    Jalapeño Cheese Burger is topped with pickled jalapeños, grilled onions, and cheese for a mouthful of delicious flavor in every bite.

    🍽 Serve with…

    Serve these Steakhouse Bacon Cheeseburgers with a side of potato chips, french fries, or classic potato salad.

    Up close image of a barbecue bacon cheese burger with all the toppings on a hamburger roll.

    Don't forget to check out my Amazon storefront for some of my favorite products!

    When you make this barbeque bacon cheeseburger recipe, please comment below and let me know what you think. I'd love it if you tag me on Instagram @grumpyshoneybunch or #grumpyshoneybunch so I can see your photos!

    If you love this recipe, please leave a ⭐⭐⭐⭐⭐ rating

    📖 Recipe

    Featured Image for Steakhouse Bacon Cheeseburger.

    Steakhouse Barbeque Bacon Cheeseburger

    Shelby Law Ruttan
    A hearty steakhouse style Barbeque bacon burger packed with flavor and that satisfies hunger.
    5 from 1 vote
    Prevent your screen from going dark
    Print FREE recipe card with your email address Pin Recipe Save Go to Collections
    Prep Time 10 minutes mins
    Cook Time 20 minutes mins
    Total Time 30 minutes mins
    Course Main Dish
    Cuisine American
    Servings 8 burgers
    Calories 659 kcal

    As an Amazon Associate I earn from qualifying purchases.

    Ingredients
      

    • 2 pounds 80/20 ground beef
    • 2 tablespoons soy sauce
    • ⅓ cup grated parmesan cheese
    • 8 slices thick cut bacon
    • black pepper , to taste
    • 2 tablespoons sugar
    • 8 hamburger rolls
    • 8 slices cheddar cheese

    Instructions
     

    • In a large bowl mix together ground beef, soy sauce, and parmesan cheese. Shape about ⅓ cup of burger mixture into 1 patty. Place burger in refrigerator and chill for 30 minutes.
    • Preheat oven to 350 degrees. Lay bacon strips onto a cookie sheet lined with parchment paper. Sprinkle with freshly ground black pepper and raw sugar. Bake in oven until crispy. Watch carefully so sugar does not burn.
    • Begin checking bacon after 10 minutes in the oven. Depending on the thickness of your bacon, this will be ready in about 15-20 minutes. Remove the bacon from oven and set aside.
    • Preheat grill for burgers. Once grill is hot, place burgers on grill and cook for about 10 minutes on each side or until temperature is at least 145 (for medium rare), 160 (for medium), or 170 (for well done).
    • Turn off grill and place a slice of cheese on top of each burger. Close lid and let sit for 5 minutes to allow cheese to melt some. Remove from grill. Serve with bacon, lettuce, onion, and tomato.

    Nutrition

    Serving: 1gCalories: 659kcalCarbohydrates: 26gProtein: 34gFat: 46gSaturated Fat: 18gPolyunsaturated Fat: 4gMonounsaturated Fat: 18gTrans Fat: 1gCholesterol: 125mgSodium: 962mgPotassium: 460mgFiber: 1gSugar: 6gVitamin A: 220IUVitamin C: 1mgCalcium: 242mgIron: 4mg
    Keyword Barbecue Bacon Cheeseburger, Barbeque Bacon Cheeseburger, Steakhouse Bacon Cheeseburger
    Tried this recipe?Mention @grumpyshoneybunch or tag #grumpyshoneybunch!

    Thai Style Hot Dogs

    May 19, 2017 by Shelby Law Ruttan 3 Comments

    Featured Image for Thai Hot Dogs.

    Thai Hot Dogs are a delicious and easy way to enjoy hot dogs in a different way. They are perfect for summertime cookouts and and holidays from Memorial Day to Labor Day.

    All Beef franks are first topped with a homemade Thai style peanut sauce, then a jalapeno cabbage slaw, with a garnish of chopped peanuts and cilantro for a delicious twist on an American classic

    Thai Style Hot Dogs

    ❤️ Why you'll love it

    ✔️ The homemade peanut sauce is an excellent topping for hot dogs!
    ✔️ It is perfect fusion food with an American Classic.
    ✔️ It is a peanut butter hot dog recipe that so delicious you will want to enjoy them often!

    🥘 Ingredients

    Beef hot dogs
    Hot dog rolls, chose good quality sturdy rolls.
    Rice vinegar
    Sesame oil
    Maple syrup
    Red cabbage
    Carrots
    Red bell pepper
    Cilantro
    Jalapeno
    Peanut butter
    Soy sauce
    Ketchup
    Mustard
    Sesame oil
    Red pepper flakes , optional
    Peanuts

    Ketchup, mustard, peanut butter, and hot dogs with a bag of cilantro in the back.

    🔪 Instructions

    FOR THE SLAW

    1. In a large measuring cup, blend the rice vinegar, sesame oil, and maple syrup.
    2. Toss the dressing with the cabbage, red bell pepper, jalapeno pepper, shredded carrots, and cilantro. Set aside.

    FOR THE PEANUT SAUCE

    1. In a large measuring cup whisk together the peanut butter, soy sauce, rice vinegar, ketchup, mustard, sesame oil, and red pepper flakes (if using). Set aside.

    ASSEMBLE

    1. Cook the hot dogs on the grill for 5 minutes, until warmed through and slightly charred on all sides.
    2. Serve the hot dogs topped with the slaw and drizzled with peanut sauce. Sprinkle with chopped peanuts and cilantro.
    Homemade peanut sauce in a mixing bowl.

    🥄 Equipment
    Grill
    Tongs
    Mixing Bowls
    Hand Whisk
    Box Shredder

    🥫Storage
    Store any leftovers in air tight containers in the fridge up to 4 days.

    📖 Variations
    Eliminate the ketchup and mustard and use a teaspoon of fish sauce and 1 teaspoon sriracha or chili sauce in its place.
    Drizzle a squeeze of lime juice over top of the cabbage slaw.

    Jalapeno cabbage slaw in a mixing bowl.

    💭 Tips

    • Choose a good quality beef hot dog and hot dog bun. The hotdog bun should be sturdy enough to hold all of the toppings
    • Grilled the hot dog buns to with butter for a delicious buttery roll to nestle the hot dog in.

    🍽 Serve with…

    Serve these hot dogs with a side of potato chips and an ice cold beverage.

    Up close image of hotdogs with purple cabbage slaw, cilantro, chopped peanuts, and peanut sauce

    📚 Related Recipes

    Chili Cheese Dogs are just like the ones you would get at Dairy Queen or A&W.

    Try these Bourbon Onion Bacon Dog for a boozy take on the onion topping.

    Low Carb Chili Dog Casserole is all the deliciousness without the bun (but you can serve it with one if you want to!

    🏫 The last word

    Don't let the combination of ingredients scare you. Be adventurous and try this recipe and I guarantee you will love the Thai style hot dog toppings.

    Thai Hot Dogs in a hot dog roll and topped with peanut sauce, slat, peanuts, and cilantro.

    If you give this 4-bean salad a try, I'd love to hear how it turned out! Please leave a comment and ⭐⭐⭐⭐⭐ rating below to let me know if you kept the heat mild or went all in with the jalapenos. Don't forget to tag me on Instagram @grumpyshoneybunch so I can see your beautiful salad bowls!

    📖 Recipe

    Featured Image for Thai Hot Dogs.

    Thai Style Hot Dogs

    Shelby Law Ruttan
    These Thai Style Hot Dogs are made with beef franks topped with a jalapeno cabbage slaw, homemade peanut sauce, chopped peanuts, and cilantro for a delicious twist on an American classic!
    5 from 1 vote
    Prevent your screen from going dark
    Print FREE recipe card with your email address Pin Recipe Save Go to Collections
    Prep Time 15 minutes mins
    Cook Time 5 minutes mins
    Total Time 20 minutes mins
    Course Main Course
    Cuisine American
    Servings 8
    Calories 346 kcal

    As an Amazon Associate I earn from qualifying purchases.

    Ingredients
      

    • 8 Beef hot dogs
    • 8 Hot dog rolls

    For the Slaw

    • 1 tablespoon rice vinegar
    • 1 teaspoon sesame oil
    • 1 tablespoon maple syrup
    • salt and pepper to taste
    • ½ cup red cabbage chopped
    • ½ cup carrots shredded
    • ½ cup red bell pepper chopped
    • ½ cup cilantro chopped
    • 1 tablespoon jalapeno diced

    For the Peanut Sauce

    • 2 tablespoons peanut butter
    • 1 tablespoon soy sauce
    • ½ tablespoon rice vinegar
    • ½ tablespoon ketchup
    • ½ tablespoon mustard
    • ½ tablespoon sesame oil
    • 2 dashes red pepper flakes , optional

    For the Toppings

    • ½ cup cilantro , chopped
    • ¼ cup peanuts , chopped

    Instructions
     

    FOR THE SLAW

    • In a large measuring cup, blend the rice vinegar, sesame oil, and maple syrup.
    • Toss the dressing with the cabbage, red bell pepper, jalapeno pepper, shredded carrots, and cilantro. Set aside.

    FOR THE PEANUT SAUCE

    • In a large measuring cup whisk together the peanut butter, soy sauce, rice vinegar, ketchup, mustard, sesame oil, and red pepper flakes (if using). Set aside.

    ASSEMBLE

    • Cook the hot dogs on the grill for 5 minutes, until warmed through and slightly charred on all sides.
    • Serve the hot dogs topped with the slaw and drizzled with peanut sauce. Sprinkle with chopped peanuts and cilantro.

    Nutrition

    Calories: 346kcalCarbohydrates: 28gProtein: 12gFat: 21gSaturated Fat: 7gPolyunsaturated Fat: 3gMonounsaturated Fat: 10gCholesterol: 25mgSodium: 847mgPotassium: 261mgFiber: 2gSugar: 7gVitamin A: 1851IUVitamin C: 19mgCalcium: 96mgIron: 3mg
    Keyword Thai Hot Dogs, Thai Style Hot Dogs
    Tried this recipe?Mention @grumpyshoneybunch or tag #grumpyshoneybunch!

    Blueberry Almond Tart with Puff Pastry

    May 15, 2017 by Shelby Law Ruttan 13 Comments

    A rectangular slice of blueberry almond tart with a creamy white filling, topped with fresh blueberries and sliced almonds on a flaky puff pastry crust.

    This Blueberry Almond Tart is a simple puff pastry dessert topped with almond cream cheese, fresh blueberries, and a light almond icing drizzle. It works just as well on a brunch table as it does served after dinner with coffee.

    Blueberry Almond Cream Dessert

    I like keeping a box of puff pastry in the freezer for times when I want a dessert that looks bakery-style without much effort. This tart reminds me why simple ingredients and a good flavor pairing can go a long way.

    [feast_advanced_jump_to]

    Why You'll Love Blueberry Almond Tart

    Simple prep: Puff pastry keeps the process easy and approachable.

    Flavor pairing: Almond and blueberry work together without overpowering one another.

    Flexible serve: This tart works for brunch, dessert or a casual gathering.

    A Box of Puff Pastry Sheets

    What you need to make this Blueberry Tart

    See the recipe card below for a full list of ingredients and instructions.

    • Puff pastry sheet: creates a crisp, flaky base with minimal effort.
    • Cream cheese: forms the smooth almond filling.
    • Granulated sugar: sweetens the cream cheese just enough.
    • Almond extract: brings warmth and depth to the filling and drizzle.
    • Fresh blueberries: add color and natural sweetness.
    • Confectioners' sugar: Used for a light finishing drizzle.
    • Milk: helps thin the glaze to the right consistency.

    Ingredient Substitutions

    • Berry swap: raspberries, blackberries, or sliced strawberries work well in place of blueberries.
    • Flavor change: vanilla extract can replace almond extract for a softer profile.
    • Cream cheese option: use Neufchatel cheese instead of full-fat cream cheese.

    Variations on Blueberry Almond Tart

    • Mixed Berry Tart: combine blueberries with raspberries for added contrast.
    • Citrus Almond Tart: stir a small amount of orange zest into the cream cheese mixture.
    • Mini Tarts: cut the puff pastry into smaller rectangles for individual puff pastry blueberry tarts.
    Blueberry Almond Cream Tart

    Tips for Puff Pastry Blueberry Tarts

    • Dock the dough: score around the edges of the puff pastry with a knife and then pierce the tart with fork tines all over the tart to prevent puffing too much.
    • Cool fully: let the pastry cool before adding the almond cream for clean layers.
    • Drizzle lightly: a thin glaze adds sweetness without covering the fruit.

    How to Store

    Store leftover tart covered in the refrigerator for up to 3 days. This puff pastry dessert is best enjoyed chilled.

    More Easy Dessert Recipes You'll Love

    If you enjoy fruit-forward pastries, my Strawberry Rhubarb Tart is another favorite from my kitchen. For a sweet and tangy dessert try my Rhubarb Cream Cheese Danish. Everyone loves my Red White and Blueberry Pie, or try these tasty puffs of Chocolate Strawberry Cream Puff Bites.

    If you give this 4-bean salad a try, I'd love to hear how it turned out! Please leave a comment and ⭐⭐⭐⭐⭐ rating below to let me know if you kept the heat mild or went all in with the jalapenos. Don't forget to tag me on Instagram @grumpyshoneybunch so I can see your beautiful salad bowls!

    📖 Recipe

    A rectangular slice of blueberry almond tart with a creamy white filling, topped with fresh blueberries and sliced almonds on a flaky puff pastry crust.

    Blueberry Almond Tart

    Shelby Law Ruttan
    This Blueberry Almond Tart features flaky puff pastry topped with almond cream cheese, fresh blueberries, and a light almond drizzle. It's a simple recipe suited for both brunch and dessert.
    5 from 1 vote
    Prevent your screen from going dark
    Print FREE recipe card with your email address Pin Recipe Save Go to Collections
    Prep Time 5 minutes mins
    Cook Time 15 minutes mins
    Total Time 20 minutes mins
    Course Dessert Recipes
    Cuisine American
    Servings 12
    Calories 373 kcal

    Equipment

    • Baking Sheet
    • Parchment Paper
    • Pastry roller
    • mixing bowls
    • hand mixer
    • Hand whisk
    • Measuring cups
    • Measuring spoons

    As an Amazon Associate I earn from qualifying purchases.

    Ingredients
      

    • 490 grams Pepperidge Farm Puff Pastry Sheet , thawed
    • 1 large egg white
    • ¾ cup granulated sugar
    • 8 ounces cream cheese , softened
    • 1 teaspoon almond extract
    • ½ cup confectioners sugar
    • ½ teaspoon almond extract
    • 1 tablespoon milk
    • 1½ cups blueberries , washed and patted dry with paper towel

    Instructions
     

    • Preheat oven to 400 degrees.
    • Place thawed pastry sheet on parchment lined large cookie sheet.
    • Roll out pastry with pastry roller. Score edges of pastry with knife and prick pastry with fork tines all over top of the pastry to prevent a full puff.
    • Whisk the egg white until foamy. Brush the egg white over the puff pastry dough.
    • Bake the puff pastry for 15 minutes, or until golden brown. Remove from oven and cool.

    Make the almond cream:

    • In a medium bowl with hand mixer, blend together cream cheese, granulated sugar, and 1 teaspoon almond extract. Set aside until puff pastry is finished baking and cooled.
    • Spread almond cream over top of puff pastry. Sprinkle with blueberries and sliced almonds.
    • Make drizzle by stirring together confectioners sugar, ½ teaspoon almond extract and milk. Drizzle over top of tart. Makes 12 servings

    Video

    Nutrition

    Serving: 1gCalories: 373kcalCarbohydrates: 40gProtein: 5gFat: 22gSaturated Fat: 8gPolyunsaturated Fat: 2gMonounsaturated Fat: 11gCholesterol: 19mgSodium: 167mgPotassium: 72mgFiber: 1gSugar: 20gVitamin A: 266IUVitamin C: 2mgCalcium: 25mgIron: 1mgNet Carbohydrates: 39g
    Keyword almond and blueberry tart, Almond Cream Filling, Blueberry Almond Tart, blueberry cream cheese puff pastry, blueberry puff pastry tarts, Blueberry Tart, easy blueberry dessert, puff pastry blueberry tarts, puff pastry dessert
    Tried this recipe?Mention @grumpyshoneybunch or tag #grumpyshoneybunch!

    Rustic Strawberry Rhubarb Custard Galette

    May 14, 2017 by Shelby Law Ruttan 3 Comments

    Strawberry Rhubarb Custard Galette

    A little sweet, a little tang, a whole lot of flavor! Rustic Strawberry Rhubarb Custard Galette is an open-faced version of our springtime favorite pie. Amaretto flavor in the custard filling as well as in the egg wash for the crust. This has become a new favorite in the Grumpy house!Strawberry Rhubarb Custard Galette

    Finally, after living in this area for almost 7 years now, I have my own rhubarb plants. Now if only they don't drown with all this rain we are getting! Four years ago we bought bulbs. Grumpy never planted planted them.  A year later, he plants the bulbs. They do nothing. Then two years ago we bought the actual plants and he put them in the ground. Then he used weed killer in that same spot. It killed the rhubarb and I cried. Yes. I literally was that unhappy.
    Strawberry Rhubarb Custard Galette

    Last year we bought more plants to transplant. Grumpy was threatened warned that he was only allowed to put manure in that spot. If he tried to use weed killer again, it was grounds for divorce! Either I scared him, or he just plain learned his lesson because this year, I have my own rhubarb. I do not have to buy it this year. And I'm so happy. EVER so happy!

    This is my very first recipe for this year with my very own rhubarb. I have a few other ideas of how to use it, but the next dessert recipe I make will be the Rhubarb Custard Bars. Probably my favorite rhubarb recipe ever. If you haven't tried that recipe, then you really need to!

    Strawberry Rhubarb Custard Galette

    I decided that I wanted to make a galette because I don't care to have so much pie crust. Give me lot of filling and a little crust any day of the week. I love a custard like filling (hence why I love the Rhubarb Custard Bars so much) and I love almond. So, I made the filling a custard filling by adding an egg to my fruit mixture and added my favorite almond flavor by adding amaretto in the filling and adding a splash to the egg wash that I brushed over the crust before baking.

    Strawberry Rhubarb Custard Galette

    I used about 3 cups of diced rhubarb and 2 cups of diced strawberries. Most of the time, I leave the strawberries out of my pie, but this time I wanted something a little different. It was perfect. 🙂

    Fair warning, the filling does leak some, so be sure to have a pan beneath the galette to catch any of the drippings that may run off into the oven. However, because it was a custard filling, most of it just baked around the galette. I scraped it off and tossed it out. I feel no matter what when you use fresh fruit, you have a chance of liquid leakage, but hey, isn't that part of what makes it "rustic"?

    This is also excellent served up with a scoop of your favorite vanilla ice cream or whipped topping!

    📖 Recipe

    Strawberry Rhubarb Custard Galette

    Rustic Strawberry Rhubarb Custard Galette

    Shelby Law Ruttan
    Rustic Strawberry Rhubarb Custard Galette is an open-faced version of our springtime favorite pie. Amaretto flavor in the custard filling as well as in the egg wash for the crust.
    5 from 1 vote
    Prevent your screen from going dark
    Print FREE recipe card with your email address Pin Recipe Save Go to Collections
    Prep Time 20 minutes mins
    Cook Time 45 minutes mins
    Total Time 1 hour hr 5 minutes mins
    Course Desserts
    Cuisine American
    Servings 6
    Calories 242 kcal

    As an Amazon Associate I earn from qualifying purchases.

    Ingredients
      

    • 1 8- inch pie pastry
    • 3 cups rhubarb washed and diced.
    • 2 cups strawberries washed and diced
    • ½ cup sugar Swerve Granulated Sweetener
    • 1 egg beaten
    • 2 tablespoons cornstarch
    • 1 tablespoon amaretto *
    • 1 teaspoon salt
    • 1 teaspoon fresh grated orange zest **
    • 1 egg
    • 1 teaspoon amaretto ***

    Instructions
     

    • Preheat oven to 375 degrees.
    • Roll pie crust out and place on parchment lined cookie sheet with an edge (to prevent spills).
    • In medium sized mixing bowl, stir together fruit, sugar, egg, salt, cornstarch, and amaretto.
    • Place fruit filling in center of pie crust. Dampen edges of pie crust with water, and bring up sides towards center of filling.
    • Brush galette with egg wash/amaretto mixture. Sprinkle with sugar crystals.
    • Bake for 45 minutes or until crust is golden brown and filling is bubbly.
    • Remove from oven. Cool. Serve with ice cream or whipped topping. Store leftover pie in refridgerator.

    Notes

    *Substitute 1 teaspoon almond extract for the amaretto
    **Substitute ½ teaspoon dried orange zest for the fresh orange zest.
    *** Substitute 1 teaspoon water for the amaretto

    Nutrition

    Serving: 1/6th of galetteCalories: 242kcalCarbohydrates: 41gProtein: 4gFat: 7gSaturated Fat: 3gPolyunsaturated Fat: 3gCholesterol: 69mgSodium: 470mgFiber: 3gSugar: 27g
    Keyword Almond, Amaretto, Galette, Pastry, Pie, Rhubarb
    Tried this recipe?Mention @grumpyshoneybunch or tag #grumpyshoneybunch!

    Pin it! Rustic Strawberry Rhubarb Custard Galette

    Rustic Strawberry Rhubarb Galette Pinterest

    Caramelized Cinnamon Sugar Toast

    May 9, 2017 by Shelby Law Ruttan 5 Comments

    Featured image for Cinnamon Sugar Toast.

    Mom's Caramelized Cinnamon Sugar Toast is a simple childhood favorite treat we would enjoy for an easy breakfast recipe on busy mornings. A sturdy piece of bread is buttered and topped a combination of cinnamon and sugar, then broiled to a golden brown perfection!

    Caramelized Cinnamon Toast
    [feast_advanced_jump_to]

    ❤️ Why you'll love it

    • The crunchy, buttery cinnamon sugar mixture broiled on top makes a crisp toast that pairs perfectly with a nice hot latte!
    • Broiling the cinnamon sugar toast is the best way to make this childhood treat and brings the best flavor and texture.
    • This cinnamon toast recipe is a great way to make special food memories for your the kids!

    🥘 Ingredients

    Bread slices: choose a sturdy loaf of bread. I used a cinnamon raisin bread pictured in the photos or this homemade soft white bread recipe.

    Butter: I use salted butter. If you use unsalted butter, add a pinch of salt to the cinnamon sugar mixture.

    Granulated sugar

    Ground cinnamon

    Butter on a plate with a knife and cut slice.
    Be sure to use softened butter when spreading over the bread.

    🔪 Instructions

    1. Preheat broiler on low setting.
    2. Butter each of the bread slices with 1 teaspoon butter, spreading all the way to the edges of the bread. Depending on the size of your bread, you may need to use more butter.
    3. Combine sugar and ground cinnamon, and a pinch of salt
    4. Sprinkle over buttered bread. Gently tap bread slice all around to spread sugar mixture over top, coating the butter completely.
    5. Place under broiler and broil 2-3 minutes. Watch carefully as toast can burn easily.

    🥄 Equipment

    Baking sheet

    Small bowl

    Butter knife

    Cinnamon sugar and butter mixture.
    The perfect combination of cinnamon and sugar gives great flavor to this toast!
    Sprinkling sugar mixture over top of buttered raisin bread.
    Butter bread thinly with softened butter. This will help the cinnamon sugar mixture to adhere to the bread.
    A hand holding a piece of bread with cinnamon and sugar mixture on top.
    Tap the bread to spread the sugar mixture over top and tap any excess back into the bowl.
    Caramelized Cinnamon Toast
    Place bread slices on a baking sheet to place under the broiler.

    🥫Storage

    Store any leftover cinnamon sugar in an airtight container in the pantry.

    📖 Variations

    • Substitute brown sugar for granulated sugar.
    • Use pumpkin pie spice or apple pie spice in place of the cinnamon.
    • Cinnamon sugar butter spread can be used in place of the butter.
    • Use cinnamon bread (with or without raisins).
    • Try using this spiced sugar in place of the cinnamon sugar.

    💭 Tips

    • Use softened butter to make spreading over the bread easy.

    📚 Related Recipes

    Pumpkin Spice Cinnamon Rolls are one of my weekend fall favorites.

    Another great fall favorite is this recipe for Butter Rum Glazed Applesauce Cake Recipe.

    🍽 Serve with...

    Serve with a side of fruit and a cup of hot coffee, hot cocoa, or glass of milk.

    Caramelized Cinnamon Toast

    🏫 The last word

    This is one of two ways to make cinnamon sugar toast. This is the longer way, where you have a crunchy sugar coating on top of the bread. The other way people make cinnamon sugar toast is to toast the bread, butter it, and then sprinkle the cinnamon sugar on top of the buttered bread. Both ways are delicious but I love the candy like topping by caramelizing the sugar!


    Don't forget to check out my Amazon storefront for some of my favorite products!

    When you make this recipe, please comment below and let me know what you think. I'd love it if you tag me on Instagram @grumpyshoneybunch or #grumpyshoneybunch so I can see your photos!

    If you love this recipe, please leave a ⭐⭐⭐⭐⭐ rating

    📖 Recipe

    Featured image for Cinnamon Sugar Toast.

    Mom's Caramelized Cinnamon Toast

    Shelby Law Ruttan
    The crunchy, buttery cinnamon sugar mixture broiled on top of this toast bring back fond memories of mom making this very recipe in her kitchen!
    5 from 7 votes
    Prevent your screen from going dark
    Print FREE recipe card with your email address Pin Recipe Save Go to Collections
    Prep Time 5 minutes mins
    Cook Time 2 minutes mins
    Total Time 7 minutes mins
    Course Breakfast & Brunch
    Cuisine American
    Servings 4
    Calories 136 kcal

    Equipment

    • Baking Sheet
    • Small bowl

    As an Amazon Associate I earn from qualifying purchases.

    Ingredients
      

    • 4 slices bread
    • 4 teaspoons butter
    • 2 tablespoons sugar
    • ½ teaspoon ground cinnamon

    Instructions
     

    • Preheat broiler on low setting.
    • Butter each of the bread slices with 1 teaspoon butter, spreading all the way to the edges of the bread. Depending on the size of your bread, you may need to use more butter.
    • Combine sugar and ground cinnamon, and a pinch of salt. Sprinkle over buttered bread. Gently tap bread slice all around to spread sugar mixture over top, coating the butter completely.
    • Place under broiler and broil 2-3 minutes. Watch carefully as toast can burn easily. Serve warm.

    Nutrition

    Calories: 136kcalCarbohydrates: 19gProtein: 3gFat: 5gSaturated Fat: 3gPolyunsaturated Fat: 1gMonounsaturated Fat: 1gTrans Fat: 0.2gCholesterol: 11mgSodium: 165mgPotassium: 42mgFiber: 1gSugar: 8gVitamin A: 126IUVitamin C: 0.1mgCalcium: 39mgIron: 1mgNet Carbohydrates: 18g
    Keyword Caramelized Cinnamon Toast, Cinnamon Sugar Toast
    Tried this recipe?Mention @grumpyshoneybunch or tag #grumpyshoneybunch!

    Low Carb Chili Dog Casserole

    May 6, 2017 by Shelby Law Ruttan 6 Comments

    Featured Image Low Carb Chili Dog Casserole.

    All the flavor without the carbs, this Low Carb Chili Dog Casserole is quick dish to put together, has great flavor and perfect for those summertime gatherings. Take this Chili Dog Casserole to a family reunion with a side of rolls for those who must have them!

    This recipe is so easy to make and please both low carb dieters and non dieters alike! If you don't want to make your own chili, you can buy premade chili and use that to top the hotdogs before baking. Just be sure to read the labels first to make sure its low carb if your concerned about that!

    Single serving of Low Carb Chili Dog Casserole on plate with green napkin to the back

    Why a low carb Chili Dog Casserole?

    I love chili dogs, and let's face it, I love the bun that goes with them just as much. But, one of the things you have to do to keep yourself in check sometimes, is to limit those things you love.

    For me, carbs are one of the most addicting foods to put in my face. I'm one for the starchy carbs. You know, things like homemade bread, flour tortillas, pasta. I could go on and on. I love things like cookies, brownies (especially brownies!), and cupcakes too. But they aren't as tempting to me as a savory carb is.

    Single serving of Low Carb Chili Dog Casserole on plate with green napkin to the back

    Chili Dog Casserole FAQ's

    Are hot dogs ok for low carb keto way of eating?

    Hot dogs are a processed food, which really makes them something you should not eat much of on the keto diet. They are also not zero carb as they do have some fillers in them. Read your packages and pick what is best and acceptable for your diet. People who eat dirty keto will consume hotdogs without concern. I would definitely go with an all beef hotdog if I were trying to stick close to the keto diet.

    Can I leave the beans out of this recipe and make it keto friendly?

    Leaving the kidney beans out of this recipe will not affect the deliciousness this casserole has to offer. You can easily just omit the beans and have a fewer carbs in the casserole!

    All of that said, I wasn't so sure I would enjoy this casserole without the bun. I also wasn't sure Grumpy would want to eat it without a bun. However, I had no buns in the house. So he had no choice! He ate it and he enjoyed the flavor, but stated it would have been better for him with a biscuit topping! He was definitely in a casserole state of mind when making that comment! I had to remind him that would have added carbs to my low carb casserole!

    How to assemble Chili Dog Casserole

    It all starts with using the #BestBeef you can find. For us, that is Certified Angus Beef® brand. I went 90% lean ground beef sirloin and a low fat turkey hot dog to keep the fat in check.

    Certified Angus Beef Ground Beef in packaging

    Start with the base layer. Cut hot dogs in half and placing them in an 8 x 12 inch casserole dish.

    hotdogs cut in half and layered in bottom of casserole dish

    Next, you bury your hot dogs with your chili mixture.

    Chili layer over top of hot dogs in casserole dish

    Cover the chili layer with reduced fat cheddar cheese and chopped onion. Then bake for 20-30 minutes.

    fuly assembled casserole before baking

    Once it has baked so it is hot through and cheese is melted, remove from oven and serve!

    fully baked chili dog casserole in baking dish before serving

    What to serve with Chili Dog Casserole

    This would be a different type of casserole to take to a family reunion, memorial day or july 4th picnic. Quick, easy, and your friends can serve themselves on a plate or in a bun!

    Other great crowd friendly low carb recipes that I like to make and would fit great on a reunion table are Broccoli Salad - Keto Recipe, and BLT Bites. I also love this Low Carb Cauliflower Picnic Salad from Carrie's Experimental Kitchen!

    📖 Recipe

    Featured Image Low Carb Chili Dog Casserole.

    Low Carb Chili Dog Casserole

    Shelby Law Ruttan
    All the flavor without the carbs, this Low Carb Chili Dog Casserole is quick to put together, has great flavor and perfect for those summertime gatherings.
    5 from 1 vote
    Prevent your screen from going dark
    Print FREE recipe card with your email address Pin Recipe Save Go to Collections
    Prep Time 20 minutes mins
    Cook Time 20 minutes mins
    Total Time 40 minutes mins
    Course Main Course
    Cuisine Americain
    Servings 8 servings
    Calories 301 kcal

    As an Amazon Associate I earn from qualifying purchases.

    Ingredients
      

    • 8 low-fat turkey hot dogs
    • 1 pound 90% lean Certified Angus Beef ground sirloin
    • 1 cup diced onion divided
    • 2 large cloves garlic diced
    • 1 large large jalapeno diced (see notes)
    • 2 tablespoons chili powder
    • 1 tablespoon ground cumin
    • 1 teaspoon salt
    • 1 tablespoon brown sugar substitute or 2 tablespoons regular brown sugar
    • 1 cup tomato or pasta sauce see notes
    • 1 teaspoon Worcestershire sauce
    • 15 ounce chili beans in chili sauce
    • ¾ cup shredded reduced fat cheddar cheese
    • ¼ cup Cilantro , chopped for topping (optional)
    • ¼ cup diced onion , for topping (optional)

    Instructions
     

    • Brown the ground beef, garlic, ½ cup of the onion and the jalapeno pepper in large frying pan over medium high heat until very soft and tender. Drain off any fat from the pan.
    • Add the chili powder, cumin, brown sugar, salt, Worcestershire, tomato sauce and beans. Bring to a boil, lower heat and simmer for 15 minutes.
    • Arrange hot dogs on the bottom of a baking dish. Cover with chili, scatter with cheese and top with remaining diced onion.
    • Bake at 400 F until hot and bubbling, 15 to 20 minutes. 
    • Serve with chopped onion and cilantro if desired.

    Notes

    If jalapeno peppers are too hot for you, substitute a ½ cup diced green bell pepper.
    Feel free to use plain tomato sauce or pasta sauce. I used Prego's Marketplace Roasted Garlic pasta sauce in my recipe.

    Nutrition

    Serving: 1/8th of recipeCalories: 301kcalCarbohydrates: 14gProtein: 19gFat: 12gSaturated Fat: 4gCholesterol: 33mgSodium: 1071mgFiber: 6gSugar: 4g
    Keyword Casserole, Chili, Chili Dog Casserole, low carb, Low Carb Chili Dog Casserole
    Tried this recipe?Mention @grumpyshoneybunch or tag #grumpyshoneybunch!

    Harissa Marinated Steak and Shrimp Salad with Cilantro Lime Dressing

    April 27, 2017 by Shelby Law Ruttan 3 Comments

    Harissa Marinated Steak

    Harissa Marinated Steak and Shrimp Salad made with grilled vegetables and a fresh cilantro lime dressing makes a perfect weeknight dinner salad!

    Harissa Marinated Steak

    I love summer weather, and I really love being able to grill outdoors! As soon as I am able to be outside and not freeze to death, I am out there grilling. It makes weeknight meals super easy because usually when I grill, I have just a salad to go with it, or sometimes I just grill corn alongside my protein and call it dinner!

    Harissa Marinated Steak

    I found a Harissa Paste at my most recent Trader Joe's shopping trip and decided to put it in my cart. I had seen it on tv shows (Food Network!) and heard a few others talk about it, but had never attempted to make it on my own. So, when I saw the paste in a jar, there was no way I wasn't buying it to try!

    Harissa Marinated Steak

    Of course, I still have some of the #BestBeef in my freezer from my Instagram win with Certified Angus Beef ® so, when warm weather hit this last weekend, the steaks came out and the grill was turned on! By the way, I have to give Certified Angus Beef ® full credit for being my inspiration in learning how to cook beef perfectly! I have gained a lot of experience with all those steaks I received from the contest and I seem to always get them cooked perfectly for us. Internal temp of 125-130 before pulling off the grill, then letting it rest for 15 minutes before slicing. The hardest part is waiting those 15 minutes!

    Harissa Marinated Steak

    When thinking about making this salad, I decided that a "surf and turf" type salad was going to be perfect for a filling dinner for Grumpy and me. However, the steak is definitely the star of the show in this recipe. The shrimp was just an added plus.

    Harissa Marinated Steak

    Now, about the Harissa Paste. It is basically a chili paste and it's quite spicy. If you can't find it in the store, you can always make it yourself. Before I used it, I  naturally tasted it. I warn you to be cautious if you're heat sensitive! It's very spicy. However, I wanted to see if I needed to add anything to it before putting it on the steak and shrimp. I decided a little brown sugar and some olive oil mixed into it would be good enough! The mixture turned out to have just enough sweetness added to make it not too hot and you could taste the sweet heat in every bite! The perfect way to #BeefUpYourSalad!

    📖 Recipe

    Harissa Marinated Steak

    Marinated Steak and Shrimp Salad with Cilantro Lime Dressing

    Shelby Law Ruttan
    A steak and seafood bowl made with fresh and delicious ingredients topped with a tangy dressing.
    No ratings yet
    Prevent your screen from going dark
    Print FREE recipe card with your email address Pin Recipe Save Go to Collections
    Prep Time 10 minutes mins
    Cook Time 20 minutes mins
    Total Time 30 minutes mins
    Course Main Dish
    Cuisine Tex-Mex
    Servings 6 servings
    Calories 495 kcal

    As an Amazon Associate I earn from qualifying purchases.

    Ingredients
      

    For the Grill:

    • 1 lb Sirloin Beef Steaks
    • 1 lb shrimp thawed, peeled and de-veined and threaded on skewers for grilling
    • 4 tablespoon Harissa Paste
    • 2 tablespoon brown sugar
    • 1 tablespoon olive oil
    • 2 large tomatoes
    • 4 ears corn on the cob
    • 1 large onion sliced
    • 1 tablespoon olive oil for the vegetables
    • 1 teaspoon garlic salt
    • 1 avocado sliced
    • 6 cups mixed lettuce greens

    For the dressing:

    • 4 tablespoon lime juice
    • 4 tablespoon olive oil
    • 2 cloves garlic minced
    • 1 teaspoon granulated sugar
    • ½ teaspoon salt
    • ¼ teaspoon ground coriander
    • 2 tablespoon cilantro minced.

    Instructions
     

    • Pre-heat grill until hot.
    • Make the salad dressing by whisking together lime juice, olive oil, garlic cloves, sugar, salt, coriander, and fresh cilantro.
    • Mix Harissa paste, brown sugar and 1 tablespoon olive oil together. Baste steaks and shrimp skewers with Harissa mixture. Set aside until ready to grill.
    • On a large platter, drizzle olive oil over top of tomatoes, corn on the cob and sliced onion. Sprinkle with garlic salt. Place on grill and cook for 10-15 minutes over medium heat, until vegetables have a slight char. Tomatoes may need to be removed sooner. Remove tomatoes when the skin starts to burst. Remove all vegetables and set aside.
    • Place steak and shrimp on hot grill. Shrimp will take only 2-3 minutes (about 1-½ minute each side). Shrimp is ready when it is pink, and no longer opaque. Cook steak according to desired doneness. Remove from heat and set aside to rest.
    • To prep salad, dice tomatoes and cut the corn from the cob. Dice avocado into bite sized pieces. assemble salad in layers, side by side, over top of the lettuce. Serve with 1-½ tablespoons dressing.

    Nutrition

    Serving: 1gCalories: 495kcalCarbohydrates: 33gProtein: 39gFat: 25gSaturated Fat: 4gPolyunsaturated Fat: 3gMonounsaturated Fat: 15gTrans Fat: 1gCholesterol: 237mgSodium: 1429mgPotassium: 1343mgFiber: 8gSugar: 14gVitamin A: 18268IUVitamin C: 47mgCalcium: 243mgIron: 6mg
    Keyword Steak and Shrimp Salad Bowl
    Tried this recipe?Mention @grumpyshoneybunch or tag #grumpyshoneybunch!

    This post contains affiliate links for products I recommend and use in my home.

    Pin it! Harissa Marinated Steak and Shrimp Salad!Harissa Marinated Steak

    Chicken Thighs with Cilantro Sauce

    April 20, 2017 by Shelby Law Ruttan 4 Comments

    Chicken Thighs with Cilantro Sauce in skillet up close view

    So full of flavor and quick to put on the table! Low carb and Keto Friendly, these Chicken Thighs with Cilantro Sauce are pan-fried and served with a sauce that is made of shallots, sesame oil, cilantro, and soy sauce.

    Chicken Thighs with Cilantro Sauce

    When it comes to being dinner time, there is nothing I like better than to have something simple and delicious that doesn't require a lot of messy cleanup.  I love how I only dirtied up a cast iron skillet and the 2-3 tools it took to make this cilantro sauce! Now that better weather is in sight, grilling the chicken would cause even less mess for clean up and I can't wait to try this with grilled chicken thighs!

    Chicken Thighs with Cilantro Sauce

    A lot of people I know (including Grumpy) seems to prefer the chicken breast over the chicken thigh. Not me! I really love the flavor in the chicken thigh and I can be guaranteed it is never dry like the chicken breast can be. Fortunately, I have persuaded Grumpy that it's not only tastier but more economical than the chicken breast! If you are still sold only on the chicken breast, never fear, you still can use chicken breast in this recipe. Keep in mind that the breast is larger so the serving sizes (ounces) would be different. I still highly encourage you to give thighs a try though. The flavor can't be beat!

    Chicken Thighs with Cilantro Sauce

    Of course, the real star of the show here is the cilantro sauce. If you love cilantro as much as I do, then you will love this recipe! I tend to go overboard and I was ready to bury my chicken in this sauce. It was that good! This would also go great with beef or seafood.

    Try this sauce recipe with any of your favorite meats, it will work well with steak, chicken, pork, and seafood. I promise!

    📖 Recipe

    Chicken Thighs with Cilantro Sauce in skillet up close view

    Chicken Thighs with Cilantro Sauce

    Shelby Law Ruttan
    Chicken Thighs with Cilantro Sauce are pan fried and served with a sauce that is made of shallots, sesame oil, cilantro, and soy sauce.
    5 from 1 vote
    Prevent your screen from going dark
    Print FREE recipe card with your email address Pin Recipe Save Go to Collections
    Prep Time 10 minutes mins
    Cook Time 10 minutes mins
    Total Time 20 minutes mins
    Course Main Dish
    Cuisine American
    Servings 4 servings
    Calories 440 kcal

    As an Amazon Associate I earn from qualifying purchases.

    Ingredients
      

    • 2 pounds skinless boneless chicken thighs
    • ½ tablespoon olive oil divided
    • ¾ teaspoon salt divided
    • 2 tablespoons finely chopped shallots
    • 1 large garlic clove minced
    • 1-½ tablespoons sesame oil
    • 1 tablespoon soy sauce
    • ½ teaspoon Sriracha sauce use more or less according to taste
    • ½ teaspoon lime zest
    • ½ cup chopped fresh cilantro

    Instructions
     

    Cook the chicken:

    • In a a large skillet over medium-high heat, add ½ tablespoon olive oil. Sprinkle chicken evenly with ½ teaspoon salt. Add chicken to pan; sauté 6 minutes or until browned. Turn; sauté 4 minutes or until chicken is done.

    Make the sauce:

    • Smash ¼ teaspoon salt, shallots, and garlic with mortar and pestle. If you don't have a mortar and pestle, use the back of a spoon to smash in a small mixing bowl. Mash together until you form a paste. Combine garlic mixture, sesame oil, soy sauce, sriracha sauce, lime zest and cilantro.

    Top the Chicken:

    • Place 1-½ teaspoons cilantro sauce over each piece of chicken. Serve.

    Notes

    In grilling season, I would highly recommend grilling your chicken rather than sauteeing in the pan. The flavor from the grill would only add to this great sauce, which is the star of the party!

    Nutrition

    Serving: 2thighs and 3 teaspoons cilantro sauceCalories: 440kcalCarbohydrates: 2gProtein: 56gFat: 24gSaturated Fat: 6gPolyunsaturated Fat: 18gCholesterol: 277mgSodium: 1036mgSugar: 1g
    Keyword chicken thighs, cilantro, cilantro sauce, crispy chicken thighs, Sauce, skillet recipe
    Tried this recipe?Mention @grumpyshoneybunch or tag #grumpyshoneybunch!

    Pin it! Chicken Thighs with Cilantro Sauce

    Chicken Thighs with Cilantro Sauce

    Chocolate Chip Pecan Cookies

    April 11, 2017 by Shelby Law Ruttan 5 Comments

    Chocolate Chip Pecan Cookies

    These big fat Chocolate Chip Pecan Cookies are chock full of semi-sweet chocolate chips and roasted salted pecans giving you that sweet, salty satisfaction.

    Chocolate Chip Pecan Cookies

    Making a cookie that Grumpy will love

    Grumpy loves a big chewy cookie and I am always on the lookout for a chocolate chip cookie recipe that will stay chewy for more than a day. While these cookies still did not meet that requirement, they were delicious. If you like them chewy, then that will last for about a day.

    Otherwise, these cookies got quite crunchy after the first day. I think by day three, Grumpy stopped going to the cookie box. Thankfully by then, there was only one cookie left and I snuck it into his lunchbox the next day. When he came home, it was gone, so I am pretty sure he still ate it even though it was crunchy!

    Chocolate Chip Pecan Cookies

    What I learned by making these Chocolate Chip Pecan Cookies

    This recipe made a good 2 dozen cookies. I used my large cookie scoop which measures out about ¼ cup of dough. After scooping the cookies onto the parchment paper-lined cookie sheet, I flattened them so they weren't a domed cookie ball. Maybe if I had baked these a little less time they would have stayed chewy. I'm not certain but I may give that a try because these cookies had great flavor.

    Do you have a tried and true chewy cookie recipe? I would love to have you link me up in the comments so I can check the recipe out and give it a try for Grumpy!

    Chocolate Chip Pecan Cookies

    📖 Recipe

    Chocolate Chip Pecan Cookies

    Chocolate Chip Pecan Cookies

    Shelby Law Ruttan
    Chocolate chips and pecans fill this delicious buttery cookie dough for one of the best tasting cookies ever.
    5 from 1 vote
    Prevent your screen from going dark
    Print FREE recipe card with your email address Pin Recipe Save Go to Collections
    Prep Time 10 minutes mins
    Cook Time 15 minutes mins
    Total Time 25 minutes mins
    Course Desserts
    Cuisine American
    Servings 24
    Calories 211 kcal

    As an Amazon Associate I earn from qualifying purchases.

    Ingredients
      

    • 2 cups all-purpose flour
    • ½ teaspoon baking soda
    • 1 teaspoon salt
    • ¾ cup unsalted butter melted
    • 1 cup packed brown sugar
    • ½ cup white sugar
    • 3 teaspoons vanilla extract
    • 1 egg
    • 1 egg yolk
    • 2 cups semisweet chocolate chips
    • ½ cup chopped roasted salted pecan pieces

    Instructions
     

    • Preheat the oven to 325 degrees F (165 degrees C). Grease cookie sheets or line with parchment paper.
    • Sift together the flour, baking soda, and salt; set aside.
    • In a medium bowl, cream together the melted butter, brown sugar and white sugar until well blended. Beat in the vanilla, egg, and egg yolk until light and creamy. Mix in the sifted ingredients until just blended. Stir in the chocolate chips by hand using a wooden spoon.
    • Drop cookie dough ¼ cup at a time onto the prepared cookie sheets. Cookies should be
      about 3 inches apart.
    • Bake for 15 to 17 minutes in the preheated oven, or until the edges are lightly toasted. Cool on baking sheets for a few minutes before transferring to wire racks to cool completely.

    Nutrition

    Serving: 1gCalories: 211kcalCarbohydrates: 29gProtein: 2gFat: 11gSaturated Fat: 6gPolyunsaturated Fat: 4gCholesterol: 31mgSodium: 122mgFiber: 1gSugar: 20g
    Keyword Chocolate Chip Pecan Cookies
    Tried this recipe?Mention @grumpyshoneybunch or tag #grumpyshoneybunch!

    Grilled Ham and Blue Cheese Sandwich

    March 20, 2017 by Shelby Law Ruttan 6 Comments

    Grilled Ham and Blue Cheese Sandwich

    This shop has been compensated by Collective Bias, Inc. and its advertiser. All opinions are mine alone. #SandwichWithTheBest #CollectiveBias. Grilled Ham and Blue Cheese Sandwich was made for this shop.

    Grilled Ham, Bacon and Blue Cheese Sandwich

    This Grilled Ham and Blue Cheese Sandwich, made with only 6 ingredients, is full of flavor and texture. Start off with Pepperidge Farm Farmhouse™ Potato Bread, Hillshire Farm® Thin Sliced Honey Ham, and Hellmann's® Real Mayonnaise.  Add crispy bacon, blue cheese, and peppery arugula to complement the sandwich!

    Grilled Ham, Bacon and Blue Cheese Sandwich

    Grumpy's very favorite bread is the Pepperidge Farm Farmhouse Potato Bread. I can't say I blame him. It has that fresh baker's touch, hearty, and delicious. It holds together and melds well with all types of flavors. I also love that it is double wrapped for freshness!

    Grilled Ham, Bacon and Blue Cheese Sandwich

    When it comes to mayonnaise, the only way to go for us is Hellmann's® Real Mayonnaise. It is the absolute best and the only mayonnaise we will use.  It was (and still is!) a staple in my mom's kitchen too! I remember mom baking bread and my dad right there at the table with a jar of Hellmann's® Real Mayonnaise and a knife, ready to spread some on a warm slice as soon as the bread came out of the oven!  As an adult, I love using it as a very thin coating on the outside of my bread prior to grilling as well as on the inside, to make for a super tasty sandwich! I am really loving the unique squeeze bottle too. It's perfect for getting just the right amount out to spread on your slice of bread.

    Grilled Ham and Blue Cheese Sandwich

    Hillshire Farm® Thin Sliced Honey Ham lunchmeat is my choice of sandwich meat. I love how the thin slices easily layer for your sandwiches but what I really love is there is no artificial flavors or by products in it. The slow roasted for hours, sweet honey taste contrasts so well with the tang and bite of blue cheese in this sandwich!

    Grilled Ham and Blue Cheese Sandwich

    The crispy crunch of bacon and the peppery taste of arugula complete this sandwich. While Grumpy was skeptical about the flavor combination, he was happy that it turned out as well as it did! I guarantee this sandwich will satisfy all your senses and will become a comfort food favorite! I literally cannot wait to eat another one as I tell you about it!

    Grilled Ham and Blue Cheese Sandwich

    Finding the ingredients for this sandwich is as easy as stopping at your local Walmart!


    *If you made this Grilled Ham and Blue Cheese Sandwich, please give it a star rating*

    📖 Recipe

    Grilled Ham and Blue Cheese Sandwich

    Grilled Ham and Blue Cheese Sandwich

    Shelby Law Ruttan
    Grilled Ham and Blue Cheese Sandwich with the crispy texture of bacon and peppery arugula makes for a perfect lunch or dinner sandwich any day of the week!
    4.20 from 10 votes
    Prevent your screen from going dark
    Print FREE recipe card with your email address Pin Recipe Save Go to Collections
    Prep Time 5 minutes mins
    Cook Time 6 minutes mins
    Total Time 11 minutes mins
    Course lunch
    Cuisine American
    Servings 1 serving
    Calories 430 kcal

    As an Amazon Associate I earn from qualifying purchases.

    Ingredients
      

    • 2 slices Pepperidge Farm Farmhouse Potato Bread
    • 4 slices Hillshire Farm® Thin Sliced Honey Ham lunch meat
    • 2 slices cooked bacon strips
    • Hellmann's® Real Mayonnaise to taste
    • 1-2 tablespoons blue cheese crumbles
    • ¼ cup fresh arugula

    Instructions
     

    • Spread one side of each slice of bread with a thin layer of mayonnaise.
    • Place both slices of bread on griddle over medium to medium low heat, mayonnaise side down. Spread desired amount of mayonnaise on inside of sandwich slices. Sprinkle with blue cheese on bottom slice of bread.
    • On top of bottom slice of bread, layer with 4 slices of ham, 2 slices of bacon, and ¼ cup arugula. Sprinkle top of arugula with a little more blue cheese if desired.
    • Grill over medium low heat until slightly browned. When top slice of bread is golden, place on top of sandwich fillings to form sandwich.
    • Remove from griddle and serve immediately.

    Nutrition

    Serving: 1gCalories: 430kcalCarbohydrates: 33gProtein: 19gFat: 25gSaturated Fat: 8gPolyunsaturated Fat: 15gCholesterol: 55mgSodium: 1087mgFiber: 2gSugar: 20g
    Keyword Grilled Ham and Blue Cheese
    Tried this recipe?Mention @grumpyshoneybunch or tag #grumpyshoneybunch!

    Cheesy Bacon Home Fries

    March 18, 2017 by Shelby Law Ruttan 3 Comments

    Featured image for Cheesy Bacon Home Fries.

    These Cheesy Bacon Home Fries are made with leftover potatoes, bacon, cheese, and onions for a crispy and smoky side dish recipe. These can be served for breakfast or dinner and are excellent with a soft fried egg on top.

    Cheesy Bacon Home Fries in a cast iron skillet.

    ❤️ Why you'll love it

    Uses leftover potatoes: this recipe is a great way to use any leftover baked potatoes you have on hand.

    Crispy bits: the fried crispy bits of potato and bread are irresistibly delicious!

    Incredible flavors: the combination of fried potatoes, bread, cheese and smoky bacon come together to make a delicious side dish.

    Ingredients for home fries.

    🥘 Ingredients

    Baked potatoes (skin on): try making air fryer baked potatoes a day ahead just to make this recipe!

    Onion: I used a white onion, but any onion will work in this recipe.

    Bread: preferably the heels of a loaf of brioche bread as the crust on the heel makes the bread sturdier. Bread bulks up the recipe and adds crispy fried bits!

    Fat-free cheddar cheese: I like to use fat-free or reduced fat cheese since I am using bacon in this recipe.

    Bacon crumbled

    Bacon drippings: reserved from cooking bacon, this adds more flavor to the home fries.

    Butter

    A serving of fried potatoes with bacon and cheese and a fried egg on top of the potatoes.

    🔪 Instructions

    1. In a large skillet over medium heat, cook until golden brown and crispy. Remove from pan and set aside on a paper towel lined plate to cool.
    2. Remove all but 1 tablespoon bacon fat from pan.
    3. Add onion to bacon fat and cook over medium heat, 1-2 minutes, until onions begin to turn translucent.
    4. Add butter to onion and let melt and bubble. Place potatoes and bread pieces in skillet with butter and onions. Toss to coat with butter.
    5. Cook over medium heat for 10 minutes, stirring occasionally.
    6. Turn heat down to low.
    7. Sprinkle cheddar cheese over top of potatoes. Top with crumbled bacon and Sprinkle with chives.
    8. Serve with salt and pepper to taste.
    Upclose image of cheesy bacon home fries.

    🥄 Equipment

    Large skillet

    Flat head wooden spoon

    Chef knife

    Cutting board

    🥫Storage

    Refrigerate: store leftovers in an airtight container in the fridge up to 5 days.

    Reheat: to reheat, place leftover home fries in a large skillet, heat until warmed through or heat on a microwave safe plate in the microwave until warm.

    📖 Variations

    • Substitute butter for the bacon fat.
    • Use turkey bacon instead of pork.
    • Sprinkle the top of the home fries with fresh snipped chives and sour cream.

    💭 Tips

    • When cooking the home fries, allow the skillet to set for 4-5 minutes before stirring, until potatoes have begun to brown. Stirring less often will create crispier potatoes.

    🥓 Bacon Filled Recipes

    Bacon Maple Breakfast Rolls

    Bacon Deviled Eggs

    Bourbon Onion Bacon Dog

    Broccoli Salad with Bacon and Jalapeno

    Cheesy Jalapeno Bacon Cheeseburger

    Bacon Pecan Stuffed Mushrooms

    Bacon Tomato Grilled Cheese

    🍽 Serve with..

    Serve cheesy bacon home fries with a soft fried egg and buttered toast.


    Don't forget to check out my Amazon storefront for some of my favorite products!

    When you make this recipe, please comment below and let me know what you think. I'd love it if you tag me on Instagram @grumpyshoneybunch or #grumpyshoneybunch so I can see your photos!

    If you love this recipe, please leave a ⭐⭐⭐⭐⭐ rating

    📖 Recipe

    Featured image for Cheesy Bacon Home Fries.

    Cheesy Bacon Home Fries

    Shelby Law Ruttan
    Cheese, bacon, and potatoes fried crispy and served with a fried eg!
    4.17 from 6 votes
    Prevent your screen from going dark
    Print FREE recipe card with your email address Pin Recipe Save Go to Collections
    Prep Time 10 minutes mins
    Cook Time 15 minutes mins
    Total Time 25 minutes mins
    Course Breakfast & Brunch
    Cuisine American
    Servings 4
    Calories 365 kcal

    Equipment

    • Large skillet
    • Flat head wooden spoon
    • chef knife
    • cutting board

    As an Amazon Associate I earn from qualifying purchases.

    Ingredients
      

    • 4 cups leftover baked potato skins on, diced
    • 1 small onion diced
    • 2 slices bread preferably the heels
    • 1 cup reduced-fat cheddar cheese
    • 5 slices bacon crumbled
    • 1 tablespoon bacon drippings
    • 1 tablespoon butter

    Instructions
     

    • Cook bacon in hot skillet until crisp. Remove from pan and set aside to cool.
    • Remove all but 1 tablespoon bacon fat from pan.
    • Add onion to bacon fat and cook over medium heat, 1-2 minutes, until they begin to turn translucent.
    • Add butter to onion and let melt and bubble. Place potatoes and bread pieces in skillet with butter and onions. Toss to coat with butter.
    • Cook over medium heat for 10 minutes, tossing occasionally.
    • Turn heat down to low.
    • Sprinkle cheddar cheese over top of potatoes. Top with crumbled bacon.
    • Sprinkle with chives.
    • Serve with salt and pepper to taste.

    Nutrition

    Serving: 1gCalories: 365kcalCarbohydrates: 45gProtein: 19gFat: 12gSaturated Fat: 5gPolyunsaturated Fat: 6gCholesterol: 32mgSodium: 685mgFiber: 4gSugar: 4g
    Keyword Cheesy Bacon Home Fries
    Tried this recipe?Mention @grumpyshoneybunch or tag #grumpyshoneybunch!

    Chocolate Cupcakes with Bailey's Irish Cream Frosting

    March 10, 2017 by Shelby Law Ruttan 19 Comments

    With a deep, dark chocolate flavor, these Chocolate Cupcakes with Bailey's Irish Cream Frosting are a great way to celebrate St. Patrick's Day!  The cupcakes are so easy to put together and the frosting is out of this world delicious!

    Chocolate Cupcakes with Bailey's Irish Cream Frosting
    This year to celebrate St. Patrick's Day I decided to doctor up my Chocolate Mayonnaise Cupcakes, frost with an Irish Cream Buttercream frosting and sprinkle with green and gold sugars. Simple, easy, delicious!

    Chocolate Cupcakes with Bailey's Cream Frosting

    I started with Nanny's Mayonnaise Cake recipe, substituted some Irish Cream Liquor for some of the water and made a dozen cupcakes.

    Chocolate Cupcakes with Bailey's Cream Frosting
     
    I love the deep dark chocolate flavor and moistness to this particular cupcake recipe. This cupcake recipe will always be my favorite!
     
    Chocolate Cupcakes with Bailey's Cream Frosting
    The buttercream is just that, smooth, buttery, and delicious with a nice hit of Irish Cream Liqueur giving it that perfect touch for your St. Paddy's Day Celebration!


    Pin it! Chocolate Cupcakes with Bailey's Irish Cream FrostingChocolate Cupcakes with Bailey's Cream Frosting


    📖 Recipe

    Chocolate Cupcakes with Bailey's Irish Cream Frosting

    Chocolate Cupcakes with Bailey's Irish Cream Frosting

    Shelby Law Ruttan
    A tender chocolate cupcake with a delicious Irish Cream spiked frosting!
    4.67 from 3 votes
    Prevent your screen from going dark
    Print FREE recipe card with your email address Pin Recipe Save Go to Collections
    Prep Time 20 minutes mins
    Cook Time 25 minutes mins
    Total Time 45 minutes mins
    Course Desserts
    Cuisine American
    Servings 24
    Calories 224 kcal

    As an Amazon Associate I earn from qualifying purchases.

    Ingredients
      

    For the Cupcakes

    • 1½ cups flour
    • ¾ cup sugar
    • ½ teaspoon salt
    • 1½ teaspoons baking soda
    • 3 tablespoons cocoa , heaping
    • ¾ cups mayonnaise
    • ½ cups water
    • ¼ cup Bailey's Irish Cream
    • 1 teaspoon vanilla extract

    For the Irish Cream Frosting

    • 8 ounces cream cheese at room temperature
    • 4 tablespoons butter at room temperature
    • 3 cups powdered sugar
    • 3 tablespoons Baileys Irish Cream , more if needed

    Instructions
     

    FOR THE CUPCAKES

    • Preheat the oven to 350°F. Line the cupcake pans with paper liners.
    • In a large mixing bowl, sift together the flour, sugar, baking powder, salt, and cocoa powder.
    • Make a well in the flour mixture and add the mayonnaise, water, Bailey's Irish Cream and vanilla. Mix with hand mixer on medium speed for 2 minutes, or until smooth.
    • Using a ¼ cup measure, scoop batter into the cupcake liners. Bake for approximately 20 minutes or until no longer wet on top and toothpick comes out clean. Transfer cupcakes to a wire rack and cool completely.

    FOR THE FROSTING

    • In a medium sized mixing bowl, blend together the cream cheese, butter, and Bailey's Irish Cream.
    • Gradually add the powdered sugar, to the cream cheese mixture, mixing well until well combined. Add more cream if needed to obtain spreading consistency.
    • This frosting will harden in the fridge, so plan to frost your cupcakes as soon as you are done making the frosting, If refrigerated, you will need to bring back to room temperature prior to frosting.

    Nutrition

    Serving: 1cupcakeCalories: 224kcalCarbohydrates: 29gProtein: 2gFat: 11gSaturated Fat: 4gPolyunsaturated Fat: 3gMonounsaturated Fat: 3gTrans Fat: 1gCholesterol: 18mgSodium: 209mgPotassium: 34mgFiber: 1gSugar: 22gVitamin A: 190IUCalcium: 13mgIron: 1mg
    Keyword Baileys Irish Cream Frosting, Chocolate Cupcakes
    Tried this recipe?Mention @grumpyshoneybunch or tag #grumpyshoneybunch!

    Shrimp Enchiladas Recipe

    March 6, 2017 by Shelby Law Ruttan 16 Comments

    Featured Image for Shrimp Enchiladas Recipe

    This creamy Shrimp Enchiladas Recipe is topped with a green enchilada sauce made with pickled jalapenos and mild Monterey jack cheese. It is a creamy seafood recipe that shrimp lovers wont be able to get enough of!

    These shrimp enchiladas are my new favorite Mexican recipe. It is full of the Mexican flavors I love combined in a casserole and a cilantro garnish!

    Two shrimp enchiladas on a white plate topped with jalapeno cream sauce and chopped cilantro.
    [feast_advanced_jump_to]

    ❤️ Why you'll love it

    ✔️ It is an awesome recipe to make for Cinco de Mayo and for lent!

    ✔️ This easy shrimp enchiladas recipe makes weeknight dinners something to look forward to.

    ✔️ Leftovers reheat well and make a great lunch the next day.

    🥘 Ingredients

    Large size fresh shrimp

    Mushrooms, Onions, Red pepper (bell)

    Canned sliced or diced jalapenos, choose your own level of heat desired.

    Extra virgin olive oil

    Ground Cumin, chili Powder, and garlic cloves

    All-purpose flour

    Chicken broth

    Monterey jack cheese

    Fresh cilantro

    Corn tortillas

    Ingredients for enchilada recipe.

    🔪 Instructions

    For the filling

    1. In a large bowl, toss shrimp with ¾ teaspoon all purpose seasoning, ¾ teaspoon dried cumin, and 1 teaspoon chili powder. Set aside.
    2. Add ½ tablespoon of oil to a large skillet and heat until hot. Stir in the mushrooms, onions, red bell pepper, pickled jalapenos, and garlic cloves. Cook for 7 minutes, until the mushrooms have released their water and onions are translucent. Transfer the vegetable mixture to a small bowl and set aside.
    3. Over medium high heat, add remaining ½ tablespoon oil and heat until hot. Add the shrimp mixture to skillet and cook for 5 minutes, until shrimp just turn opaque. Remove from the heat and set aside to cool.

    For the Jalapeno cream sauce

    1. In a medium saucepan, melt the butter until bubbly. Whisk in the flour, salt, and pepper, and cook stirring constantly for 1 minute, until the flour mixture begins to brown lightly.
    2. Whisk in the chicken broth, jalapenos, and jalapeno brine. Continuously whisk and cook over medium heat for 3 minutes, or until sauce begins to bubble and thicken.
    3. Stir one cup of the Monterey jack cheese into the cream sauce. Cook and stir until cheese has melted. Remove from the heat and set aside.
    Roasted Shrimp Enchiladas

    How to make the enchiladas

    1. Fill each tortilla with shrimp filling by spreading ¼ cup shrimp mixture slightly to the edge of one side of the tortilla.
    2. Roll to enclose the filling and lay the enchilada seam-side down in prepared baking dish that has been sprayed with cooking spray.
    3. Pour the jalapeno cream sauce over top of the enchiladas and bake at for 30 minutes, or until sauce is bubbly.
    4. Remove the enchiladas from the oven and sprinkle with cilantro leaves. (if using)

    🥄 Equipment

    9 x 13 baking dish

    Large skillet

    Medium saucepan

    Hand whisk

    Rubber spatula

    🥫Storage

    Store any leftover shrimp enchiladas in the refrigerator up to 3 days or in the freezer up to 3 months.

    📖 Variations

    • If you prefer flour tortillas, they can be substituted for the corn tortillas.
    • For a little extra heat, substitute pepper jack cheese for the Monterey jack cheese or substitute with a Mexican blend cheese.
    • Instead of cooking the shrimp in a skillet, place the shrimp and veggies on a sheet pan and roast at 400 degrees for 7-10 minutes.
    Filled corn tortillas in a blue casserole dish with creamy jalapeno sauce and shredded cheese on top.

    💭 Tips

    A quick tip for making the creamy enchilada sauce fast: Use 2 cups of green enchilada sauce (make your own or buy it) and stir in ½ cup of sour cream. Use as directed for the sauce.

    🙋 FAQ's

    Can you use pre-cooked frozen shrimp to make these enchiladas?

    Yes, be sure to thaw the shrimp completely and toss in with the veggie mixture without cooking.

    How do you reheat enchiladas?

    The best way to reheat this enchilada recipe is on a microwave safe plate for 45-60 seconds, or until warm thru.

    Do you soften the tortilla before adding the filling?

    If the tortillas are at room temperature, you will not need to soften the tortillas.

    Can you control the amount of heat in the jalapeno cream sauce?

    You can control the spicy factor by using milder peppers or using less pickled jalapenos.

    Roasted Shrimp Enchiladas

    📚 Related Recipes

    Green Chicken Enchiladas - low carb recipe

    Chicken Enchilada Casserole - low carb recipe

    Cheese Enchiladas with Red Sauce

    Turkey Tostadas (with leftover turkey)

    Homemade Salsa for Canning

    🍽 Serve with...

    Serve these Shrimp Enchiladas with a dollop of sour cream and homemade guacamole.

    🏫 The last word

    The shrimp size can be small to medium as long as you are using one pound. If using the large shrimp, the next time I could chop it into smaller pieces to make the filling of the enchiladas easier.

    I highly recommend cooking raw shrimp for the flavor factor. While pre-cooked frozen shrimp that has been thawed can be used, it usually is tasteless and lacks in flavor.

    Don't forget to check out my Amazon storefront for some of my favorite products!

    When you make this recipe, please comment below and let me know what you think. I'd love it if you tag me on Instagram @grumpyshoneybunch or #grumpyshoneybunch so I can see your photos!

    If you love this recipe, please leave a ⭐⭐⭐⭐⭐ rating


    📖 Recipe

    Featured Image for Shrimp Enchiladas Recipe

    Easy Shrimp Enchiladas with Cheesy Jalapeno Sauce

    Shelby Law Ruttan
    A delicious creamy, cheesy Shrimp Enchiladas recipe with a white cream sauce jalapenos and make the perfect Mexican recipe for Cinco de Mayo!
    5 from 4 votes
    Prevent your screen from going dark
    Print FREE recipe card with your email address Pin Recipe Save Go to Collections
    Prep Time 10 minutes mins
    Cook Time 30 minutes mins
    Total Time 40 minutes mins
    Course Main Dish
    Cuisine Mexican
    Servings 5
    Calories 312 kcal

    As an Amazon Associate I earn from qualifying purchases.

    Ingredients
      

    For the Shrimp Filling:

    • 1 pound raw shrimp peeled, deveined and chopped into bite sized pieces
    • 1 cup chopped mushrooms
    • ¼ cup diced onions
    • ½ cup diced red bell pepper
    • ¼-½ cup pickled jalapenos , diced
    • 2 cloves garlic , chopped
    • 1 tablespoon olive oil , divided
    • ¾ teaspoon salt
    • ¾ teaspoon ground cumin
    • 1 teaspoon chili powder

    for the Jalapeno Cream Sauce:

    • 2 tablespoons unsalted butter
    • 2 tablespoons flour
    • 1¾ cups chicken broth
    • ¼-½ cup pickled jalapenos ,diced
    • ¼ cup pickled jalapeno brine
    • 1 cup monterey jack cheese ,shredded
    • Sea salt and freshly ground black pepper to taste
    • ¼ cup fresh cilantro , chopped

    Remaining ingredients:

    • 10 corn tortillas
    • cooking spray

    Instructions
     

    For the filling

    • In a large bowl, toss shrimp with ¾ teaspoon all purpose seasoning, ¾ teaspoon dried cumin, and 1 teaspoon chili powder. Set aside.
    • Add ½ tablespoon of oil to a large skillet and heat until hot. Stir in the mushrooms, onions, red bell pepper, pickled jalapenos, and garlic cloves. Cook for 7 minutes, until the mushrooms have released their water and onions are translucent. Transfer the vegetable mixture to a small bowl and set aside.
    • Over medium high heat, add remaining ½ tablespoon oil and heat until hot. Add the shrimp mixture to skillet and cook for 5 minutes, until shrimp just turn opaque. Remove from the heat and set aside to cool.

    For the jalapeno cream sauce

    • In a medium saucepan, melt the butter until bubbly. Whisk in the flour, salt, and pepper, and cook stirring constantly for 1 minute, until the flour mixture begins to brown lightly.
    • Whisk in the chicken broth, jalapenos, and jalapeno brine. Continuously whisk and cook over medium heat for 3 minutes, or until sauce begins to bubble and thicken.
    • Stir one cup of the Monterey jack cheese into the cream sauce. Cook and stir until cheese has melted. Remove from the heat and set aside

    How to make the enchiladas

    • Fill each tortilla with shrimp filling by spreading ¼ cup shrimp mixture slightly to the edge of one side of the tortilla.
    • Roll to enclose the filling and lay the enchilada seam-side down in prepared baking dish that has been sprayed with cooking spray.
    • Pour the jalapeno cream sauce over top of the enchiladas and bake at 350°F for 30 minutes, or until sauce is bubbly.
    • Remove the enchiladas from the oven and sprinkle with cilantro leaves. (if using)

    Nutrition

    Serving: 2enchiladasCalories: 312kcalCarbohydrates: 33gProtein: 11gFat: 17gSaturated Fat: 8gPolyunsaturated Fat: 2gMonounsaturated Fat: 6gTrans Fat: 1gCholesterol: 34mgSodium: 1281mgPotassium: 390mgFiber: 6gSugar: 4gVitamin A: 1422IUVitamin C: 23mgCalcium: 233mgIron: 2mg
    Keyword Easy Shrimp Enchiladas, Shrimp Enchiladas, Shrimp Enchiladas Recipe
    Tried this recipe?Mention @grumpyshoneybunch or tag #grumpyshoneybunch!

    Nanny's Sugar Cookies with Orange Moscato Frosting

    February 26, 2017 by Shelby Law Ruttan 12 Comments

    Nanny's Sugar Cookies

    Nanny's Sugar Cookies are an old fashioned recipe with a little bit of a modern upgrade! These sugar cookies are frosted with a creamy and sweet orange moscato frosting, then sprinkled with sparkling colored sugars. A great cookie to make and share during March Madness (think sugar sprinkles with your team colors) or any other event where you have a gathering of friends!

    Nanny's Sugar Cookies

    This post was written as part of the CK Mondavi Ambassador program. All opinions are my own. #CKMondaviGameDay #CKMondaviAmbassador 

    When I think wine, I usually think cheese. I'm such a cheese fanatic. I am also not normally a sweet wine kind of gal. However, when I opened my bottle of Moscato and taste tested it, I was pleasantly surprised to find that it was not too sweet. At that first taste, I knew that it would partner well with Nanny's Sugar Cookies.

    Nanny's Sugar Cookies

    Nanny's cookie recipe was handed down to me, and originally came to Nanny through her mom. So this cookie has been made for a few generations now and has been reinvented with this delicious frosting accent! Whenever I see cookies on the cutting board like this, I remember my Nanny cutting her cookies out and of the days she and I would bake cookies together. Moment of real nostalgia here.

    Nanny's Sugar Cookies

    To frost or not to frost your sugar cookies?

    The frosting for these cookies was absolutely divine. The CK Mondavi Moscato Wine worked perfectly in complementing the orange extract in the cookie.  These also went really well with a glass of wine on the side! 🙂 These cookies also passed the test of my sweets loving attorney in our office. She gave them the two thumbs up!

    Nanny's Sugar Cookies

    I would have loved to have Nanny here with me when making this particular recipe and I know she would have loved getting her fingers into the frosting with me! I had a hard time not wanting to lick the knife I was frosting the cookies with. Well, ok, so I did lick the knife, but not until I was done with frosting. 😉

    Nanny's Sugar Cookies

    Learn more about CK Mondavi by checking them out online, and following on Facebook, Twitter, Pinterest, Instagram, and YouTube.

    Nanny's Sugar Cookies

    Find more posts by other CK Mondavi Ambassadors by following the hashtag #CKMondaviAmbassador and be sure to visit the CK Mondavi Ambassador page!

    Nanny's Sugar Cookies

    Subscribe to Grumpy's Honeybunch and get my Soft Cookie e-book free to all subscribers!


    Pin it! Nanny's Sugar Cookies with Orange Moscato FrostingNanny's Sugar Cookies


    📖 Recipe

    Nanny's Sugar Cookies

    Nanny’s Sugar Cookies with Orange Moscato Frosting

    Shelby Law Ruttan
    Nanny’s Sugar Cookies are an old fashioned recipe with a little bit of a modern upgrade! These sugar cookies are frosted with a creamy and sweet orange moscato frosting, then sprinkled with sparkling colored sugars.
    5 from 1 vote
    Prevent your screen from going dark
    Print FREE recipe card with your email address Pin Recipe Save Go to Collections
    Prep Time 2 hours hrs 10 minutes mins
    Total Time 2 hours hrs 10 minutes mins
    Course Cookie Recipes, Desserts
    Cuisine American
    Servings 24 cookies
    Calories 191 kcal

    As an Amazon Associate I earn from qualifying purchases.

    Ingredients
      

    For the Cookies:

    • 2 cups sifted flour
    • ¼ teaspoon salt
    • 1½ teaspoon baking powder
    • ½ teaspoon freshly ground nutmeg
    • 2 teaspoons fresh grated orange rind or 1 teaspoon dried
    • ½ cup unsalted butter
    • 1 cup granulated sugar
    • 2 large eggs well beaten
    • 2 tablespoons milk

    For the Frosting

    • 3 cups confectioners sugar
    • 4 tablespoons unsalted butter melted
    • 1 teaspoon orange extract
    • 4 tablespoons CK Mondavi Moscato wine
    • 3 tablespoons half and half

    Instructions
     

    • Pre-heat oven to 350.
    • In a large mixing bowl, add butter, sugar, eggs and orange rind and mix until creamy. Set aside.
    • Sift together flour, salt, baking powder and nutmeg. Add to wet mixture alternately with milk, beginning and ending with flour.
    • Chill dough for at least 2 hours.
    • Remove from refrigerator and roll dough out onto floured cutting board, using a sprinkling of flour where needed to keep dough from sticking to board and rolling pin.
    • Cut cookies with round cookie cutter.
    • Bake until slightly brown around the edges, about 10 minutes.
    • While cookies are baking, assemble the frosting. Stir together melted butter, confectioner's sugar, orange extract and moscato wine until combined. Add half and half 1 tablespoon at a time until of spreading consistency. You may or may not need all of the half and half depending on the creaminess you want to obtain.

    Notes

    This is a recipe that Gram had in her kitchen all the time. Sometimes she would frost them but would always leave a few unfrosted. Everyone knew where to find her cookies. My Aunt Marlene told me that this particular recipe came from Great Grandma Lottie Clark's cookbook. (Nanny's mom)

    Nutrition

    Serving: 1cookieCalories: 191kcalCarbohydrates: 32gProtein: 2gFat: 6gSaturated Fat: 4gPolyunsaturated Fat: 1gMonounsaturated Fat: 2gTrans Fat: 1gCholesterol: 32mgSodium: 59mgPotassium: 24mgFiber: 1gSugar: 23gVitamin A: 208IUVitamin C: 1mgCalcium: 24mgIron: 1mg
    Keyword Sugar Cookies Recipe, Sugar Cookies with Orange Moscato Frosting
    Tried this recipe?Mention @grumpyshoneybunch or tag #grumpyshoneybunch!


    3.5.3226


    Nanny's Sugar CookiesNanny's Sugar Cookies with Orange Moscato Frosting

    Favorite Pork Chop Recipes

    February 21, 2017 by Shelby Law Ruttan 6 Comments

    Favorite Pork Chop Recipes

    Today I want to share with you some favorite pork chop recipes from the #SundaySupper line up last week! I absolutely love finding easy to make recipes and I love finding easy to make pork chop recipes! I'm so excited about them that I have to share with you my pick of the crop for recipes that fit my flavor profiles and are my top picks!

    Favorite Pork Chop Recipes

    • Quick and Easy Maple Glazed Pork Chops - Sprinkles and SproutsFavorite Pork Chop Recipes
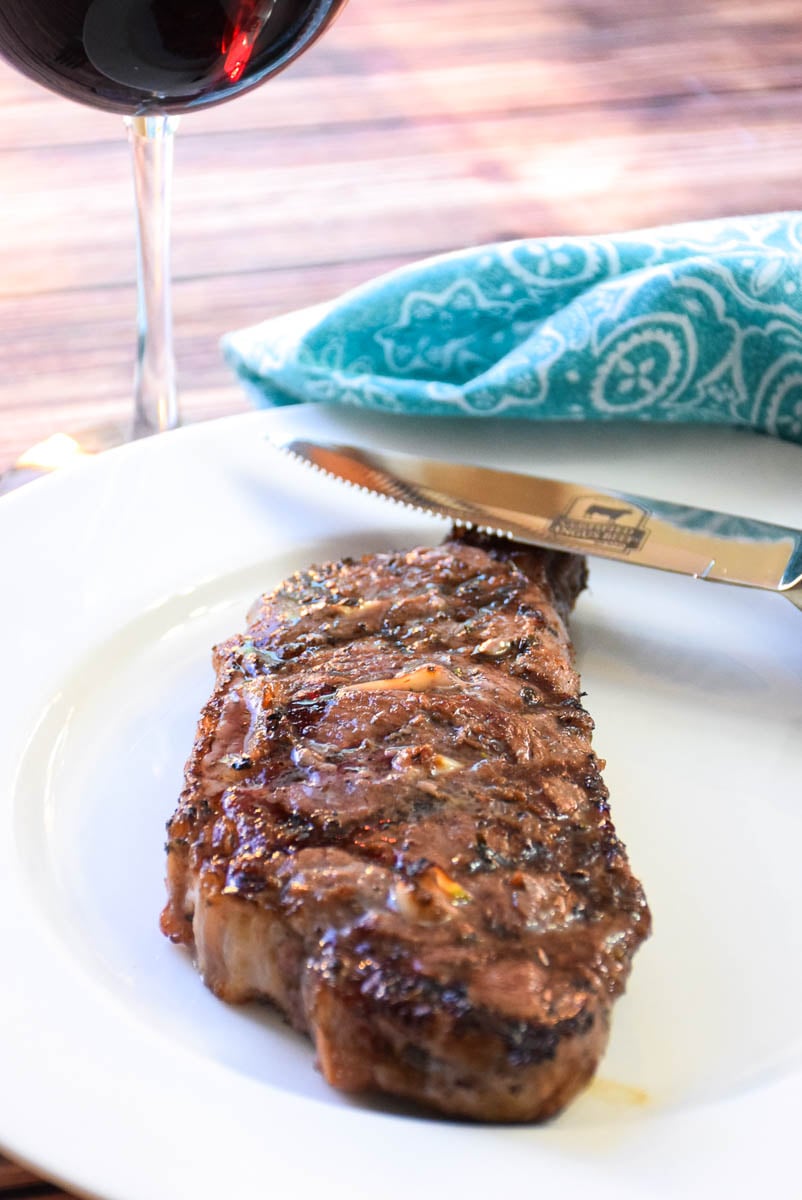
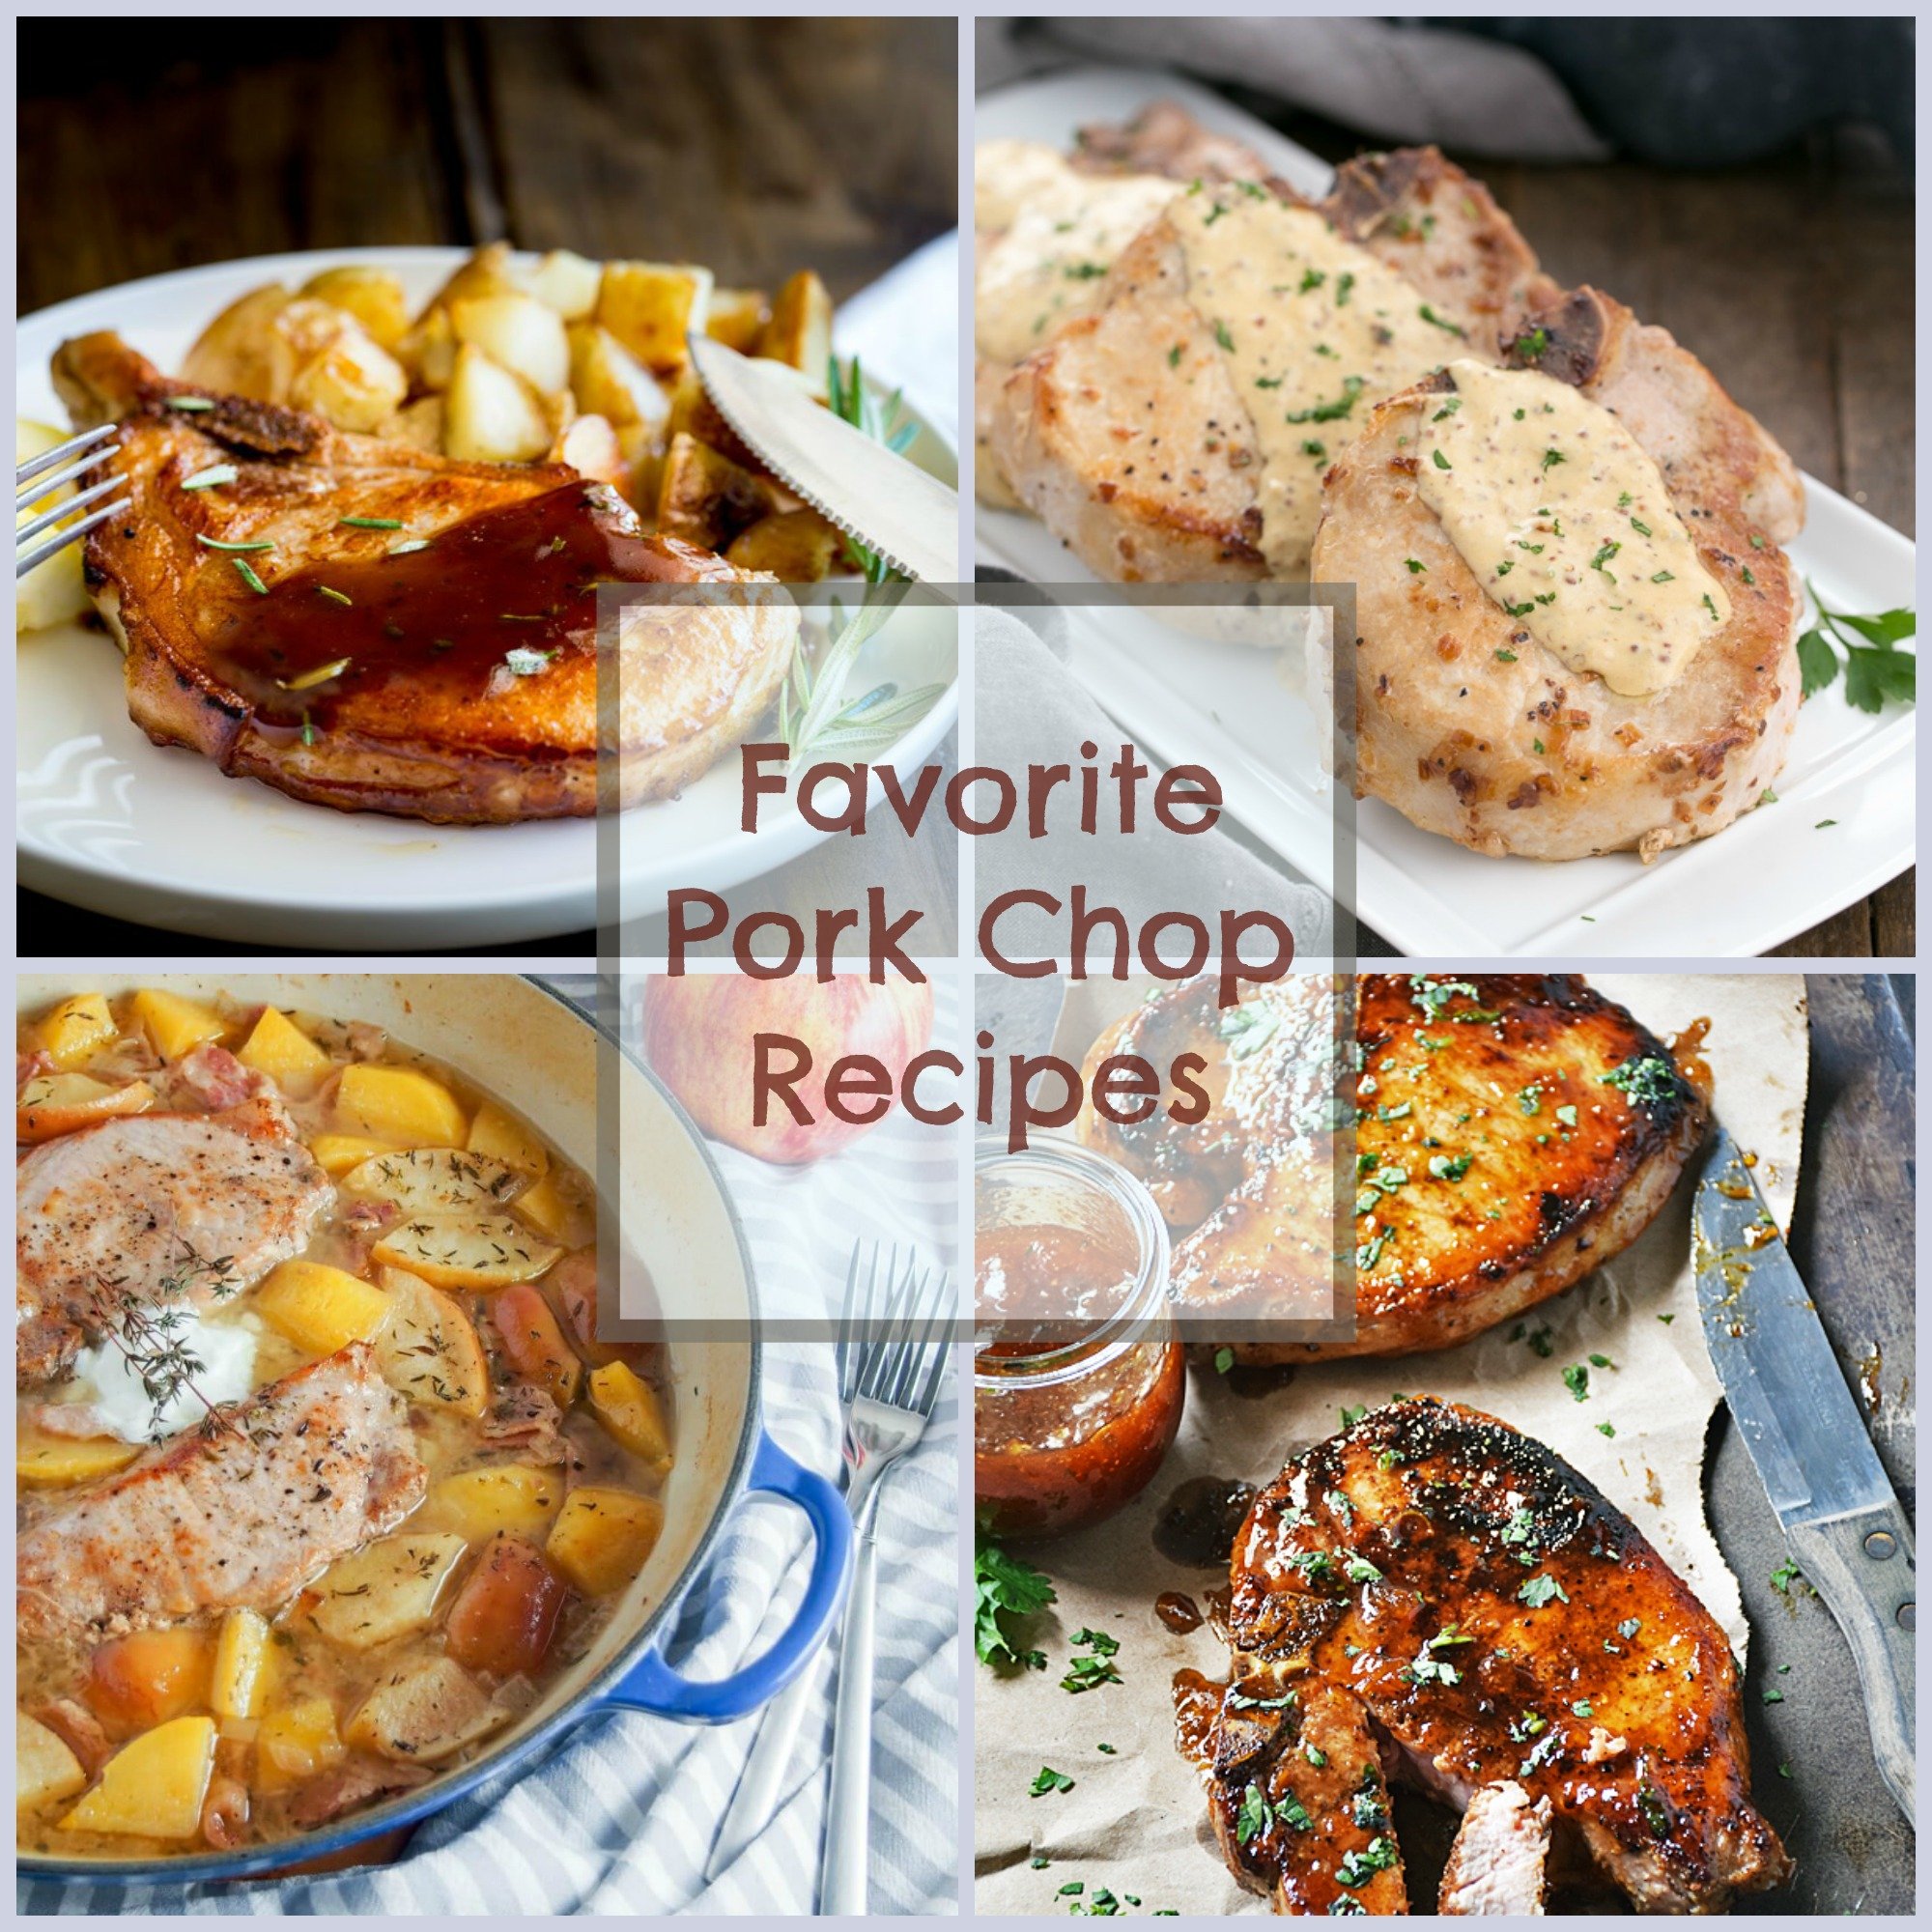
These chops are the first on my list to make. Like ASAP! I love how beautifully browned the chop is and that maple glaze is a winner in my book. Being a girl from a maple producing family, I have always enjoyed pure maple syrup and nothing can beat that!
    • Cider Braised Pork Chops - Caroline's CookingEasy Pork Chop RecipesThe magic words for me with this recipe were hard cider and bacon. Add some apples and pork and you are bound to have a winner of a meal!
    • Slow Cooker BBQ Pork Chops - Big Bears WifeEasy Pork Chop RecipesAnytime you put pork in the slow cooker, you are guaranteed to have a succulent meal come out! These chops are a surefire winner to have ready when you get home from work and can have dinner on the table quickly!
    • Braised Pork Chops in Country Gravy - Grumpy's HoneybunchBraised Country Pork Chops
      These chops have been in my recipe repertoire for a long time now. Easy and delicious and guaranteed to not come out dry. Not to mention, they are on the lower calorie end for a chop with gravy!
    • Easy Cilantro Lime Pork Chops - Cooking ChatEasy Pork Chop Recipes
      Cilantro and lime have long been favorite flavors for me. I have to try this recipe just because it has those two words in it!
    • Pork Chops Dijonnaise - That Skinny Chick Can BakeEasy Pork Chop Recipes
      Don't these chops just look like they are perfect for guests? So simple to make and so full of flavor with the seasoning and sauce. This is an impressive meal!
    • Chili Rubbed Pork Chops with Apricot Ginger Glaze - Life Tastes GoodEasy Pork Chop Recipes
      Did someone say sweet heat?! You can just see that delicious chili and apricot glaze coating that chop making it want you to grab that fork and take that bite. I cannot wait to try this one either!
    • Skillet Tuscan Pork - A "Mindfull" MomFavorite Pork Chop Recipes
      This one pot meal is not only gorgeous but full of flavor! Another meal you can make with little effort to impress your guests!

    You won't want to miss next week’s #SundaySupper where we’ll be sharing Easy Mardi Gras Recipes! Until then, here are some more recipes for you to pursue and let me know what your favorite pork chop recipes would be!

    Pork Chops

    • Braised Orange Tomato Pork Chops by Cindy's Recipes and Writings
    • Braised Pork Chops with Country Gravy by Grumpy's Honeybunch
    • Breakfast Chops by Palatable Pastime
    • Brown Sugar and Balsamic Glazed Pork Chops by My Sweet Savings
    • Chili Rubbed Pork Chops with Apricot Ginger Glaze by Life Tastes Good
    • Cider Braised Pork Chops with Apple and Rutabaga by Caroline's Cooking
    • Creamy Apple Pork Chops by Savory Experiments
    • Easy Cilantro Lime Pork Chops by Cooking Chat

    Pork Chops

    • Easy One Pan Oven Roasted Pork Chops by Pies and Plots
    • Easy Oven Baked & Breaded Pork Chops by Hardly A Goddess
    • Fontina Pork Chops with Mushroom Sauce by Soulfully Made
    • Fried Pork Chops by Bottom Left of the Mitten
    • Grilled Boneless Pork Chops with Broccoli Rabe by Simple and Savory
    • Grilled Pork Chops with a Strawberry Balsamic Glaze by Recipes Food and Cooking
    • Indian-Spiced Pork Chop Potato Skillet by Sunday Supper Movement
    • Japanese-Style Pork Chops Tonkatsu by Asian In America
    • Mom's Cornflake Pork Chops by A Day in the Life on the Farm
    • Mushroom Smothered Pork Chops over Noodles by Hezzi-D's Books and Cooks

    And More Pork Chops

    • One Pan Pesto Pork Chops by Cricket's Confections
    • Pork & Peppers Stir Fry by Wholistic Woman
    • Pork Chops Dijonnaise by That Skinny Chick Can Bake
    • Pork Chops with Dirty Rice by Turnips 2 Tangerines
    • Pork Chops, Peperoncini and Potatoes by Tramplingrose
    • Prosciutto Wrapped Brie and Onion Stuffed Pork Chops by The Freshman Cook
    • Quick Brine Pork Chops with Brown Sugar Glaze by Sew You Think You Can Cook
    • Quick Easy Maple Glazed Pork Chops by Sprinkles and Sprouts
    • Skillet Tuscan Pork Chops by A Mind "Full" Mom
    • Slow Cooker BBQ Pork Chops by Big Bear's Wife
    • Slow Cooker Pork Chops with Mushroom Sauce by A Kitchen Hoor's Adventures
    • Spicy Maple-Glazed Pork Chops with Jalapeno Cheese Grits by The Weekend Gourmet
    • Vietnamese Grilled Pork Chop by Brunch-n-Bites

    Sunday Supper MovementJoin the #SundaySupper conversation on twitter on Sunday! We tweet throughout the day and share recipes from all over the world. Our weekly chat starts at 7:00 pm ET. Follow the #SundaySupper hashtag and remember to include it in your tweets to join in the chat. To get more great Sunday Supper Recipes, visit our website or check out our Pinterest board. Would you like to join the Sunday Supper Movement? It’s easy. You can sign up by clicking here: Sunday Supper Movement.

    Pin it! Favorite Pork Chop RecipesFavorite Pork Chop Recipes

    Homemade Latte

    February 20, 2017 by Shelby Law Ruttan 5 Comments

    Homemade Latte

    This shop has been compensated by Collective Bias, Inc. and its advertiser.
    All opinions are mine alone. #LatteMadeEasy #CollectiveBias 

    Homemade Latte

    It is no secret that I love my coffee and I really love my specialty coffee! I just don't love the price you pay at a coffee shop to get said coffee. So, when I found International Delight® One Touch Latte™ - I was all over it! Making a Homemade Latte just got 100 times easier and more affordable!

    Homemade Latte

    Right now, I am all about saving money. We are in the beginnings of a kitchen remodel. A complete and total renovation. So, every dollar saved really counts! For less than the price of one small latte at a coffee shop, you can make up to seven of them right at home, and it is as easy as can be! That is a lot of savings and in just 3-steps, you will have a hot, sweetened, foamy on top mug of deliciousness.

    Homemade Latte

    While I do have my own latte maker at home, sometimes I don't feel like using it and dirtying up my foamer. Not to mention, I can only make 1 mug at a time. With International Delight® One Touch Latte™, I can brew a pot of regular coffee, fill the mug about ⅔ full, give the can a shake, point into the mug, shoot for 5-7 seconds and serve Grumpy and I both at the same time.

    Homemade Latte

    I love that I can stop at Walmart and pick up a can of this frothing creamer to take to work with me. It’s easy to find right in the dairy section with all the other creamers!

    Homemade Latte

    Now I can turn an ordinary cup of coffee into a latte and have it hot at my desk as I start the day! This frothing coffee creamer comes in three different flavors, French Vanilla, Caramel, and Mocha, making it easy to change up my flavor profiles all week long!

    I also love that I now can have my latte when I travel home to visit my parents and can't wait to share this easy and inexpensive way to have a coffeehouse latte right at home.

    Here is how to Point. Press. Obsess!

    Yes! It is that easy to turn your everyday coffee into a sweet frothy latte! What flavor will you try first?

    Pin it! Homemade Latte

    Homemade Latte

    Homemade Mozzarella Sticks

    February 12, 2017 by Shelby Law Ruttan 17 Comments

    Featured Image for Homemade Mozzarella Sticks.

    Homemade Mozzarella Sticks are lightly battered in a bread crumb mixture with Italian seasoning and oven baked until golden brown outside and stringy inside. They are a great appetizer that is perfect for dipping into your favorite marinara sauce or ranch dressing.

    These homemade mozzarella sticks with the gooey cheese inside are a great recipe to serve at your next party food line up. A healthy recipe without all the added fat you get from fried cheese sticks and easily adapted to use in the air fryer.

    Homemade Mozzarella Sticks on a Serving Platter with One broken in half and dipping sauce in background.

    ❤️ Why you'll love it

    ✔️ It is an easy recipe to make at home and are healthy mozzarella sticks with excellent flavor and without deep frying.

    ✔️ These are easy to prep ahead of time and store unbaked cheese sticks in an airtight freezer bag until ready to bake.

    ✔️ Homemade cheese sticks are a finger foods that far more budget friendly than store bought.

    Ingredients for cheese stick recipe.

    🥘 Ingredients

    Whole milk mozzarella cheese sticks, frozen

    Panko crumbs

    Garlic powder

    Dried oregano

    Dried basil

    Red pepper flakes

    Large eggs , beaten

    Breaded unbaked homemade mozzarella sticks on a baking sheet.

    🔪 Instructions

    1. Line a large baking sheet with parchment paper and set aside.
    2. In a blender on high speed, whiz the panko bread crumbs, garlic powder, oregano, basil, salt, and red pepper flakes (if using) for 10 seconds. Place panko mixture in a shallow bowl.
    3. In another shallow bowl, whisk the eggs until well blended.
    4. Dip a frozen mozzarella stick in the egg mixture, then dip in the bread crumbs. Repeat with remaining mozzarella sticks.
    5. Place coated mozzarella stick on a baking sheet sprayed with cooking spray. Spray the tops of the cheese sticks with a coating of cooking spray. Place tray in the freezer and freeze for 15 minutes and preheat the oven to 400 degrees.
    6. Remove the baking sheet from the freezer and Bake mozzarella sticks for 5 minutes. Remove from oven, gently turn over mozzarella sticks. Place back in oven for 4 minutes, or until golden brown.

    🥄 Equipment

    Blender

    Baking sheet

    Parchment paper

    Shallow bowls

    Hand whisk

    Tongs

    Stringy Cheese Pull

    🥫Storage

    Store homemade mozzarella sticks in the fridge up to 3 days, in the freezer in an airtight container up to 3 months.

    📖 Variations

    • Substitute Italian seasoning for the basil and oregano.
    • For a thicker breading, add a second coating of egg wash and bread crumbs.
    • Substitute Italian breadcrumbs for the panko and seasonings.

    💭 Tips

    • For best results, freeze cheese sticks before and after breading to help prevent the cheese from melting out of the bread crumb coating when baking.
    • If freezing to bake later, place breaded sticks on a baking sheet and freeze for 15 minutes. Remove from the freezer and store in an airtight bag in the freezer.
    • If you can find full fat mozzarella sticks of string cheese, these will be more stringy and gooey than part-skim cheese sticks.

    FAQ about this recipe

    Can I use part-skim mozzarella cheese sticks instead of whole milk?

    Yes. As a matter of fact, part-skim cheese sticks may hold up better. They just will not be as stringy.

    Can I substitute bread crumbs or crushed pork rinds for panko?

    Yes, you can substitute either. If your low carb, go with the pork rinds for sure. If you do sub bread crumbs, be aware that your coating may not come out as crispy.

    Why did the cheese melt out of my coating?

    Well, this could happen just because it is cheese, and cheese melts! The best way to try and avoid this is to be sure your cheese sticks are frozen when you start, and put them back in the freezer for a while before you bake them. There's little you can do about this when baking cheeses.

    📚 Related Recipes

    • Baked Eggplant Fries with Basil Dipping Sauce
    • Air Fryer BBQ Boneless Chicken Wings
    • Baked Chipotle Avocado Fries
    • Crispy Baked Sweet Hot Chicken Wings
    • Fried Pickles

    🍽 Serve with...

    Serve these melty mozzarella sticks with marinara sauce as a snack or appetizer to any party.

    Homemade Mozzarella Sticks

    Don't forget to check out my Amazon storefront for some of my favorite products!

    When you make this recipe, please comment below and let me know what you think. I'd love it if you tag me on Instagram @grumpyshoneybunch or #grumpyshoneybunch so I can see your photos!

    If you love this recipe, please leave a ⭐⭐⭐⭐⭐ rating

    📖 Recipe

    Featured Image for Homemade Mozzarella Sticks.

    Homemade Mozzarella Cheese Sticks

    Shelby Law Ruttan
    Mozzarella cheese sticks are breaded and oven baked until golden brown for a delicious appetizer that is perfect for your next party! Serve these with a marinara sauce on the side for dipping.
    4.50 from 24 votes
    Prevent your screen from going dark
    Print FREE recipe card with your email address Pin Recipe Save Go to Collections
    Prep Time 10 minutes mins
    Cook Time 10 minutes mins
    Total Time 20 minutes mins
    Course Appetizer
    Cuisine American
    Servings 6
    Calories 250 kcal

    As an Amazon Associate I earn from qualifying purchases.

    Ingredients
      

    • 12 ounces whole milk mozzarella cheese sticks , frozen
    • ¾ cup panko crumbs
    • 1 teaspoon garlic powder
    • ¼ teaspoon oregano
    • ¼ teaspoon basil
    • ¾ teaspoon salt
    • ½ teaspoon red pepper flakes
    • 2 large eggs , beaten

    Instructions
     

    • Line a large baking sheet with parchment paper and set aside.
    • In a blender on high speed, whiz the panko bread crumbs, garlic powder, oregano, basil, salt, and red pepper flakes (if using) for 10 seconds. Place panko mixture in a shallow bowl.In another shallow bowl, whisk the eggs until well blended.
    • Dip a frozen mozzarella stick in the egg mixture, then dip in the bread crumbs. Repeat with remaining mozzarella sticks.
    • Place coated mozzarella stick on a baking sheet sprayed with cooking spray. Spray the tops of the cheese sticks with a coating of cooking spray. Place tray in the freezer and freeze for 15 minutes and preheat the oven to 400 degrees.
    • Remove the baking sheet from the freezer and Bake mozzarella sticks for 5 minutes. Remove from oven, gently turn over mozzarella sticks. Place back in oven for 4 minutes, or until golden brown.

    Notes

    Some sticks may have some cheese ooze out, this is ok, but if you see this happening, it is time to remove them from the oven.

    Nutrition

    Serving: 2mozzarella sticksCalories: 250kcalCarbohydrates: 12gProtein: 17gFat: 15gSaturated Fat: 8gPolyunsaturated Fat: 6gCholesterol: 107mgSodium: 743mgFiber: 1gSugar: 2g
    Keyword Homemade Mozzarella Cheese Sticks
    Tried this recipe?Mention @grumpyshoneybunch or tag #grumpyshoneybunch!

    Steak and Potato Pizza - Hearty and Delicious

    January 29, 2017 by Shelby Law Ruttan 39 Comments

    Featured image for steak and potato pizza recipe.

    Are you looking for a crowd-pleasing easy football recipe for the upcoming big game day? If so, this Steak and Potato Pizza is going to fit the bill and meet your expectations!

    This post for Steak and Potato Pizza is sponsored by the Idaho® Potato Commission in conjunction with Sunday Supper LLC. All opinions are my own.

    Overhead shot of whole steak and potato pizza on a pizza stone.

    This pizza is chock full of lean steak, golden potatoes cubes, and cheese! Pure good and hearty finger food for all those happy gamers! So, get that pizza dough recipe going and let's make some hearty party food!

    Scroll to the end of this post to find out how to keto adapt this recipe!

    Steak and Potato Pizza for the win!

    If you love a dinner filled with lean flavorful steak and potatoes, then this pizza is for you! Made with golden Idaho® potatoes and complemented with cheese both mild and bold. The garlic flavored steak bites, and red onion slices, are like having a steakhouse dinner except your plate is the pizza crust! 

    I absolutely loved this pizza! It is a great way to use any leftover steak you may like, is hearty and satisfying and will win over a football party crowd in a heartbeat!

    whole gold potato with potato peeler in background

    The best way to cook an Idaho potato

    It is best to cook the potato ahead of time for this recipe. While preparing to write this post, I went over to the Idaho® Potato website to see what I could learn about the best method of cooking.

    They recommend cooking the potatoes with the skins on. Baking the potato is the best way to get all of its nutrients. Before boiling, scrub the potato clean and once they are cooked, you can remove the skins if you wish.

    cooked and cubed potatoes in a glass bowl

    Did you know that you can cook potatoes in your microwave and still have them come out like you had baked them in the oven? Idaho® Potato tells you how to do it on their website!

    Toppings for Steak and Potato Pizza

    Boosting the flavor of your potatoes

    I decided to boil my potatoes for this recipe. When I did so, I added some salt and garlic cloves to infuse flavor into this recipe.

    Once the potatoes were cooked I had a hard time keeping my fingers out of the bowl and snatching up a few pieces to pop in my mouth. I absolutely love the golden Idaho® Potato and how creamy and flavorful it is!

    Whole Steak and Potato Pizza ona  pizza stone

    How to make a Steak and Potato Pizza

    Now, about this Steak and Potato Pizza! It is so easy to have it ready to put together in no time flat for your party gathering. You can make your own pizza dough recipe, or buy a premade dough right at the grocery store.

    Steak and Potato Pizza is also a great way to use up any leftover steak you may have in the refrigerator. If you don't have leftover, it is cool to buy the stir-fry steak pieces in the store and quickly cook them up with some butter and lots of garlic. You want a lot of garlic flavor in this pizza!

    Steak and Potato Pizza sliced and on pizza stone

    For more information on Idaho® potatoes be sure to visit them on all their social channels!

    Substitutions

    Sometimes you may not have all the ingredients needed, but you do have something in your kitchen that will work. Here are a few substitution suggestions to help you out!

    • Canned potatoes - many will keep canned potatoes in their pantry, these will work great for the potato portion of this recipe.
    • Meat swap - this is a great way to use leftover burgers, chicken or steak.
    • Vegetarian - replace the steak with your favorite vegan protein. MorningStar Farms grillers are a great choice to try.
    • Keto version: Want to make this low carb and keto friendly? You absolutely can! Sub roasted radishes for the potatoes and use this keto pizza crust.

    Variations

    Giving the visitor ideas on how they can change this recipe to better suit their dinner guests, or their cultural cuisine, is a great way to increase the chances they make the recipe.

    • Spicy - add chili pepper flakes while cooking the steak to infuse heat into the dish or sprinkle with crispy fried jalapeno topping (affiliate link)
    • Deluxe - sprinkle with diced tomato and shredded lettuce and drizzle with ranch or blue cheese dressing.
    • Individual pizzas: use this two ingredient pizza dough and portion onto single serve pizza pans for party time fun!

    Related Recipes

    • Featured image for Ground Beef Pizza.
      Ground Beef Pizza
    • Featured image for Buffalo Chicken Pizza
      Buffalo Chicken Pizza Recipe
    • Garlic Butter Steak Bites on a white plate.
      Garlic Butter Steak Bites: Easy Air Fryer Recipe
    • Spicy Poutine Potato Skins

    When you make this recipe, please comment below and let me know what you think. I'd love it if you tag me on Instagram @grumpyshoneybunch or #grumpyshoneybunch so I can see your photos!

    If you love this recipe, please leave a ⭐⭐⭐⭐⭐ rating

    📖 Recipe

    Featured image for steak and potato pizza recipe.

    Steak and Potato Pizza Recipe

    Shelby Law Ruttan
    This hearty Steak and Potato Pizza is the perfect pizza for game day events! Packed with flavor and bite sized pieces of steak and potato, it is delicious topped with crumbly blue cheese and a drizzle of your favorite dressing.
    5 from 2 votes
    Prevent your screen from going dark
    Print FREE recipe card with your email address Pin Recipe Save Go to Collections
    Prep Time 15 minutes mins
    Cook Time 20 minutes mins
    Total Time 35 minutes mins
    Course Dinner
    Cuisine American
    Servings 8
    Calories 336 kcal

    Equipment

    • Pizza stone
    • Microwave safe bowl
    • Sharp knife
    • Pizza Cutter

    As an Amazon Associate I earn from qualifying purchases.

    Ingredients
      

    • 1 pound Pizza dough
    • 1½ cup lean steak , cut into bite sized pieces
    • 1 tablespoon butter
    • 2 cloves fresh garlic , chopped
    • 1½ cups shredded mozzarella cheese
    • ¼ cup crumbled blue cheese
    • 2 medium Potatoes , boiled and cubed
    • ½ cup sliced red onion

    Instructions
     

    • Press pizza crust out on a large pizza pan that has been coated with cooking spray. Melt butter in microwave and stir in garlic cloves. Spread this mixture over top of pizza crust. Layer as follows:
    • Mozzarella cheese, cubed potatoes, steak pieces, red onion.
    • Bake in 425 oven for 20 minutes or until crust is golden and cheese begins to turn brown.
    • Remove from oven and immediately sprinkle with blue cheese crumbles. Cut and serve.

    Notes

    Tip for If you are cooking your steak specifically for this recipe: I like to pan sear my steaks in butter, then put in the oven to finish off with crushed garlic and thyme sprigs. For this recipe I took the butter drippings and chopped the roasted garlic and put on the crust of the pizza before putting the cheese on.

    Nutrition

    Serving: 1sliceCalories: 336kcalCarbohydrates: 38gProtein: 21gFat: 11gSaturated Fat: 6gPolyunsaturated Fat: 1gMonounsaturated Fat: 3gTrans Fat: 0.1gCholesterol: 51mgSodium: 630mgPotassium: 427mgFiber: 2gSugar: 5gVitamin A: 219IUVitamin C: 4mgCalcium: 150mgIron: 3mgNet Carbohydrates: 37g
    Keyword Steak and Potato Pizza
    Tried this recipe?Mention @grumpyshoneybunch or tag #grumpyshoneybunch!

    Smokehouse Steak Quiche

    January 22, 2017 by Shelby Law Ruttan 23 Comments

    Smokehouse Steak Quiche

    Smokehouse Steak Quiche is a quick, easy, and delicious recipe that is perfect for breakfast, lunch, or dinner!  Fresh veggies, a grain packet, and flavor packet in the the Smokehouse Brussels Sprouts Mann's Nourish Bowl are all a part of this delicious recipe! While the bowl is a meal on its own, it turned out to be an amazing part of my quiche recipe.
    Smokehouse Steak Quiche

    This post is sponsored by Nourish Bowls in conjunction with a social media campaign through Sunday Supper LLC. All opinions are my own.

    It can be really challenging for me when it comes to meals during the week,  I want to provide healthy, delicious meals for Grumpy and me that don't make a mess in my kitchen. I also need quick because I hate to take too much of what is left of my evening hours. The last thing I want to do is have a bunch of dishes to wash after I spent time making dinner and then have little relax time before its time to go to bed.

    Smokehouse Steak Quiche

    Being that we are late diners, it is  even more important for our meals to be healthy. Our evening meal usually consists of a lean protein and vegetable. So, when I saw Mann's Nourish Bowls, I knew I had found a winner. Three minutes in the microwave, add some lean protein, and you have a complete meal.

    Smokehouse Steak Quiche

    While enjoying my Smokehouse Brussels Sprouts Nourish Bowl for lunch one day,  I realized that I could use the bowl as ingredients in a quiche for a meal and make muffin quiches that I could take to work with me for breakfast or lunch.

    Smokehouse Steak Quiche

    To make my Smokehouse Steak Quiche, I added to the cooked Mann's Nourish Bowl: cooked stir-fried lean beef (cut into cubes), reduced fat cheddar, eggs, almond milk, and a little salt and pepper.

    Smokehouse Steak Quiche

    This recipe made 8 muffin sized quiche (2 quiche per serving) and went great with a side salad of tomatoes, cucumbers and herbed goat cheese salad!

    Smokehouse Steak Quiche

    I'm so excited to have found Mann's Nourish Bowls for quick, easy, and nutritious meals and so is Sunday Supper! Today (January 22, 2017) there will be a Facebook live on the Sunday Supper Page at 4pmEST. Family Foodie is making one of her famous breakfast bowls using Nourish Bowls and at the end of the video a winner will be selected from the comment section to win a prize pack from Nourish Bowls! Make sure to be there to get in on the action and a chance to win!

    Be sure to follow Mann's on their social channels!

    Website | Facebook | Twitter | Instagram | Pinterest | YouTube

    Smokehouse Steak Quiche
    Author: Grumpy's Honeybunch
    Mann's Smokehouse Brussels Sprouts bring to life a meal full of nutrition that your entire family will love!
    Ingredients
    • 1 Mann's Smokehouse Brussels Sprouts Nourish Bowl
    • 1 cup cooked lean steak, cut into cubes
    • 3 large eggs
    • 1 cup reduced fat cheddar cheese
    • ½ cup almond milk
    • ¼ teaspoon salt
    • ⅛ teaspoon ground pepper
    Instructions
    1. Pre-heat oven to 350 degrees.
    2. Cook Nourish Bowl according to package directions. Set aside and allow to cool, about 10 minutes.
    3. Stir into Nourish Bowl, the steak cubes, eggs, cheddar cheese, milk, salt and pepper making sure to blend well.
    4. Place ½ cup portions of mixture into muffin tin cups that has been coated with cooking spray.
    5. Bake for 20 minutes, or until center of quiche no longer is wet.
    Serving size: 2 quiche Calories: 283 Fat: 18 Saturated fat: 5 Carbohydrates: 9 Sugar: 2 Fiber: 2 Protein: 23
    Notes
    For the beef, feel free to use leftover lean steak and cut into cubes. Stir fry beef that you can buy in the store is quick and easy to cook if you don't have leftover steak in your refrigerator 🙂 When I cook my steak, I normally season with salt, pepper, and garlic. If you do the same, I suggest omitting the salt and pepper in the ingredients list entirely.
    3.5.3226

    Nourish Bowls

    • Cooking for One with Mann's Nourish Bowls by Take A Bite Out of Boca
    • Easiest Southwest Chipotle Tacos by Recipes Food and Cooking
    • Easy Curry Cauliflower Rice Bowl with Egg by Renee's Kitchen Adventures
    • Gluten Free Family Dinner with Nourish Bowls by Cricket's Confections
    • Healthy Dinner Solutions for the Late-Shift by Cindy's Recipes and Writings
    • Healthy Eating on the Go by Wholistic Woman
    • How to Eat Like a Foodie and Stay Healthy by Go Epicurista
    • How to Eat Well When You Don't Feel Up To It by Monica's Table
    • How to Fit Veggies into a Jam-Packed Week with Nourish Bowls by Casa de Crews
    • How To Prepare Fresh Healthy Meals In A Snap by Dizzy Busy and Hungry
    • Keeping Fit with a Pesky Sweet Tooth by That Skinny Chick Can Bake
    • Monterey Risotto Enchiladas by Moore or Less Cooking
    • Nourishing a Healthy Soul by Family Foodie
    • Olive Oil-Poached Salmon Over Cauli-Rice Curry by Culinary Adventures with Camilla
    • Sesame Sriracha Bowl with Kimchi Tofu by kimchi MOM
    • Smokehouse Brussels Sprouts with Shrimp by Cooking Chat
    • Smokehouse Steak Quiche by Grumpy's Honeybunch
    • Southwest Chipotle Tuna Bowls with Pico De Gallo by Simple and Savory
    • Southwest Chipotle Grilled Chicken Bowl by The Chef Next Door
    • Southwest Chipotle Pulled Pork Naan Bread Pizza by The Freshman Cook

    Plus meet Gina Nucci, aka Gina Broccolini, one of the third generation family owners of Mann Packing - the creators of Nourish Bowls - in a Sunday Supper Movement Interview

    PIN IT - Pin Smokehouse Steak Quiche!

    Smokehouse Steak Quiche

    • « Previous Page
    • 1
    • …
    • 21
    • 22
    • 23
    • 24
    • 25
    • …
    • 37
    • Next Page »
    An image of Shelby Law Ruttan.

    Hey, I'm Shelby

    Shelby Law Ruttan is the cookbook author and food blogger behind HoneyB's Kitchen, where she shares scratch-made family recipes, comfort food, and easy home cooking inspired by generations of home cooks.

    About me

    Footer

    ↑ back to top

    About

    About Shelby Law Ruttan

    Privacy Policy

    Terms and Conditions of Use

    Accessibility Statement

    Contact Shelby

    Contact

    Work with me

    As an Amazon Associate I earn from qualifying purchases.

    Copyright © 2026 Foodie Pro on the Foodie Pro Theme

    Rate This Recipe

    Your vote:


    A rating is required
    A name is required
    An email is required