
Apple Loaf Cake is a buttery almond flavored pound cake loaded with cinnamon sugared apples sprinkled with sliced amaretto soaked almonds and baked to sweet perfection! It is a great recipe for fall baking that is made with fresh apples and perfect for holiday dessert tables.
It's my opinion that you can never has enough apple recipes and apple cake is one you're sure to get rave reviews for. It is similar to pound cake in texture and has an amazing almond flavor.

❤️ Why you'll love it
✔️ This moist loaf cake is a perfect way to use fresh fall apples.
✔️ It makes a great breakfast cake or afternoon snack with a hot cup of coffee or tea.
✔️ It is not your typical fall spiced recipe, this apple pound cake has delicious buttery flavors with a hint of apple cinnamon.

🥘 Ingredients
Fresh apples, the best apples to use would be pink lady, honeycrisp, or granny smith apples are good choices.
Granulated sugar
Ground cinnamon
Unsalted butter
Large eggs
Almond extract
All purpose flour
Salt
Slivered almonds
Amaretto liquor (optional)
🔪 Instructions
- In large mixing bowl combined the apples, 3 tablespoons of sugar and cinnamon. Let stand for 1 hour. Toss slivered almonds with amaretto and set aside.
- In a medium bowl, using an electric mixer, cream butter and remaining sugar until light and fluffy.
- Add eggs, one at a time. Add almond extract.
- Mix flour and salt together in a small bowl. Gradually add dry ingredients to the wet ingredients until smooth.
- Place cake batter in a 9x5 inch loaf pan that has been sprayed with cooking spray. Place apples vertically in the top of the cake and press into batter. Place slivered almonds on top of the loaf and using a spoon, ladle any amaretto left from the almonds over the top of the batter prior to baking.
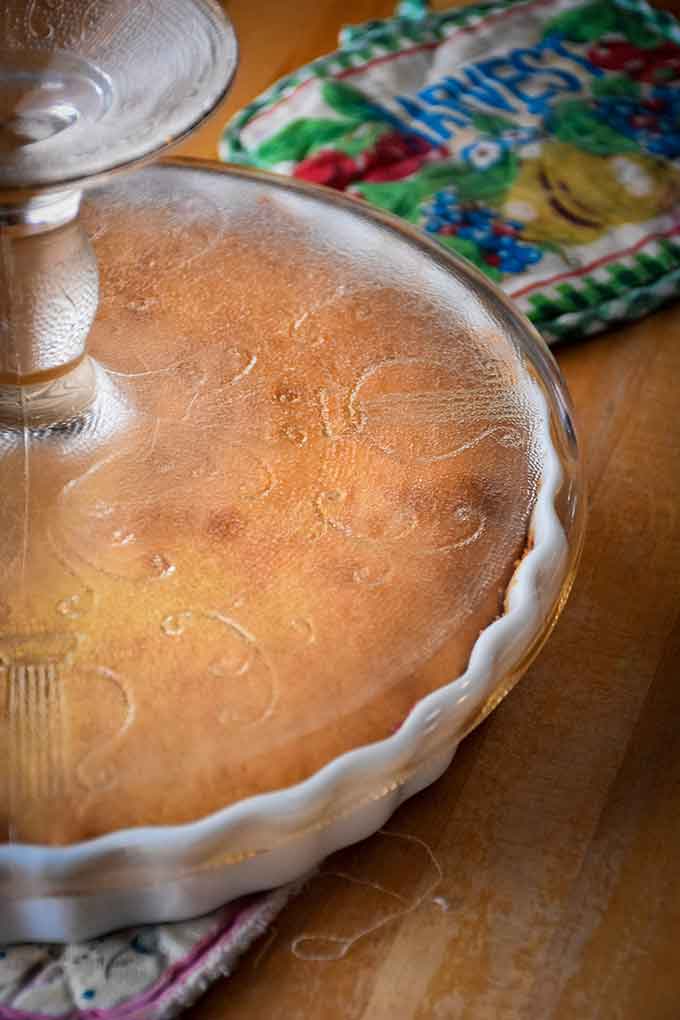
- Bake at 300 degree for 90 minutes, or until a cake tester comes out clean. Transfer to a cooling rack and cool for 10 minutes before removing from the apple loaf from the pan to a wire rack. Cool completely.

🥄 Equipment
9 x 5 inch loaf pan
Mixing bowls
Electric mixer
Rubber scraper
🥫Storage
Store this loaf cake in an airtight container on the counter up to 4 days, in the fridge up to 2 weeks, and in the freezer up to 3 months.

📖 Variations
- Chop the apples into small cubes instead of slices and stir into the cake batter instead of placing on top.
- Substitute vanilla extract for the almond extract.
- Toss the apples in brown sugar instead of white sugar.
💭 Tips
- Drizzle any of the cinnamon sugar liquid from the soaked apples into the same holes the apples are pressed into to add as much apple cinnamon flavor as possible.
📚 Related Recipes
This Almond Coffee Cream is delicious with a touch of amaretto.
The apple filling in these Apple Pie Cinnamon Rolls is to die for.
Butter Rum Glazed Applesauce Cake is a delicious cake for every day or special occasions.
🍽 Serve with...
This moist apple loaf recipe makes the perfect dessert with a scoop of vanilla ice cream!
Don't forget to check out my Amazon storefront for some of my favorite products!
When you make this recipe, please comment below and let me know what you think. I'd love it if you tag me on Instagram @grumpyshoneybunch or #grumpyshoneybunch so I can see your photos!
If you love this recipe, please leave a ⭐⭐⭐⭐⭐ rating
📖 Recipe

Apple Loaf Cake
As an Amazon Associate I earn from qualifying purchases.
Ingredients
- 2 large apples , peeled and cut into ¼ inch slices (about 3 cups)
- 1¼ cup granulated sugar divided
- 1 teaspoon ground cinnamon
- ⅔ cup unsalted butter , softened
- 4 large eggs
- 1 teaspoon almond extract
- 2 cups all purpose flour
- ⅛ teaspoon salt
- ¼ cup slivered almonds
- 2 tablespoons amaretto , optional
Instructions
- In large mixing bowl combined the apples, 3 tablespoons of sugar and cinnamon. Let stand for 1 hour. Toss slivered almonds with amaretto and set aside.
- In a medium bowl, using an electric mixer, cream butter and remaining sugar until light and fluffy.
- Add eggs, one at a time. Add almond extract.Mix flour and salt together in a small bowl. Gradually add dry ingredients to the wet ingredients until smooth.
- Place cake batter in a 9x5 inch loaf pan that has been sprayed with cooking spray. Place apples vertically in the top of the cake and press into batter. Place slivered almonds on top of the loaf and using a spoon, ladle any amaretto left from the almonds over the top of the batter prior to baking.
- Bake at 300 degree for 90 minutes, or until a cake tester comes out clean. Transfer to a cooling rack and cool for 10 minutes before removing from the apple loaf from the pan to a wire rack. Cool completely.


