
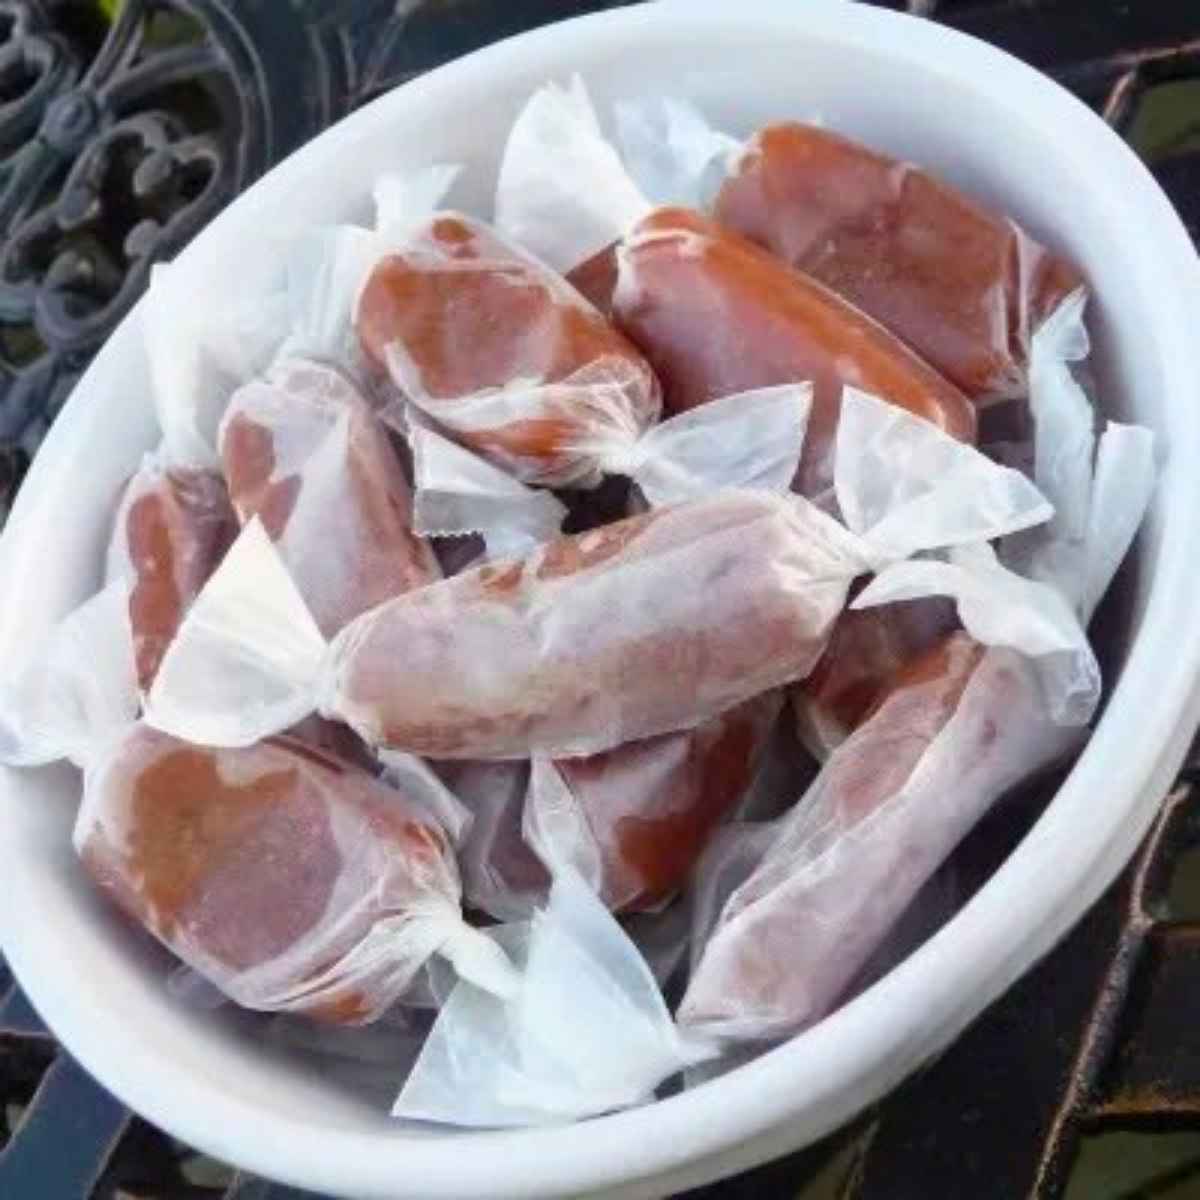
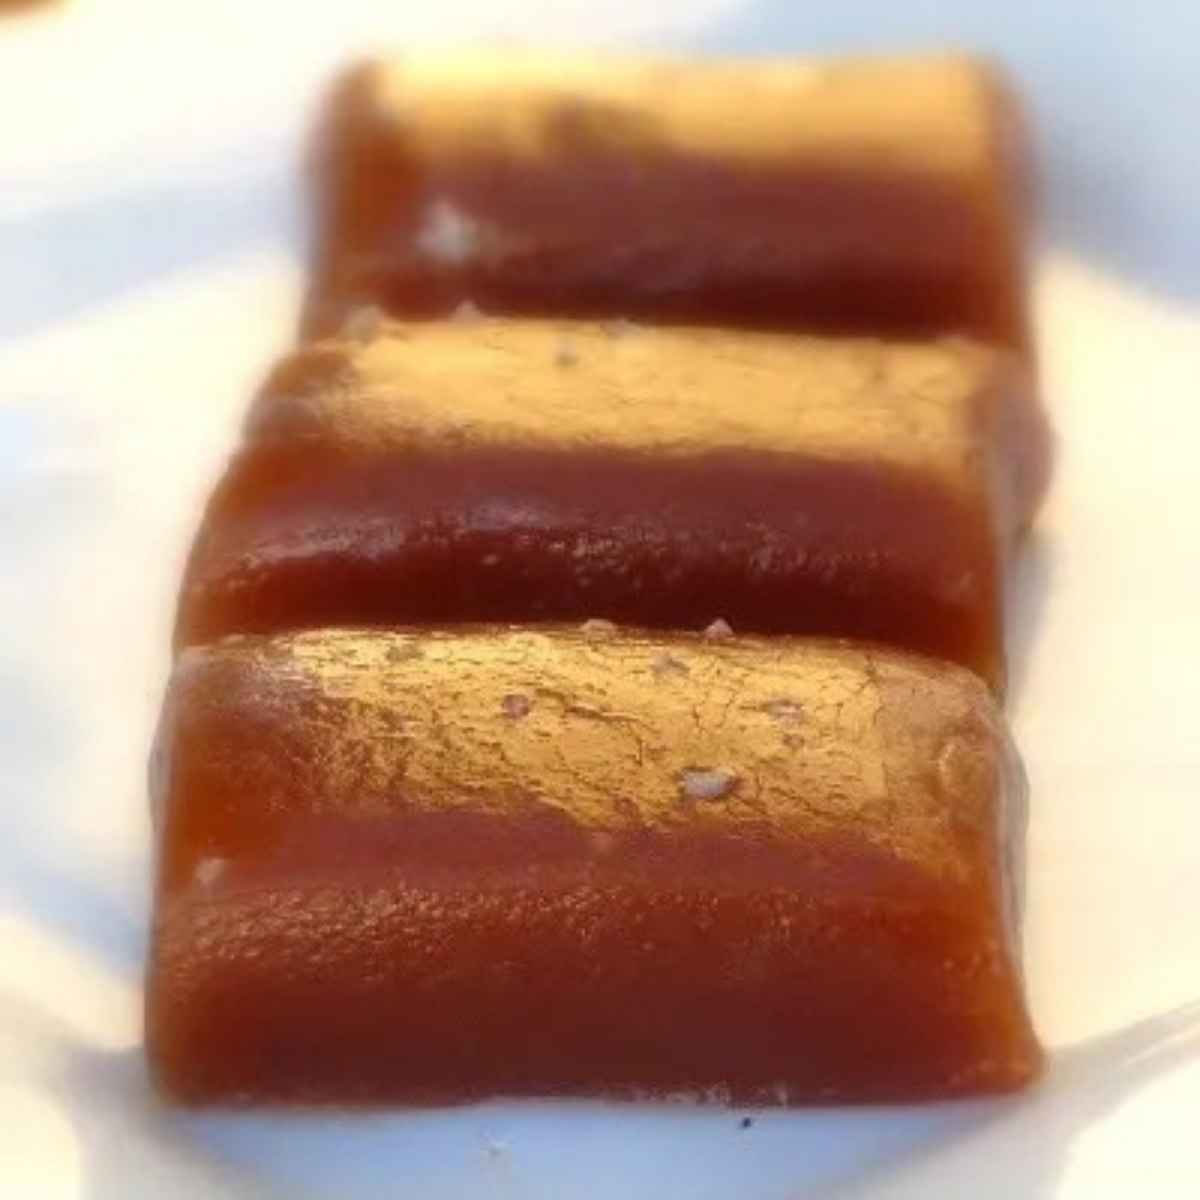
These Salted Caramels are soft, buttery candies with just enough salt to keep them from tasting overly sweet. They're the kind of homemade treat that feels special without being complicated.

I've made many batches of homemade salted caramels over the years, and this method never lets me down. If you like old-fashioned candy recipes that you can count on, this is one you'll keep coming back to.
Jump to:
Why You'll Love Salted Caramels Recipe
Smooth texture: heavy cream and butter create soft caramels that stay tender and easy to cut.
Balanced flavor: the salt sharpens the sweetness without overpowering it.
Reliable method: cooking to temperature takes the stress out of making candy at home.
Key Ingredients for Soft Caramels
See the recipe card below for a full list of ingredients and instructions.
- Heavy cream: keeps the caramel rich and smooth instead of stiff.
- Unsalted butter: adds flavor and helps create that classic soft caramel bite.
- Sugar: the backbone of true caramel flavor.
- Light corn syrup: helps prevent grainy texture in sea salt caramels.
- Fleur de sel: a delicate finishing salt that works beautifully in fleur de sel caramels.
Ingredient Substitutions
- Use fine sea salt if fleur de sel is unavailable.
- Swap light corn syrup with golden syrup if needed.
- Add vanilla extract after cooking for a subtle flavor change.
Variations on Salted Caramels
- Stir in a splash of bourbon for grown-up caramel candy.
- Add expresso powder for coffee flavored caramels.
- Dip finished pieces halfway in melted chocolate.
Shelby's Tips for the Best Soft Caramels
- Watch for the honey glow: Don't just rely on the clock, keep an eye our for that beautiful light golden honey color. It happens fast, so stay close.
- Swirl, don't stir: To keep things smooth and avoid any graininess, gently swirl the pan instead of using a spoon while the sugar is melting.
- Hit 248°F exactly: for that perfect soft caramel bite, trust your candy thermometer. Reaching 248°F ensures they are firm enough to slice cleanly but still melt-in-your-mouth tender.
- Pour slowly: the mixture bubbles up significantly when the cream is added. Use a heavy-bottomed 3-4 quart pan and pour slowly for safety.
- Clean slices: if the caramel sticks while cutting, lightly oil your knife to get those perfect, clean squares.
Serving Suggestions for Salted Caramels
Serve these Salted Caramels on a dessert tray alongside Layered Chocolate Praline Bourbon Fudge, Old Fashioned Peanut Butter Fudge, or Maple Walnut Fudge.
More Recipes You'll Love
If candy making is your thing, you'll enjoy my Chocolate Marshmallows, Brown Sugar Fudge, Chipotle Peanut Brittle, and Conversations Hearts Candy.
Ready to get cooking? If you make these Salted Caramels, please leave a ⭐⭐⭐⭐⭐ rating and a comment below! I love hearing how your candy turned out. Don't forget to tag @grumpyshoneybunch or #grumpyshoneybunch on Instagram so I can see your delicious creations!
📖 Recipe

Salted Caramels Recipe (Soft & Buttery Candy)
Equipment
- Sharp knife , or bench scraper
As an Amazon Associate I earn from qualifying purchases.
Ingredients
- 1 cup heavy cream
- 5 tablespoons unsalted butter cut into pieces
- 1 teaspoon fleur de sel
- 1 ½ cups sugar
- ¼ cup light corn syrup
- ¼ cup water
Instructions
- Line bottom and sides of an 8-inch square baking pan with parchment paper, then lightly oil parchment.
- Bring cream, butter, and fleur de sel to a boil in a small saucepan, then remove from heat and set aside.
- Boil sugar, corn syrup, and water in a 3- to 4-quart heavy saucepan, stirring until sugar is dissolved. Boil, without stirring but gently swirling pan, until mixture is a light golden honey color.
- Carefully and slowly pour the cream mixture into the boiling sugar. (Caution: the mixture will bubble significantly) Simmer, stirring frequently until the candy thermometer registers 248℉ (firm ball state). This should take about 10-15 minutes.
- Pour into the prepared pan and immediately sprinkle with a few more fleur de sel crystal.
- Allow caramels to cool completely at room temperature for at least 2 hours before cutting.
- Using a lightly oiled knife or bench scraper, cut into 1-inch pieces, then wrap each piece in a 4-inch square of wax paper, twisting 2 ends to close.
Jamie says
Oh my goodness....these look incredible.
Kathleen says
Hey girlfriend! Congrats on making top 9
Linn @ Swedish Home Cooking says
Home made sticky candies..Mm! Can't go wrong.
Megan says
Are these soft and chewt? Mine always turn out to hard. I want soft. They look very inviting!
Megan says
Are these soft and chewt? Mine always turn out to hard. I want soft. They look very inviting!
bellini valli says
I am absolutely in love with salted caramel anything, and they wouldn't last long that's for sure.
teresa says
a friend of ours makes caramels like these for us every christmas and we love them. the addition of that salt must make them awesome!
Marthe says
These look sooo decadent! Yum!
Carrian says
Time consuming, but I bet delicious!
Mindika says
I think I'm going to try this. I'm so terrible at making caramel, but this looks so good it's worth a try.
Ingrid says
LOL, I need to give these a try. Thanks for the tip on stashing a few for myself. 🙂
~ingrid
pigpigscorner says
Well done! And I like the flavour!
The Duo Dishes says
Those are dangerous! Looks like you'd have to try hard to only eat one a day.
Amanda says
Man Shelby, those look incredible! You did a marvelous job. There's an orchard here in town in the fall that sells caramels like these, and they have cherry flavored. MMMMMMMMM
Chef E says
I knew it I knew it when I saw those wrappers what you made! I was just talking to someone about these, and I ordered a pro candy thermometer today! I am not a candy maker either, my mom was the baker queen, so I have to say yours are gorgeous!
Fallon says
MMM Love caramels. We have a friend that makes these every Christmas. It is definitely something I always look forward to. The wrapping is a nice touch and definitely worth it IMO!
Cristine says
They look PERFECT!
Kait says
I wish I was one of your co-workers. These looks delicious and addicting. Grumpy didn't save you a piece?
Chef Tess says
Well...now the Devil will be making these with me too! Thanks for sharing! They look divine!
pegasuslegend says
love soft buttery gooey caramel....omg these look fabulous mouth watering~
Mags says
Oh these look absolutely delicious. I've been craving caramels too!